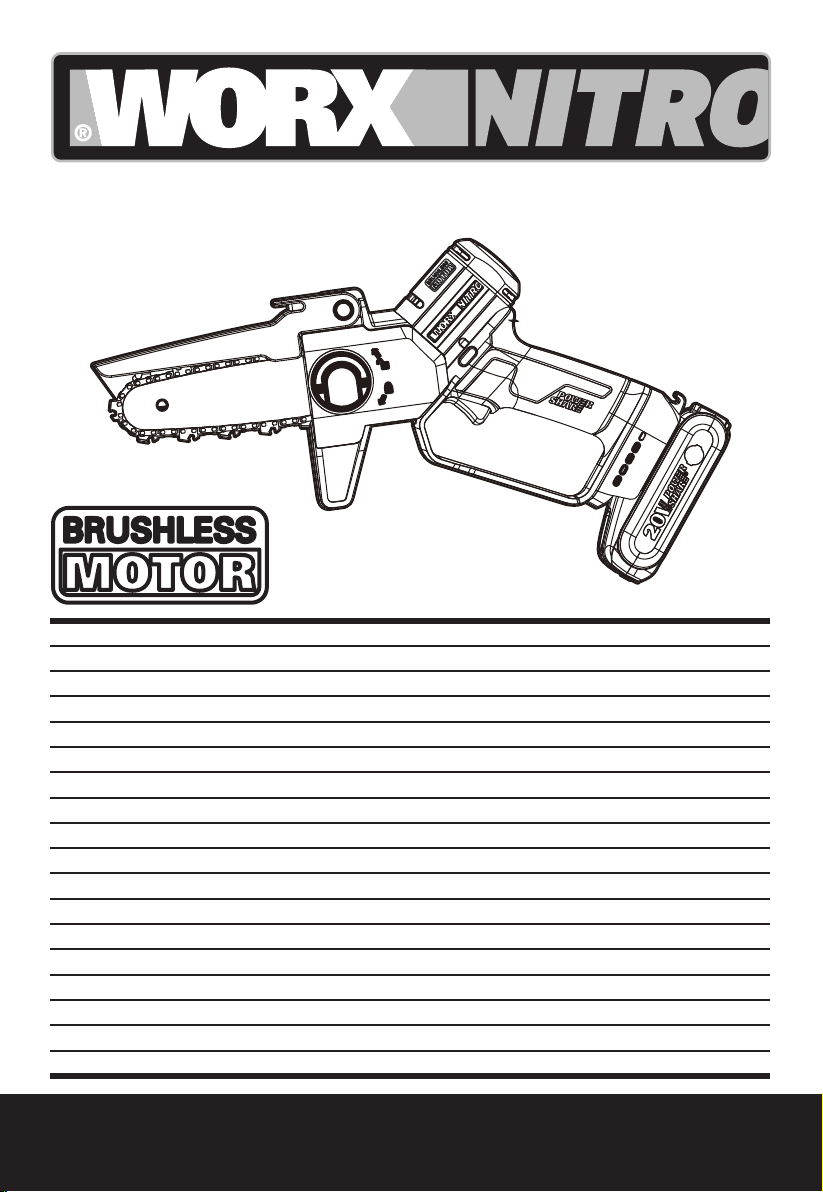
Worx Nitro WG325E Series User manual

WG325E WG325E.X
P11
P24
P38
P52
P66
P81
P95
P109
P121
P133
P146
P160
P176
P189
P203
P215
P228
P242
Cordless Pruning Saw
Kabellose Astsäge
Sierra podadora sin cable
Snoerloze snoeizaag
Ledningsfri grensav
Greinsag uten ledning
Sladdlös beskärningssåg
EN
D
F
I
ES
PT
NL
DK
NOR
SV
PL
GR
HU
RO
CZ
SK
SL
RU


Original Instructions
Originalbetriebsanleitung
Notice originale
Istruzioni originali
Manual original
Manual original
Original brugsanvisning
Bruksanvisning i original
Izvirna navodila
EN
D
F
I
ES
PT
NL
DK
NOR
SV
PL
GR
HU
RO
CZ
SK
SL
RU

18
23*
24*19*20*
22*21*
15
17
16
14
15
25
3
2
1
4
5
6
10
11
9
8
7
13
12

B2
B1
A2
A1
E
D
Bar
3-5 mm
2
1
2
1
F2
F1
1
2
F4
F3
C2
C1
Kink
2
F5
1
2
3
G1

B2
B1
A2
A1
E
D
Bar
3-5 mm
2
1
2
1
F2
F1
1
2
F4
F3
C2
C1
Kink
2
F5
1
2
3
G1

B2
B1
A2
A1
E
D
Bar
3-5 mm
2
1
2
1
F2
F1
1
2
F4
F3
C2
C1
Kink
2
F5
1
2
3
G1
Z
Z
Y
Y
M
L
K
J
O
N
H2
H1
1
2´
2
I
2
1
2
1
P1
G2
P2

Z
Z
Y
Y
M
L
K
J
O
N
H2
H1
1
2´
2
I
2
1
2
1
P1
G2
P2

Z
Z
Y
Y
M
L
K
J
O
N
H2
H1
1
2´
2
I
2
1
2
1
P1
G2
P2
Q
P4
P3
P5
2
1
P6

Q
P4
P3
P5
2
1
P6

11
Cordless Pruning Saw EN
TABLE OF CONTENT
1. SAFETY INSTRUCTIONS
2. COMPONENT LIST
3. TECHNICAL DATA
4. ASSEMBLY
5. OPERATION
6. ENVIRONMENTAL PROTECTION
7. TROUBLESHOOTING TABLE
8. DECLARATION OF CONFORMITY
1. SAFETY INSTRUCTIONS
PRODUCT SAFETY
GENERAL POWER TOOL
SAFETY WARNINGS
Failure to follow all instructions listed below may
Save all warnings and instructions for future
reference.
The term “power tool” in the warnings refers to your
mains-operated (corded) power tool or battery-
operated (cordless) power tool.
a) Keep work area clean and well lit.
Cluttered or
dark areas invite accidents.
b) Do not operate power tools in explosive
Power tools
create sparks which may ignite the dust or
fumes.
operating a power tool.
Distractions can cause
you to lose control.
a) Power tool plugs must match the outlet. Never
adapter plugs with earthed (grounded) power
tools.
will reduce risk of electric shock.
and refrigerators.
There is an increased risk
of electric shock if your body is earthed or
grounded.
c) Do not expose power tools to rain or wet
conditions.
Water entering a power tool will
increase the risk of electric shock.
d) Do not abuse the cord. Never use the cord for
moving parts.
Damaged or entangled cords
increase the risk of electric shock.
extension cord suitable for outdoor use.
Use of
a cord suitable for outdoor use reduces the risk
of electric shock.
f) If operating a power tool in a damp location
Use of an RCD reduces
the risk of electric shock.
common sense when operating a power tool.
medication.
A moment of inattention while
operating power tools may result in serious
Protective equipment
such as dust mask, non-skid safety shoes, hard
hat, or hearing protection used for appropriate
c) Prevent unintentional starting. Ensure the
switch is in the off-position before connecting
Carrying power tools
power tools that have the switch on invites
accidents.
turning the power tool on.
A wrench or a key left
attached to a rotating part of the power tool may
e) Do not overreach. Keep proper footing and
balance at all times.
This enables better control
of the power tool in unexpected situations.
from moving parts.
long hair can be caught in moving parts.
g) If devices are provided for the connection of
Use of
dust collection can reduce dust-related hazards.
A careless action
second.
4) Power tool use and care
a) Do not force the power tool. Use the correct
The correct
rate for which it was designed.
b) Do not use the power tool if the switch does not

12
Cordless Pruning Saw EN
turn it on and off.
Any power tool that cannot
be controlled with the switch is dangerous and
must be repaired.
c) Disconnect the plug from the power source
power tools.
Such preventive safety measures
reduce the risk of starting the power tool
accidentally.
d) Store idle power tools out of the reach of
children and do not allow persons unfamiliar
with the power tool or these instructions
to operate the power tool.
Power tools are
dangerous in the hands of untrained users.
e) Maintain power tools and accessories. Check
use.
Many accidents are caused by poorly
maintained power tools.
f) Keep cutting tools sharp and clean.
Properly
maintained cutting tools with sharp cutting
edges are less likely to bind and are easier to
control.
taking into account the working conditions and
the work to be performed.
Use of the power tool
for operations different from those intended
could result in a hazardous situation.
and free from oil and grease.
Slippery handles
and grasping surfaces do not allow for safe
handling and control of the tool in unexpected
situations.
the manufacturer.
A charger that is suitable for
when used with another battery pack.
Use of any other
one terminal to another.
Shorting the battery
irritation or burns.
batteries may exhibit unpredictable behaviour
or excessive temperature.
temperature above 130 °C may cause explosion.
g) Follow all charging instructions and do not
instructions.
Charging improperly or at
6) Service
parts.
This will ensure that the safety of the
power tool is maintained.
Service
of battery packs should only be performed
by the manufacturer or authorized service
providers.
chain when the pruning saw is operating.
A
moment of inattention while operating pruning
saws may cause entanglement of your clothing
or body with the saw chain.
contact hidden wiring.
Saw chains contacting
a live wire may make exposed metal parts of
the pruning saw live and could give the operator
an electric shock.
legs and feet is recommended.
Adequate
saw chain.
support.
Operation of a pruning saw in this
secure and level surface.
Slippery or unstable
surfaces may cause a loss of balance or
control of the pruning saw.
be alert for spring back.
When the tension in
pruning saw out of control.
g) Use extreme caution when cutting brush and
saplings.
The slender material may catch the
saw chain and be whipped toward you or pull
you off balance.

13
Cordless Pruning Saw EN
Proper handling of the pruning saw will reduce
the likelihood of accidental contact with the
moving saw chain.
tensioning and changing the bar and chain.
Improperly tensioned or lubricated chain
may either break or increase the chance for
kickback.
Use
of the pruning saw for operations different than
intended could result in a hazardous situation.
k) This pruning saw is not intended for tree
felling.
Use of the pruning saw for operations
different than intended could result in serious
pack is removed.
Unexpected actuation of the
a saw-horse or cradle.
n) Recommendation to have sharpening and
authorised service centres.
Kickback may occur when the nose or tip of the
closes in and pinches the saw chain in the cut.
Tip contact in some cases may cause a sudden
reverse reaction, kicking the guide bar up and back
towards the operator.
Pinching the saw chain along the top of the guide
bar may push the guide bar rapidly back towards
the operator.
Either of these reactions may cause you to lose
control of the saw which could result in serious
safety devices built into your saw. As a pruning
saw user, you should take several steps to keep
or incorrect operating procedures or conditions
and can be avoided by taking proper precautions
as given below:
resist kickback forces.
Kickback forces can be
controlled by the operator, if proper precautions
are taken. Do not let go of the pruning saw.
b) Do not overreach and do not cut above
shoulder height.
This helps prevent unintended
tip contact and enables better control of the
pruning saw in unexpected situations.
Incorrect
replacement guide bars and saw chains may
d) Follow the manufacturer’s sharpening and
maintenance instructions for the saw chain.
Decreasing the depth gauge height can lead to
increased kickback.
Residual risks
Even with the intended use of the appliance there
is always a residual risk, which can not prevented.
According to the type and construction of the
appliance the following potential hazards might
apply:
- Contact with exposed saw teeth of the saw
chain (cutting hazards)
- Access to the rotating saw chain (cutting
hazards)
- Unforeseen, abrupt movement of the guide bar
(cutting hazards)
- Flung out of parts of the work piece
- Skin contact with the oil
- Loss of hearing, if no required ear protection
used during work
warnings
1. Do not use the machine when the operator is
other drugs.
2. To reduce the risk, please keep bystanders at
a safe distance from the machine during its
operation.
3. Be aware of the dangerous of operating
positions, as well as the risk of being struck by
falling branches or branches that, having hit the
ground, rebound, the operator may be struck by
falling branches or by those that rebound after
hitting the ground. Remove the branches in
sections.
operating. Use the harness provided.
from overhead electrical power lines.
SAFETY WARNINGS FOR
BATTERY PACK

14
Cordless Pruning Saw EN
materials. When battery pack is not in use,
paper clips, coins, keys, nails, screws or
connection from one terminal to another.
Shorting the battery terminals together may
Avoid storage in direct sunlight.
shock.
affected area with copious amounts of water
and seek medical advice.
correct charging procedure.
not in use.
performance.
n) Retain the original product literature for future
reference.
not in use.
high pressure.
SAVE THESE
INSTRUCTIONS
limbing and cross-cutting
1. Limbing a tree
Limbing is removing the branches from a fallen
tree. When limbing leave larger lower limbs to
support the log off the ground. Remove the small
limbs in one cut as illustrated in Figure 1. Branches
under tension should be cut from the bottom up to
avoid binding the pruning saw.
3
22
W
YZ
X
2˝
2˝
1
1
1
2
2/3
1
1/3
12
2/3
1/3
Figure 1
2. Bucking a log
Bucking is cutting a log into lengths. It is important
evenly distributed on both feet. When possible, the
log should be raised and supported by the use of
limbs, logs or chocks. Follow the simple directions
for easy cutting.
When the log is supported along its entire length
as illustrated in Figure 2, it is cut from the top
(overbuck), avoid contacting ground as this will
greatly reduce the chain sharpness.
3
22
W
YZ
X
2˝
2˝
1
1
1
2
2/3
1
1/3
12
2/3
1/3
Figure 2
When the log is supported on one end, as
the underside ( underbuck) (1). Then make the
cut.
3
22
W
YZ
X
2˝
2˝
1
1
1
2
2/3
1
1/3
12
2/3
1/3
Figure 3
When the log is supported on both ends, as

15
Cordless Pruning Saw EN
cut.
3
22
W
YZ
X
2˝
2˝
1
1
1
2
2/3
1
1/3
12
2/3
1/3
Figure 4
When bucking on a slope always stand on the
uphill side of the log, as illustrated in Figure 5.
When “cutting through”, to maintain complete
control release the cutting pressure near the end
of the cut without relaxing your grip on the pruning
saw handles. Don’t let the chain contact the
ground. After completing the cut, wait for the saw
chain to stop before you move the pruning saw.
Always stop the motor before moving from tree to
tree.
3
22
W
YZ
X
2˝
2˝
1
1
1
2
2/3
1
1/3
12
2/3
1/3
Figure 5
SYMBOLS
must read instruction manual
Wear ear protection
Wear eye protection
Wear dust mask
Wear head protection
Beware of pruning saw kickback and
avoid contact with bar tip
Do not expose to rain
Wear protective gloves
Wear protective footwear
Warning of danger from overhead
electric-power lines
Do not burn
Batteries may enter water cycle if
disposed improperly, which can
be hazardous for ecosystem. Do
not dispose of waste batteries as
unsorted municipal waste.
Waste electrical products must
not be disposed of with household
waste. Please recycle where
facilities exist. Check with your
local authorities or retailer for
recycling advice.

16
Cordless Pruning Saw EN
Li-Ion battery. This product has
been marked with a symbol relating
to ‘separate collection’ for all
battery packs and battery pack. It
will then be recycled or dismantled
in order to reduce the impact on the
environment. Battery packs can be
hazardous for the environment and
for human health since they contain
hazardous substances.
Lock
Unlock
2. COMPONENT LIST
1. CHAIN GUARD
2. HOUSING-COVER KNOB
3. LOCK-OUT BUTTON
4. ON/OFF SWITCH
5. GRIP AREA
6. BATTERY PACK *
7. BATTERY PACK RELEASE BUTTON *
8. HAND GUARD
9. HOUSING-COVER
10. CHAIN
11. GUIDE BAR
12. BASE PLATE
13. OIL FILLER CAP
14. BAR PAD
15. DRIVE SPROCKET
16. FASTENING BAR BOLT
17. BAR LOCATING TAB
18. BAR AND CHAIN SHEATH/SCABBARD
19. LOCK-OUT BUTTON ON EXTENSION POLE
HANDLE *
20. EXTENSION POLE HANDLE *
21. ON/OFF SWITCH ON EXTENSION POLE
HANDLE *
22. LOCKING KNOB *
23. EXTENSION POLE RELEASE BUTTON *
24. CLAMPING LEVER *
25. OIL OUTLET
* Not all the accessories illustrated or described
3. TECHNICAL DATA
Type WG325E WG325E.X (3 - designation of
pruning saw)
WG325E WG325E.X***
Voltage 20 V Max.**
Bar length 12 cm
Chain speed
Chain pitch 7.6 mm
Number of chain drive
links 28
Chain gauge 1.1 mm
Adaptive chain type
WA0142
Adaptive guide bar type
WA0151
Extension pole length
125 cm
Maximum cutting height 275 cm
Extension pole weight
0.9 kg
Machine weight (chain &
bar included) (bare tool)
1.1 kg
** Voltage measured without workload. Initial
battery voltage reaches maximum of 20 volts.
Nominal voltage is 18 volts.
*** X=1-999, A-Z, M1-M9 there are only used for
different customers, there are no safe relevant
changes between these models.

17
Cordless Pruning Saw EN
SUGGESTED BATTERIES
AND CHARGERS
20V Battery WA3551 2.0 Ah
WA3639 2.0 Ah
20V Charger WA3880 2.0 A
We recommend that you purchase your accessories
from the same store that sold you the tool. Refer to the
accessory packaging for further details. Store person-
nel can assist you and offer advice.
NOISE INFORMATION
A weighted sound pressure LpA = 84 dB(A)
KpA 3 dB(A)
A weighted sound power LwA = 94 dB(A)
KpA 3 dB(A)
Wear ear protection.
VIBRATION INFORMATION
Vibration total values (triax vector sum) determined
according to EN 62841:
Vibration emission value: ah2
Uncertainty
The declared vibration total value and the declared
noise emission value have been measured in
accordance with a standard test method and may
be used for comparing one tool with another.
The declared vibration total value and the declared
noise emission value may also be used in a
preliminary assessment of exposure.
The vibration and noise emissions
during actual use of the power tool can differ
from the declared value depending on the ways in
which the tool is used especially what kind of
workpiece is processed dependant on the following
examples and other variations on how the tool is
used:
How the tool is used and the materials being cut or
drilled.
The tool being in good condition and well maintained.
The use of the correct accessory for the tool and
ensuring it is sharp and in good condition.
The tightness of the grip on the handles and if any
anti vibration and noise accessories are used.
And the tool is being used as intended by its design
and these instructions.
To be accurate, an estimation of
exposure level in the actual conditions of use
should also take account of all parts of the operating
cycle such as the times when the tool is switched off
and when it is running idle but not actually doing the
over the total working period.
Helping to minimise your vibration and noise
exposure risk.
Always use sharp chisels, drills and blades.
Maintain this tool in accordance with these
instructions and keep well lubricated (where
appropriate).
If the tool is to be used regularly then invest in anti
vibration and noise accessories.
Plan your work schedule to spread any high vibration
tool use across a number of days.
INTENDED USE
• The mini pruning saw is intended for cutting only
wood and branches up to a diameter corresponding
to the length of the pruning saw guide bar.
• The mini pruning saw must be used at ground level
or from a suitable platform that is completely stable
and secure.
• The mini pruning saw is intended for outdoor use
only.
• The mini pruning saw is not intended for any other
use.
• Mounting of parts on the mini pruning saw is
authorized only for original or manufacturer-
approved spare parts (chain guides or saw chains
saw chain combinations as indicated in the manual.
• The user is responsible for any accident resulting
the mini pruning saw.
4. ASSEMBLY
MOUNTING THE SAW CHAIN
1. Unpack all parts carefully. Remove the Housing-
Cover by turning the Housing-Cover Knob in a
counterclockwise direction. (See Fig. A1)
2. Place the pruning saw on a solid, level surface.

18
Cordless Pruning Saw EN
recommended for Guide Bar.
4. Slide the Chain in the slot around the Guide Bar.
Ensure the Chain is in correct running direction
by comparing it to the chain icon on the Guide
Bar, or referring to the chain direction symbol
found on the saw body. (See Fig. A2)
5. Fit the Chain onto the Drive Sprocket, so that the
Fastening Bar Bolt and the Bar Locating Tab on
the Guide Bar. (See Fig. B1, B2)
6. Assure all parts are seated properly. Make
sure the drive links are fully seated in the Drive
Sprocket (See Fig. C1), avoiding a kink as shown
in Fig. C2. If kink occurs, pick up the Chain at the
kink out.
kinks.
7. Fit the Housing Cover. Tilt the guide bar forward
where the guide bar tip is pushed in an vertically
downward direction. This will remove slack from
the chain. The correct chain tension is reached
when the chain can be raised approx. Half the
drivelink depth from the guide bar in the center.
This should be done by using one hand to raise
the chain against the weight of the machine.
Then tighten the Housing Cover by turning the
Housing-Cover Knob clockwise until it is tight.
(See Fig. D)
The chain is properly tensioned when
it can be lifted off of the Guide Bar and the
drivelink is within the rail of the Guide Bar. (See
Fig. E)
The chain will stretch while cutting and
lose proper tension. When the chain becomes
loose, completely unscrew the Housing-Cover
Knob or turn the knob around three full turns in a
counter-clockwise direction, then retighten the
Housing-Cover Knob to properly reset the chain
tension by repeating Steps 1-7 listed above.
New saw chains will stretch. Check the
tighten when the Chain becomes loose around
the Guide Bar.
ASSEMBLING THE EXTENSION POLE
Align and insert the handle of extension pole into
the shaft. Rotate the Locking Knob clockwise to
lock. (See Fig. F1, F2)
place.
ASSEMBLING THE EXTENSION POLE TO THE
Step 1: Align and insert the extension pole into the
saw.
Step 2: Hang the buckle on the hook of the saw.
Press the Clamping Lever to tighten the extension
pole to the machine.
Make sure the extension pole is locked into
position securely before operation.
REMOVING THE EXTENSION POLE (See Fig. F5)
Loosen the Clamping Lever to release the buckle.
Press the Extension Pole Release Button to
disconnect the extension pole with the saw.
WARNING! When using this machine with the
has been removed.
G2)
operate the Pruning Saw without chain oil or at an
damage to the product.
be oiled before operation.
1. Set Pruning Saw on any suitable surface with oil
unscrew the cap by turning it counter-clockwise.
3. Add bar and chain oil until tank is full.
cap and tighten by turning clockwise until hand
tight.
small breather channels are provided
horizontal position when not in use.
It is important to use bar and chain lubricant (not
provided) that is formulated to perform over a
Checking the Automatic Oiler
Use protective gloves.
Put downward the chain saw. Lift the Chain Guard
up the oil tank.(See Fig.G2) Proper functioning of
the automatic oiler can be checked by running the
Pruning Saw and pointing the tip of the guide chain
bar towards a piece of cardboard or paper on the
ground. If an increasing oil pattern develops on the

19
Cordless Pruning Saw EN
there is no oil pattern, despite a full oil reservoir,
contact WorxNitro customer service agent or
WorxNitro approved service agent.
5. OPERATION
1. BEFORE USING YOUR CORDLESS TOOL
WARNING! The charger and battery pack are
specially designed to work together so do not
attempt to use any other devices. Never insert or
pack connections because of an electrical failure and
hazard will occur.
Your battery pack is UNCHARGED and you
must charge once before use.
The battery charger supplied is matched to the
Li-ion battery installed in the machine. Do not use
another battery charger.
H2)
The Li-ion battery is protected against deep
discharging. When the battery is empty, the
machine is switched off by means of a protective
circuit.
In a warm environment or after heavy use, the
battery pack may become too hot to permit
charging. Allow time for the battery to cool down
before recharging.
(2) TO REMOVE OR INSTALL BATTERY PACK (See
Fig. I)
Depress the Battery Pack Release Button to remove
the Battery Pack from your tool. After recharging,
insert the Battery Pack into the battery port. A
until a click is heard. Check to see if the battery is
fully secured.
(3) HOLDING AND CONTROLLING THE PRUNING
SAW (See Fig. J)
Hold and control the pruning saw with one hand on
the Grip Area – wrap your thumb around the Grip
Area.
2. SWITCHING ON AND OFF (See Fig. K)
pack listed in the accessories section.
For switching on the tool, press the Lock-Out
in this position. The Lock-Out Button can now be
released.
For switching off
3. CUTTING
IMPORTANT
operation.
(1) Installing the battery pack into the machine.
(2) Make sure section of log to be cut is not laying
on the ground. This will keep the chain from
touching the ground as it cuts through the log.
Touching the ground while the Chain is moving
is dangerous and will dull the Chain.
(3) When ready to make a cut, push the Lock-Out
Button completely in with the right thumb
and squeeze the trigger. This will turn saw on.
Releasing the trigger will turn the saw off. Make
sure the saw is running at full speed before
starting a cut.
(4) When starting a cut, slowly place moving chain
against the wood. The wood should be as close
in place to avoid possible bouncing or skating
(sideways movement) of saw.
(5) Guide the saw using light pressure and do not
put excessive force on the saw, letting the saw
do its work. The motor will overload and can
rate for which it was intended.
(6) Remove the saw from a cut with the saw running
off Switch. Make sure the chain has stopped
before setting the saw down.
(7) Keep practicing on scrap logs in a secure
working area until you are comfortable, using a
This saw has a low-kickback chain and reduced
kickback Guide Bar. Both items reduce the chance
of kickback. However, kickback can still occur with
this saw.
The following steps will reduce the risk of kickback.
• Keep all safety items in place on saw. Make sure
they work properly.
• Do not overreach or cut above shoulder height.
• Keep solid footing and balance at all times.
• Stand slightly to the left side of saw. This keeps
your body from being in direct line with chain.
• Do not let Guide Bar nose touch anything when
chain is moving.
• Never try cutting through two logs at same time.
Only cut one log at a time.
• Do not bury the Guide Bar nose or try plunge cut
(boring into wood using Guide Bar nose).
• Watch for shifting of wood or other forces that
may pinch chain.
• Use extreme caution when reentering a previous
cut.
• Use only the low-kickback chain and Guide Bar
that were supplied with this pruning saw or

20
Cordless Pruning Saw EN
recommended.
• Never use a dull or loose chain. Keep chain
sharp with proper tension.
1. Use the pruning saw only with secure footing.
2. Hold the pruning saw at the right-hand side of
your body (See Fig. L).
3. The Chain must be running at full speed before it
makes contact with the wood.
4. Use the Base Plate to secure the saw onto the
wood before starting to cut.
5. Use the Base Plate as a leverage point while
cutting. (See Fig. M)
6. Do not operate the saw with arms fully extended,
or stand on a ladder while sawing. (See Fig. N)
Never use the pruning saw above shoulder height.
Cutting wood under tension (See Fig. O)
could spring back and strike operator causing
When sawing logs supported on both ends, start the
below, in order to avoid contact of the pruning saw
with the ground. When sawing logs supported on
the cut from above (Z) in order to avoid log splitting
OPERATION FOR POLE SAW
Cutting with extension pole
1. Install the battery pack into the machine.
2. Before cutting a high branch, consider all the
same points detailed in the previous section
“Trimming Branches” but pay particular
attention to the likely path of the falling branch.
from all power lines. (See Fig. P1-P4)
3. Use both hands to grip Pole Saw. Use only
designated grip areas when operating Pole Saw
must wrap around Pole Saw handle and pole.
Divide your weight evenly on both feet.
5. When ready to make a cut, press the Lock-out
Fig. P6). This will turn Pole Saw on. Releasing
saw is running at full speed before starting a cut.
6. When starting a cut, place moving chain
avoid possible bouncing or skating (sideways
movement) of saw.
7. Guide Pole Saw using light pressure. Do not
force Pole Saw. The motor will overload and can
rate for which it was intended.
8. Remove Pole Saw from a cut with saw running
at full speed. Stop Pole Saw by releasing trigger.
Make sure chain has stopped before setting
Pole Saw down.
CLEAN RESIDUAL OIL AFTER OPERATION
Lift the Chain Guard to the maximum position for 3
to 5 times. (See Fig.G2)
people. The Chain and Guide bar should be faced
down.
SAW MAINTENANCE
Follow maintenance instructions in this manual.
Proper cleaning of saw and chain and Guide Bar
maintenance can reduce chances of kickback.
Inspect and maintain saw after each use. This will
increase the service life of your saw.
Even with proper sharpening, risk of
kickback can increase with each sharpening.
MAINTENANCE AND STORAGE OF PRUNING SAW
1. Remove the battery pack
• When not in use
• Before moving from one place to another
• Before servicing
• Before changing accessories or attachments,
such as saw chain and guard
2. Inspect pruning saw before and after each
use. Check saw closely if guard or other part
has been damaged. Check for any damage
that may affect operator safety or operation of
saw. Check for alignment or binding of moving
parts. Check for broken or damaged parts. Do
not use pruning saw if damage affects safety or
operation. Have damage repaired by authorized
service center. To locate an authorized service
center, visit www.worx.com.
3. Maintain pruning saw with care.
• Never expose saw to rain or direct moisture.
• Keep chain sharp, clean, and lubricated for
better and safer performance.
• Follow steps outlined in this manual to sharpen
chain.
• Keep handles dry, clean, and free of oil and
grease.
• Keep all screws and nuts tight.
4. When servicing, use only identical replacement
parts.
5. When not in use, always store pruning saw
• in a high or locked place, out of children’s reach
• in a dry place
• with Bar and Housing Cover in place
Other manuals for WG325E Series
1
This manual suits for next models
2
Table of contents
Languages:
Other Worx Nitro Cordless Saw manuals