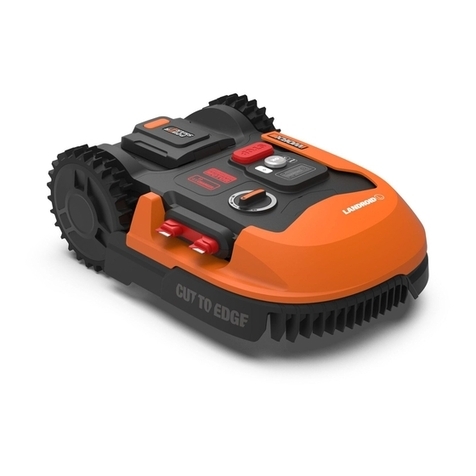
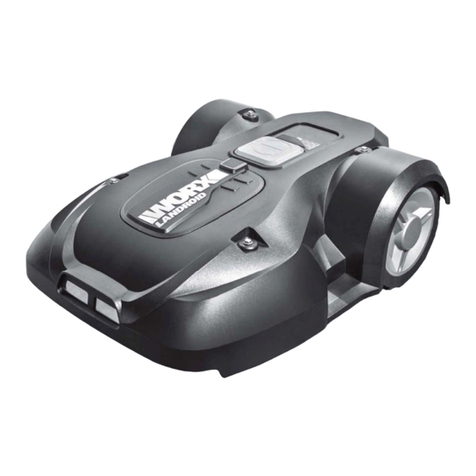
Worx Landroid User manual

P02
P16
Lawn Mowing Robot
Robô corta-relvas
EN
PT

Lawn Mowing Robot EN
2
TABLE OF CONTENTS
1. Product Safety
1.1 Safety Warnings for your lawnmower
1.2 Information on the Landroid®M
2. Component list
3. Understanding Your Landroid®M
3.1 How does my Landroid®M know what to mow?
3.2 How does my Landroid®M know where to go?
A. Finding the charging base
B. Rain sensors
C. Sensing the boundary wire
D. Starting and stopping while mowing
3.3 How big an area can my Landroid®M mow?
3.4 How efficiently will my Landroid®M mow the grass?
4. Boundary Wire Basics
4.1 Pegging the Boundary Wire
4.2 Burying the Boundary Wire
4.3 Joining the Boundary Wire
4.4 Turn on and test installation
5. Software update
6. Maintenance
6.1 Keep it Sharp
A. Rotate and Flip the Blades
B. Replace the Blades
6.2 Keep it Clean
A. Cleaning the Body
B. Cleaning the Underside
C. Clean the contact pins and the charging strips
6.3 Battery Life
6.4 Winter Hibernation
6.5 Replacing the battery
3
3
5
6
8
8
9
9
9
9
9
10
10
11
11
11
11
11
12
12
12
13
13
13
13
13
13
14
14
14
ORIGINAL INSTRUCTIONS

Lawn Mowing Robot EN
3
1. Product Safety
1.1 Safety warnings for your lawnmower
WARNING: Read all safety warnings and all instructions. Failure to follow the warnings and instructions
may result in electric shock, fire and/or serious injury.
Carefully read the instructions for the safe operation of the machine.
Save all warnings and instructions for future reference.
•This appliance is not intended for use by persons (including children) with reduced physical, sensory or mental
capabilities, or lack of experience and knowledge, unless they have been given supervision or instruction concerning
use of the appliance by a person responsible for their safety.
• Children should be supervised to ensure that they do not play with the appliance.
• The appliance is only to be used with the power supply unit provided with the appliance.
IMPORTANT
READ CAREFULLY BEFORE USE
KEEP FOR FUTURE REFERENCE
SAFE OPERATION PRACTICES
Training
a) Read the instructions carefully. Make sure you understand the instructions and be familiar with the controls and the
proper use of the appliance.
b) Never allow people unfamiliar with these instructions or children to use the appliance. Local regulations can restrict the
age of the operator.
c) The operator or user is responsible for accidents or hazards occurring to other people or their property.
Preparation
a) Ensure the correct installation of the boundary wire as instructed.
b) Periodically inspect the area where the appliance is to be used and remove all stones, sticks, wires, bones, and other
foreign objects.
c) Periodically visually inspect to see that the blades, blade bolts and cutter assembly are not worn or damaged. Replace
worn or damaged blades and bolts in sets to preserve balance.
d) On multi-spindle appliances, take care as rotating one blade can cause other blades to rotate.
e) WARNING! The lawnmower shall not be operated without the guard in place.
OPERATION
1. GENERAL
a) Never operate the appliance with defective guards, or without safety devices, for example deflectors, in place;
b) Do not put hands or feet near or under rotating parts. Keep clear of the discharge opening at all times;
c) Never pick up or carry an appliance while the motor is running;
d) Operate the disabling device from the appliance;
– Before clearing a blockage;
– Before checking, cleaning or working on the appliance;
e) It is not permitted to modify the original design of robotic lawnmower. All modifications are made at your own risk.
f) Start robotic lawnmower according to the instructions. When the power key is switched on, make sure you keep your
hands and feet away from the rotating blades. Never put your hands and feet under the mower.
g) Never lift up robotic lawnmower or carry it when the power key is switched on.
h) Do not let persons who do not know how robotic lawnmower works and behaves use the mower.
i) Do not put anything on top of robotic lawnmower or its charging station.
j) Do not allow robotic lawnmower to be used with a defective blade disc or body. Neither should it be used with defective
blades, screws, nuts or cables.
k) Always switch off robotic lawnmower when you do not intend to use the mower. Robotic lawnmower can only start
when the power key is switched on and the correct PIN code has been entered.
2. ADDITIONALLY WHEN THE APPLIANCE IS OPERATING AUTOMATICALLY
a) Do not leave the machine to operate unattended if you know that there are pets, children or people in the vicinity.
MAINTENANCE AND STORAGE
WARNING! When turning the mower upside down, the power key must always be switched off.
The power key should be switched off during all work on the mower’s underframe, such as
cleaning or replacing the blades.


Lawn Mowing Robot EN
4
a) Keep all nuts, bolts and screws tight to be sure the appliance is in safe working condition;
b) Inspect the robotic lawnmower each week and replace worn or damaged parts for safety;
c) Check especially that the blades and blade disc are not damaged. Replace all blades and screws at the same time if
necessary so that the rotating parts are balanced.
d) Ensure that only replacement cutting means of the right type are used;
e) Ensure that batteries are charged using the correct charger recommended by the manufacturer. Incorrect use may result
in electric shock, overheating or leakage of corrosive liquid from the battery;
f) In the event of leakage of electrolyte flush with water/neutralizing agent, seek medical help if it comes into contact with
the eyes etc;
g) Servicing of the appliance should be according to manufacturers instructions.
Transport
The original packaging should be used when transporting robotic lawnmower over long distances.
To safely move from or within the working area:
a) Press the STOP button to stop the mower.
b) You select the four digit PIN code when you start the mower for the first time.
c) Always switch off robotic lawnmower if you intend to carry the mower.
d) Carry the mower by the handle at the rear under the mower. Carry the mower with the blade disc away from the body.
Safety warnings for battery pack
a) Do not dismantle, open or shred cells or battery pack.
b) Do not short-circuit a battery pack. Do not store battery packs haphazardly in a box or drawer
where they may short-circuit each other or be short-circuited by conductive materials. When battery
pack is not in use, keep it away from other metal objects, like paper clips, coins, keys, nails, screws or other
small metal objects, that can make a connection from one terminal to another. Shorting the battery terminals
together may cause burns or a fire.
c) Do not expose battery pack to heat or fire. Avoid storage in direct sunlight.
d) Do not subject battery pack to mechanical shock.
e) In the event of battery leaking, do not allow the liquid to come into contact with the skin or eyes.
If contact has been made, wash the affected area with copious amounts of water and seek medical
advice.
f) Seek medical advice immediately if a cell or battery pack has been swallowed.
g) Keep battery pack clean and dry.
h) Battery pack gives its best performance when it is operated at normal room temperature (20 °C ±
5 °C).
i) When disposing of battery packs, keep battery packs of different electrochemical systems separate
from each other.
j) Recharge only with the charger specified by WORX. Do not use any charger other than that
specifically provided for use with the equipment. A charger that is suitable for one type of battery pack
may create a risk of fire when used with another battery pack.
k) Do not use any battery pack which is not designed for use with the equipment.
l) Keep battery pack out of the reach of children.
m) Retain the original product literature for future reference.
n) Dispose of properly.

Lawn Mowing Robot EN
5
1.2 Information on the Landroid®M
WARNING - Robotic lawnmower can be dangerous if incorrectly used.
Read through the Operator’s manual carefully and understand the content before using your robotic
lawnmower.
WARNING - Keep a safe distance from the machine when operating.
WARNING - Operate the disabling device before working on or lifting the machine.
WARNING - Do not ride on the machine.
Do not burn
Batteries may enter water cycle if disposed improperly, which can be hazardous for ecosystem. Do not
dispose of waste batteries as unsorted municipal waste.
Class III appliance
Batteries should be recycled. Do not dispose of batteries, Return exhausted batteries to your local collection
or recycling point.
Do not wash the machine with a high pressure washer
Waste electrical products must not be disposed of with household waste. Please recycle where facilities
exist. Check with your local authorities or retailer for recycling advice.

Lawn Mowing Robot EN
6
2. Component List
68
75
9
10
11
12
13
23
2221
17
19
16
18
3
4
2
1
25
20
24
15
14

Lawn Mowing Robot EN
7
1. HANDLE BAR
2. LOW VOLTAGE CABLE
3. CONTACT PINS
4. CHARGING BASE
5. CHARGING STRIP
6. DISPLAY WINDOW
7. CONTROL PANEL COVER
8. STOP BUTTON
9. RAIN SENSOR
10. REAR DRIVING WHEEL
11. HANDLE
12. BATTERY PACK
13. BLADE TURNING DISC
14. CUTTING BLADE
15. FRONT WHEEL
16. START KEY
17. DISPLAY
18. KEYPAD
19. ON/OFF KEY
20. POWER ADAPTOR
21. BOUNDARY WIRE
22. WIRE PEGS
23. CHARGING BASE FIXING NAILS
24. BOUNDARY WIRE DISTANCE GAUGE
25. HEX KEY

Lawn Mowing Robot EN
8
A
3. Understanding Your Landroid®M
We would like to congratulate you on your new purchase of the Landroid®M and entering into the care-free life of automatic
mowing. In the following, we would like to help you better understand how your Landroid®M thinks.
3.1 How does my Landroid®M know what to mow?
The Landroid®M chooses its direction at random. It will make sure your entire lawn is evenly mowed without leaving
behind any unattractive mowing paths (See Fig. A).

Lawn Mowing Robot EN
9
3.2 How does my Landroid®M
know where to go?
Your Landroid®M is capable of doing things on its own. The
Landroid®M knows when it needs to go to its Charging Base (4)
to charge, can sense when it is raining, can stop itself if it senses
a problem, and knows to stop, draw back, and then turn around
when it bumps into something blocking its path or other object. The
Landroid®M will also automatically stop its Blade Turning Disc (13)
from rotating if it is lifted off the ground to prevent an accident.
A. Finding the charging base
When your Landroid®M needs to recharge, it will stop mowing and
follow the Boundary Wire (21) in an anti-clockwise direction back
to its Charging Base. Landroid®M is pre-programmed to mow the
grass near the boundary wire once a week. If you want to mow the
grass near the boundary wire at other times, open the panel cover,
press the home button and close the panel cover. Landroid®M will
stop mowing, locate the boundary wire and mow the grass near the
boundary wire while it locates the charging station . We suggest you
use this function when the battery power is more than 75%.You can
check the battery power in the display.
B. Rain sensors
The Landroid®M is fitted with a Rain Sensor (9) that will detect
rain drops and tell the Landroid®M to stop mowing and follow the
Boundary Wire back to its Charging Base (See Fig. B )
The Landroid®M is programmable to have a delay start function
(0 – 180 mins) when it rains. When the rain sensors are wet, the
Landroid®M returns to its docking station. Only when the rain sensors
become dry will the Landroid®M begin the delay start countdown or
return to mowing immediately. See the Programming and Troubleshooting Guide for more details.
C. Sensing the boundary wire
The Landroid®M always obeys the border set by the Boundary Wire and uses two sensors at its front to sense when it is
getting close(See Fig. C). Before changing direction, the Landroid®M will overrun the Boundary Wire up to 20 cm*.
*This is the recommended distance. Use the provided distance gauge to ensure proper installation.
D. Starting and stopping while mowing (See Fig. D,E)
If you would like to command the Landroid®M to stop mowing, then simply press the STOP button (8) on top of the mower.
To start mowing open the Control Panel Cover, press the ON/OFF key and input the PIN code, then press start key and
close the panel cover.
B
C
DD E

Lawn Mowing Robot EN
10
If the Landroid®M senses that something is wrong, it will display a fault message on the Display (17), and will turn itself off
if it does not receive any input from the user within 20 min (for information on fault messages refer to the Programming
and Troubleshooting Guide).
To resume:
Scene 1: STOP –Auto Shutdown after 20 mins.
• Open the Control Panel Cover.
• Press the ON/OFF Key (19) to ON.
• Press 0 key to correct the problem.
• Press START button again and Close the Control Panel Cover.
• Now the Landroid®M will begin to mow!
Scene 2: STOP– Without Auto Shutdown.
• Open the Control Panel Cover.
• Press 0 key to correct the problem.
• Press START button again and Close the Control Panel Cover.
• Now the Landroid®M will begin to mow!
3.3 How big an area can my Landroid®M mow?
Your Landroid
®
M is capable of mowing areas of up to different size areas, although this depends on various factors, such as:
• Species of grass in your lawn and its growth rate.
• Sharpness of the Cutting Blades (14).
• Humidity.
• Surrounding temperature.
• Amount of obstacles in your Lawn.
If the surrounding temperature is very hot where you live then your Landroid®M may charge at a slightly slower rate. The
Landroid®M uses less energy in open areas that have fewer obstacles, such as flower beds, fountains, walkways, etc…
You can find the default work time of Landroid®M for different lawn size in programming guide .
Mowing times are different for every lawn depending on the factors mentioned previously. Gradually adjust the time you
allow your Landroid®M to mow each day until you find the most suitable setting.
You can also program Landroid®M working time to suit your schedule – refer to Programming Guide.
3.4 How efficiently will my Landroid®M mow the grass?
The Landroid®M’s cutting height can be adjusted between 2cm - 6cm. Before starting your Landroid®M for the first time,
you should cut the grass to the height not more than 9cm.Then make sure you open the Control Panel Cover (7) and set
the cutting height to its maximum cutting height of 6cm (See Fig. F,G).
Your Landroid®M will cut its best in dry weather. It does not like wet grass, which can build up on the BladeTurning Disc (13)
and within the motor, and can also cause loose traction and slippage while working.
Your Landroid®M is afraid of Lightening Storms. In case of a Lightening Storm, protect the Landroid®M by unplugging the
Charging Base (4), disconnecting the Boundary Wire (21), and making sure the Landroid®M is not allowed to charge.
Your Landroid®M loves mowing grass and requires the Cutting Blades (14) to be kept in good condition to cut at its best.
The Landroid®M can do most things by itself, but will need your help sometimes to prevent damage to itself.
• Never let the Landroid®M travel over gravel.
•
Remove or prevent access to obstacles that the
Landroid®M
could accidentally climb on and damage its Blade Turning Disc.
• Remove all debris and foreign objects from your lawn.
GF

Lawn Mowing Robot EN
11
4. Boundary Wire Basics
4.1 Pegging the Boundary Wire
Use the Boundary Wire Distance Gauge (24) to set the correct
distance from the border of your lawn (More than 35cm *).
* This is the recommended distance. Use the provided distance
gauge to ensure proper installation.
If your neighbor also uses a Landroid®M, then you must keep a
spacing of at least 2 metres between your Boundary Wire and your
neighbors.
Please be aware that your Landroid®M will not be able to receive a
signal from the Boundary Wire beyond the distance of 18m.
The boundary wire must outline the intended mowing area
exactly.
Your Landroid®M will become confused by extra bends or coils of Boundary Wire that are not part of its mowing
area ( See Fig. H). If there is excess Boundary Wire after the mowing area has been outlined, then cut it off and store
this additional wire in a separate location. However, it is important to leave the necessary length where it connects to the
Charging Base so it can be connected and still remain buried.
4.2 Burying the Boundary Wire
If you are planning to bury the Boundary Wire then it should be noted that when entering its Charging Base for the first time,
your Landroid®M may find problems with the way you have laid the wire. It is recommended to first peg down the Boundary
Wire to the lawn so it is easy to make adjustments if necessary. This will allow the Landroid®M to become adjusted to its new
environment and ensures it will successfully work with the charging base before the Boundary Wire is buried.
When you have completed installing the boundary wire, it is recommended that you ask Landroid®M to follow the boundary
wire by pressing the home button.
Whilst observing Landroid®M locating the charging station you can then make alterations to the boundary wire route to
ensure trouble free tracking of the boundary wire by Landroid®M when locating the charging station.
4.3 Joining the Boundary Wire
The Boundary Wire (21) can be extended simply by splicing the ends
and connecting it to the ends of another piece of wire. You can use
insulating tape to secure the joined part of the wire. (See Fig. I)
4.4 Turn on and test installation
If the charger base LED does not come on, then check the power
connections.
If the charger base LED is flashing green, check if the boundary wire
is connected correctly.
Red light on: charging.
Red light flashing: error message, refer to Trouble Shooting and
correct the problems.
Green light flashing: check if the boundary wire is connected correctly.
When the green light on the charging base is on, place your Landroid®M over the boundary wire, if Landroid®M follows the
boundary it is connected correctly.
If your Landroid®M is inside its territory but the display says “Outside working area” ,and the charger
base LED is green, it means you clamped the boundary wire ends incorrectly. Just reverse them.
H
I

Lawn Mowing Robot EN
12
5. Software update
Your Landroid®M software can be updated when new versions
become available.The software version will be displayed in the
bottom right hand corner of the display. The manual in box is based
on the default software in the mass production .Some new features/
functions in the new version may not exist in the manual If you found
some settings not in the manual, please visit www.worxlandroid.com
to download the latest manual.You can check the software version
installed on your machine by pressing the ON/OFF button.
The latest software can be downloaded from our website – see
below download and installation instructions;
Step 1: Locate the latest software version at: www.worxlandroid.com.
Copy the “.bin” file containing the latest software version to a USB
memory stick. Note: before transferring the “bin” file make sure
the memory stick does not contain other files or data.
Step 2: Open the cover at the bottom and remove the battery and
then insert the U disk to the USB port. (See Fig.J1)
Step 3: Insert the battery back and press the ON/OFF button for ten
seconds until the mower is powered ON.The new software version
will be displayed in the bottom right corner of the display. (See Fig.J2)
Step 4: Remove the memory stick and refit the battery cover.
Step 5: After installing the new software you will need to reset the
diagnostic panel on your mower. Firstly, position the mower on a
horizontal surface.
Press Key “2” to enter the diagnosis interface, then press key
“5” for a few seconds until the three numbers 1 2 & 3 highlighted
below turn back to zero. (See Fig J3)
6. Maintenance
Your Landroid®M needs to be checked from time to time. The
Landroid®M works hard and after time needs a good cleaning as well
as having some parts replaced, as they can become worn.
In the following we want to let you know how to take care of your
Landroid®M.
6.1 Keep it sharp
WARNING: Before cleaning, adjusting, or replacing
the Blades, turn your Landroid®M OFF by pressing
the ON/OFF Button to OFF and put on protective gloves.
WARNING: When fitting new blades, make sure
you replace ALL the blades. Always use new

screws when fitting blades . This is important to ensure
blade retention. Failure to use new screws could cause
serious injury.
The Landroid®M does not cut grass like other mowers. Its
Cutting Blades (14) are razor sharp on all 4 edges and spin in
both directions for maximum cutting capacity (See Fig. K ).Each
blade of your Landroid®M has 4 cutting edges. Depending on the
frequency the Landroid®M mows your lawn, the cutting blades will
need to be flipped/rotated periodically for a new cutting edge. If
your Landroid®M is programmed to mow the lawn every day then
the cutting blades will need to be rotated monthly for the best
mowing results. Each cutting blade will last up to 4 months when
it is programmed to mow every day. When the cutting blades are
dull and worn out, they should be replaced with the spare blades
provided with your Landroid®M. Spare blades are also available at
your nearest WORX retailer.
1
2
3
J1
J2
J3
43
1 2
K

Lawn Mowing Robot EN
13
A. Rotate and flip the blades
Your Landroid®M carries the Blades that are all screwed onto the Blade Turning Disc (13).The Blades allow the
Landroid®M do its job and need care and attention. Every once in awhile, you should simultaneously rotate and flip all
blades for a perfect cut. When rotating and flipping the Blades, make sure all the Blades are adjusted at the same time
or else it could make the Blade Disc off balance. If your Landroid®M mows on a normal schedule (daily) then the Blades
should last one season if they are rotated and flipped every month. Always check to see if the Blades are chipped or
damaged and replace them if they are.
B. Replace the blades (See Fig. L)
After some time, usually every season, your Landroid®M’s Blades
will need to be replaced. Your Landroid®M does not like mowing
while using Blades of different age and quality. So when replacing
the Blades, make sure to replace all of them at the same time.
You can replace them with one of the three spare Blade kits and
extra Blade screws supplied with your Landroid®M.
Before attempting to replace your Landroid®M’s Blades, turn the
power off and put on protective gloves. Then follow these steps:
1. Gently flip the Landroid®M over.
2. Remove the battery cover and remove the battery.
3. Take the screws off the Blades with a screwdriver.
4. Firmly screw on the new Blades.
5. Refit the battery and the battery cover.
IMPORTANT: After screwing the Blade to the Blade
Disc, make sure the Blade is able to spin freely.
6.2 Keep it clean
WARNING: Before cleaning turn your Landroid®M
OFF by pressing the ON/OFF Button. Put on
protective gloves before cleaning the Blade Turning Disc
(13) and do not use running water. (See Fig. M)
A. Cleaning the body
Your Landroid®M will live a much happier and longer life if it is
cleaned regularly. Although, as your Landroid®M is an electric
machine, you will need to take care when cleaning, so DO NOT use
a hose, high pressure washers or otherwise pour running water on
your Landroid®M, it is best to use a spray bottle filled with water .
When cleaning the machine body use a soft brush or clean cloth and
avoid using solvents or polishes (See Fig. M). Lastly, make sure that
you remove all build up of grass clippings and debris.
B. Cleaning the Underside
Again, it is important that you power the Landroid®M OFF using the ON/Off Button and wear protective gloves
before touching the Blade Turning Disc (13).
First, flip your Landroid®M upside down to expose its underside. Here you will see the Blade Disc, the chassis, and the
Front Wheel (15) and Driving Wheel(10). Clean everything thoroughly with a soft brush or moist rag.
Rotate the Blade Disc to make sure it moves freely and that there is not anything lodged between it and the surrounding
Motor Frame Box. Also, make sure the Blades are able to spin freely and that there's no grass obstructing them.
IMPORTANT: Remove any lodged debris so that it does not cause a crack in the Blade Disc. Even the
tiniest crack can decrease your Landroid®M's mowing output.
C. Clean the contact pins and the charging strips
Clean the Contact Pins (3) located on the Charging Base (4) and the Charging Strip (5) located on the Landroid®M using a
cloth. Remove any build up of grass clippings and debris around the contact pins and charge strips periodically to ensure
the Landroid®M successfully charges each time.
M
L

Lawn Mowing Robot EN
14
6.3 Battery life
The heart of the Landroid®M is its 28-volt lithium-ion battery.
No maintenance is required. For proper storage of the battery,
make sure it is fully charged in kept in a cool dry place between
(20°C-60°C).
The life-span of the Landroid®M’s battery depends on various
factors, such as:
• The time span of the mowing season in your region.
• Amount of hours the Landroid®M mows per day.
• Battery maintenance during storage.
Landroid®M can be charged manually without the
boundary wire.(See Fig. N)
To manually charge the battery without connecting the
boundary wire to the charging base;
1. Connect the Charging Base to a suitable power supply.
2. Manually dock the Landroid®M into the Charging Base while the Landroid®M is powered off.
3. The charging base red light will turn on.
4. Within 3 seconds and before the charging base light turns green, press the Landroid®M power ON/
OFF button.
5. Landroid®M will begin to charge.
6.4 Winter hibernation
Your Landroid®M will live longer and healthier if it is allowed to hibernate. So even though it is tough, we would recommend
that you store your Landroid®M in your shed or garage during the winter.
Before you prepare your Landroid®M for winter hibernation, we recommend you:
• Thoroughly clean your Landroid®M
• Fully charge the battery
• Turn the power off
To maximize the battery life, it is recommended to fully charge the battery before storage during winter.
The Boundary Wire can be left in the ground although its ends should be protected, such as placed in a tin can with grease.
If the Charging Base is left outside for winter, leave the Boundary Wire connected.
NOTE: Before storing for winter, you can take your Landroid®M to a dealer for a thorough cleaning and tune-up, where its
functions will be tested and worn parts will be replaced.
When bringing the Landroid®M back to work after winter hibernation, make sure the Charging Strips (5) and Contact Pins (3)
are clean, it is recommended to use a fine grade emery cloth to clean. Then make sure the date and time are correct and
send the Landroid®M back to what it loves doing: mowing.
6.5 Replacing the battery
WARNING: Press the ON/OFF Key to OFF before attempting any adjustment, replacement or repair.
If you need to replace the Battery, follow these steps:
1. Gently turn your Landroid®M upside down.
2. Remove the four screws on the battery cover (See Fig. O).
3. Take out the old battery (See Fig. P).
4. Put in the new battery.
5. Firmly replace the 4 screws.
1
2
N

Lawn Mowing Robot EN
15
Environmental Protection
Waste electrical products should not be disposed of with household waste. Please recycle where facilities exist.
Check with your Local Authority or retailer for recycling advice.
OP

Robô corta-relvas PT
16
MANUAL ORIGINAL
ÍNDICE
1. Segurança do produto
1.1 Avisos de segurança para o seu cortador de relva
1.2 Informações sobre o Landroid®M
2. Lista de componentes
3. Compreender o seu Landroid®M
3.1 Como é que o meu Landroid®M sabe o que cortar?
3.2 Como é que o meu Landroid®M sabe para onde ir?
A. Detectar a base de carga
B. Sensores de chuva
C. Detectar o fio de delimitação
D. Iniciar e parar ao cortar a relva
3.3 Qual é a área máxima que o meu Landroid®M consegue cortar?
3.4 Qual o nível de eficiência de corte de relva do meu Landroid®M?
4. Informações básicas sobre o fio de delimitação
4.1 Prender o fio de delimitação
4.2 Enterrar o fio de delimitação
4.3 Unir o fio de delimitação
4.4 Ligação e instalação de teste
5. Actualização de software
6. Manutenção
6.1 Mantenha-o afiado
A. Rode e vire as lâminas
B. Substitua as lâminas
6.2 Mantenha-o limpo
A. Limpar o corpo
B. Limpar a parte interior
C. Limpar os pinos de contacto e tiras de carga
6.3 Vida útil da bateria
6.4 Armazenamento no Inverno
6.5 Substituição da bateria
17
17
19
20
22
22
23
23
23
23
23
24
24
25
25
25
25
25
26
26
26
27
27
27
27
27
28
28
28
28

Robô corta-relvas PT
17
1. Segurança do produto
1.1 Avisos de segurança para o seu cortador de relva
AVISO: Leia todos os avisos e instruções de segurança. O desrespeito dos avisos e instruções pode
resultar em choques eléctricos, incêndios e/ou ferimentos graves.
Leia cuidadosamente as instruções sobre o funcionamento seguro da máquina.
Preserve todos avisos e instruções para referência futura.
•Este aparelho não se destina a ser utilizado por indivíduos (incluindo crianças) com capacidades físicas reduzidas,
capacidades sensoriais e mentais reduzidas ou falta de experiência e conhecimento, salvo quando supervisionados ou
instruídos por uma pessoa responsável acerca da utilização do aparelho e respectiva segurança.
•Deve supervisionar as crianças para garantir que não brincam com o aparelho.
•Este aparelho só deve ser utilizado com a fonte de alimentação fornecida com o mesmo.
IMPORTANTE
LEIA CUIDADOSAMENTE ANTES DE UTILIZAR
PRESERVE PARA FUTURA REFERÊNCIA
PRÁTICAS DE UTILIZAÇÃO SEGURA
Formação
a) Leia atentamente as instruções. Certifique-se de que compreende as instruções e familiarize-se com os controlos e
com a utilização adequada do aparelho;
b) Nunca permita que o aparelho seja utilizado por crianças ou pessoas que não estejam familiarizadas com a utilização do
aparelho. Os regulamentos locais podem restringir a idade do operador;
c) O operador ou utilizador é responsável por acidentes ou situações de perigos ocorrendo a outras pessoas ou na sua
propriedade.
Preparação
a) Certifique-se de que instala correctamente o fio de delimitação conforme instruído.
b) Inspeccione periodicamente a área onde o aparelho deve ser utilizado e retire todas as pedras, paus, fios, ossos e
outros objectos estranhos.
c) Inspeccione a máquina visual e periodicamente para verificar se as lâminas, os parafusos das lâminas e o conjunto de
corte estão desgastados ou danificados. Substitua lâminas e parafusos gastos ou danificados em conjunto de modo a
preservar o equilíbrio.
d) Nos aparelhos com vários pivôs, preste atenção ao rodar uma lâmina pois pode provocar a rotação das restantes lâminas.
e) AVISO! O cortador de relva não deve ser utilizado sem a protecção no local correcto.
FUNCIONAMENTO
1. GERAL
a) Nunca utilize o aparelho com protecções defeituosas ou sem dispositivos de segurança no local correcto, por exemplo
deflectores;
b) Não coloque os pés nem as mãos perto ou debaixo de peças em rotação. Mantenha-se sempre afastado da abertura de
descarga;
c) Nunca pegue ou transporte um aparelho enquanto o motor estiver a funcionar;
d) Opere o dispositivo de desativação a partir do aparelho;
– Antes de eliminar um bloqueio;
– Antes de inspeccionar, limpar ou trabalhar no aparelho;
e) Não é permitido modificar a concepção original do robot corta-relva.Todas as modificações são da sua exclusiva responsabilidade.
f) Ligue cortador de grama robô de acordo com as instruções. Quando o botão de energia estiver ativado, certifique-se de
que mantém as mãos afastadas das lâminas rotativas. Nunca coloque as mãos e pés sob o cortador.
g) Nunca levante ou transporte o cortador de grama robô com o botão de energia ativado.
h) Não deixe as pessoas que não se encontram familiarizadas com o funcionamento do cortador de grama robô utilizarem
o mesmo.
i) Não coloque objetos sobre o cortador de grama robô ou na respectiva estação de carga.
j) Não permita que o cortador de grama robô seja utilizado com um disco da lâmina ou corpo defeituosos. Também não
deve ser utilizado com lâminas, parafusos, porcas ou cabos defeituosos.
k) Desligue sempre o cortador de grama robô quando concluir a sua utilização. O cortador de grama robô só pode iniciar
quando o botão de energia estiver ativado e tenha sido introduzido o código PIN correcto.
2. ALÉM DISSO, QUANDO O APARELHO ESTIVER A FUNCIONAR AUTOMATICAMENTE
a) Não deixe a máquina a funcionar sem supervisão caso não saiba se existem animais de estimação, crianças ou pessoas
nas proximidades.

Robô corta-relvas PT
18
MANUTENÇÃO E ARMAZENAMENTO
AVISO! Quando o cortador estiver ao contrário, o botão de energia deve estar sempre desligado.
O botão de energia deve estar sempre desligado durante os trabalhos realizados sob a estrutura,
como a limpeza ou substituição das lâminas.
a) Mantenha todas as porcas, pernos e parafusos apertados para garantir que o aparelho se encontra em condições de
funcionamento seguras;
b) Inspeccione o robot corta-relva semanalmente e substitua as peças gastas ou danificadas por motivos de segurança;
c) Verifique especialmente se as lâminas e respectivos discos estão danificados. Substitua todas as lâminas e parafusos
em simultâneo (caso necessário) para que as peças rotativas fiquem equilibradas.
d) Certifique-se de que são utilizados apenas meios de corte sobresselentes do tipo correcto;
e) Certifique-se de que as baterias estão carregadas utilizando o carregador correcto recomendado pelo fabricante. A
utilização incorrecta pode provocar choques eléctricos, sobreaquecimento ou fugas de líquido corrosivo da bateria;
f) Em caso de fuga de electrólitos lave com água/agente neutralizador e procure aconselhamento médico se entrar em
contacto com os olhos, etc.;
g) A assistência ao aparelho deve estar de acordo com as instruções do fabricante.
Transporte
A embalagem original deve ser utilizada ao transportar o robot corta-relva em longas distâncias.
Para transportá-lo desde ou na área de funcionamento:
a) Pressione o botão PARAR para parar o cortador.
b) Seleccionou o código PIN de quatro dígitos quando ligou o cortador pela primeira vez.
c) Desligue sempre o cortador de grama robô caso pretenda transportá-lo.
d) Transporte sempre o cortador pelo manípulo na parte posterior sob o cortador. Transporte o cortador com o disco da
lâmina afastado do corpo.
Avisos de segurança para a bateria
a) Não desmonte, abra ou corte as células da bateria.
b) Não submeta a bateria a curto-circuitos. Não armazena as baterias ao acaso numa caixa ou gaveta
onde possam provocar um curto-circuito ou submetidas a curto-circuitos por materiais condutores.
Quando não estiver a utilizar a bateria, mantenha-a afastada de outros objectos metálicos, como clipes, moedas,
chaves, pregos, parafusos ou outros pequenos objectos de metal, que possam realizar uma ligação de um terminal a
outro. Um curto-circuito dos terminais da bateria pode provocar queimaduras ou um incêndio.
c) Não exponha a bateria ao calor ou a incêndios. Evite o armazenamento à exposição de luz solar
directa.
d) Não exponha a bateria ao choque eléctrico.
e) Em casos de fugas na bateria, não permita que o líquido entre em contacto com a pele ou olhos.
Caso entre em contacto, lave a área afectada com quantidades abundantes de água e procure
aconselhamento médico.
f) Procure imediatamente aconselhamento médico se ingerir uma célula ou bateria.
g) Mantenha a bateria limpa e seca.
h) A bateria regista o seu melhor desempenho quando é utilizada a uma temperatura ambiente normal
(20ºC ± 5ºC).
i) Ao eliminar as baterias, mantenha as baterias com diferentes sistemas electroquímicos separadas
umas das outras.
j) Recarregue apenas com o carregador especificado pela WORX. Não utilize um carregador que
não se encontra especificado para a utilização com o equipamento. Um carregador adequado para um
determinado tipo de bateria pode provocar risco de incêndio quando é utilizado com outra bateria.
k) Não utilize uma bateria que não se encontra concebida para a utilização com o equipamento.
l) Mantenha a bateria fora do alcance das crianças.
m) Preserve as informações originais do produto para futura referência.
n) Elimine-a de forma adequada.

Robô corta-relvas PT
19
1.2 Informações sobre o Landroid®M
AVISO - o robot cortador de relva pode ser perigoso se for utilizado incorrectamente.
Leia cuidadosamente o manual do proprietário e compreenda o respetivo conteúdo antes de utilizar o seu
cortador de grama robô.
AVISO - Mantenha uma distância segura da máquina quando estiver em utilização.
AVISO - Execute a desactivação do dispositivo antes de reparar ou levantar a máquina.
AVISO - Não se coloque sobre a máquina.
Não queimar
As baterias podem entrar no ciclo de água se forem eliminadas de forma incorreta, o que pode ser perigoso
para o ecossistema. Não elimine as baterias usadas como resíduo ou lixo municipal comum.
Classe III Aparelho
As baterias devem ser recicladas
As baterias devem ser recicladas. Não elimine ou jogue fora as baterias/pilhas. Devolva as baterias gastas ao
ponto de recolha ou reciclagem da sua localidade.
Não lave a máquina com equipamento de lavagem de alta pressão.
Os produtos eléctricos residuais não devem ser eliminados juntamente com o lixo doméstico. Recicle onde
existam instalações. Confirme com as suas autoridades locais ou distribuidor relativamente ao dispositivo de
reciclagem.

Robô corta-relvas PT
20
2. Lista de componentes
68
75
9
10
11
12
13
23
2221
17
19
16
18
3
4
2
1
25
20
24
15
14
Other manuals for Landroid
16
Table of contents
Languages:
Other Worx Lawn Mower manuals

Worx
Worx Landroid WR141E User manual

Worx
Worx WG776E User manual

Worx
Worx WG705E User manual

Worx
Worx WG776E User manual

Worx
Worx Landroid WR130E User manual

Worx
Worx WR165E User manual

Worx
Worx wg706e User manual

Worx
Worx Landroid User manual

Worx
Worx Landroid S 300 Specification sheet

Worx
Worx Landroid WR139E User manual

Worx
Worx Landroid S 300 Specification sheet

Worx
Worx WG779E User manual

Worx
Worx WG774 User manual

Worx
Worx WG754E User manual

Worx
Worx WG775E Installation manual

Worx
Worx Landroid M WG794E User manual

Worx
Worx Landroid WR141E User manual

Worx
Worx WG719 User manual

Worx
Worx WG744 User manual

Worx
Worx NITRO WG749E User manual