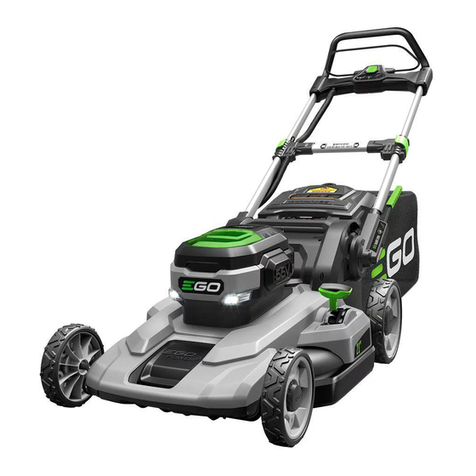
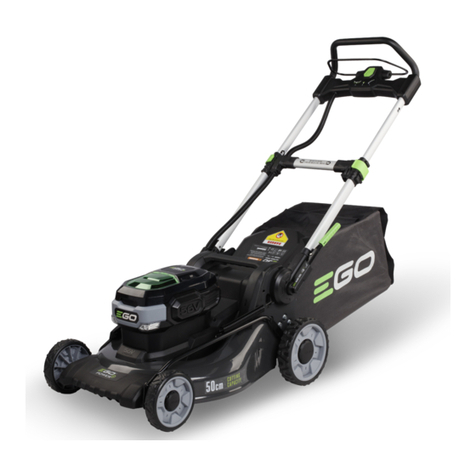
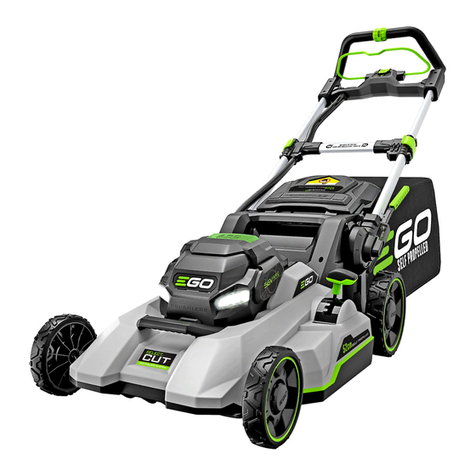
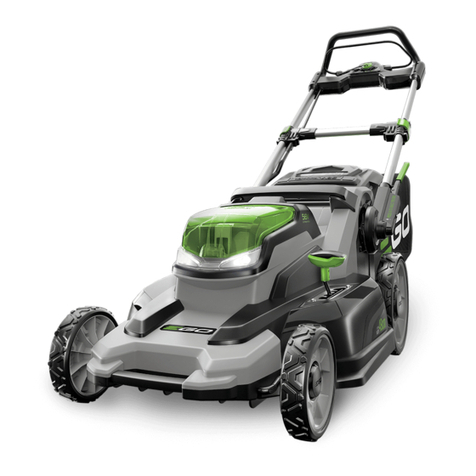
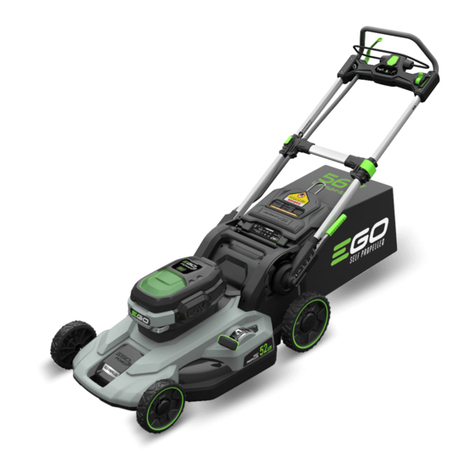
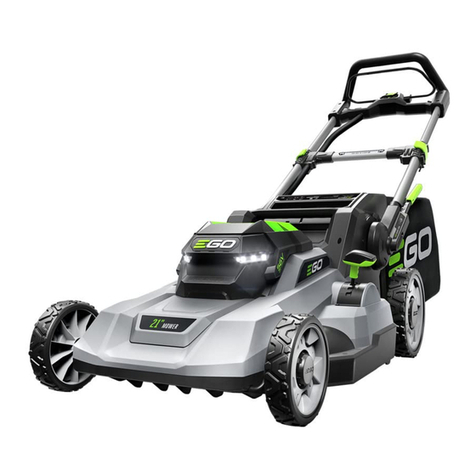
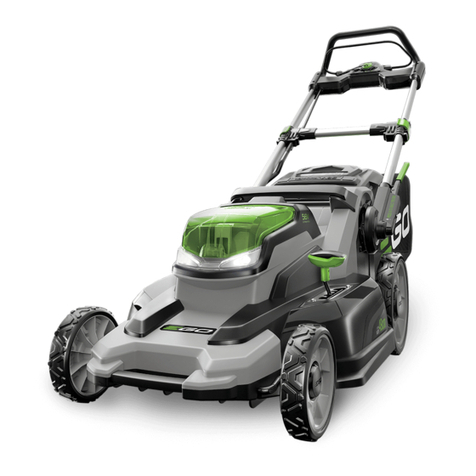
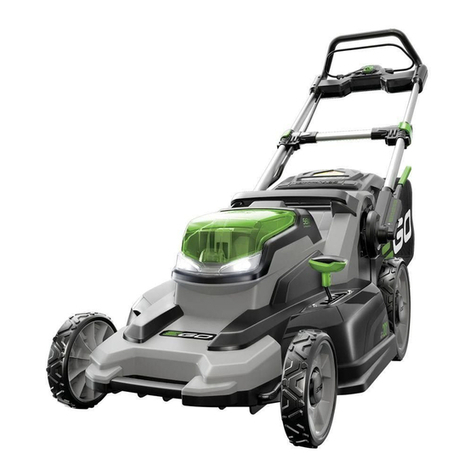
EGO LM2110E-SP User manual

WARNING: To reduce the risk of injury, the user must read and understand the
Operator’s Manual before using this product. Save these instructions for future reference.
OPERATOR’S MANUAL
56 VOLT LITHIUM-ION
CORDLESS MOWER
MODEL NUMBER LM2110E-SP
MNL_EGO_LM2110E-SP_AV01.01_230413

4. Mower-Status Indicator
3. Bail Switch (Switch Lever)
11. Cutting-Height Adjustment Lever
2. Self-Propel Trigger
1. Self-Propel Speed-Control Knob
19. Mulching Insert
18. Handle
17. Safety Button
16. Headlights Button
14. Handle-Locking Clamp
13. Grass Bag
12. Quick-Adjust Lever
10. Rear Wheel9. Front Wheel
8. LED Headlights
7. Battery Compartment Cover
6. Rear Handle
5. Rear Discharge Door
15. Side Rail
A
E
C
22. Trailling Shield
D
23. Battery-Release Button
B
20. Front Handle
21. Mower Deck

1
2
G
H
2
1
JK
F
I
Upper Operating
Position
Middle Operating
Position
Lower Operating
Position
Grass Bag
Attachment/
Removal
Position
Locked Storage
Position
2
1
LCutting-Height Adjustment Lever
Cutting-Height
Indication Plate
2
1
M
Battery Compartment
Cover
Battery-Release Button

OFF
U
Mower-Status
Indicator
Switch Button for
LED Headlights
3
12
P
1
2
N
RS
OFF
Self-Propel Trigger
Self-Propel Speed-Control Knob
TLED Headlights
1
2
Q
Safety Button
Bail Switch
O
Indication Line

Y
THIS SIDE FACING GRASS
X
Tighten
Stablizer
THIS SIDE FACING GRASS
V
Stablizer
Loosen
Recommended torque for removing or
tightening the blade bolt is 49-59Nm.
THIS SIDE FACINGGRASS
W
Blade
Fan
Bolt
Out
Flange

56 VOLT LITHIUM-ION CORDLESS MOWER — LM2110E-SP6
READ ALL INSTRUCTIONS!
READ OPERATOR'S MANUAL
WARNING: To ensure safety and reliability, all repairs
and replacements should be performed by a qualified
service technician.
Intended use & Foreseeable misuse: The product
is intended for mowing grass in domestic gardens only. It
must not be used to mow unusually high, dry or wet grass,
e.g. pasture grass; or to shred leaves. The product is to
be used only for its prescribed purpose. Any other use is
deemed to be a case of misuse.
SAFETY SYMBOLS
The purpose of safety symbols is to attract your attention
to possible dangers. The safety symbols and the
explanations with them deserve your careful attention and
understanding. The symbol warnings do not, by themselves,
eliminate any danger. The instructions and warnings they
give are no substitutes for proper accident prevention
measures.
WARNING: Be sure to read and understand all safety
instructions in this Operator’s Manual, including all safety
alert symbols such as “DANGER,” “WARNING,” and
“CAUTION” before using this tool. Failure to follow all
instructions listed below may result in electric shock, fire,
and/or serious personal injury.
SYMBOL MEANING
SAFETY ALERT SYMBOL: Indicates DANGER,
WARNING, OR CAUTION, may be used in conjunction with
other symbols or pictographs.
WARNING: The operation of any power tools can
result in foreign objects being thrown into your eyes,
which can result in severe eye damage. Before beginning
power tool operation, always wear safety goggles or safety
glasses with side shields and a full face shield when
needed. We recommend a Wide Vision Safety Mask for
use over eyeglasses or standard safety glasses with side
shields.
SAFETY INSTRUCTIONS
This page depicts and describes safety symbols that may
appear on this product. Read, understand, and follow all
instructions on the machine before attempting to assemble
and operate it.
Safety Alert Indicates a potential
personal injury hazard.
Read Operator’s
Manual
To reduce the risk of
injury, user must read the
operator’s manual.
Wear protective
glasses and
hearing protection
Always wear hearing
protection, safety goggles
or safety glasses with side
shields and a full face
shield when operating this
product.
Keep hands and
feet away from
the blades
Keep hands and feet away
from the blades.
Keep Bystanders
Away
Ensure that other people
and pets remain at least
30m away from the mower
when it is in use and pay
attention to the risk of
injury caused by flying
debris.
Disconnect
battery before
maintenance
Switch off and remove
detachable battery pack
(or disabling device) before
adjusting or cleaning.
XX
Noise Guaranteed sound power
level.
Keep hand away Keep hand away.
CAUTION Do not stare at operating
lamp.
The RCM is a
symbol that
represents
compliance
with Australian
Standards
The RCM is a symbol that
represents compliance
with Australian Standards.
IPX4 Ingress Protection
Degree
Protection from splashing
water.
V Volt Voltage

56 VOLT LITHIUM-ION CORDLESS MOWER — LM2110E-SP 7
A Amperes Current
Kg Kilogram
Weight of the machine
which is stated on the
nameplate.
min Minutes Time
Direct Current Type or a characteristic of
current.
GENERAL POWER TOOL SAFETY WARNINGS
WARNING: READ ALL SAFETY WARNINGS,
INSTRUCTIONS, ILLUSTRATIONS AND SPECIFICATIONS
PROVIDED WITH THIS MACHINE. Failure to follow all
instructions listed below may result in electric shock, fire
and/or serious injury.
SAVE ALL WARNINGS AND INSTRUCTIONS FOR FUTURE
REFERENCE.
The term “machine” in the warnings refers to your mains-
operated (corded) machine or battery-operated (cordless)
machine.
WORK AREA SAFETY
◾Keep work area clean and well lit. Cluttered or dark
areas invite accidents.
◾Do not operate machines in explosive atmospheres,
such as in the presence of ammable liquids,
gases or dust. Machines create sparks which may
ignite the dust or fumes.
◾Keep children and bystanders away while
operating a machine. Distractions can cause you to
lose control.
ELECTRICAL SAFETY
◾Machine plugs must match the outlet. Never
modify the plug in any way. Do not use any
adapter plugs with earthed (grounded) machines.
Unmodified plugs and matching outlets will reduce risk
of electric shock.
◾Avoid body contact with earthed or grounded
surfaces, such as pipes, radiators, ranges and
refrigerators. There is an increased risk of electric
shock if your body is earthed or grounded.
◾Do not expose machines to rain or wet conditions.
Water entering a machine will increase the risk of
electric shock.
◾Do not abuse the cord. Never use the cord for
carrying, pulling or unplugging the machine. Keep
cord away from heat, oil, sharp edges or moving
parts. Damaged or entangled cords increase the risk
of electric shock.
◾When operating a machine outdoors, use an
extension cord suitable for outdoor use. Use of
a cord suitable for outdoor use reduces the risk of
electric shock.
◾If operating a machine in a damp location is
unavoidable, use a residual current device (RCD)
protected supply. Use of an RCD reduces the risk of
electric shock.
PERSONAL SAFETY
◾Stay alert, watch what you are doing and use
common sense when operating a machine. Do
not use a machine while you are tired or under
the inuence of drugs, alcohol or medication. A
moment of inattention while operating machines may
result in serious personal injury.
◾Use personal protective equipment. Always wear
eye protection. Protective equipment such as a dust
mask, non-skid safety shoes, hard hat or hearing
protection used for appropriate conditions will reduce
personal injuries.
◾Prevent unintentional starting. Ensure the switch
is in the off-position before connecting to power
source and/or battery pack, picking up or carrying
the machine. Carrying machines with your finger on
the switch or energising machines that have the switch
on invites accidents.
◾Remove any adjusting key or wrench before
turning the machine on. A wrench or a key left
attached to a rotating part of the machine may result in
personal injury.
◾Do not overreach. Keep proper footing and balance
at all times. This enables better control of the machine
in unexpected situations.
◾Dress properly. Do not wear loose clothing or
jewellery. Keep your hair and clothing away from
moving parts. Loose clothes, jewellery or long hair
can be caught in moving parts.
◾If devices are provided for the connection of dust
extraction and collection facilities, ensure these
are connected and properly used. Use of dust
collection can reduce dust-related hazards.
◾Do not let familiarity gained from frequent use of
machines allow you to become complacent and
ignore machine safety principles. A careless action
can cause severe injury within a fraction of a second.
MACHINE USE AND CARE
◾Do not force the machine. Use the correct machine
for your application. The correct machine will do

56 VOLT LITHIUM-ION CORDLESS MOWER — LM2110E-SP8
the job better and safer at the rate for which it was
designed.
◾Do not use the machine if the switch does not turn
it on and off. Any machine that cannot be controlled
with the switch is dangerous and must be repaired.
◾Disconnect the plug from the power source and/
or remove the battery pack, if detachable, from
the machine before making any adjustments,
changing accessories, or storing machines. Such
preventive safety measures reduce the risk of starting
the machine accidentally.
◾Store idle machines out of the reach of children
and do not allow persons unfamiliar with the
machine or these instructions to operate the
machine. Machines are dangerous in the hands of
untrained users.
◾Maintain machines and accessories. Check for
misalignment or binding of moving parts, breakage
of parts and any other condition that may affect
the machine’s operation. If damaged, have the
machine repaired before use. Many accidents are
caused by poorly maintained machines.
◾Keep cutting machines sharp and clean. Properly
maintained cutting machines with sharp cutting edges
are less likely to bind and are easier to control.
◾Use the machine, accessories and machine bits
etc. in accordance with these instructions, taking
into account the working conditions and the work
to be performed. Use of the machine for operations
different from those intended could result in a
hazardous situation.
◾Keep handles and grasping surfaces dry, clean
and free from oil and grease. Slippery handles and
grasping surfaces do not allow for safe handling and
control of the machine in unexpected situations.
BATTERY MACHINE USE AND CARE
◾Recharge only with the charger specied by the
manufacturer. A charger that is suitable for one type
of battery pack may create a risk of fire when used
with another battery pack.
◾Use machines only with specically designated
battery packs. Use of any other battery packs may
create a risk of injury and fire.
◾When battery pack is not in use, keep it away from
other metal objects, like paper clips, coins, keys,
nails, screws or other small metal objects, that can
make a connection from one terminal to another.
Shorting the battery terminals together may cause
burns or a fire.
◾Under abusive conditions, liquid may be ejected
from the battery; avoid contact. If contact
accidentally occurs, ush with water. If liquid
contacts eyes, additionally seek medical help.
Liquid ejected from the battery may cause irritation
or burns.
◾Do not use a battery pack or machine that is
damaged or modied. Damaged or modified batteries
may exhibit unpredictable behaviour resulting in fire,
explosion or risk of injury.
◾Do not expose a battery pack or machine to
re or excessive temperature. Exposure to fire or
temperature above 130 °C may cause explosion.
◾Follow all charging instructions and do not
charge the battery pack or machine outside the
temperature range specied in the instructions.
Charging improperly or at temperatures outside the
specified range may damage the battery and increase
the risk of fire.
SERVICE
◾Have your machine serviced by a qualied repair
person using only identical replacement parts.
This will ensure that the safety of the machine is
maintained.
◾Never service damaged battery packs. Service
of battery packs should only be performed by the
manufacturer or authorized service providers.
LAWNMOWER SAFETY WARNINGS
◾Do not use the lawnmower in bad weather
conditions, especially when there is a risk of
lightning. This decreases the risk of being struck by
lightning.
◾Thoroughly inspect the area for wildlife where the
lawnmower is to be used. Wildlife may be injured by
the lawnmower during operation.
◾Thoroughly inspect the area where the lawnmower
is to be used and remove all stones, sticks, wires,
bones, and other foreign objects. Thrown objects
can cause personal injury.
◾Before using the lawnmower, always visually
inspect to see that the blade and the blade
assembly are not worn or damaged. Worn or
damaged parts increase the risk of injury.
◾Check the grass catcher frequently for wear or
deterioration. A worn or damaged grass catcher may
increase the risk of personal injury.
◾Keep guards in place. Guards must be in working
order and be properly mounted. A guard that is
loose, damaged, or is not functioning correctly may
result in personal injury.
56 VOLT LITHIUM-ION CORDLESS MOWER — LM2110E-SP 9
◾Keep all cooling air inlets clear of debris. Blocked
air inlets and debris may result in overheating or risk
of fire.
◾While operating the lawnmower, always wear
non-slip and protective footwear. Do not operate the
lawnmower when barefoot or wearing open sandals.
This reduces the chance of injury to the feet from
contact with the moving blade.
◾While operating the lawnmower, always wear long
trousers. Exposed skin increases the likelihood of
injury from thrown objects.
◾Do not operate the lawnmower in wet grass. Walk,
never run. This reduces the risk of slipping and falling
which may result in personal injury.
◾Do not operate the lawnmower on excessively
steep slopes. This reduces the risk of loss of control,
slipping and falling which may result in personal injury.
◾When working on slopes, always be sure of your
footing, always work across the face of slopes,
never up or down and exercise extreme caution
when changing direction. This reduces the risk of
loss of control, slipping and falling which may result in
personal injury.
◾Use extreme caution when reversing or pulling the
lawnmower towards you. Always be aware of your
surroundings. This reduces the risk of tripping during
operation.
◾Do not touch blades and other hazardous moving
parts while they are still in motion. This reduces the
risk of injury from moving parts.
◾When clearing jammed material or cleaning the
lawnmower, make sure all power switches are off
and the battery pack is disconnected. Unexpected
operation of the lawnmower may result in serious
trimmer personal injury
◾Use only with EGO’s battery packs and chargers listed
below:
BATTERY PACK CHARGER
BA1400, BA2800, BA4200,
BA1400T, BA2800T, BA4200T,
BA5600T, BA6720T
CH2100E,
CH5500E,
CH7000E
◾SAVE THESE INSTRUCTIONS. Refer to them frequently
and use them to instruct others who may use this
machine. If you lend this machine to someone else,
also lend these instructions to them to prevent misuse
of the product and possibly injury.
SPECIFICATIONS
Model Number LM2110E-SP
Self Propel System Yes
Voltage 56 V
Recommended Operating
Temperature 0°C-40°C
Recommended Storage
Temperature -20°C-70°C
Optimum Charging
Temperature 5°C-40°C
No-Load Speed 2800 r/min
Cutting Height 25-90 mm
Cutting Height Positions 7
Deck Size 53 cm
Cutting Width 52 cm
Grass Bag Volume 70 L
Weight (without battery
pack) 23 kg
Blade Model AB2103,
AB2102(Sold Separately)
Blade Brake Yes
PACKING LIST
PART NAME QUANTITY
Lawn mower 1
Grass bag 1
Grass bag frame 1
Mulching Insert 1
Blade 1
Operator’s Manual 1
DESCRIPTION
KNOW YOUR MOWER (Fig. A& B & C & D)
1. Self-Propel Speed-Control Knob
2. Self-Propel Trigger
3. Bail Switch (Switch Lever)
4. Mower-Status Indicator
5. Rear Discharge Door
6. Rear Handle
7. Battery Compartment Cover

56 VOLT LITHIUM-ION CORDLESS MOWER — LM2110E-SP10
8. LED Headlights
9. Front Wheel
10. Rear Wheel
11. Cutting-Height Adjustment Lever
12. Quick-Adjust Lever
13. Grass Bag
14. Handle-Locking Clamp
15. Side Rail
16. Headlights Button
17. Safety Button
18. Handle
19. Mulching Insert
20. Front Handle
21. Mower Deck
22. Trailing Shield
23. Battery-Release Button
OPERATION
ASSEMBLING THE GRASS BAG
1) Slide the grass bag onto the frame (Fig. E).
2) Assemble the top clips to the frame (Fig. F). Then
assemble the two side clips. Assemble the bottom clip
lastly.
3) The completely assembled grass bag is shown in
Fig. G.
ADJUSTING THE FOLDABLE HANDLE
WARNING: Do not attempt to start the mower until
the handle has been locked at one of the three preset
operating positions (UPPER OPERATING POSITION,
MIDDLE OPERATING POSITION and LOWER OPERATING
POSITION). Your mower is shipped with the handle in
the compact, LOCKED STORAGE POSITION (Fig. H).
1) Press and hold the quick-adjust lever to release the
handle from the LOCKED STORAGE POSITION.
2) Lift the handle from its folded position, then release
the lever. Gently pivot the handle upward until you hear
and feel the lock pin engage in one of the following
different positions as shown in the Fig. I.
ATTACHING/REMOVING THE GRASS BAG/
MULCHING INSERT
WARNING: Do not at either time make any
adjustment to the lawn mower without first stopping the
motor, removing the battery pack and waiting for the
blade to stop rotating.
◾To Attach/Remove the Grass Bag (Fig. J)
Adjust the handle to the suitable operating position. Lift
the rear discharge door and hook the grass bag onto
the pivot rod. To remove, just lift the grass bag up, off
of the pivot rod. Lastly, release the rear discharge door.
NOTICE: Remove the pre-installed mulching insert
from the mower before attaching the grass bag to the
mower.
NOTICE: leftover grass in the lawn mower grass bag
can cause it to become overfilled and may even cause
something to break. Empty the grass bag after each and
every use!
◾To Attach/Remove the Mulching Insert (Fig. K)
ADJUSTING THE CUTTING HEIGHT (Fig. L)
WARNING: Keep your feet away from the deck
when adjusting its height.
ATTACHING/DETACHING THE BATTERY PACK (Fig. M)
CHARGE BEFORE FIRST USE.
WARNING: If any parts are broken or missing, do
not attempt to attach the battery pack to the mower or
operate the mower until the broken or missing parts
are replaced. Failure to do so could result in serious
injury.
◾To Attach
Push the battery pack into the battery compartment until
you hear a “click”.
◾To Detach
Depress the battery-release button in the battery
compartment.
NOTICE: Make sure that the latch on the mower snaps
into place and that the battery pack is secured to the
mower before starting operation.
STARTING/STOPPING THE MOWER
WARNING: The operation of any lawn mower
can result in foreign objects being thrown into your or
others’ eyes, which can damage eyes severely. Always
wear safety glasses while operating the mower, or while
performing any adjustments or repairs on it.
WARNING: Do not use the mower in the rain.

56 VOLT LITHIUM-ION CORDLESS MOWER — LM2110E-SP 11
WARNING: Ensure that other people and pets
remain at least 30m away from the mower when it is in
use.
WARNING: The blade will continue to rotate for
a few seconds after the mower is turned off. Allow the
motor/blade to stop rotating before starting it again. Do
not rapidly turn the mower off and on.
WARNING: Stop the blade if the lawnmower has to
be tilted for transportation when crossing surfaces other
than grass and when transporting the lawnmower to and
from the area to be mowed.
WARNING: Do not tilt the lawn mower when starting
switching on the motor, except if the lawn mower has to
be tilted for starting. In this case, do not tilt it more than
absolutely necessary and lift only the part which is away
from the operator.
NOTICE: The motor cannot be started unless:
◾The side rails are fully extended (Fig. N).
◾Both green handle-locking clamps are securely closed
(Fig. O).
◾The handle is locked into one of the three operating
positions.
◾To Start
1) Attach the battery pack to the mower.
2) Depress the safety button (Fig. P).
3) With the safety button depressed, pull the bail switch
upward to meet the handle and release the safety
button (Fig. Q).
◾To Stop
1) Fully release the bail switch (Fig. R).
2) The electric brake in the Automatic Braking
Mechanism will stop the blade rotation.
3) Stop the machine, and remove the battery pack to
make sure that all moving parts have come to a
complete stop after striking a foreign object, and to
inspect the machine for damage and make repairs
before restarting and operating the machine.
4) Stop the machine, and remove the battery pack
to make sure that all moving parts have come to
a complete stop, if the machine starts to vibrate
abnormally, and then to immediately inspect for
damage, replace or repair any damaged parts and to
check for and tighten any loose parts.
VARIABLE-SPEED SELF-PROPEL SYSTEM
LM2110E-SP mower is equipped with variable-speed,
self-propel capability. This system is independent of the
blade On/Off switch. It is not dependent on blade rotation.
For example, when you have completed cutting your lawn,
you can use the self-propel to propel the mower back to
your storage location without blade rotation. Or you may
choose to operate the mower as a non-self-propelled
mower to maximize battery running time.
To operate the self-propel system without blade rotation,
turn the self-propel speed-control knob on, press the self-
propel trigger(s).There are two self-propel triggers. Press
either trigger to start the self-propel function (Fig. S).
To turn the self-propel off, release the self-propel trigger,
turn the self-propel speed-control knob off.
LED HEADLIGHTS (Fig. T)
To turn on the headlights, press the headlights button
(Fig. U).
To turn off the headlights, press the button again.
POWER INDICATOR ON THE MOWER
Mower-
status
indicator
Meaning Action
Solid green
Mower is
working
properly;
battery has
at least 15%
of its charge.
None required.
Flashing
green
The side
rails are
not fully
extended.
Make sure that the
side rails are fully
extended.
The handle
is not
locked in an
operating
positions.
Make sure that the
handle is locked
in an operating
positions.
Flashing
red Low battery.
Stop the mower and
charge the battery
pack.
Solid
orange
The mower
stops due to
overheating.
Remove the battery
from the mower,
move them to the
shade and cool
them for at least 15
minutes.

56 VOLT LITHIUM-ION CORDLESS MOWER — LM2110E-SP12
Flashing
orange
The
mower is
overloaded.
First, remove the
battery pack, then
check and clean if
grass has collected
beneath the deck.
Slow down your
pace when cutting.
If this does not work,
please contact EGO.
Flashing
red/green
alternately
Error Contact EGO
Dark & LED
on battery
flashing
Battery
overheat.
Release the bail
switch, wait until the
battery pack cools
down, then restart
the mower.
MOWER OVERLOAD PROTECTION
To prevent overload conditions, do not try to remove too
much grass at one time. Slow down your cutting pace or
raise the cut height.
Your mower has built-in overload circuit protection. When
the mower is overloaded, the motor will stop and the
power indicator on the mower will flash orange. Remove
the battery pack from the mower. Check to see if grass
has collected beneath the deck and clear it if necessary,
then install the battery and restart the mower.
BATTERY HIGH TEMPERATURE PROTECTION
The battery pack will generate heat during operation. The
heat dissipates more slowly in hot weather. If the battery
temperature exceeds 70°C during operation, the protection
circuit will immediately turn off the mower to protect the
battery pack from damage. The power indicator on the
mower will shine orange and the LED on the battery will
flash orange. Release the bail handle, wait until the battery
pack cools down to approximately 67°C, then restart the
mower.
MAINTENANCE
WARNING: Before inspecting, cleaning or servicing
the unit, stop the motor, wait for all moving parts to
stop, and remove the battery pack. Failure to follow
these instructions can result in serious personal injury
or property damage.
WARNING: When servicing, use only identical
replacement parts. Inspect and maintain the machine
regularly. To ensure safety and reliability, all repairs
should be performed by a qualified service technician.
GENERAL THE MOWER
The underside of mower deck should be cleaned after
each use, as grass clippings, leaves, dirt and other
debris will accumulate.
Remove any build-up of grass and leaves on or around
the drive shaft and the motor fan (do not use water). Wipe
the mower clean with a damp cloth.
REMOVING/INSTALLING THE BLADE
WARNING: Always protect your hands by wearing
heavy gloves or wrapping the cutting edges with rags
or other materials when performing any maintenance
on the mower blade. Always remove the battery pack
when servicing or transporting the mower.
WARNING: Be careful during adjustment of the
machine to prevent entrapment of the fingers between
moving blades and fixed parts of the appliance.
◾To remove the blade (Fig. V)
Place a manual screwdriver or metal rod in the stabilizer
hole. This is to stop the blade from rotating while loosening
the bolt.
Use a wrench (impact wrench is recommended) to turn
the blade bolt counterclockwise to loosen and remove the
bolt. Remove the out flange and the blade (Fig. W).
◾To install the blade (Fig. X)
Following the assembly sequence in Fig. W. Position the
blade on the shaft with the surface stating “THIS SIDE
FACING GRASS" facing toward the outside. Mount the bolt
into the shaft and turn it clockwise.
NOTICE: The recommended torque for removing or
tightening the blade bolt is 49-59Nm.
STORING THE MOWER
The following steps should be taken in order to prepare
the lawn mower for storage:
◾Always allow the machine to cool down before storing
◾Remove the battery pack from the mower and store it
in a cool, dry and clean location. Do not store it next to
corrosive materials, such as fertilizer or rock salt.
◾Lubricate the mower.
◾Store the mower in a covered, enclosed space, that is
cool and dry and out of the reach of children.
◾Do not cover the lawn mower with a solid plastic sheet.
Plastic coverings trap moisture around the mower,
which causes rust and corrosion.
◾The mower can be stored upright or flat. (Fig. Y).
WARNING: If the mower begins to tip over from

56 VOLT LITHIUM-ION CORDLESS MOWER — LM2110E-SP 13
the upright position, mower damage or personal injury
may result. Always keep the mower stable and out of
the reach of children when it is in the upright position. If
possible, lay it flat for storage.
Protecting the environment
Do not dispose of electrical appliances as
unsorted municipal waste, use separate
collection facilities.
Contact your local government for
information regarding the collection
systems available.
If electrical appliances are disposed of in
landfills or dumps, hazardous substances
can leak into the groundwater and get into
the food chain, damaging your health and
well-being.

56 VOLT LITHIUM-ION CORDLESS MOWER — LM2110E-SP14
TROUBLESHOOTING
WARNING: Always remove the battery pack when servicing or transporting the mower. Always protect your hands
by wearing heavy gloves or wrapping the cutting edges with rags or other materials when performing any maintenance
on the mower blade.
PROBLEM CAUSE SOLUTION
The mower fails
to start
◾The battery pack is depleted. ◾Charge the battery pack.
◾The battery pack is not mounted in place in
the battery compartment.
◾Attach the battery pack to the
mower; press it until you hear a
click.
◾The battery or mower circuitry is too hot.
(The power indicator on the mower shines
orange).
◾Allow the battery pack or mower
to cool until the temperature drops
below 67°C.
◾The side rails are not extended to their
maximum length and the clamps are not
locked in position.
◾Fully extend the handle and lock
both clamps.
◾The handle is not set at one of the three
operating positions.
◾Adjust the handle to one of the three
operating positions.
◾The mower deck is clogged with grass and
debris.
◾Clean the mower deck and make
certain that the blade has freedom
of movement.
The mower cuts
unevenly
◾The blade is dull. ◾Sharpen or replace the blade.
◾The cutting height is not set properly. ◾Raise the deck to a higher cutting
height setting.
◾The blade is assembled incorrectly. ◾Reassemble the blade, following the
section “INSTALLING THE BLADE”
in this manual.
Short running time
of the mower with
included battery
◾Grass conditions and cutting height setting
will greatly affect the battery run time. The
claimed run time is based on a light load
condition.
◾Raise the blade height and slow
your pace to reduce the cutting load.
The mower does not
mulch properly
◾Wet grass clippings are sticking to the
underside of the deck.
◾Wait until the grass dries before
mowing.
◾The mower is set to cut too much grass at
once.
◾Raise the deck to a higher cutting
height setting.

56 VOLT LITHIUM-ION CORDLESS MOWER — LM2110E-SP 15
PROBLEM CAUSE SOLUTION
The blade/motor
unexpectedly stops
while mowing
◾The battery pack charge is depleted. ◾Charge the battery pack.
◾Mower is in overload condition. ◾Raise the cutting height or slow
down the pace.
◾Mower deck is clogged with grass and
debris.
◾Unclog the mower deck. Raise the
cutting height and/or cut a narrower
swath.
◾The battery or mower circuitry is too hot.
(The power indicator on the mower shines
orange for 10s).
◾Allow the battery pack or mower
to cool until the temperature drops
below 67°C.
◾The side rail is retracted a little by the
pushing force applied on the handle.
◾Unlock the clamps. Fully extend the
side rails and lock the handle-
locking clamps again.
There is excessive
vibration
◾The cutting blade is loose. ◾Tighten the outer nut.
◾The cutting blade is unbalanced. ◾Balance the blade.
◾The cutting blade is bent. ◾Replace the blade.
◾The motor shaft is bent. ◾Contact the service center.
◾The mower is set to cut too much grass at
once.
◾Raise the deck to a higher cutting-
height setting.
The handle-locking
clamps cannot be
closed in position
◾The side rails are not fully extended. ◾Fully extend the side rails, then lock
the clamps.
Mower is difficult to
pull back when the
self-propel is turned
off
◾The wheels are temporarily locked. ◾Simply push the mower ahead
slightly and then move the mower
as desired.
Self-propel function
fails to turn on when
one of the self-propel
triggers is pressed
◾The self-propel speed-control knob is set
all the way back effectively turning off the
self-propel function.
◾Turn the self-propel speed-control
knob slightly forward BEFORE
pressing the self-propel trigger.
The motor works but
the blade doesn’t cut
the grass
◾The blade bolt is not tightened to the
required torque.
◾Re-tighten the blade bolt to
recommended torque of 49-59 Nm.

56 VOLT LITHIUM-ION CORDLESS MOWER — LM2110E-SP16
WARRANTY POLICY
For warranty service or to make a claim, please visit our Warranty Portal at egopowerplus.com.au/warranty-policy,
alternatively you can contact EGO customer service via the following, Australia 1300 000 346,
New Zealand 0508 000 346.
Chervon Australia Pty Ltd ABN 36 165 077 501 and Chervon New Zealand Subsidiary Ltd NZBN 9429049277616
(“Chervon”) warrants to the original domestic purchaser that this product will be free from defects in materials and
workmanship for 5 years from date of purchase, and any battery or charger will be free from defects in materials and
workmanship for 3 years from date of purchase. Warranty for commercial use is 1 year on all product, battery and
chargers. The Commercial Range Product Warranty for commercial users is 2 years for product, backpack battery
(BAX1501) and commercial charger (CHX5500E). Please refer to product warranty table below for further clarification.
To make a claim, call 1300 000 346 for AU or 0508 000 346 for NZ or lodge a claim via our portal link above. Any
handling and transportation costs (and other expenses incurred in claiming this warranty) are not covered by this
warranty and will not be borne by Chervon. The replacement product or part or repaired product will be made available
for your collection at an address nominated by Chervon. Where a valid warranty claim is made, Chervon will replace the
defective product or repair the fault. Where the product is repaired, Chervon may use refurbished parts. This warranty
does not cover normal wear and tear, misuse or abuse (including overloading of the product beyond capacity and
exposure to water or rain), accidents, neglect or lack of proper installation, and improper maintenance or storage. This
warranty does not cover the damage resulting from modification, alteration or unauthorised repair. This warranty does
not cover normal deterioration of the exterior finish, including but not limited to scratches, dents, paint chips, or to any
corrosion or discolouring by heat, abrasive and chemical cleaners. This warranty is void if the product has been used
for rental purpose. This warranty may also be further limited or voided as specifically detailed in the product Manual.
Chervon has no other liability under this warranty. The benefits to you given by this warranty are in addition to other
rights and remedies imposed by State and Federal legislation that cannot be excluded. Our goods come with guarantees
that cannot be excluded under the Australian Consumer Law and the New Zealand Consumer Guarantee Act 1993. You
are entitled to a replacement or refund for a major failure and compensation for any other reasonably foreseeable loss
or damage. You are also entitled to have the goods repaired or replaced if the goods fail to be of acceptable quality
and the failure does not amount to a major failure. The warranty applies to the original purchaser and applies only to
purchases made from authorised EGO Dealers, which can be confirmed on the website store locator. For avoidance of
doubt, 3rd party online stores such as eBay, Gumtree, Amazon, etc. are excluded.
Chervon Australia Pty Ltd, Unit 14, 5 Kelletts Rd, Rowville, VIC. 3178.
Chervon New Zealand Subsidiary Ltd, 4th Floor, Smith & Caughey Building, 253 Queen St, Auckland, 1141.

56 VOLT LITHIUM-ION CORDLESS MOWER — LM2110E-SP 17
PRODUCT WARRANTY TABLE
PRODUCT OR MODEL #
LIMITED WARRANTY FOR
CONSUMER USE (PERSONAL,
HOUSEHOLD USE)
LIMITED WARRANTY FOR
PROFESSIONAL USE (ANY
COMMERCIAL, AGRICULTURAL,
INSTITUTIONAL,
OR INCOME-PRODUCING USE)
EGO Power+ Outdoor Power Equipment and
Portable Power Products 5 years 1 year
EGO Power+ Battery Packs and Chargers 3 years 1 year
Specic warranties apply to the products below:
Commercial Tools: LBX6000, BCX3800,
STX3800, HTX7500, CSX3000, PPX1000,
PSX2500, PTX5100, BHX1001, STX4500,
BCX4500, EDX2000, HTX5300-P,
HTX5300-PA, LBPX8000
5 years 2 years
Commercial Backpack Battery: BAX1501 3 years 2 years
Commercial Charger: CHX5500E 3 years 2 years


Table of contents
Other EGO Lawn Mower manuals

EGO
EGO POWER Plus ZT5200L User manual

EGO
EGO LM2100E User manual

EGO
EGO POWER+ LM2110 User manual

EGO
EGO LM2000-S User manual

EGO
EGO POWER+ ZT5200E-L User manual

EGO
EGO LM2100SP User manual

EGO
EGO LM2000E Power+ Mower User manual

EGO
EGO POWER+ LM2130E-SP User manual

EGO
EGO Power+ User manual

EGO
EGO LM2135SP User manual