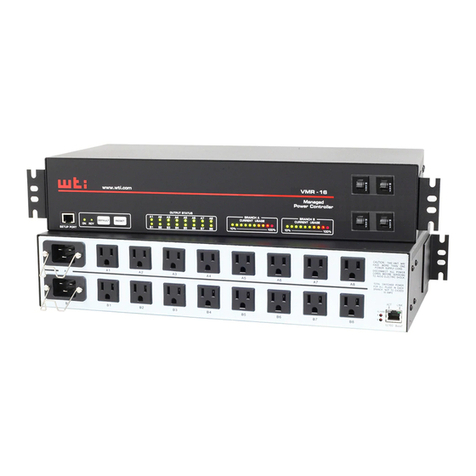
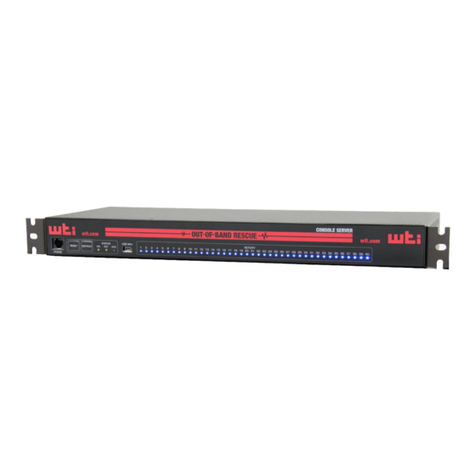
WTI TSM Series User manual

WTI Part No. 14023
Rev. O
TSM Series
SerialConsoleServers
RSM Series
RemoteSiteManagers
RSM-xRy Series
RemoteSiteManagerswithPowerControl
Products Covered:
TSM Series RSM Series RSM-xRy Series
TSM-40 Models RSM-16 Models RSM-16R16 Models
TSM-24 Models RSM-8 Models RSM-8R8 Models
TSM-8 Models RSM-2R4 Models
User's Guide

i
Warnings and Cautions:
Installation Instructions
Secure Racking
If Secure Racked units are installed in a closed or multi-unit rack assembly, they may
require further evaluation by Certification Agencies. The following items must be
considered.
1. The ambient within the rack may be greater than room ambient. Installation
should be such that the amount of air flow required for safe operation is not
compromised. The maximum temperature for the equipment in this environment is
45°C. Consideration should be given to the maximum rated ambient.
2. Installation should be such that a hazardous stability condition is not achieved due
to uneven loading.
Input Supply
1. Check nameplate ratings to assure there is no overloading of supply circuits that
could have an effect on overcurrent protection and supply wiring.
2. When installing 48 VDC rated equipment, it must be installed only per the following
conditions:
A. Connect the equipment to a 48 VDC supply source that is electrically isolated
from the alternating current source. The 48 VDC source is to be connected to
a 48 VDC SELV source.
B. Input wiring to terminal block must be routed and secured in such a manner
that it is protected from damage and stress. Do not route wiring past sharp
edges or moving parts.
C. A readily accessible disconnect device, with a 3 mm minimum contact gap,
shall be incorporated in the fixed wiring.
Grounding
Reliable earthing of this equipment must be maintained. Particular attention should
be given to supply connections when connecting to power strips, rather than direct
connections to the branch circuit.
No Serviceable Parts Inside; Authorized Service Personnel Only
Do not attempt to repair or service this device yourself. Internal components must be
serviced by authorized personnel only.
• ShockHazard-DoNotEnter
• LithiumBattery
CAUTION:Dangerofexplosionifbatteryisincorrectlyreplaced.Replace
onlywithsameorequivalenttyperecommendedbythemanufacturer.
Discardusedbatteriesaccordingtothemanufacturer'sinstructions.

ii
Warnings and Cautions
Disconnect Power
If any of the following events are noted, immediately disconnect the unit from the outlet
and contact qualified service personnel:
1. If the power cord becomes frayed or damaged.
2. If liquid has been spilled into the device or if the device has been exposed to rain
or water.
Disconnect Power Before Servicing
Before attempting to service or remove this unit, please make certain to disconnect the
power supply cable(s) from the power source(s).
Two Power Supply Cables
Note that some TSM/RSM series units and RSM-xRy series units feature two separate
power inlets and a separate power supply cable for each power inlet.
In addition, RSM-16R16 series units feature four separate power inlets and a separate
power supply cable for each power inlet. Make certain to disconnect all power supply
cables from their power source before attempting to service or remove the unit.
Modem Cables
CAUTION: To reduce the risk of fire, use only No. 26 AWG or larger (e.g., 24 AWG) UL
Listed or CSA Certified Telecommunication Line Cord.

iii
Agency Approvals
FCC Part 15 Regulation
This equipment has been tested and found to comply with the limits for a Class A digital
device, pursuant to part 15 of the FCC Rules. These limits are designed to provide
reasonable protection against harmful interference when the equipment is operated
in a commercial environment. This equipment generates, uses, and can radiate radio
frequency energy and, if not installed and used in accordance with the instruction
manual, may cause harmful interference to radio communications. Operation of this
equipment in a residential area is likely to cause harmful interference in which case the
user will be required to correct the interference at his own expense.
This device complies with part 15 of the FCC Rules. Operation is subject to the following
two conditions: (1) This device may not cause harmful interference, and (2) this device
must accept any interference received, including interference that may cause undesired
operation
WARNING: Changes or modifications to this unit not expressly approved by
the party responsible for compliance could void the user’s authority to operate
the equipment
EMC, Safety, and R&TTE Directive Compliance
The CE mark is affixed to this product to confirm compliance with the following
European Community Directives:
• CouncilDirective89/336/EECof3May1989ontheapproximationofthelaws
ofMemberStatesrelatingtoelectromagneticcompatibility;
and
• CouncilDirective73/23/EECof19February1973ontheharmonizationof
thelawsofMemberStatesrelatingtoelectricalequipmentdesignedforuse
withincertainvoltagelimits;
and
• CouncilDirective1999/5/ECof9Marchonradioequipmentand
telecommunicationsterminalequipmentandthemutualrecognitionoftheir
conformity.
Industry Canada - EMI Information
This Class A digital apparatus complies with Canadian ICES-003.
Cet appareil numérique de la classe A est conforme à la norme NMB-003 du Canada.
This product meets the applicable Industry Canada technical specifications
The Ringer Equivalence Number is an indication of the maximum number of devices
allowed to be connected to a telephone interface. The termination on an interface may
consist of any combination of devices subject only to the requirement that the sum of
the RENs of all the devices does not exceed five.

iv
Table of Contents
1. Introduction.............................................................1-1
2. UnitDescription..........................................................2-1
2.1. TSMSeries-FrontPanel................................................2-1
2.2. TSMSeries-BackPanel ................................................2-2
2.3. RSMSeries-FrontPanel................................................2-4
2.4. RSMSeries-BackPanel................................................2-5
2.5. RSM-16R16Series-FrontPanel..........................................2-6
2.6. RSM-16R16Series-BackPanel ..........................................2-7
2.7. RSM-8R8Series-FrontPanel............................................2-8
2.8. RSM-8R8Series-BackPanel ...........................................2-10
2.9. RSM-2R4Series-FrontPanel...........................................2-11
2.10. RSM-2R4-BackPanel.................................................2-12
2.11. FrontPanelButtonFunctions............................................2-13
3. GettingStarted..........................................................3-1
3.1. ApplyPowertotheTSM/RSM............................................3-1
3.2. ConnectYourPCtotheTSM/RSM ........................................3-1
3.3. CommunicatingwiththeTSM/RSM........................................3-2
3.4. Connecting Ports and Switching Outlets. . . . . . . . . . . . . . . . . . . . . . . . . . . . . . . . . . . . 3-3
3.5. The WMU Enterprise Management Solution . . . . . . . . . . . . . . . . . . . . . . . . . . . . . . . . . 3-5
4. HardwareInstallation.....................................................4-1
4.1. Connecting the Power Supply Cables. . . . . . . . . . . . . . . . . . . . . . . . . . . . . . . . . . . . . . 4-1
4.1.1. Connect the TSM/RSM to Your Power Supply . . . . . . . . . . . . . . . . . . . . . . . . . 4-1
4.1.2. Installing the Power Supply Cable Keeper . . . . . . . . . . . . . . . . . . . . . . . . . . . . 4-1
4.1.3. DCPoweredUnits...............................................4-2
4.2. ConnectingtheNetworkCable ...........................................4-2
4.3. TheInternalModemPort................................................4-2
4.4. ConnectiontoSwitchedOutlets ..........................................4-3
4.5. Connecting Devices to the TSM/RSM Serial Ports . . . . . . . . . . . . . . . . . . . . . . . . . . . . 4-3
4.6. EmergencyShutOffFunction............................................4-3
5. BasicConfiguration......................................................5-1
5.1. Communicating with the TSM/RSM Unit . . . . . . . . . . . . . . . . . . . . . . . . . . . . . . . . . . . . 5-1
5.1.1. TheTextInterface ...............................................5-1
5.1.2. TheWebBrowserInterface........................................5-3
5.1.3. AccessViaPDA.................................................5-4
5.2. ConfigurationMenus ...................................................5-5
5.3. DefiningSystemParameters.............................................5-6
5.3.1. The Real Time Clock and Calendar . . . . . . . . . . . . . . . . . . . . . . . . . . . . . . . . . 5-9
5.3.2. The Serial Port Invalid Access Lockout Feature . . . . . . . . . . . . . . . . . . . . . . . 5-11
5.3.3. LogConfiguration..............................................5-14
5.3.3.1. The Audit Log and Alarm Log Configuration Options. . . . . . . . . . . 5-14
5.3.3.2. TheTemperatureLog....................................5-15
5.3.3.3. Reading, Downloading and Erasing Logs. . . . . . . . . . . . . . . . . . . . 5-15
5.3.4. CallbackSecurity...............................................5-16
5.3.5. ScriptingOptions...............................................5-17
5.3.5.1. AutomatedMode.......................................5-20
5.3.6. Power Configuration (RSM-8R8-CM Series Units Only) . . . . . . . . . . . . . . . . . 5-21
5.4. UserAccounts .......................................................5-22
5.4.1. CommandAccessLevels........................................5-22
5.4.2. GrantingSerialPortAccess ......................................5-23
5.4.3. GrantingPlugAccess...........................................5-24

Table of Contents
v
5. BasicConfiguration(continued)
5.5. ManagingUserAccounts...............................................5-25
5.5.1. ViewingUserAccounts..........................................5-25
5.5.2. AddingUserAccounts ..........................................5-25
5.5.3. ModifyingUserAccounts ........................................5-28
5.5.4. DeletingUserAccounts..........................................5-28
5.6. ThePlugGroupDirectory ..............................................5-29
5.6.1. ViewingPlugGroups............................................5-30
5.6.2. AddingPlugGroups............................................5-30
5.6.3. ModifyingPlugGroups..........................................5-31
5.6.4. DeletingPlugGroups ...........................................5-31
5.7. DefiningPlugParameters...............................................5-32
5.7.1. TheBootPriorityParameter ......................................5-34
5.7.1.1. Example 1: Change Plug 3 to Priority 1 . . . . . . . . . . . . . . . . . . . . . 5-34
5.7.1.2. Example 2: Change Plug 4 to Priority 2 . . . . . . . . . . . . . . . . . . . . . 5-35
5.8. SerialPortConfiguration ...............................................5-36
5.8.1. RS232PortModes..............................................5-37
5.8.2. The Serial Port Configuration Menu . . . . . . . . . . . . . . . . . . . . . . . . . . . . . . . . 5-38
5.8.3. Copying Parameters to Several Serial Ports (Text Interface Only) . . . . . . . . . 5-45
5.9. NetworkConfiguration.................................................5-46
5.9.1. NetworkPortParameters ........................................5-48
5.9.2. NetworkParameters............................................5-49
5.9.2.1. ModemPooling........................................5-54
5.9.3. IPSecurity....................................................5-55
5.9.3.1. Adding IP Addresses to the Allow and Deny Lists . . . . . . . . . . . . . 5-56
5.9.3.2. Linux Operators and Wild Cards . . . . . . . . . . . . . . . . . . . . . . . . . . . 5-57
5.9.3.3. IPSecurityExamples....................................5-57
5.9.4. StaticRoute...................................................5-58
5.9.5. DomainNameServer ...........................................5-58
5.9.6. SNMPAccessParameters .......................................5-59
5.9.7. SNMPTrapParameters..........................................5-61
5.9.8. LDAPParameters ..............................................5-62
5.9.8.1. AddingLDAPGroups....................................5-64
5.9.8.2 ViewingLDAPGroups...................................5-65
5.9.8.3. Modifying LDAP Groups . . . . . . . . . . . . . . . . . . . . . . . . . . . . . . . . . 5-65
5.9.8.4. Deleting LDAP Groups. . . . . . . . . . . . . . . . . . . . . . . . . . . . . . . . . . . 5-65
5.9.9. TACACSParameters............................................5-66
5.9.10. RADIUSParameters ............................................5-69
5.9.10.1. Dictionary Support for RADIUS . . . . . . . . . . . . . . . . . . . . . . . . . . . . 5-70
5.9.11. Email Messaging Parameters . . . . . . . . . . . . . . . . . . . . . . . . . . . . . . . . . . . . . 5-72
5.10. SaveUserSelectedParameters .........................................5-73
5.10.1. RestoreConfiguration...........................................5-73
6. RebootOptions..........................................................6-1
6.1. Ping-No-AnswerReboot.................................................6-2
6.1.1. Adding Ping-No-Answer Reboots . . . . . . . . . . . . . . . . . . . . . . . . . . . . . . . . . . . 6-2
6.1.2. Viewing Ping-No-Answer Reboot Profiles. . . . . . . . . . . . . . . . . . . . . . . . . . . . . 6-4
6.1.3. Modifying Ping-No-Answer Reboot Profiles . . . . . . . . . . . . . . . . . . . . . . . . . . . 6-4
6.1.4. Deleting Ping-No-Answer Reboot Profiles . . . . . . . . . . . . . . . . . . . . . . . . . . . . 6-4
6.2. ScheduledReboot.....................................................6-5
6.2.1. AddingScheduledReboots .......................................6-5
6.2.2. Viewing Scheduled Reboot Actions . . . . . . . . . . . . . . . . . . . . . . . . . . . . . . . . . 6-6
6.2.3. Modifying Scheduled Reboots . . . . . . . . . . . . . . . . . . . . . . . . . . . . . . . . . . . . . 6-6
6.2.4. DeletingScheduledReboots ......................................6-6

Table of Contents
vi
7. AlarmConfiguration......................................................7-1
7.1. The Over Current Alarms (RSM-8R8-CM Series Only) . . . . . . . . . . . . . . . . . . . . . . . . . 7-2
7.1.1. Over Current Alarms - Load Shedding and Auto Recovery . . . . . . . . . . . . . . . 7-4
7.2. TheOverTemperatureAlarms............................................7-6
7.2.1. Over Temperature Alarms - Load Shedding and Auto Recovery . . . . . . . . . . . 7-8
7.3. TheLostCommunicationAlarm..........................................7-10
7.4. ThePing-No-AnswerAlarm .............................................7-12
7.4.1. Ping-No-Answer Notification - TSM and RSM Series Units . . . . . . . . . . . . . . 7-12
7.4.1.1. Defining Ping No Answer IP Addresses -
TSMandRSMSeriesUnits...............................7-12
7.4.1.2. Configuring the Ping No Answer Alarm -
TSMandRSMSeriesUnits...............................7-14
7.4.2. Ping-No-Answer Alarm - RSM-xRy Series Units . . . . . . . . . . . . . . . . . . . . . . . 7-15
7.5. The Serial Port Invalid Access Lockout Alarm . . . . . . . . . . . . . . . . . . . . . . . . . . . . . . . 7-17
7.6 ThePowerCycleAlarm ................................................7-19
7.7. BufferThresholdAlarm.................................................7-20
7.8. The Plug Current Alarm (RSM-8R8-CM Series Only) . . . . . . . . . . . . . . . . . . . . . . . . . 7-22
7.9. TheNoDialtoneAlarm.................................................7-25
7.10. The Lost Voltage Alarm (Dual Power Inlet Units Only) . . . . . . . . . . . . . . . . . . . . . . . . 7-27
8. TheStatusScreens.......................................................8-1
8.1. ProductStatus ........................................................8-1
8.2. TheNetworkStatusScreen..............................................8-1
8.3. ThePortStatusScreen .................................................8-2
8.4. ThePortandPlugStatusScreens.........................................8-3
8.5. ThePlugGroupStatusScreen ...........................................8-4
8.6. The Current Metering Status Screen (RSM-8R8-CM Series Only) . . . . . . . . . . . . . . . . 8-5
8.7. The Current History Screen (RSM-8R8-CM Series Only) . . . . . . . . . . . . . . . . . . . . . . . 8-6
8.8. The Power Range Status Screen (RSM-8R8-CM Series Only) . . . . . . . . . . . . . . . . . . . 8-7
8.9. The Power History Screen (RSM-8R8-CM Series Only) . . . . . . . . . . . . . . . . . . . . . . . . 8-8
8.10. ThePortDiagnosticsScreen.............................................8-9
8.11. AliasStatusScreen ....................................................8-9
8.12. TheAlarmStatusScreen................................................8-9
8.13. ThePortParametersScreens ...........................................8-10
8.14. TheEventLogs.......................................................8-11
8.14.1. TheAuditLog .................................................8-11
8.14.2. TheAlarmLog.................................................8-11
8.14.3. TheTemperatureLog ...........................................8-11
9. Operation...............................................................9-1
9.1. Connecting and Disconnecting Serial Ports - Text Interface . . . . . . . . . . . . . . . . . . . . . 9-1
9.1.1. Any-to-AnyMode................................................9-1
9.1.1.1. Connecting Ports - Text Interface. . . . . . . . . . . . . . . . . . . . . . . . . . . . 9-2
9.1.1.2. Disconnecting Ports - Text Interface . . . . . . . . . . . . . . . . . . . . . . . . . 9-4
9.1.1.3. The Port Control Screen - Web Browser Interface . . . . . . . . . . . . . . 9-6
9.1.1.4. Defining Hunt Groups - Text Interface . . . . . . . . . . . . . . . . . . . . . . . . 9-7
9.1.2. PassiveMode ..................................................9-8
9.1.3. BufferMode....................................................9-8
9.1.3.1. Reading Data from Buffer Mode Ports - Text Interface . . . . . . . . . . . 9-8
9.1.3.2. PortBuffers............................................9-10
9.1.4. ModemMode .................................................9-11
9.1.5. ModemPPPMode .............................................9-11
9.2. Controlling Power - Web Browser Interface. . . . . . . . . . . . . . . . . . . . . . . . . . . . . . . . . 9-12
9.2.1. The Plug Control Screen - Web Browser Interface. . . . . . . . . . . . . . . . . . . . . 9-12
9.2.2. The Plug Group Control Screen - Web Browser Interface . . . . . . . . . . . . . . . 9-13

Table of Contents
vii
9. Operation(continued)
9.3. ControllingPower-TextInterface ........................................9-14
9.3.1. The Port and Plug Status Screen - Text Interface . . . . . . . . . . . . . . . . . . . . . . 9-14
9.3.2. Switching and Reboot Commands - Text Interface . . . . . . . . . . . . . . . . . . . . 9-15
9.3.2.1. Applying Commands to Several Plugs - Text Interface . . . . . . . . . . 9-17
9.4. ManualOperation.....................................................9-18
9.5. LoggingOutofCommandMode.........................................9-18
9.6. EmergencyShutOffFunction...........................................9-18
10.Telnet&SSHFunctions..................................................10-1
10.1. NetworkPortNumbers.................................................10-1
10.2. SSHEncryption ......................................................10-1
10.3. TheDirectConnectFeature ............................................10-2
10.3.1. Standard Telnet Protocol, SSH and Raw Socket . . . . . . . . . . . . . . . . . . . . . . 10-2
10.3.2. Configuration..................................................10-2
10.3.3. Connecting to a Serial Port using Direct Connect . . . . . . . . . . . . . . . . . . . . . 10-4
10.3.4. Terminating a Direct Connect Session . . . . . . . . . . . . . . . . . . . . . . . . . . . . . . 10-7
10.4. IPAliasing...........................................................10-8
10.5. Creating an Outbound Telnet Connection . . . . . . . . . . . . . . . . . . . . . . . . . . . . . . . . . . 10-9
10.6. Creating an Outbound SSH Connection . . . . . . . . . . . . . . . . . . . . . . . . . . . . . . . . . . 10-10
11.SyslogMessages.......................................................11-1
11.1. Configuration........................................................11-1
12.SNMPTraps............................................................12-1
12.1. Configuration:........................................................12-1
13.OperationviaSNMP.....................................................13-1
13.1. TSM/RSMSNMPAgent................................................13-1
13.2. SNMPv3 Authentication and Encryption . . . . . . . . . . . . . . . . . . . . . . . . . . . . . . . . . . . 13-1
13.3. ConfigurationviaSNMP................................................13-2
13.3.1. ViewingUsers.................................................13-3
13.3.2. AddingUsers..................................................13-3
13.3.3. ModifyingUsers................................................13-3
13.3.4. DeletingUsers.................................................13-3
13.4. PlugControlviaSNMP.................................................13-4
13.4.1. ControllingPlugs ..............................................13-4
13.4.2. ControllingPlugGroups.........................................13-5
13.5. ConfiguringSerialPorts................................................13-6
13.6. ViewingUnitStatusviaSNMP...........................................13-7
13.6.1. System Status - Ethernet Port Mac Addresses. . . . . . . . . . . . . . . . . . . . . . . . 13-7
13.6.2. PlugStatus ...................................................13-7
13.6.3. UnitTemperatureStatus.........................................13-7
13.6.4. AlarmStatus ..................................................13-8
13.7. SendingTrapsviaSNMP...............................................13-9
14SettingUpSSLEncryption................................................14-1
14.1. Creating a Self Signed Certificate . . . . . . . . . . . . . . . . . . . . . . . . . . . . . . . . . . . . . . . . 14-2
14.2. CreatingaSignedCertificate............................................14-3
14.3. Downloading the Server Private Key . . . . . . . . . . . . . . . . . . . . . . . . . . . . . . . . . . . . . . 14-4
14.4. TLSMode...........................................................14-5
15.SavingandRestoringConfigurationParameters. . . . . . . . . . . . . . . . . . . . . . . . . . . . . . 15-1
15.1. SendingParameterstoaFile............................................15-1
15.1.1. Downloading & Saving Parameters via Text Interface . . . . . . . . . . . . . . . . . . 15-1
15.1.2. Downloading & Saving Parameters via Web Browser Interface. . . . . . . . . . . 15-2
15.2. Restoring Downloaded Parameters . . . . . . . . . . . . . . . . . . . . . . . . . . . . . . . . . . . . . . . 15-2
15.3. Restoring Recently Saved Parameters . . . . . . . . . . . . . . . . . . . . . . . . . . . . . . . . . . . . 15-3

Table of Contents
viii
16.UpgradingTSM/RSMFirmware............................................16-1
16.1. WMU Enterprise Management Software (Recommended) . . . . . . . . . . . . . . . . . . . . . 16-1
16.2. The Upgrade Firmware Function (Alternate Method) . . . . . . . . . . . . . . . . . . . . . . . . . 16-1
17.CommandReferenceGuide...............................................17-1
17.1. CommandConventions................................................17-1
17.2. CommandSummary ..................................................17-2
17.3. CommandSet .......................................................17-3
17.3.1. DisplayCommands.............................................17-3
17.3.2. ControlCommands.............................................17-7
17.3.3. ConfigurationCommands.......................................17-14
Appendices:
A. Specifications.........................................................Apx-1
A.1. Standard TSM Series Units and Standard RSM Series Units . . . . . . . . . . . . . . . . . . Apx-1
A.2. RSM-xRy Series Units. . . . . . . . . . . . . . . . . . . . . . . . . . . . . . . . . . . . . . . . . . . . . . . . . Apx-2
B. SerialInterfaceDescription..............................................Apx-3
B.1. SerialPort(RS232)...................................................Apx-3
B.2. TSM and RSM-xRy Series RJ45 Serial Ports . . . . . . . . . . . . . . . . . . . . . . . . . . . . . . . Apx-4
B.3. RSMSeriesDB9MSerialPorts .........................................Apx-5
C. ConnectingDevicestoRJ45SerialPorts. . . . . . . . . . . . . . . . . . . . . . . . . . . . . . . . . . . Apx-6
C.1. Straight RJ-45 Cables and Rollover RJ-45 Cables . . . . . . . . . . . . . . . . . . . . . . . . . . Apx-6
C.2. ConnectingDB-9MDTEDevices........................................Apx-7
C.3. ConnectingDB-25FDTEDevices .......................................Apx-8
C.4. ConnectingDB-25FDCEDevices.......................................Apx-9
C.5. ConnectingRJ-45DCEDevices .......................................Apx-10
C.6. DX9F-NULL-RJSnapAdapter .........................................Apx-10
D. CustomerService.....................................................Apx-11

Table of Contents
ix
List of Figures
2.1. TSM Series - Front Panel (Model TSM-24 Shown) . . . . . . . . . . . . . . . . . . . . . . . . . . . . . . . 2-1
2.2. TSM-8SeriesUnits-BackPanel ............................................2-2
2.3. TSM-24SeriesUnits-BackPanel ...........................................2-2
2.4. TSM-40SeriesUnits-BackPanel ...........................................2-2
2.5. RSM Series - Front Panel (Model RSM-8 Shown) . . . . . . . . . . . . . . . . . . . . . . . . . . . . . . . 2-4
2.6. RSM-8 - Back Panel. . . . . . . . . . . . . . . . . . . . . . . . . . . . . . . . . . . . . . . . . . . . . . . . . . . . . . . 2-5
2.7. RSM-16 - Back Panel. . . . . . . . . . . . . . . . . . . . . . . . . . . . . . . . . . . . . . . . . . . . . . . . . . . . . . 2-5
2.8. RSM-16R16Series-FrontPanel.............................................2-6
2.9. RSM-16R16-1Series-BackPanel...........................................2-7
2.10. RSM-16R16-2Series-BackPanel...........................................2-7
2.11. RSM-8R8Series-FrontPanel...............................................2-8
2.12. RSM-8R8-1-BackPanel..................................................2-10
2.13. RSM-8R8-2-BackPanel..................................................2-10
2.14. RSM-2R4Series-FrontPanel..............................................2-11
2.15. RSM-2R4-1F-BackPanel.................................................2-12
2.16. RSM-2R4-2F-BackPanel.................................................2-12
4.1. Terminal Block Assembly (TSM Series, DC Units Only) . . . . . . . . . . . . . . . . . . . . . . . . . . . 4-2
4.2. Terminal Block Assembly (RSM Series, DC Units Only). . . . . . . . . . . . . . . . . . . . . . . . . . . 4-2
5.1. BootPriorityExample1...................................................5-34
5.2. BootPriorityExample2...................................................5-35
14.1. Web Access Parameters (Text Interface Only). . . . . . . . . . . . . . . . . . . . . . . . . . . . . . . . . 14-1
B.1. TSM Series and RSM-xRy Series RS232 Port Interface (RJ45) . . . . . . . . . . . . . . . . . . . Apx-3
B.2. RSM Series RS232 Port Interface (DB9). . . . . . . . . . . . . . . . . . . . . . . . . . . . . . . . . . . . . Apx-3
C.1. StraightCables........................................................Apx-6
C.2. RolloverCables........................................................Apx-6
C.3. DX9F-DTE-RJ Snap Adapter Interface . . . . . . . . . . . . . . . . . . . . . . . . . . . . . . . . . . . . . . Apx-7
C.4. Connecting DB-9M DTE Devices to TSM and RSM-xRy Series Units . . . . . . . . . . . . . . Apx-7
C.5. DX25M-DTE-RJ Snap Adapter Interface. . . . . . . . . . . . . . . . . . . . . . . . . . . . . . . . . . . . . Apx-8
C.6. Connecting DB-25F DTE Devices to TSM RSM-xRy Series Units . . . . . . . . . . . . . . . . . Apx-8
C.7. DX25M-DCE-RJ Snap Adapter Interface. . . . . . . . . . . . . . . . . . . . . . . . . . . . . . . . . . . . . Apx-9
C.8. Connecting DB-25F DCE Devices to TSM and RSM-xRy Series Units . . . . . . . . . . . . . Apx-9
C.9. Connecting RJ-45 DCE Devices to TSM and RSM-xRy Series Units. . . . . . . . . . . . . . Apx-10
C.10. DX9F-NULL-RJ Snap Adapter Interface . . . . . . . . . . . . . . . . . . . . . . . . . . . . . . . . . . . . Apx-10

1-1
1. Introduction
This User's Guide covers three WTI product lines: TSM Series Serial Console Servers,
RSM Series Remote Site Managers and RSM-xRy Series Remote Site Managers with
Power Control . All four of these product lines are designed to simplify the process of
remotely managing vital network elements located at distant network equipment sites
and off-site facilities. The TSM and RSM lines both provide remote access to console
port command functions on faraway network elements. RSM-xRy Series units provide
remote access to console ports on distant network equipment and also include the
ability to remotely control power switching and reboot functions at the remote network
equipment site.
Security and Co-Location Features:
Secure Shell (SSHv2) encryption and address-specific IP security masks help to prevent
unauthorized access to command and configuration functions.
The TSM/RSM provides four different levels of security for user accounts: Administrator,
SuperUser, User and ViewOnly. The Administrator level provides complete access to
all serial port and switched plug functions, status displays and configuration menus.
The SuperUser level allows control of serial ports and plugs, but does not allow access
to configuration functions. The User level allows access to only a select group of
Administrator-defined serial ports and plugs. The ViewOnly level allows you to check
unit status, but does not allow control of serial ports or switched outlets or access to
configuration menus. The TSM/RSM includes full Radius, LDAP and TACACS capability,
DHCP, an IP Address filter and an invalid access lockout feature. An Audit Log records
all user access, login and logout times and command actions, and an Alarm Log
records user-defined alarm events.
Environmental Monitoring and Management:
The TSM/RSM can constantly monitor temperature levels, ping response and other
factors. If the TSM/RSM detects that user defined thresholds for these values have
been exceeded, the unit can promptly provide notification via email, SNMP, or Syslog.
When temperature readings exceed user-defined critical values, the TSM/RSM can also
intelligently decrease the amount of heat being generated within the rack by temporarily
shutting down nonessential devices; when readings return to acceptable levels, the
TSM/RSM can restore power to those devices to return to normal operating conditions.
The TSM/RSM also records temperature readings to a convenient log file.
In addition to the capabilities described above, RSM-8R8-CM series units include
current monitoring capabilities, allowing the unit to monitor and report current, power
and voltage conditions at remote equipment sites. If current or power usage exceeds
user-defined threshold values, the RSM-8R8-CM can also generate alarms and shut
down user-designated non-essential devices.

1-2
Introduction
WTI Management Utility
TSM/RSM units include the WTI Enterprise Management Utility (WMU,) which allows you
to manage multiple WTI units via a single menu. For more information on the Enterprise
Management Utility, please refer to the WMU User’s Guide, which can be downloaded
from the WTI web site at: http://www.wti.com/t-product-manuals.aspx.
Model Numbers Covered
This User’s Guide discusses several different models from our TSM Series, RSM Series,
RSM-xRy Series product lines. Throughout this User's Guide, all of these units are
referred to as the "TSM/RSM." In addition, when power control features are discussed,
all RSM-16R16 models, RSM-8R8 models and RSM-2R4 models are referred to as
"RSM-xRy Series Units.
Typographic Conventions
^(e.g. ^X) Indicates a control character. For example, the text
"^X" (Control X) indicates the [Ctrl] key and the [X]
key must be pressed simultaneously.
COURIER FONT Indicates characters typed on the keyboard.
For example, /RB or /ON 2.
[BoldFont] Text set in bold face and enclosed in square brackets,
indicates a specific key. For example, [Enter] or [Esc].
< > Indicates required keyboard entries:
For Example: /P <n>.
[ ] Indicates optional keyboard entries.
For Example: /P [n].

2-1
2. Unit Description
2.1. TSM Series - Front Panel
As shown in Figure 2.1, the TSM front panel includes the following components:
RESET: Can be used to restart the TSM operating system as described in
Section 2.11.
DEFAULT: Can be used to initialize the TSM to default parameters as described in
Section 2.11.
ON: Lights when AC Power is applied.
ÃRDY: (Ready) Flashes to indicate that the unit is operational.
DCD: (Data Carrier Detect) Lights when the DCD signal is present.
ACTIVITYLEDs: A series of LEDs, which will light when a CTS signal is detected,
and will flash during data transmission to indicate activity at the corresponding port.
• TSM-8seriesunitsinclude8ActivityLEDs
• TSM-24seriesunitsinclude24ActivityLEDs
• TSM-40seriesunitsinclude40ActivityLEDs.
STATUS
DEFAULT
RESET
ON RDY DCD
ACTIVITY
1 2 3 4 5 6 7 8 9 10 11 12 13 14 15 16 17 18 19 20 21 22 23 24
www.wti.com TSM-24
Serial Console Manager
1 2 3 4 5 6
Figure 2.1: TSM Series - Front Panel (Model TSM-24 Shown)

2-2
Unit Description
2.2. TSM Series - Back Panel
As shown in Figures 2.2, 2.3 and 2.4, the TSM Back Panel includes the following
components:
PowerInlet: An IEC-320-C14 inlet, for connection to your 100 to 240 VAC power
supply.
Notes:
• 48VDCpoweredmodelsincludeaterminalblockassembly(see
Figure4.1)inplaceofthepowerinlet.Formoreinformation,pleasereferto
Section4.1.3.
• SomeTSMseriesunitsincludeanoptional,secondaryIEC-320-C14
powerinlet.Thisallowsconnectiontoasecondarypowersourceinpower
redundancyapplications.
PowerOn/OffSwitch Master Power Switch.
Note:ThePowerOn/OffSwitchisnotpresentonTSMseriesunitsthatinclude
theoptional,secondarypowerinlet.
I
O
Ethernet 10/100 PHONE
ACT LINK
100 - 120V ~
50/60Hz 0.1-0.06A
SETUP
PORT
SERIAL PORTS
12345
Figure 2.2: TSM-8 Series Units - Back Panel
I
O
Ethernet 10/100 PHONE
ACT LINK
100 - 120V ~ 50/60Hz 0.1-0.06A
1 3 5 7 9 11 13 15
10 12 14 16
17 19 21 23
18 20 22 24
8642
SETUP
PORT
1
2 3
4 5
Figure 2.3: TSM-24 Series Units - Back Panel
I
O
Ethernet 10/100 PHONE
ACT LINK
100 - 120V ~ 50/60Hz 0.1-0.06A
1 3 5 7 9 11 13 15
10 12 14 16
9 11 13 15
10 12 14 16
17 19 21 23
18 20 22 24
17 19 21 23
18 20 22 24
8642
SETUP
PORT
1
23
45
Figure 2.4: TSM-40 Series Units - Back Panel

2-3
Unit Description
RS232SerialPorts: For connection to console ports on target devices. Standard
RJ45 connectors configured as DTE ports. The RS232 ports are similar to a serial
port on a PC. When connecting a modem, use a standard serial cable. When
connecting a PC or other DTE device, please refer to Section 4.5 and Appendix B
and Appendix C.
• TSM-8seriesunitsinclude8SerialPorts.
• TSM-24seriesunitsinclude24SerialPorts.
• TSM-40seriesunitsinclude40SerialPorts.
ÃNetworkPort(s): An RJ45 Ethernet port for connection to your 10/100Base-T,
TCP/IP network. Note that the TSM features a default, IPv4 format IP address
(192.168.168.168). This allows you to connect to the unit without first assigning an
IP address. Note that the Network Port also includes two, small LED indicators for
Link and Data Activity. For more information on Network Port configuration, please
refer to Section 5.9.
Notes:
• SomeTSMseriesunitsincludeanoptional,secondaryRJ45Ethernet
port.ThisallowstheTSMtobeconnectedtobothaprimarynetworkand
secondarynetwork.
• WhentwoNetworkPortsarepresent,thetopNetworkPortisETH0;the
bottomNetworkPortisETH1.
• WhenconnectingonlyasinglenetworkcabletoaTSMseriesunitthat
includestheoptional,secondaryNetworkPort,makecertaintoconnectto
PortETH0.
PhoneLinePort(InternalModemPort): When the Internal Modem option is
present, the phone line port is used for connection to your external phone line.

2-4
Unit Description
2.3. RSM Series - Front Panel
As shown in Figure 2.5, the RSM front panel includes the following components:
CLEAR: Can be used to restart the RSM operating system as described in
Section 2.11.
ON: Lights when AC Power is applied.
SET: Can be used to initialize the RSM to default parameters as described in
Section 2.11.
ÃRDY: (Ready) Flashes to indicate unit is operational.
ACTIVITYLEDs: A series of LEDs, which will light when a CTS signal is detected,
and will flash during data transmission to indicate activity at the corresponding port.
• RSM-8seriesunitsinclude8ActivityLEDs
• RSM-16seriesunitsinclude16ActivityLEDs
CLEAR SET
ON RDY ACTIVITY
1 2 3 4 5 6 7 8
www.wti.com RSM-8
Remote
Site Manager
1 2 3 4 5
Figure 2.5: RSM Series - Front Panel (Model RSM-8 Shown)

2-5
Unit Description
2.4. RSM Series - Back Panel
As shown in Figures 2.6 and 2.7, the RSM Back Panel includes the following
components:
PhoneLinePort(InternalModemPort): When the Internal Modem is present, the
phone line port is used for connection to your external phone line.
NetworkPort: An RJ45 Ethernet port for connection to your 10/100Base-T,
TCP/IP network. Note that the RSM features a default, IPv4 format IP address
(192.168.168.168). This allows you to connect to the unit without first assigning an
IP address. Note that the Network Port also includes two, small LED indicators for
Link and Data Activity. For more information on Network Port configuration, please
refer to Section 5.9.
RS232SerialPorts: For connection to console ports on target devices. Standard
DB9 connectors configured as DTE ports. The RS232 ports are similar to a serial
port on a PC. When connecting a modem, use a standard serial cable. When
connecting a PC or other DTE device, please refer to Section 4.5 and Appendix B
and Appendix C.
• RSM-8seriesunitsinclude8SerialPorts.
• RSM-16seriesunitsinclude16SerialPorts.
ÃPowerInlet: An IEC-320-C14 inlet, for connection to your 100 to 240 VAC power
supply. Note that RSM-16DC (-48 VDC powered models) include a terminal block
assembly (see Figure 4.2) in place of the power inlet. For more information, please
refer to Section 4.1.3.
PowerOn/OffSwitch: Master Power Switch
O I
PHONE
LINE
10/100BaseT
LINK ACTIVITY
SYSTEM SETUP PORTS
(DTE)
12345678
1234
5
Figure 2.6: RSM-8 - Back Panel
O I
PHONE
LINE
10/100BaseT
LINK ACTIVITY 2
13
4
5
6
7
8
9
10
11
12
13
14
15
16
SYSTEM
SETUP
PORTS
(DTE)
123
3
4
5
Figure 2.7: RSM-16 - Back Panel

2-6
Unit Description
2.5. RSM-16R16 Series - Front Panel
As shown in Figure 2.8, the RSM-16R16 series front panel includes the following
components:
PhoneLinePort(InternalModemPort): When the Internal Modem is present, the
phone line port is used for connection to your external phone line.
NetworkPorts: Two Ethernet ports for connection to your primary and secondary
10Base-T or 100Base-T, TCP/IP networks. Note that the RSM-16R16 features a
default, IPv4 format IP address (192.168.168.168). This allows you to connect
to the unit without first assigning an IP address. The Network Ports also include
two LED indicators for Link and Data Activity. For more information on port
configuration, please refer to Section 5.9.
Notes:
• TheleftNetworkPortisETH0;therightNetworkPortisETH1.
• WhenconnectingasinglenetworkcabletoanRSM-16R16seriesunit(Dual
EthernetPorts,)makecertaintoconnecttoPortETH0.
SerialPorts: For connection to console ports on target devices. Standard RJ45
connectors configured as DCE ports. For more information on connecting devices
to the serial ports, please refer to Section 4.5 and Appendix B and Appendix C.
ÃPortActivityIndicators: A series of LEDs, which will light when a CTS signal is
detected and flash during data transmission to indicate activity at the port.
RESETButton: Restarts the RSM-16R16 as described in Section 2.11.
DEFAULTButton: Switches all plugs Off or sets plugs to default values as
described in Section 2.11.
ONIndicator: Lights when AC Power is applied to the unit.
RDYIndicator: (Ready) Flashes to indicate the unit is ready to receive commands.
DCDIndicator: The Data Carrier Detect indicator.
PlugActivityIndicators: A series of sixteen LED indicators which light when
power is applied to the corresponding switched outlet.
Note:Providingthatpowerisstillpresentatthesecondarypowerinletfora
givenbranch,thePlugActivityindicatorsforthatbranchwillblinkonandoff
whentheprimarypowersourceforthatbranchislostordisconnected.
www.wti.com RSM-16R16
Remote Site Manager
+
Power Control
SET UP
SERIAL PORTS
1 3 5 7 9 11 13 15
2 4 6 8 10 12 14 16
PLUG ACTIVITYPORT ACTIVITYSTATUS
ACT LNKACT LNK
Ethernet 0 Ethernet 1
PHONE
RST DEF
ON RDY DCD
1 3 5 7 9 11 13 14
2 4 6 8 10 12 14 16
A1 A2 A3 A4 A5 A6 A7 A8
B1 B2 B3 B4 B5 B6 B7 B8
1 2 3 4 5 6 7 8 9 10
Figure 2.8: RSM-16R16 Series - Front Panel

2-7
Unit Description
2.6. RSM-16R16 Series - Back Panel
As shown in Figures 2.9 and 2.10, the RSM-16R16 series back panel includes the
following components:
BranchAPowerInlets: Two IEC-320-C20 inlets that supply power to Branch A.
Each branch includes two inlets to allow connection to both a primary power supply
and secondary (fallback) power supply to Branch A. Also includes cable keepers
(not shown.)
BranchBPowerInlets: Two IEC-320-C20 inlets that supply power to Branch B.
Each branch includes two inlets to allow connection to both a primary power supply
and secondary (fallback) power supply to Branch B. Also includes cable keepers
(not shown.)
BranchASwitchedOutlets: Eight switched AC outlets that are powered by the
Branch A Power Inlets.
• RSM-16R16-1: Eight (8) each, NEMA 5-15R Outlets.
• RSM-16R16-2: Eight (8) each, IEC320-C13 Outlets.
ÃBranchBSwitchedOutlets: Eight switched AC outlets that are powered by the
Branch B Power Inlets.
• RSM-16R16-1: Eight (8) each, NEMA 5-15R Outlets.
• RSM-16R16-2: Eight (8) each, IEC320-C13 Outlets.
A
PRIMARY SECONDARY
SECONDARYPRIMARY
B
A1 A2 A3 A4 A5 A6 A7 A8
B1 B2 B3 B4 B5 B6 B7 B8
1
2
3
4
Figure 2.9: RSM-16R16-1 Series - Back Panel
A
PRIMARY SECONDARY
SECONDARYPRIMARY
B
A1 A2 A3 A4 A5 A6 A7 A8
B1 B2 B3 B4 B5 B6 B7 B8
1
2
3
4
Figure 2.10: RSM-16R16-2 Series - Back Panel

2-8
Unit Description
2.7. RSM-8R8 Series - Front Panel
As shown in Figure 2.11, the RSM-8R8 series front panel includes the following
components:
PhoneLinePort(InternalModemPort): When the optional Internal Modem is
present, the phone line port is used for connection to your external phone line.
NetworkPort(s): RJ45 Ethernet port(s) for connection to your 10Base-T or
100Base-T, TCP/IP network. The RSM-8R8 features a default, IPv4 format address
(192.168.168.168). This allows you to connect to the unit without first assigning an
IP address. The Network Port also includes two LED indicators for Link and Data
Activity. For more information on port configuration, please refer to Section 5.9.
Note:
• SomeRSM-8R8seriesunitsincludeanoptional,secondaryEthernetPort.
ThisallowstheRSM-8R8tobeconnectdtobothaprimarynetworkand
secondarynetwork.
• WhentwoNetworkPortsarepresent,thetopNetworkPortisETH0;the
bottomNetworkPortisETH1.
• WhenconnectingonlyasinglenetworkcabletoanRSM-8R8seriesunitthat
includestheoptional,secondaryNetworkPort,makecertaintoconnectto
PortETH0.
SerialPorts: For connection to console ports on target devices. Standard RJ45
connectors configured as DCE ports. For more information on connecting devices
to the serial ports, please refer to Section 4.5 and Appendix B and Appendix C.
ÃACTIVITYIndicators: A series of LEDs, which will light when a CTS signal
is detected, and will flash during data transmission to indicate activity at the
corresponding port.
RESETButton: Restarts the RSM-8R8 as described in Section 2.11.
DEFAULTButton: Switches all plugs Off or sets plugs to default values as
described in Section 2.11.
ONIndicator: An LED Indicator which lights when AC Power is applied to
the unit.
Ethernet
PHONE
ACT LINK
www.wti.com RSM-8R8
Remote Site Manager
+
Power Control
SET UP SERIAL PORTS
1 2 3 4 5 6 7 8
ACTIVITY
1 2 3 4 5 6 7 8
RESET DEFAULT
STATUS
ON RDY DCD
OUTPUT STATUS
1234
5678
1 2 3 4 5 6 7 8 9 10
Figure 2.11: RSM-8R8 Series - Front Panel
This manual suits for next models
10
Table of contents
Other WTI Network Hardware manuals
Popular Network Hardware manuals by other brands

2N
2N 9154100 installation manual

ADTRAN
ADTRAN 6540 Installation and maintenance practice

Huawei
Huawei CR-P1RS Specifications

Digital Watchdog
Digital Watchdog Blackjack X-Rack quick start guide

Lantronix
Lantronix SLC 8000 Series user guide

Cabletron Systems
Cabletron Systems Netlink FRX8000 Installation and setup guide