Xantrex 783-0100-01 User manual

Portable Flex Kit
[100W Xantrex Solar Portable Flex Kit shown]
Owner’s Guide
100W Xantrex Solar Portable Flex Kit
Model Number: 783-0100-01
100W Xantrex Solar Portable Kit
Model Number: 782-0100-01
160W Xantrex Solar Portable Kit
Model Number: 782-0160-01
NOTE: Actual product may be different from what is shown.
Copyright © 2019 Xantrex LLC. All Rights Reserved.
Trademarks are owned by Xantrex LLC and its affiliates. All other trademarks are owned
by their respective companies.
Exclusion for Documentation
UNLESS SPECIFICALLY AGREED TO IN WRITING, SELLER
(A) MAKES NO WARRANTY AS TO THE ACCURACY, SUFFICIENCY OR SUITABILITY OF ANY
TECHNICAL OR OTHER INFORMATION PROVIDED IN ITS MANUALS OR OTHER DOCUMENTATION;
(B) ASSUMES NO RESPONSIBILITY OR LIABILITY FOR LOSSES, DAMAGES, COSTS OR EXPENSES,
WHETHER SPECIAL, DIRECT, INDIRECT, CONSEQUENTIAL OR INCIDENTAL, WHICH MIGHT ARISE
OUT OF THE USE OF SUCH INFORMATION. THE USE OF ANY SUCH INFORMATION WILL BE
ENTIRELY AT THE USER’S RISK; AND
(C) REMINDS YOU THAT IF THIS MANUAL IS IN ANY LANGUAGE OTHER THAN ENGLISH, ALTHOUGH
STEPS HAVE BEEN TAKEN TO MAINTAIN THE ACCURACY OF THE TRANSLATION, THE ACCURACY
CANNOT BE GUARANTEED. APPROVED CONTENT IS CONTAINED WITH THE ENGLISH LANGUAGE
VERSION WHICH IS POSTED AT http://www.xantrex.com.
Contact Information
Telephone: +1-800-670-0707 / +1-408-987-6030
Email: customerservice@xantrex.com,
http://www.xantrex.com/power-products-support/
Web: http://www.xantrex.com
Safety Information
Important Information
READ AND SAVE THIS OWNER’SGUIDE FOR FUTURE REFERENCE.
Read these instructions carefully and look at the equipment to become familiar with the
device before installing, operating, configuring, maintaining, and troubleshooting it. The
following special messages may appear throughout this documentation or on the
equipment to warn of potential hazards or to call attention to information that clarifies or
simplifies a procedure.
The addition of either symbol to a “Danger” or “Warning” safety label
indicates that an electrical hazard exists which will result in personal
injury if the instructions are not followed.
This is the safety alert symbol. It is used to alert you to potential
personal injury hazards. Obey all safety messages that follow this
symbol to avoid possible injury or death.
975-0809-01-01 Rev B
January 2019
©2019 Trademarks are owned by Xantrex LLC and its affiliates. All other trademarks are owned by
their respective companies.
Xantrex Solar Portable Kit
http://www.xantrex.com

Product Safety Information
1. Before using the solar portable kit, read all instructions and cautionary markings on
the solar portable kit's components, the batteries, and all appropriate sections of this
guide.
2. Use of accessories not recommended or sold by the manufacturer may result in
injury to persons, a risk of electric shock, or a risk of fire.
3. The solar portable kit is designed to be connected to your DC electrical systems. The
manufacturer recommends that all wiring be done by a certified PV technician or
electrician to ensure adherence to the local and national electrical codes applicable in
your jurisdiction.
4. To avoid a risk of fire and electric shock, make sure that existing wiring is in good
condition and that wire is not undersized. Do not operate the solar portable kit with
damaged or substandard wiring.
5. Do not operate the solar portable kit if it has been damaged in any way.
6. This solar portable kit does not have any user-serviceable parts. Do not disassemble
the solar portable kit except where noted for connecting wiring and cabling. See your
warranty for instructions on obtaining service. Attempting to service the solar
portable kit yourself may result in a risk of electrical shock or fire.
7. To reduce the risk of electrical shock, disconnect all DC power sources from the
solar portable kit before attempting any maintenance or cleaning or working on any
components connected to the solar portable kit.
8. Do not expose the solar charge controller to rain, snow, or liquids of any type. This
product is designed for dry-locations-use only. Damp environments will significantly
shorten the life of this product and corrosion caused by dampness will not be covered
by the product warranty.
9. To reduce the chance of short-circuits, always use insulated tools when installing or
working with this equipment.
10. Remove personal metal items such as rings, bracelets, necklaces, and watches
when working with electrical equipment.
WARNING
ELECTRIC SHOCK AND FIRE HAZARD
lDo not use the charge controller included with this portable kit with any other products.
lUse only the supplied PV panel configuration. Do not connect any other panels in
series or parallel.
lDo not ground any PV conductors. The portable kit has a common positive design.
lPortable use only. Do not permanently install on RVs or mobile homes.
Failure to follow these instructions can result in death, serious injury, or equipment
damage.
WARNING
ELECTRIC SHOCK AND FIRE HAZARD
lDo not install the portable kit on top of an RV roof or any vehicle roof.
lDo not install the portable kit on top of a residential structure.
lDo not connect the portable kit's charge controller to a residential electrical system.
lNever use Lithium Ion type batteries, as this product is not designed for use with these
battery types and doing so could result in an explosion.
Failure to follow these instructions can result in death, serious injury, or equipment
damage.
WARNING
BATTERY TYPE HAZARD
Charge only properly rated 12VDC lead-acid (Sealed, Gel, Flooded) rechargeable batteries
because other battery types, such as lithium ion, may explode.
Failure to follow these instructions can result in death, serious injury, or equipment
damage.
2 ©2019 975-0809-01-01 Rev B
January 2019

FCC Information
This equipment (the charge controller) has been tested and found to comply with the limits
for a Class B digital device, pursuant to part 15 of the FCC Rules. These limits are
designed to provide reasonable protection against harmful interference in a residential
environment. This equipment generates, uses, and can radiate radio frequency energy and,
if not installed and used in accordance with the instructions, may cause harmful
interference to radio communications.
However, there is no guarantee that interference will not occur in a particular installation. If
this equipment does cause harmful interference to radio or television reception, which can
be determined by turning the equipment off and on, the user is encouraged to try to correct
the interference by one or more of the following measures:
nReorient or relocate the receiving antenna.
nIncrease the separation between the equipment and receiver.
nConnect the equipment into an outlet on a circuit different from that to which the
receiver is connected.
nConsult the dealer or an experienced radio/TV technician for help.
CAUTION
Unauthorized changes or modifications to the equipment could void the user’s authority to
operate the equipment.
This device (the charge controller) complies with (ISED Canada) Industry Canada EMC
standard(s), pursuant to ICES-003, Class B. Operation is subject to the following two
conditions: (1) this device may not cause interference, and (2) this device must accept any
interference, including interference that may cause undesired operation of the device.
End of Life Disposal
The Xantrex Solar Portable Kit is designed with environmental awareness and
sustainability in mind. At the end of its useful life, the portable kit can be decommissioned
and disassembled. Components which can be recycled must be recycled and those that
cannot be recycled must be disposed of according to local, regional, or national
environmental regulations.
Many of the electrical components used in the Xantrex Solar Portable Kit are made of
recyclable material like steel, copper, aluminum, and other alloys. These materials can be
auctioned off to traditional scrap metal recycling companies who resell reusable scraps.
Electronic equipment such as the circuit boards, connectors, and fuses can be broken
down and recycled by specialized recycling companies whose goal is to avoid having
these components end up in the landfill.
For more information on disposal, contact Xantrex.
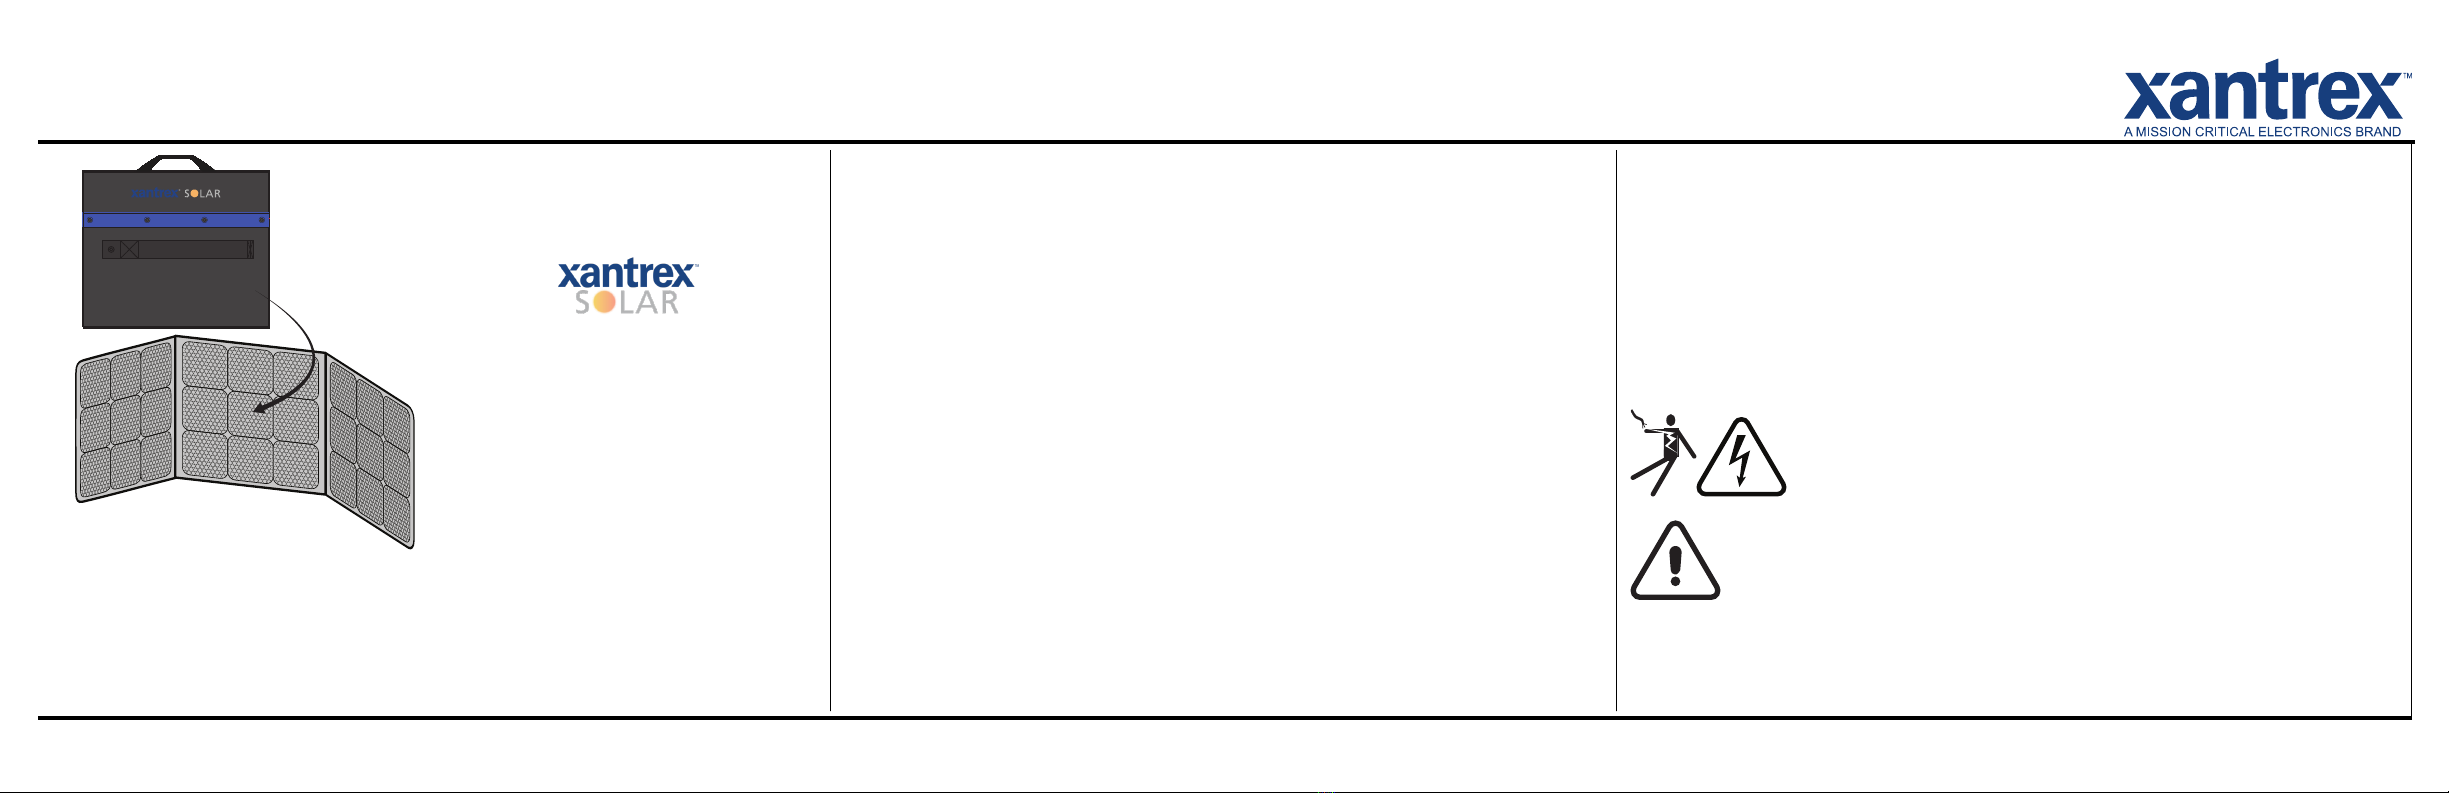
Introduction
Thank you for purchasing the Xantrex Solar Portable Kit. The Xantrex Solar Portable Kit is
a high quality, carbon emissions-free, and sustainable power source. In conjunction with
the included solar charge controller, it is designed to harvest solar energy using the
portable solar panels, quietly produce power for your DC portable power packs and your
vehicle's DC appliances, and store energy to a battery during daylight hours. The portable
kit has added convenience of portability and easy handling.
To get the most out of your Xantrex Solar Portable Kit, carefully read and follow the
instructions in this guide. These instructions include safety instructions that must be
observed during transporting and handling of the solar panels and setting up for collecting
solar energy.
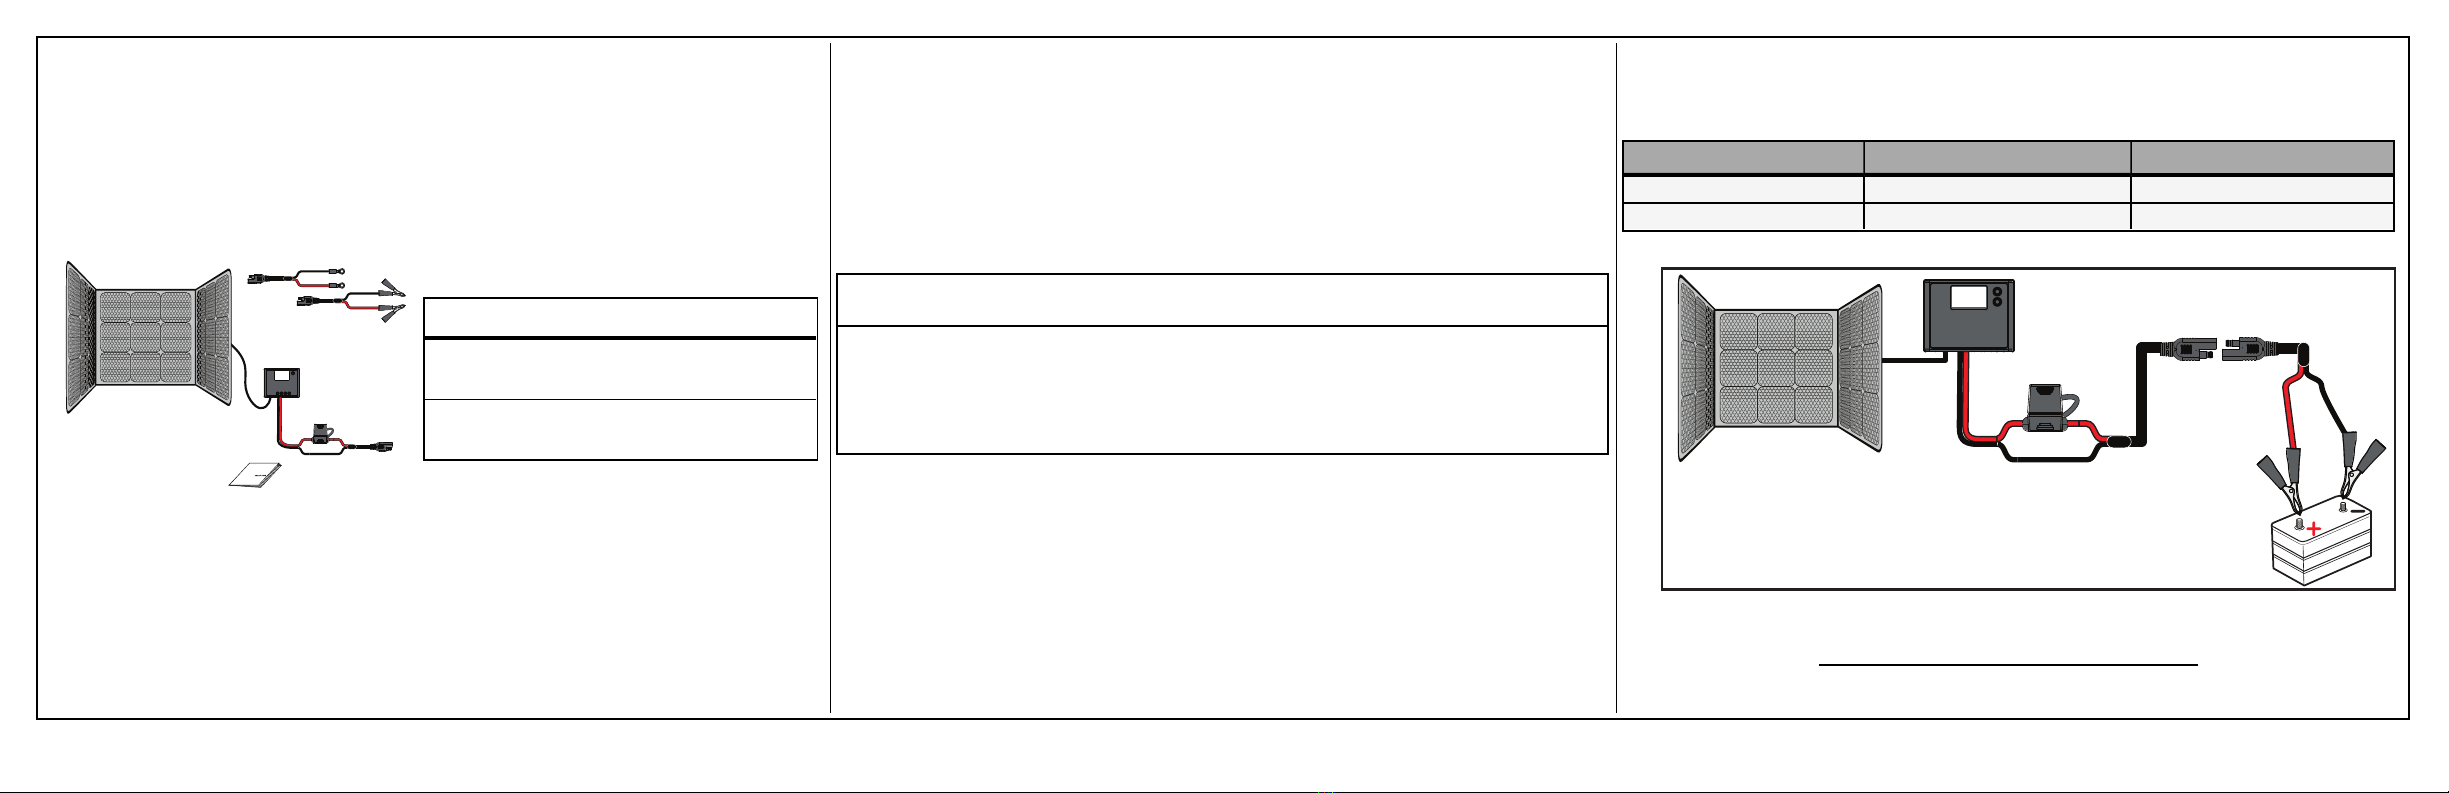
The portable kit is equipped with the following features:
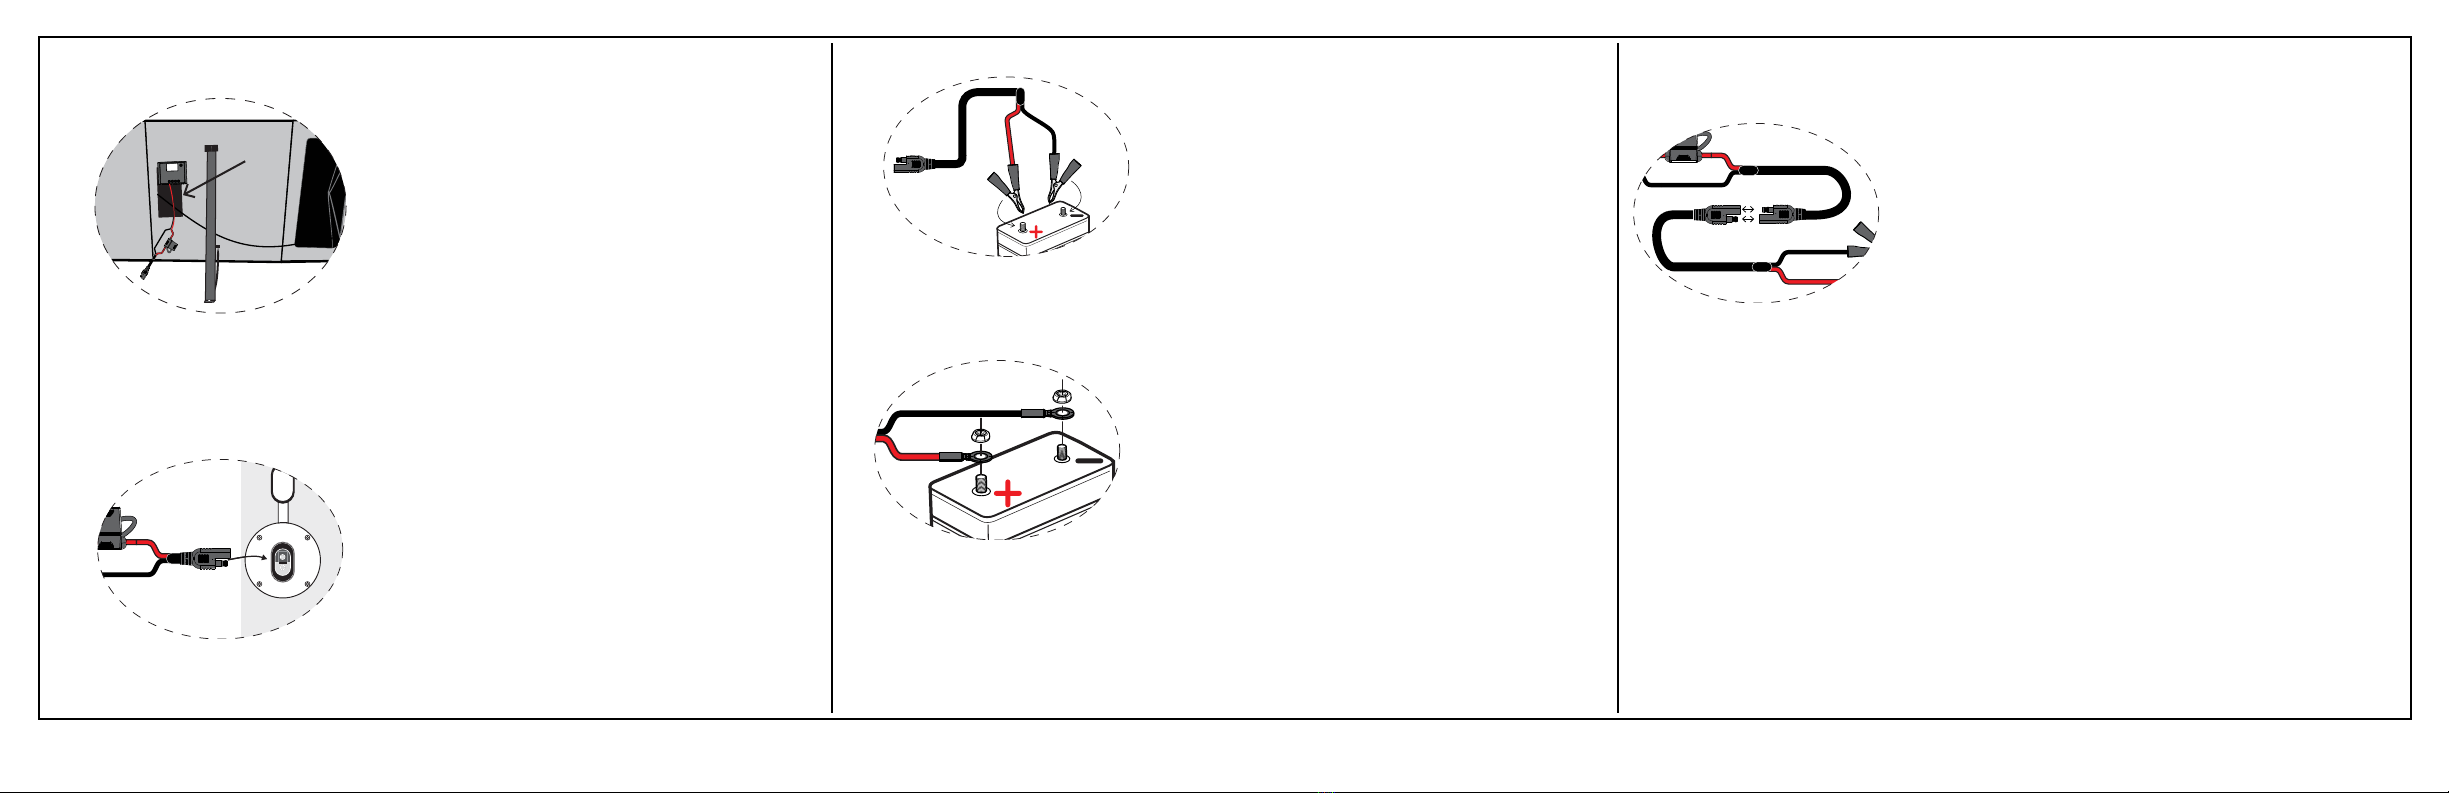
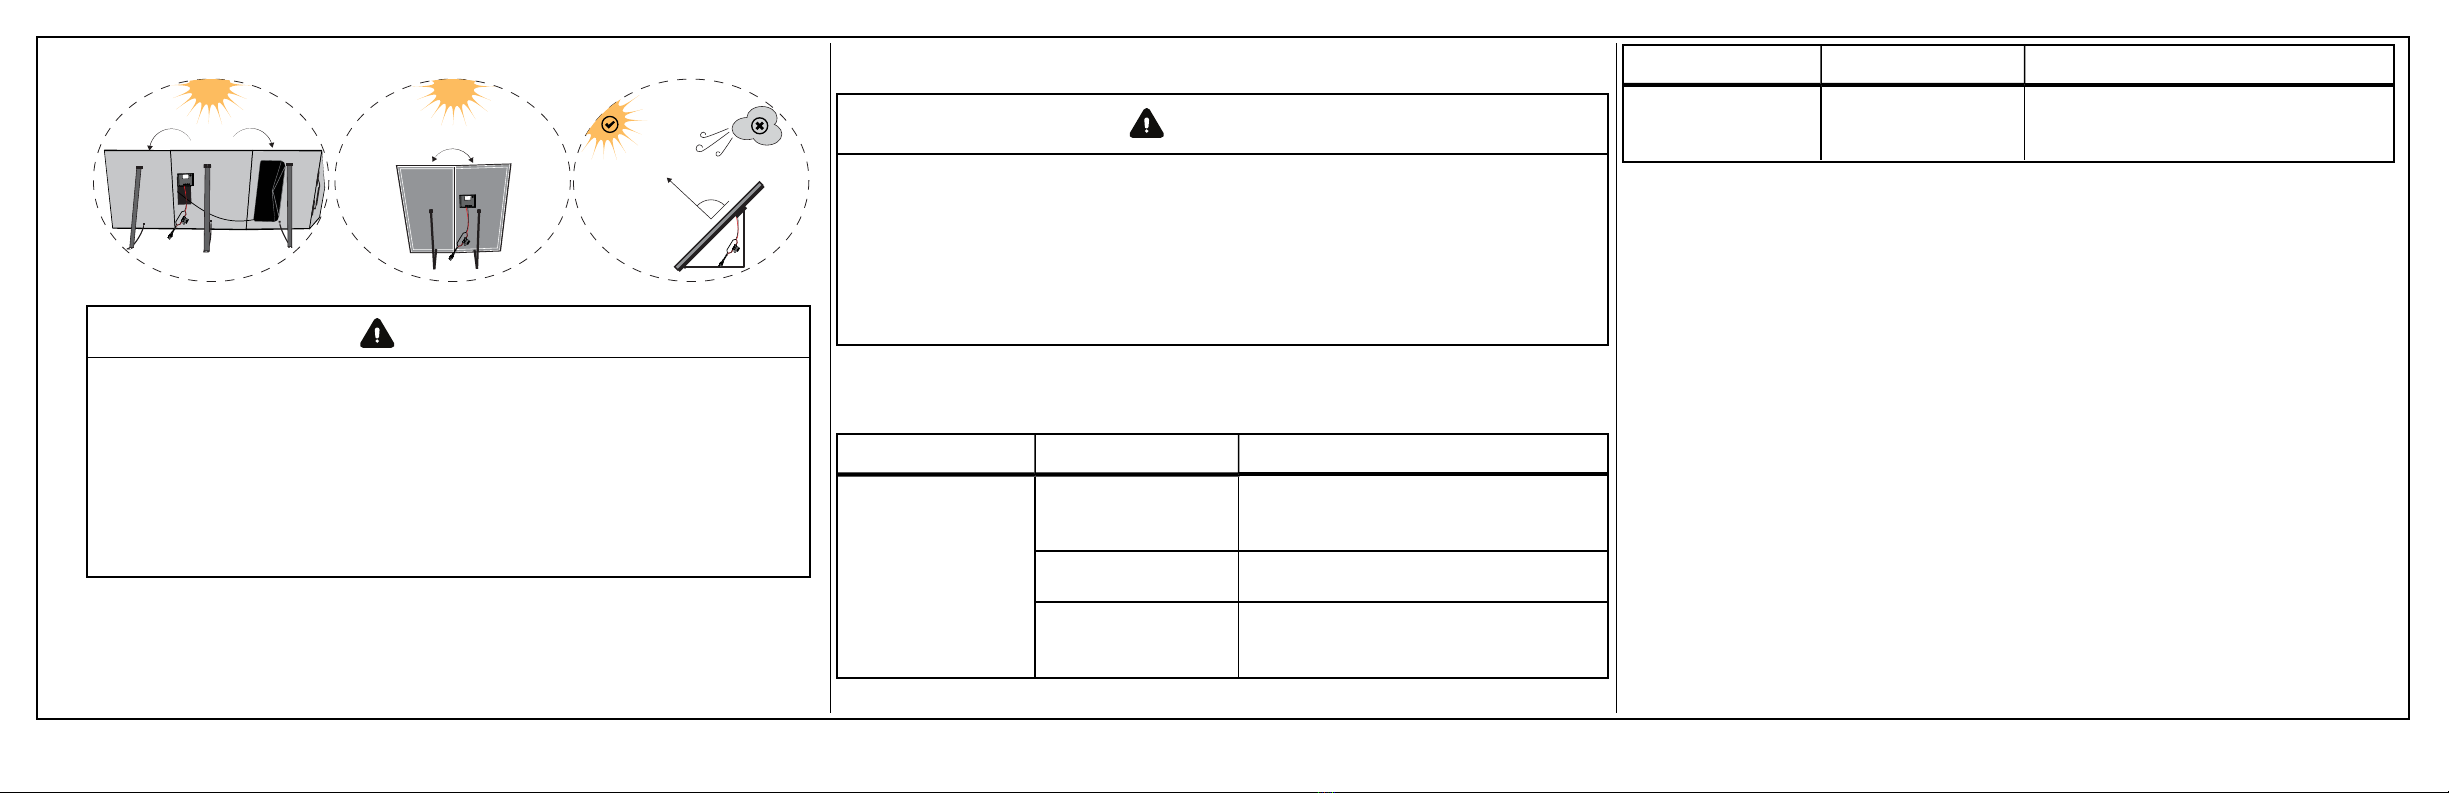
lcompact, lightweight, foldable solar panel with built-in support legs for tilting
leasy-to-connect battery extension cables with ring terminals and alligator clips
lthe charge controller protects the battery from being over-charged
lthe charge controller in this kit employs a 3-stage pulse width modulation (PWM)
charging algorithm optimized for charging 12 VDC nominal rated lead-acid (Sealed,
Gel, or Flooded) rechargeable batteries
NOTE: The charge controller has additional features not required in the utilization of the
portable kit for charging batteries. See the charge controller's separate guide for these
features.
975-0809-01-01 Rev B
January 2019
©2019 3

Materials List
The portable kit base package includes the following items:
none portable solar panel (3-panel Flex-type shown)
ntwo battery adapter cables (user-connected accessories)
none pre-wired charge controller
none 11 ft (Portable Flex) or 12ft (Portable) pre-wired battery extension cable with
SAE connector and a built-in fuse
none Owner’s Guide
Portable Solar
Panel
Charge
Controller
Accessories
Guide
Accessories
one 2-ft. battery adapter cable with ring
terminals and SAE connector
one 2-ft. battery adapter cable with alligator
clips and SAE connector
NOTE: If any of the accessories and other items are missing, contact Xantrex or any
authorized Xantrex dealer for replacement. See Contact Information on page 1.
Safety Instructions
Please read this section for safety information regarding assembling and connecting your
portable kit.
Read this entire section so you can plan the assemblyfrom beginning to end.
You may, depending on the battery, need the following tools to connect the supplied ring
terminated battery adapter cable to the battery:
nScrewdriver set
nWrench set
NOTICE
REVERSE POLARITY
lCheck polarity at all terminals before making the final DC connection. Pos(+) (red) must
connect to pos(+) (red); Neg(–) (black) must connect to neg(–) (black)
lReversing the pos(+) (red) and neg(–) (black) battery cables may blow the fuse.
Failure to follow these instructions can result in equipment damage.
Basic Connection Steps
1. Depending on your power needs and installation type, you may select from a number
of solar panel kits available below.
Typea100W 160W
Rigid 4 4
Flex 4
Figure 1 Cable connection diagram
Battery
Solar Panel
(Flex) Extension Cable
Adapter
Battery
Cable
Charge
Controller
NOTE: For illustration purposes only. Not to scale.
DC Fuse
aThe Xantrex Solar Portable Kits are designed to be easily handled, transported, and assembled from location to location.
4 ©2019 975-0809-01-01 Rev B
January 2019

2. If you have the Flex-type portable kit:
Figure 2 Unpack the accessories
hook
and
loop
a. Take out the charge controller with the
extension cable from the side pouch.
b. Attach the charge controller unit to the
panel's hook-and-loop fastener.
c. Take out the adapter battery cables from
the side pouch.
3. If you have the Rigid-type portable kit:
a. Open the solar panel case and take out the adapter battery cables.
b. Keep the solar panel case open with the solar cells facing the ground.
4. Connect the adapter battery cables to the battery.
Figure 3 Connecting to an RV sidewall SAE port
a. If your RV is equipped with a sidewall SAE
port, you can connect the 11 ft (Flex
Portable) or 12ft (Portable) pre-wired
battery extension cable's SAE connector to
the sidewall SAE port.
Figure 4 Connecting alligator clips
b. If you are using the supplied adapter battery
cable with alligator clip:
lattach the red pos (+) alligator clip to
the pos (+) battery terminal
lattach the black neg (–) alligator clip to
the neg (–) battery terminal
NOTE: See NOTICE regarding reverse polarity.
Figure 5 Connecting ring terminals
c. If you are using the supplied adapter battery
cable with ring terminals, prepare the tools
specified under Safety Instructions.
lattach the red pos (+) ring terminal to
the pos (+) battery terminal and secure
with a battery terminal nut (not
supplied)
lattach the black neg (–) ring terminal to
the neg (–) battery terminal and secure
with a battery terminal nut (not
supplied)
NOTE: See NOTICE regarding reverse polarity.
5. Attach the connector of the extension cable to the connector of the adapter battery
cable. The connector is designed to maintain the correct connection polarity.
Figure 6 Connecting the SAE connectors
6. Unfold the portable kit and position the portable kit in a safe, well lit, and unobstructed
area for maximum sun exposure. The placement location must be free from walk-
ways and other potential trip hazards.
a. Use the built-in support legs to prop up the solar panel in place. Alternatively,
you may lay the solar panel flat on any surface. See CAUTION regarding
personal injury or property damage.
b. Point the solar panel surface towards direct sunlight and manually adjust
accordingly as sunlight moves about during the day.
c. Check the LCD display of the charge controller for indications of power.
NOTE: The charge controller has no power switch and the LCD display turns on
immediately when power is detected.
975-0809-01-01 Rev B
January 2019
©2019 5

Figure 7 Positioning the solar panels
90°
CAUTION
PERSONAL INJURY OR PROPERTY DAMAGE
lAnchor the Flex-type portable solar panel using the built-in eyelets around the
edges and on the support legs of the panel using pegs (not supplied).
lDo not use the portable solar panel in excessive windy conditions.
lPack away and store after each use. Do not leave out, when not in use -- for
safety and to maximize the life of the product.
Failure to follow these instructions can result in personal injury or equipment
damage.
7. Using the solar charge controller panel, select the battery type. For operating
instructions, see the separate charge controller Owner's Guide.
Troubleshooting
WARNING
ELECTRICAL SHOCK HAZARD
lDo not disassemble the charge controller unit. It does not contain any user-serviceable
parts. Attempting to service the unit yourself could result in an electrical shock or burn.
lIf the in-line fuse on the positive (+) battery cable blows, replace only with exactly the
same rating and type of fuse. For reference, see Specifications on page 7.
Failure to follow these instructions can result in death, serious injury, or equipment
damage.
NOTE: To obtain service go to Contact Information on page 1.
Common Issues
Problem Possible Cause Solution
Battery does not get
charged even when
sunlight is present.
Solar panel is partially
shaded or there is
insufficient sunlight.
Move the solar panel to a different location
so that it faces the sun directly at noon
position.
Loose or no DC cable
connections.
Connect DC cables to the battery and solar
panel and tighten terminal connections.
Fuse is blown. Check the DC blade fuse on the battery
cable and replace the fuse with the same
type and rating as the old fuse.
Problem Possible Cause Solution
The charge controller
is indicating an event
condition.
Battery over-discharge
or over-voltage event
condition.
See the charge controller's Owner's Guide
for more further instructions.
6 ©2019 975-0809-01-01 Rev B
January 2019

Specifications
NOTE: Specifications are subject to change without prior notice.
Torque Specifications for Fasteners
10A charge controller terminal screws 4.4 lb-in (0.5 N-m)
Cable Specifications for PV and Battery
PV cable #10AWG, 600V, -40°C–90°C
Battery cable #10AWG, 300V, -40°C–90°C
Solar Panel Specifications
100W Xantrex Solar Portable Flex Kit
Physical dimension (folded) 520×435×20mm
Physical dimensions (expanded) 1515×520×5mm
Unit weight 4.45kg
Operating temperature -40°–85°C (-40°–185°F)
Total rated power 100W
Max power voltage 19.1V
Max power current 5.24A
Open circuit voltage 22.9V
Short circuit current 5.66A
Battery cable in-line fuse ATO/ATC blade-type fuse 7.5A
Solar Panel Specifications
100W Xantrex Solar Portable Kit
Physical dimension (folded) 460×670×70mm
Physical dimensions (expanded) 920×670×35mm
Unit weight 8.5kg
Operating temperature -40°–85°C (-40°–185°F)
Total rated power 100W
Max power voltage 21.4V
Max power current 4.68A
Open circuit voltage 21.4V
Short circuit current 4.96A
Battery cable in-line fuse ATO/ATC blade-type fuse 10A
Solar Panel Specifications
160W Xantrex Solar Portable Kit
Physical dimension (folded) 710×670×70mm
Physical dimensions (expanded) 1420×670×35mm
Unit weight 12.5kg
Operating temperature -40°–85°C (-40°–185°F)
Rated power 160W
Max power voltage 19.2V
Max power current 8.34A
Open circuit voltage 23V
Short circuit current 8.7A
Battery cable in-line fuse ATO/ATC blade-type fuse 10A
975-0809-01-01 Rev B
January 2019
©2019 7

Accessory List
Accessories (Sold Separately). Contact a Xantrex authorized dealer to order.
Remote Battery Temperature Sensor (PN: 708-
0080) PV Adapter Cable DC Plug (PN:708-0110)
Solar Portable Kit List
Model Number 782-
0100-01
782-
0160-01
783-
0100-01
Rating 100W 160W 100W
Type Rigid Flex
portable solar panel 444
10A Charge Controller 444
11 ft pre-wired battery extension cable with SAE connector
and a built-in fuse 4
12 ft pre-wired battery extension cable with SAE connector
and a built-in fuse 4 4
one 2-ft. battery adapter cable with ring terminals and SAE
connector 444
one 2-ft. battery adapter cable with alligator clips and SAE
connector 444
8 ©2019 975-0809-01-01 Rev B
January 2019
Other manuals for 783-0100-01
1
This manual suits for next models
2
Table of contents
Other Xantrex Camera Accessories manuals