XHIFI, INC.
465 PIKE ROAD ●UNIT 112 ●HUNTINGDON VALLEY ●PENNSYLVANIA ●19006-1621 ●USA
866-55-XHIFI ●267-288-0199 ●267-288-0198 FAX
Page 8 of 14
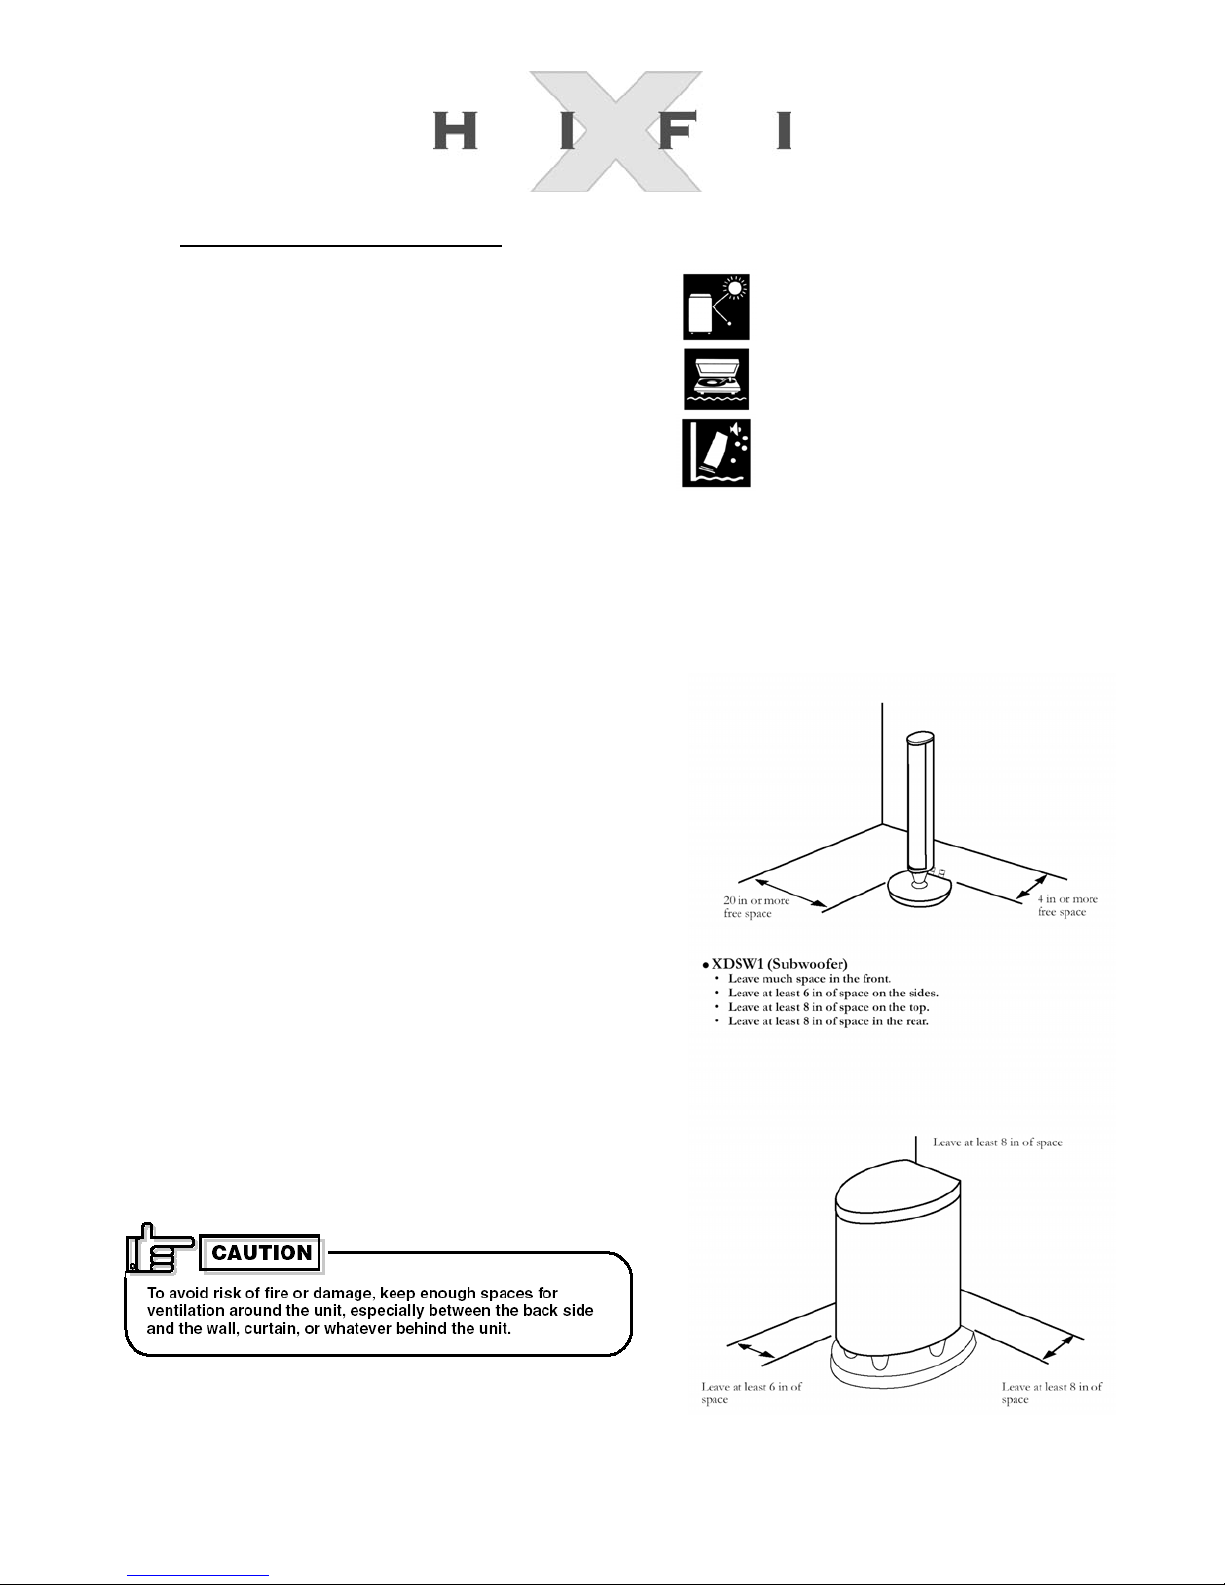
Precautions for Installation
•To prevent deformation or discoloration of the cabinet, do not install
the unit where it is exposed to direct sunlight or high humidity, and
avoid installation near air conditioning outlets.
•Speaker vibrations may cause playback devices to malfunction or
skip. Place the unit as far away from the playback device as possible.
•Take the occurrence of earthquakes or other physical shocks into
consideration when selecting the installation place, and secure the
unit thoroughly.
•This unit is magnetically shielded so as not to cause color distortions on color television sets. However, depending on the
installation method, color distortions may occur. Please pay attention to the following points when installing the unit.
1. When placing these speakers near a TV set, turn off the TV’s main power switch or unplug it before installing the speakers.
Wait at least 30 minutes after the system is installed before turning on the TV’s power.
2. If another speaker system has been set up near the TV set, that system may cause color distortions in the TV’s picture.
In spite of the shielded design of these speakers, some types of TVs may be affected by them. If this happens, move the speakers
a short distance from the TV set.
•When placing the speaker system, note that the affixed feet on both
the satellite speakers and subwoofer (as well as the optional taller
feet) may slightly discolor the setting surface after an extended
period, depending on the setting surface’s material.
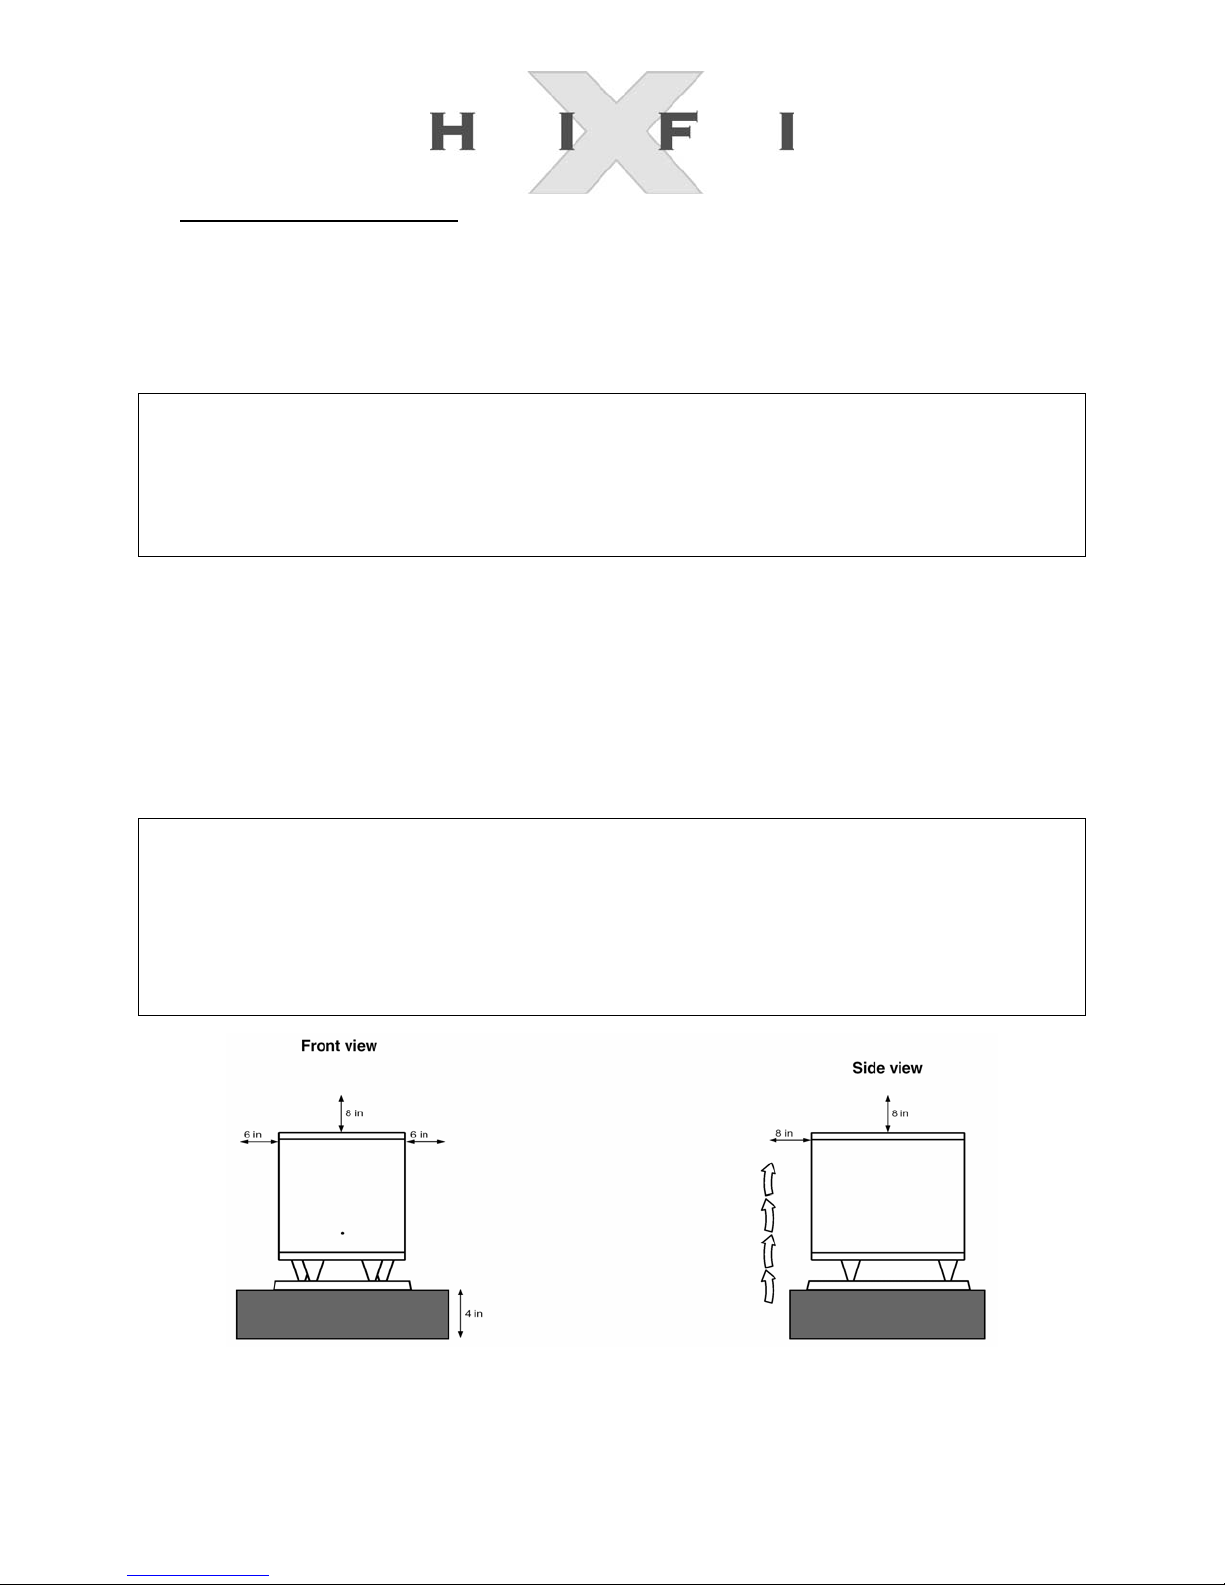
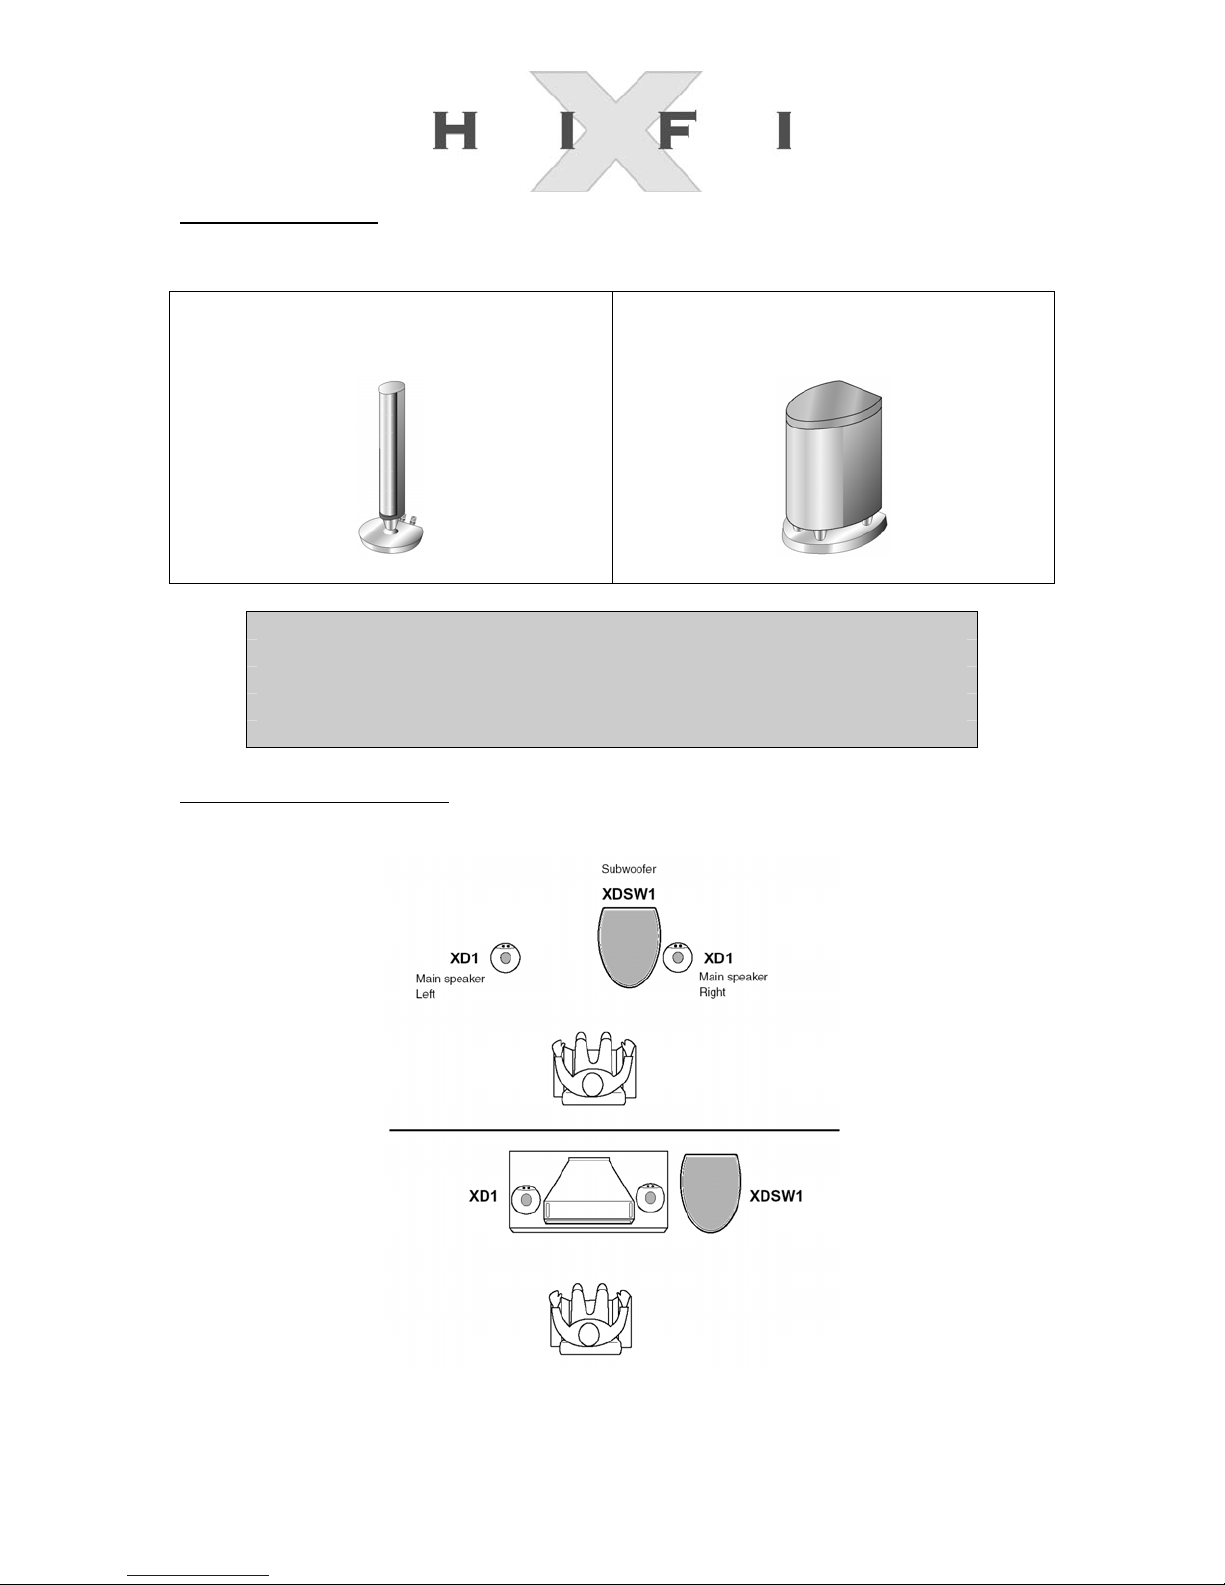
•To be considered when installing the XDC-1
•The sound reproduced by the speaker system is subtly affected by
the conditions of the listening room. The arrangement of this
system can be changed to match the conditions of the listening
room. We recommend that you use the following guidelines to
arrange the system to expand the sound field and ensure a clearly
pinpointed sound image.
•XD1 (Main Speaker)
•We recommend that there be at least about 20 in. of free space
between the sides and a wall.
•We recommend that there be at least about 4 in. of free space
between the rear side and a wall.
(Note that there is a risk that terminals may be short circuited if they
contact a wall, etc.)
We recommend that there be a distance of about 3 to 7 feet between
each speaker, and each speaker should be placed with the front
facing forward towards the listening position.