Xiaomi DDL-M1 User manual

DDL-M1 Intelligent Microscope
Operating Instruction V1.0


Contents
Notice for Use.....................................................................................................................................3
Product Introduction........................................................................................................................... 4
Microscope Installation Instructions.......................................................................................... 4
Microscope Stand Installation Instruction..................................................................................5
Charging Instruction...................................................................................................................6
Microscope Monomer Introduction........................................................................................... 7
How to Use the Microscope.......................................................................................................9
Microscope Base Introduction................................................................................................. 11
How to Use the Microscope Base............................................................................................ 13
Accessories and tools............................................................................................................... 16
APP Usage Guide............................................................................................................................. 16
How to Use on Android/iOS.................................................................................................... 17
How to Use on PC....................................................................................................................19
For Windows....................................................................................................................19
For MAC..........................................................................................................................22
Microscope Trouble Shooting.......................................................................................................... 26
Product Performance failure table.................................................................................................... 28
Storage Environment........................................................................................................................ 29
Operating Environment.................................................................................................................... 29

3
Notice for Use
Please read this manual carefully and use it correctly.
Pay attention to the protection of the lens part,be sure to close the lens cover after
use,to avoid dust or foreign matter.
This microscope can be used by hand,or can be inserted into the base as a table.Pay
attention to the strength of the insertion to avoid damaging the components.
When placing the specimen,please pay attention to the position,and place it as far as
possible in the center of the lens right below.Avoid having a bad experience with
blurred objects.

4
Product Introduction
偕Microscope Installation Instructions
Microscope Structure
Microscope monomer Microscope base

5
偖Microscope Stand Installation Instruction
Step 1. Remove the cover of the Step 2. Hand strap facing the rear,the rear
microscope monomer lens. slot should be aligned with the mounting hole.
Step 3. Holding the base with one hand, Step 4. Insert it to the bottom
insert the microscope monomer vertically (focus wheel is all exposed).
down into the mounting hole.

6
偗Charging Instruction
The indicator light on
microscope monomer
The indicator light on
microscope base
When the microscope monomer is low
battery,the power indicator blue light
flashes quickly.
The red light is always on when
charging,and the indicator goes off when
full.
During charging,if there is slight heat in
the microscope shell and battery,please
rest assured that it is normal
Whenthemicroscopebaseislow
battery,the power indicator light
flashes red.
The red light is always on when
charging,and the great light is
always on when full.
You can charge device by your
daily phone charger,computer,or
power bank.
Charging time should not
exceed 12h to avoid
affecting the battery life.
7
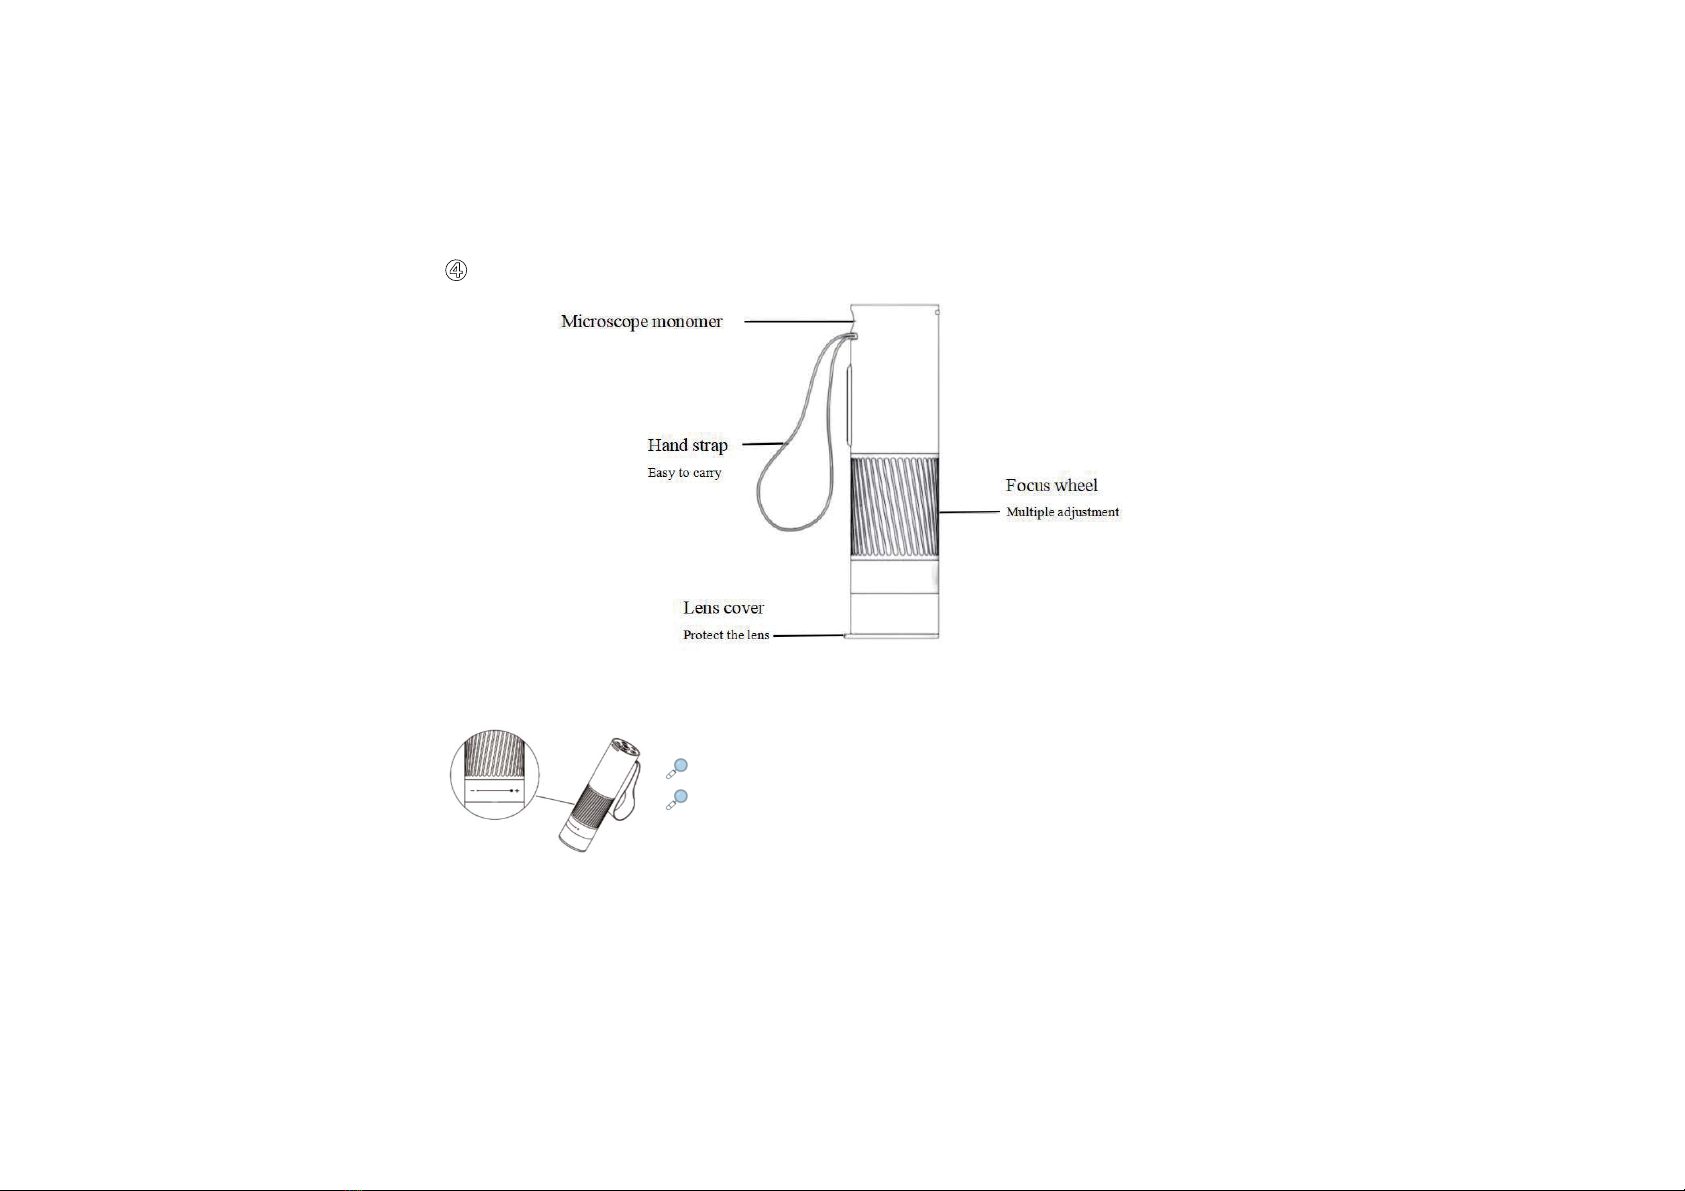
偘Microscope Monomer Introduction
Focus wheel:
Counterclockwise rotation: zoom in
Clockwise rotation: zoom out
(Notice:There are two magnifications to rotate the focus wheel at the same distance.Lifting
knob on the base and magnification /minification button can also be adjusted for multiple,when
adjusted the focus wheel,lifting knob and magnification /minification button together,the maximum magnification is 400 times.)

8
Power button: Long press the button for 3s,and the light on the microscope monomer or the light on the
microscope base will light up,which means the microscope has been turned on.Press for 3s again,when the
light goes out,means the microscope has been turned off.
Power/WiFi connection indicator: When the battery is low,the blue light flashes quickly.When
charging,the red light is always on.The blue light is always on when WiFi is successfully connected,and
the blue light flashes when WiFi is not connected.
9
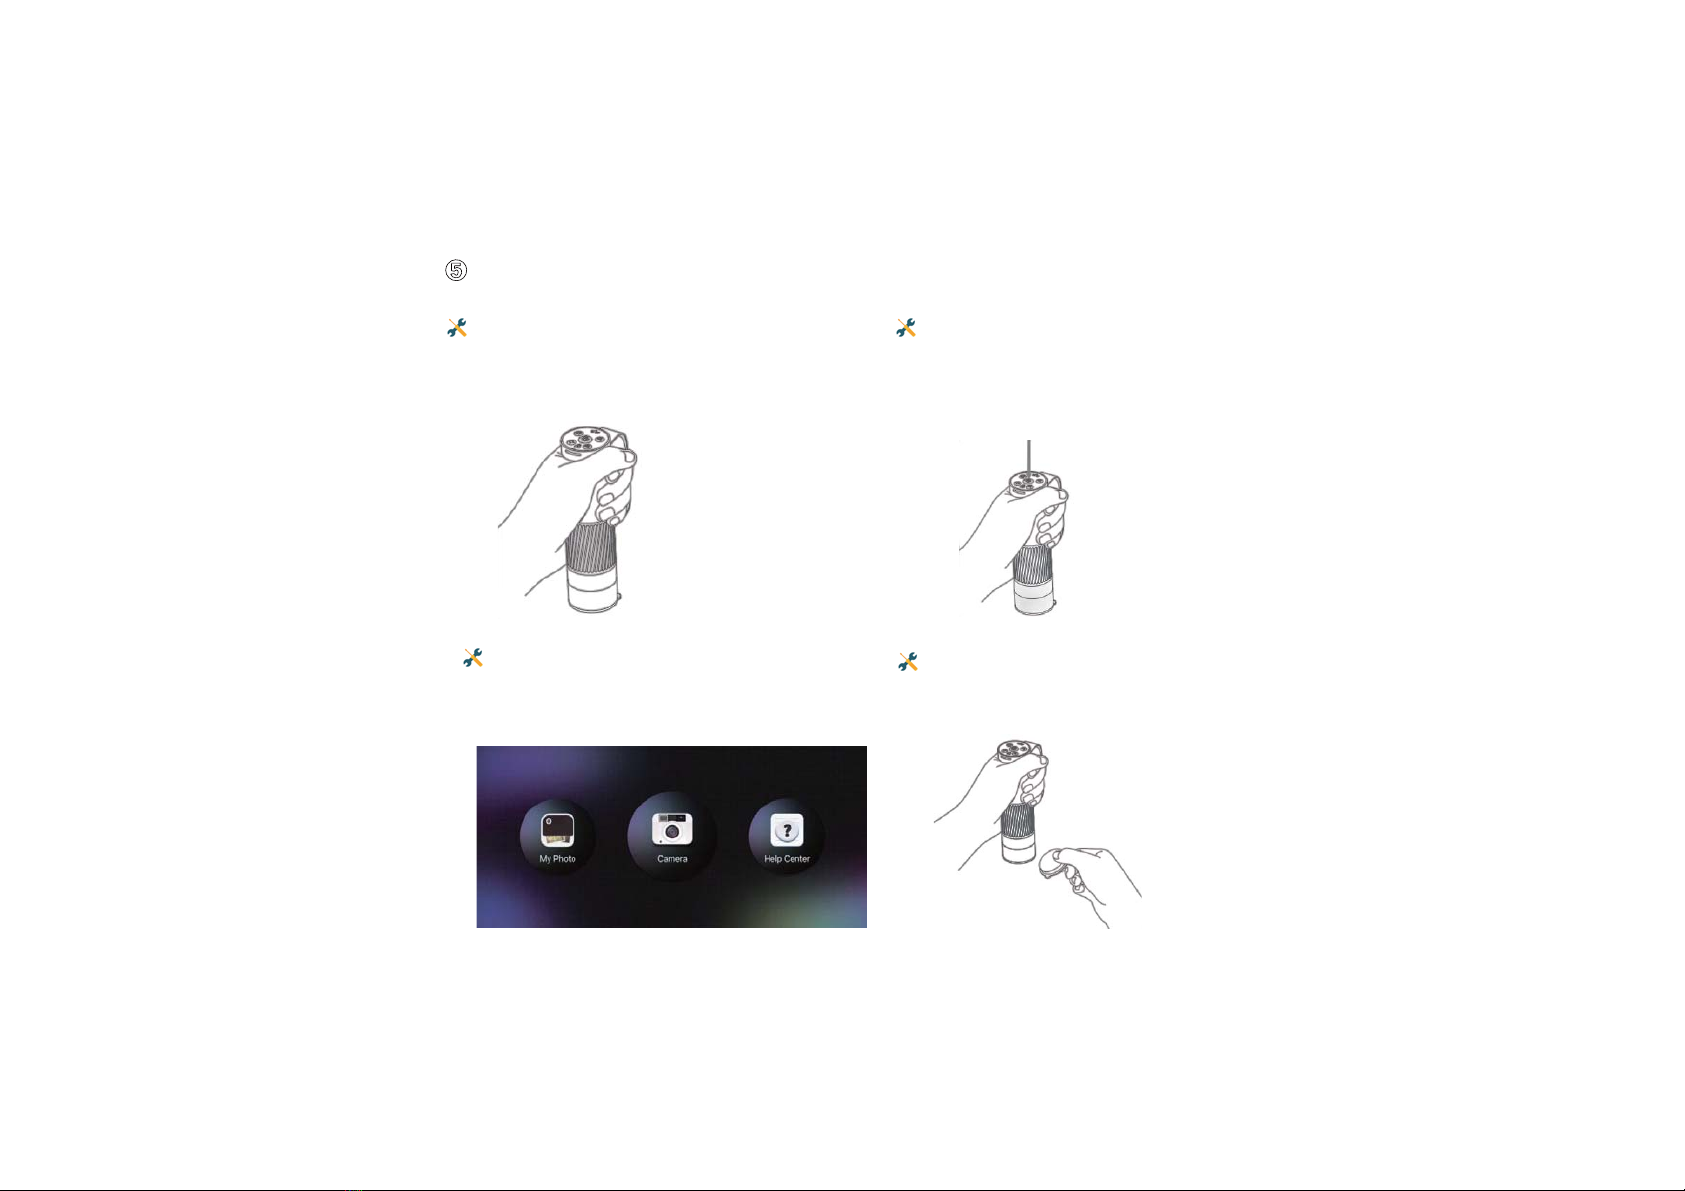
偙How to Use the Microscope
Connect the microscope and mobile app
via WiFi.
Remove the lens cover.
Hold the upper part of the microscope with
one hand, the tip of the finger can be put
into the hand strap to avoid falling.
Turn on the microscope by pressing the
power button.
Table of contents
Popular Microscope manuals by other brands


VWR
VWR VisiScope 384 Series instruction manual

Nikon
Nikon ECLIPSE E200 POL instructions

Leica
Leica DI C800 User's manual & installation instructions

ThermoFisher Scientific
ThermoFisher Scientific Continuµm manual

ThermoFisher Scientific
ThermoFisher Scientific Continuµm manual

Olympus
Olympus SZ61 instructions