FUNCTION OPERATION
This unit contains the following special function, press del button
twicetoenterthesettingmodeandpress buttontoselectone.
The setting sequence is PHONE BOOK - SET RING - BACK LIGHT - LCD
CONTRAST - SET TIME- SET LANGUAGE- SET AREA& LDS - SET FLASH- HOUR
FORMAT- DATE FORMAT.
a.Toaddnumberandnametothephonebooks
sort
Press the dial button to confirm and press del
toexit.
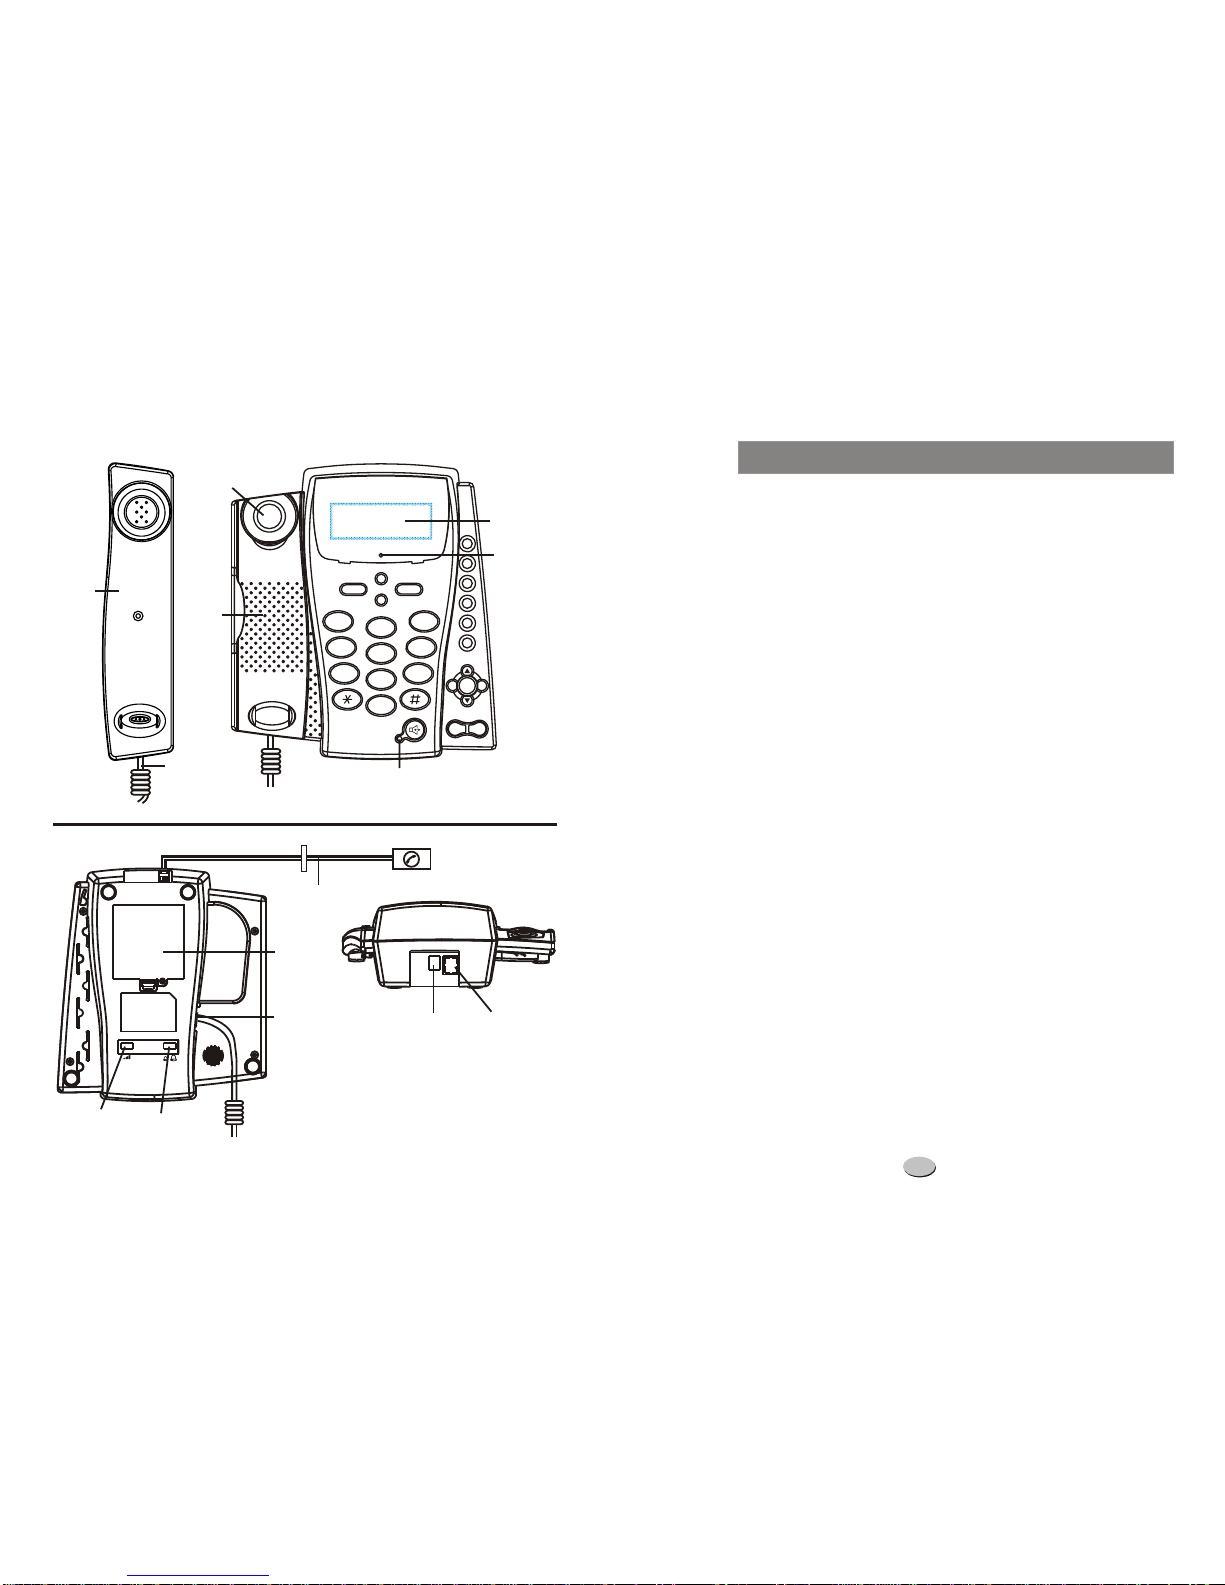
1.PHONEBOOK
Press button to select the phonebook menu and the LCD will
show: REVIEW. Press to select the ADD menu. Press
button to enter the function of adding name and number. (You
can enter it directly by pressing and holding the phone book
button.)
Enter the telephone number by keypad. Press del button for
deleting the previous digit. The maximum number of digits to be
entered is 20, if the number exceeds 20, the LCD will show
and the exceeding digits will not be stored.
After finishing the number setting, press and hold button (or
press button once) to enter the name setting, press
the appropriate keypad to get the following characters, If the next
character is on the same button as the previous one, you will first
need to press button before the entering, pressdel button to
delete the previous digit.
dial or tdial
TOO
LONG dial
phone book
dial
s
1.
2.
3.
1 1 . -" ( )
2 A B C a b c 2 A A E
3 D E F d e f 3
4 G H I g h I 4
5 J K L j k l 5
6 M N O m n o 6 O O N
7 P Q R S p q r s 7
8 T U V t u v 8 U
9 W X Y Z w x y z 9
0 0 + & @ / $ %
Key Characters Key Characters
FUNCTION OPERATIONS
Two-touch memory
a.To storenumber
You can store number to the two-touch memory in either on-hook or
off-hook state. Press the storebutton and the LCD shows - - >. Then
enterthetelephonenumberyouwanttostore.Pressthestorebutton
once again and the LCD shows - - >?. Enter desired location number (
0~9)andtheLCDshows SAVEOK .
b. To dial a number from the memory
Lift the handset or press the button. Press the auto button
followed by a corresponding location number button(0~9), the
matching stored number will be dialled out.
C. To review the number in two-touch memory
In the state of on-hook, press and hold the location number(0~9)
or press the auto button + the location button, the matching stored
number will show on the LCD.
One -touch memory
a. To store number(Youcanstore numbertothe one-touchmemory
inthefollowing3ways):
1.Intheon-hookoroff-hookstate,pressthe storebuttonandtheLCD
shows - - >. Then enter the telephone number you want to store.
Press the storebutton once again and the LCD shows - - >? Press the
desired locationbutton(m1~m6)andtheLCDshows SAVEOK.
2.First enter the number you want to store then press and hold the
(m1~m6) buttonuntiltheLCDshows SAVEOK.
3.You can copy the CID or Last 10 dialled or phone book number to
m1~m6.
When the number shows on the LCD, press and hold the location
button(m1~m6) until the LCD shows SAVE OK, now the number has
beenstoredattherightlocationintheone-touchmemory.
OPERATION ABOUT THE STORED NUMBERS
13 6