Xo 4 Use and care manual

XO®4
Calibration of XO Foot Control
YB-795
Version 1.03
XO CARE A/S
Usserød Mølle
Håndværkersvinget 6 +45 70 20 55 11
Denmark www.xo-care.com

Vejledning i kalibrering af fodkontrol.
1. Placer fodkontrollen på en plan overflade.
2. Tryk joystick syd og tryk på knap A og B samtidig. (Hvis knapperne A og B ikke er tilstæde er det kun
nødvendigt at trykke joysticket syd (Kun model 4-1))
3. Tænd for XO 4 unitten og hold knapperne og joystick nede i 5 sekunder.
4. XO 4 unitten vil nu vise følgende fejlmeddelelse: (NETWORK FAIL - CALL SERVICE) denne
meddelelse skal ignoreres da den skyldes at kommunikationen til broen afbrydes under kalibrering.
5. Frigør joystick og knapperne. Nu skal lysdioden inde i fodkontrollen blinke langsomt (lysdioden er
anbragt til højre for fodpedalen og er synlig gennem åbningen på forsiden). Hvis fodkontrollen ikke er
kalibreret, vil lysdioden blinke meget hurtigt, næsten som konstant lys, og det er nødvendigt at starte
forfra med punkt 1.
6. Tryk fodpedalen til venstre og hold den der, mens du trykker joysticket mod syd, slip fodpedal og
joystick, lysdioden blinker nu lidt hurtigere end før, som indikation på at den venstre værdi er gemt.
7. Tryk fodpedalen til højre og hold den der, mens du trykker joysticket mod syd, slip fodpedal og
joystick, lysdioden blinker nu lidt hurtigere end før, som indikation på at den højre værdi er gemt.
8. Pres fodpedalen ned (skal være i midterstilling) og hold den der mens du trykker joysticket mod syd,
slip fodpedal og joystick, lysdioden blinker nu endnu hurtigere som indikation på at værdien er gemt
og at fodkontrollen har forladt kalibreringen.
9. Genstart XO 4 unitten (sluk og tænd for unitten)
XO CARE A/S Version 1.03 Ref. No. YB-795
Page 2 of 5

Instruction in calibrating foot control.
1. Place the Foot Control on a plane surface.
2. Press Foot Control Joystick south and hold down Button A and B.( If button A and B are not present,
just press foot control joystick south (4-1 model only))
3. Turn Unit power on and keep pressing the buttons and joystick for five seconds.
4. The XO4 unit will issue the message, that the foot control has failed (Network Fail Call service). This
message shall be ignored.
5. Release buttons and joystick. Now the LED inside the Foot Control is blinking slowly (you can see the
led if you look inside the Foot Control just to the right of the pedal. If the Foot Control is not in
calibration mode, the LED is blinking very fast – looks nearly like constant light, and you have to start
from step 1).
6. Press pedal to the left most position and press joystick south and release it. Now the LED inside the
foot control is blinking a little faster, indicating that the left value is stored.
7. Press pedal to the right most position and press joystick south and release it. Now the LED inside the
foot control is blinking even a little faster than before, indicating that the right value is stored.
8. Press pedal down by pressing at the tip of the pedal and press joystick south and release it. (In this
step you must press the joystick gentle, to be sure not to tilt the Foot Control, if tilted you have to start
from step 1). Now the LED inside the foot control is blinking very fast, indicating that the down value is
stored, and the Foot Control has left the calibration mode.
9. The unit is ready for use.
XO CARE A/S Version 1.03 Ref. No. YB-795
Page 3 of 5

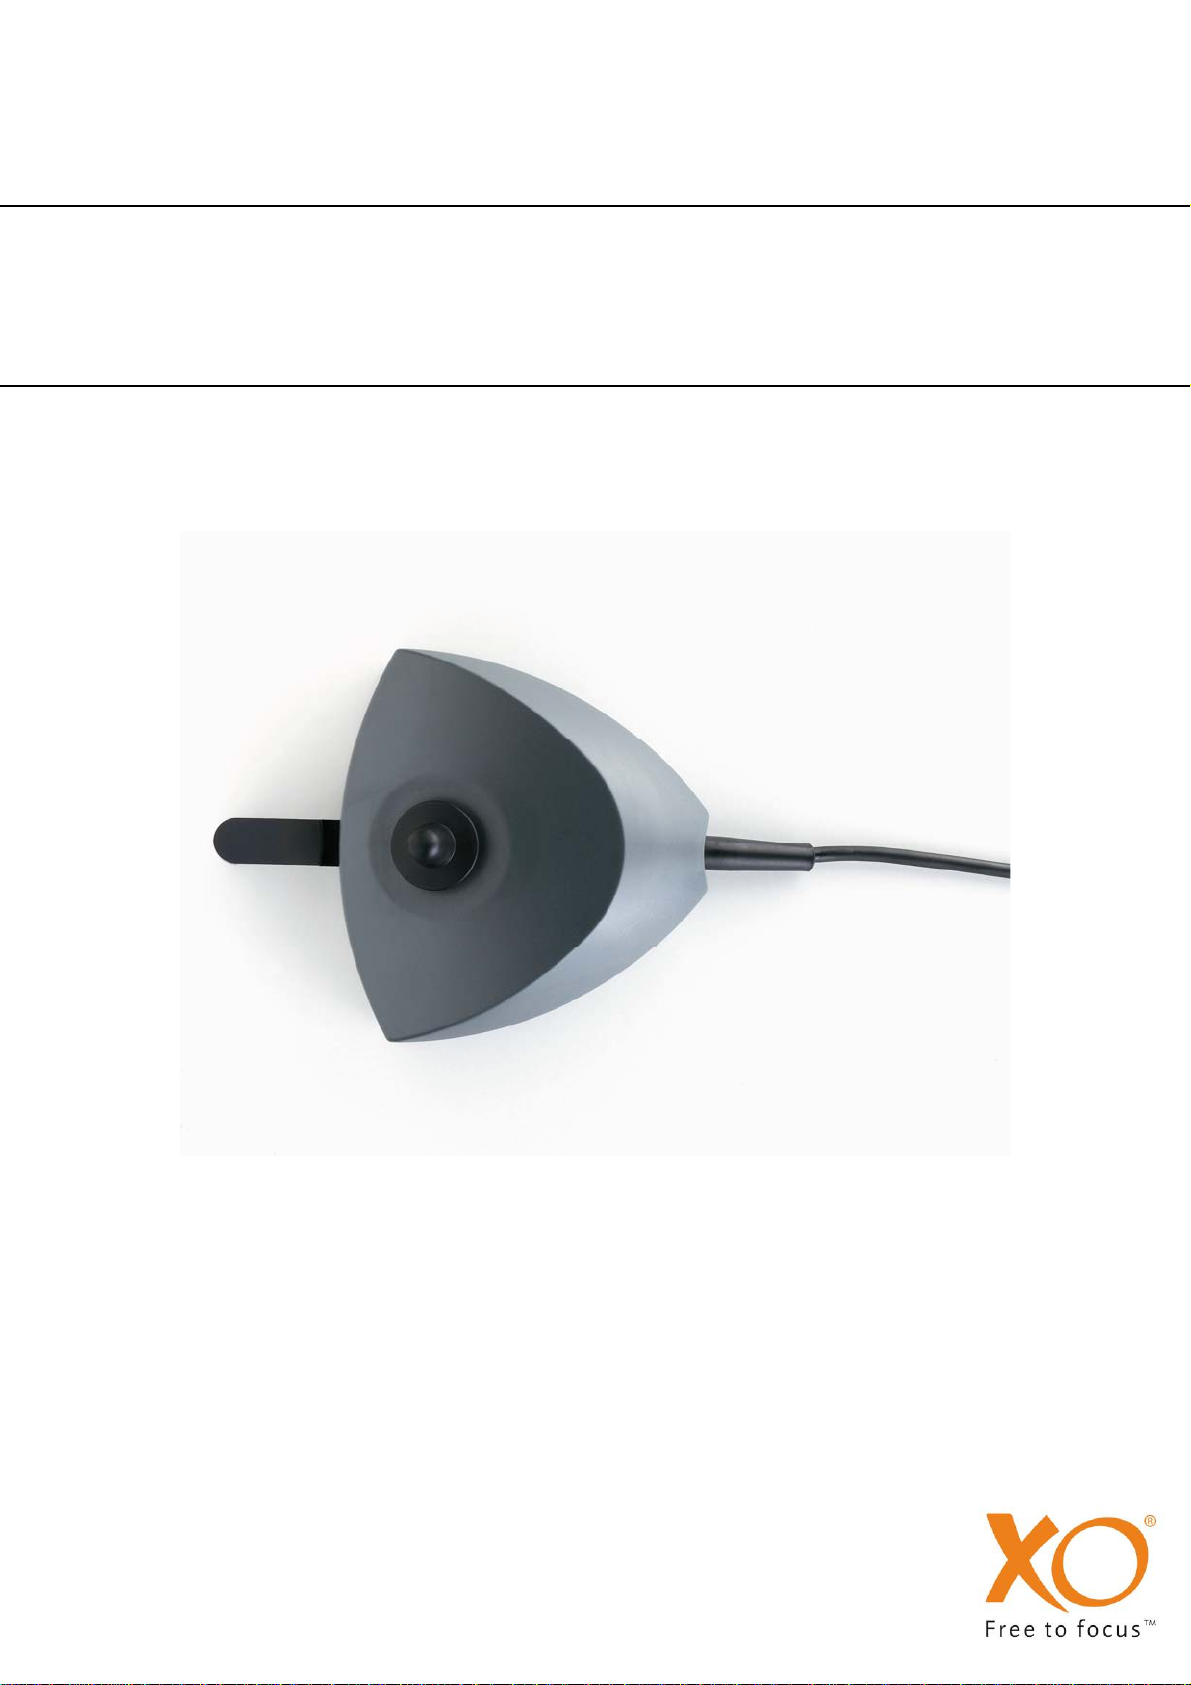
Anleitung zum kalibrieren des fußanlassers
1. Stellen Sie den Fußanlasser auf eine ebene Fläche.
2. Drücken Sie den Joystick des Fußanlassers nach „Süden“ und halten Sie Knopf A und Knopf B
gedrückt(falls A und B Knopf nicht vorhanden sind, drücken Sie nur den Joystick nach „Süden).
3. Schalten Sie die Unit ein, während Sie die Knöpfe und den Joystick weitere fünf Sekunden lang
gedrückt halten.
4. Ignorieren Sie die eventuelle erscheinende Anzeige im Display.
5. Wenn Sie die Knöpfe und den Joystick los lassen, blinkt die LED im Fußanlasser langsam (Sie
können die LED sehen, wenn Sie rechts am Pedal vorbei in den Fußanlasser hineinblicken. Wenn der
Fußanlasser sich nicht im Modus „Kalibrieren“ befindet, blinkt die LED sehr schnell – was beinahe wie
ein permanentes Leuchten aussieht. Sie müssen dann noch einmal bei Punkt 1 anfangen.
6. Drücken Sie das Pedal ganz nach links und den Joystick nach „Süden“. Lassen Sie den Joystick
wieder los. Jetzt blinkt die LED im Fußanlasser ein wenig schneller und zeigt damit an, dass der linke
Wert gespeichert ist.
7. Drücken Sie das Pedal ganz nach rechts und den Joystick nach „Süden“. Lassen Sie den Joystick
wieder los. Jetzt blinkt die LED im Fußanlasser noch ein wenig schneller und zeigt damit an, dass der
rechte Wert gespeichert ist.
8. Drücken Sie das Pedal behutsam ganz nach unten und den Joystick nach „Süden“. Lassen Sie den
Joystick wieder los. (Drücken Sie auch den Joystick sehr behutsam, damit der Fußanlasser nicht
wackelt, sonst müssen Sie wieder bei Punkt 1 anfangen. Jetzt blinkt die LED im Fußanlasser sehr
schnell und zeigt an, dass der “nach unten Drücken” Wert gespeichert ist und der Fußanlasser hat
den Kalibriermodus verlassen.
XO CARE A/S Version 1.03 Ref. No. YB-795
Page 4 of 5
9. Die Unit ist zum Gebrauch bereit.

Calibration de la pédale XO4 (tous modèles)
1. Placer la pédale sur une surface plane.
2. Maintenir le joystick vers le sud, tout en restant appuyé sur les boutons A et B (si absence des
boutons A et B activer seulement le joystick)
3. Mettre l’unit sous tension tout en maintenant la position précédente pendant 5 secondes.
4. Ne pas tenir compte des messages qui pourraient s’afficher sur le display.
5. Relâcher les 2 boutons puis le joystick. La LED de la carte pédale doit maintenant clignoter lentement
(elle est visible en inclinant la pédale si on regarde par l’ouverture du capot au niveau du levier, si on
est pas en mode calibration la LED clignote très vite, dans ce cas recommencer a partir de l’étape 1)
6. Pousser le levier de pédale en butée à gauche et valider en inclinant le joystick au sud puis relâcher le
joystick et le levier. La LED clignote maintenant un peu plus vite ce qui indique que la position a bien
était enregistrée.
7. Pousser le levier de pédale en butée droite et valider en inclinant le joystick au sud puis relâcher le
joystick et le levier. La LED clignote maintenant encore un peu plus vite ce qui indique que la position
à bien était enregistrée.
8. Appuyer verticalement sur le levier de pédale et valider en inclinant le joystick au sud puis relâcher le
joystick et le levier(durant cette étape attention de ne pas faire remonter le levier lorsque vous
actionnez le joystick ,sinon reprendre à partir de l’étape 1)La LED clignote maintenant très très vite ce
qui indique que la position à bien était enregistrée et que l’on a quitté le mode calibration de la pédale.
9. L’unit est maintenant prés a fonctionner.
XO CARE A/S Version 1.03 Ref. No. YB-795
Page 5 of 5
Other manuals for 4
4
Table of contents
Languages:
Other Xo Indoor Furnishing manuals
Popular Indoor Furnishing manuals by other brands

Stance Healthcare
Stance Healthcare Victory Assembly, maintenance and parts manual

LocknCharge
LocknCharge FUYL Cell operating instructions

Leisure Garden Furniture
Leisure Garden Furniture Amelia Cove owner's manual

Dorel Home Products
Dorel Home Products 4356939N manual

Safavieh Furniture
Safavieh Furniture Estes DCH8802 manual

Furniture of America
Furniture of America CM-AC6140BG Assembly instructions