Fan installation
Wet Rooms: on/o switch must be
situated so that it cannot be touched
by persons making use of the bath or shower.
A means for disconnection in all poles must be
incorporated in the fixed wiring in accordance
with wiring regulations.
• Ifmetalswitchboxesareused,earthing
regulationsmustbefollowed.
• Thecross-sectionalareaofthesupplycord
usedshouldberangedbetween1-1.5mm².
• VX100/VX120/VX150–2core,
VX100T/VX120T/VX150T–3core.
• VX100T/VX120T/VX150T.Awallor
ceilingon/oswitch(withindicatorlight)
isrecommended.
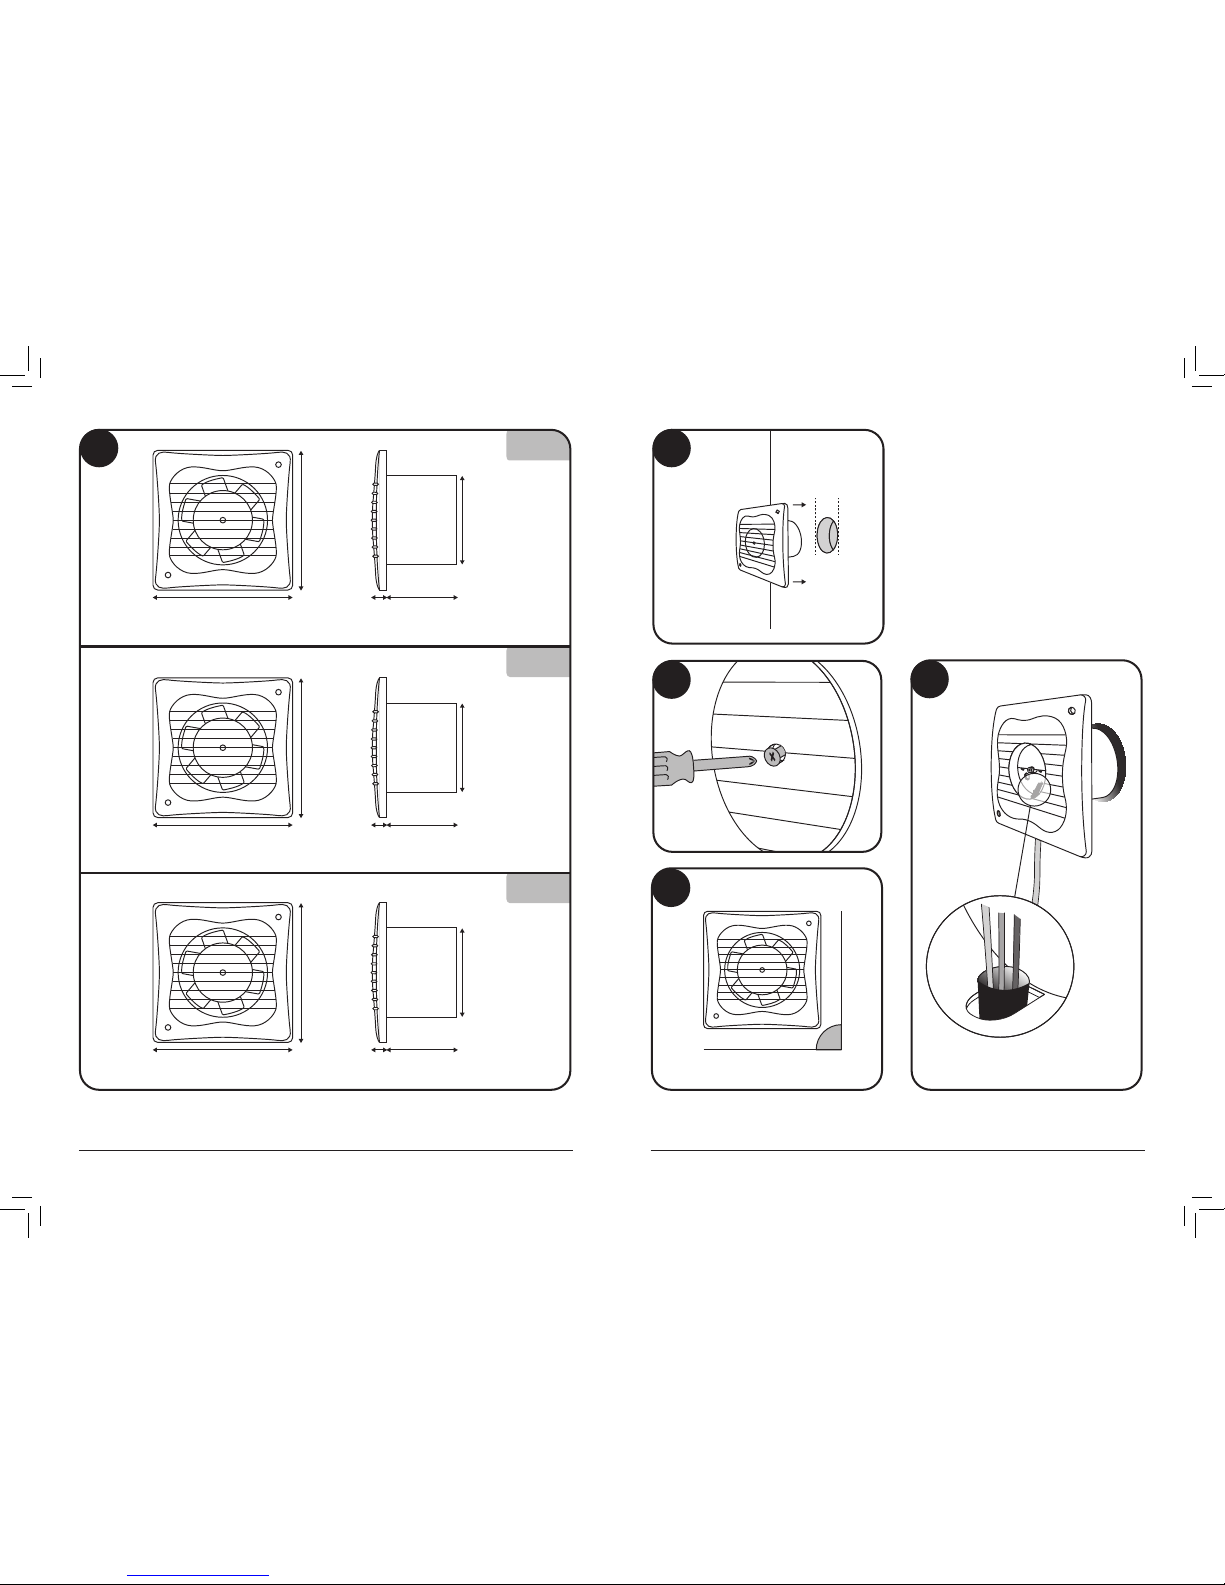
Step 1
Checkthattheelectricalratingshownon
thefanmatchesyourmainssupply.
Step 2
Checktherearenoburiedpipesorcables
e.g.electricity,gas,waterbehindtheswitch
location (in the wall or above the ceiling).
Ifindoubt,seekprofessionaladvice.
Step 3
Isolatethemainssupply.
Step 4
Installtheisolatingswitchand
on/oswitch(ifrequired).
Step 5
Layinthecablefromtheisolatingswitch
tothefanlocationviatheon/o
switch(ifrequired).
Step 6
Layinthecablefromtheisolating
switch to the point of connection to
themainssupply.
Warning: Do not make any connections
to the electrical supply at this stage.
Step 7
Make all connections within the isolating
switchandtheon/oswitch(ifrequired).
Step 1 – Preparing the fan
for installation
• Undotheelectricalcoverscrewandremove
the electrical cover.
If working above ground floor level, safety
precautions must be observed.
If installing in a ceiling, appropriate
termination ancillaries are required
Step 2 – Mount the fan body
•Ifwallmounting,ensurefanbodyis
orientatedhorizontallysee E.
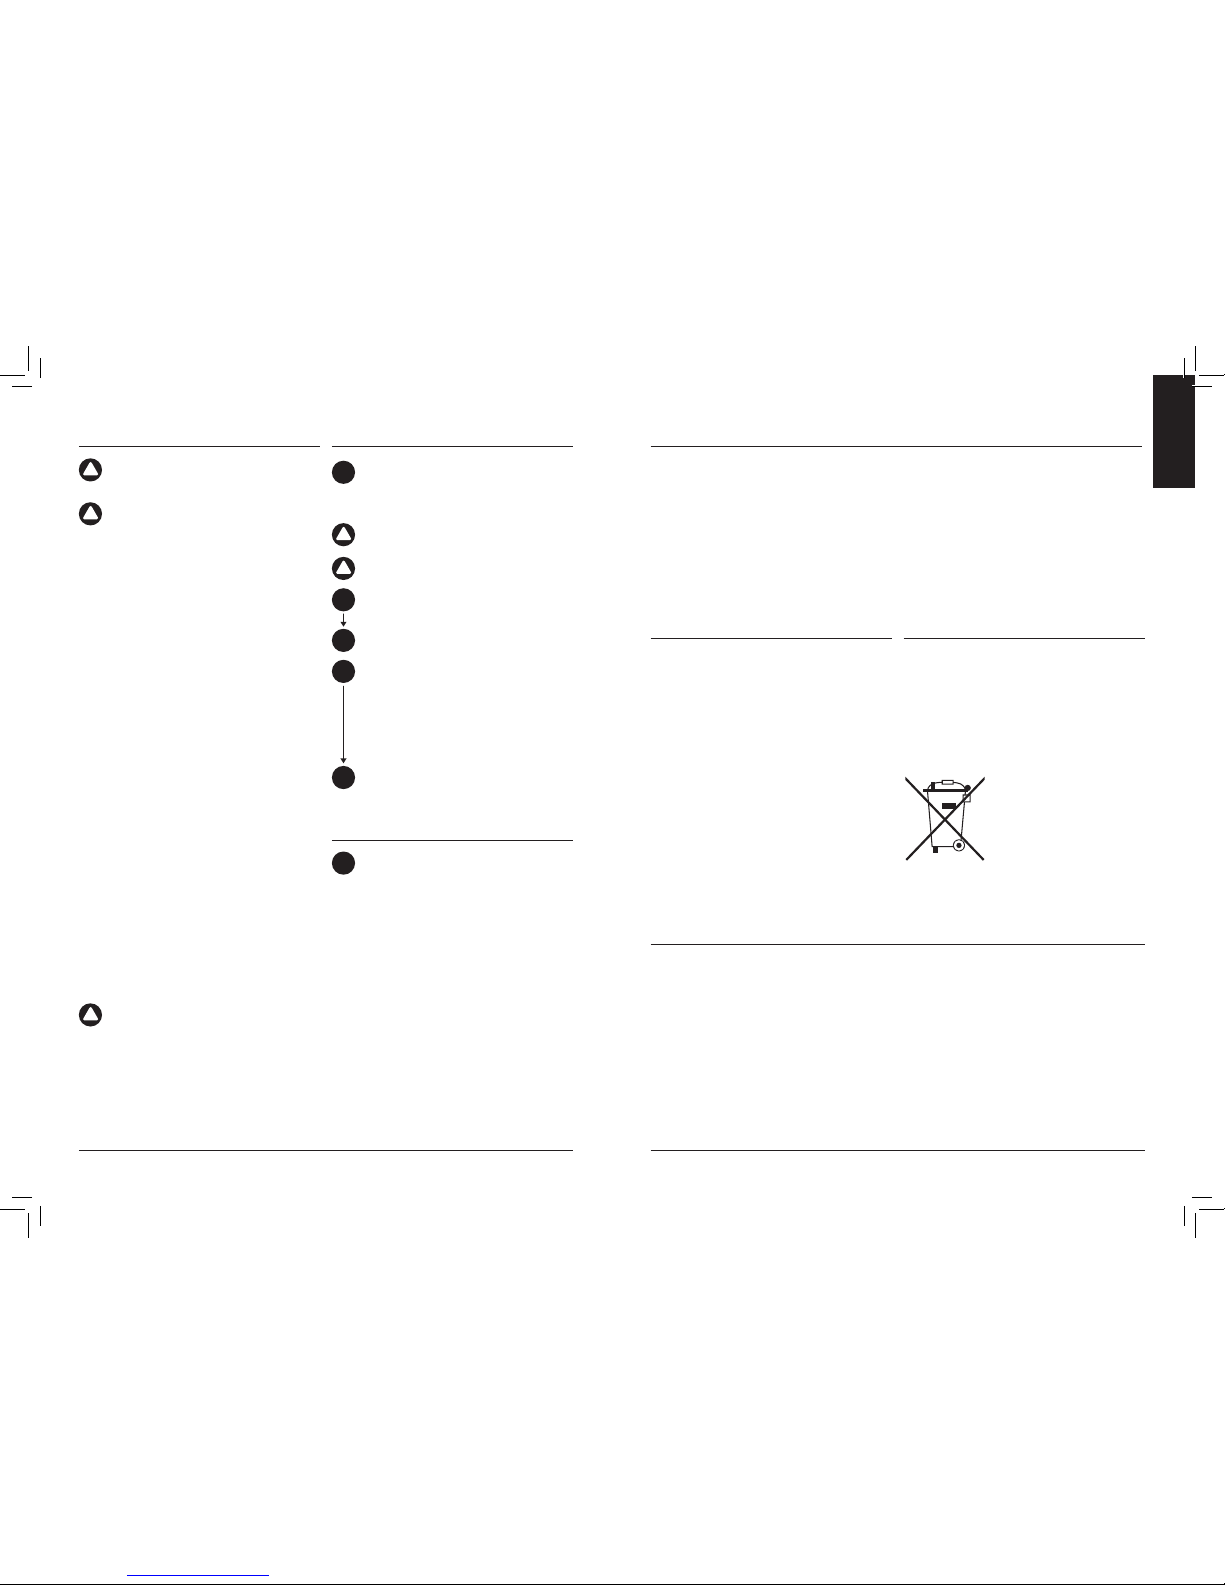
Step 3 – Wire the electrical
connections
•Makesuremainssupplyisisolated.Switchoff
themainselectricalsupplyandremovefuses.
•Pleaseensureyoufollowtherightdiagram
andinstallationtypeforthemodelyouhave
purchasedsee H.
• Usecableclamptosecurecable.
Fan settings
VX100T / VX120T / VX150T
•Toadjusttheover-runsee I.For location of
thetimercontrolsee J.
•Operatethefanusingon/offswitch(not
provided).Whenswitchisoff,fanoperates
forthesettimedelay.
VX100 / VX120 / VX150
• Operatefanusingon/oswitch
(notsupplied).
Finally refit the electrical cover ‘O’ ring seals
(where applicable) and screw in place.
Cleaning
Step 1 – Before cleaning
Isolatethefancompletelyfromthemainssupply.
Step 2 – No water or chemicals
Donotimmersethefaninwaterorotherliquidsto
cleananyotherpartsofthefan.Donotusestrong
detergents,solventsorchemicalcleaners.
Step 3 – Clean front
Wipeitwithadamp,lintfreeclothorwashitwith
warmsoapywater.
C
D
G
F
H
I
Installing switches and cables
We,RedringXpelairGroupLimited,providea
guaranteeagainstfaultypartsandmanufacture
foraperiodof2yearsfromthedateofpurchase.
Intheunlikelyeventofaproductbreakdown
duringtheguaranteeperiodtheproductshould
bereturnedtotheplaceofpurchaseorto
RedringXpelairGroupLimited.
Exclusions:
• Thisguaranteedoesnotcovercompensation
forthelossoftheproductorconsequential
lossofanykind.
• Damageordefectstotheproductarisingfrom
incorrectinstallationorlackofmaintenance.
• Transportationcosts.
Thisguaranteedoesnotaectyourstatutoryrights.
Contactlocaldistributorfordetails.
www.xpelair.co.uk/international
Guarantee UK Guarantee International
Technical Advice and Service
United Kingdom
Xpelair have a comprehensive range
of services. Please ask for details:
General Enquiries Hotline: +44 (0) 844 372 7761
General Enquiries Faxline: +44 (0) 844 372 7762
Technical Hotline: +44 (0) 844 372 7766
Technical Faxline: +44 (0) 844 372 7767
Sales/Spares Hotline: +44 (0) 844 372 7750
Sales/Spares Faxline: +44 (0) 844 372 7760
Head Oce, UK Sales Oce and Spares
Redring Xpelair Group Ltd, Newcombe House,
Newcombe Way, Orton Southgate,
Peterborough, PE2 6SE England.
www.xpelair.co.uk
International
Technical Advice and Service:
Contact your local Xpelair distributor.
www.xpelair.co.uk/international
ENGLISH
08 09
VX Manual_Latest.indd 9-10 04/02/2016 13:52:41