
Assembly Instructions
EN-6
EN
Q
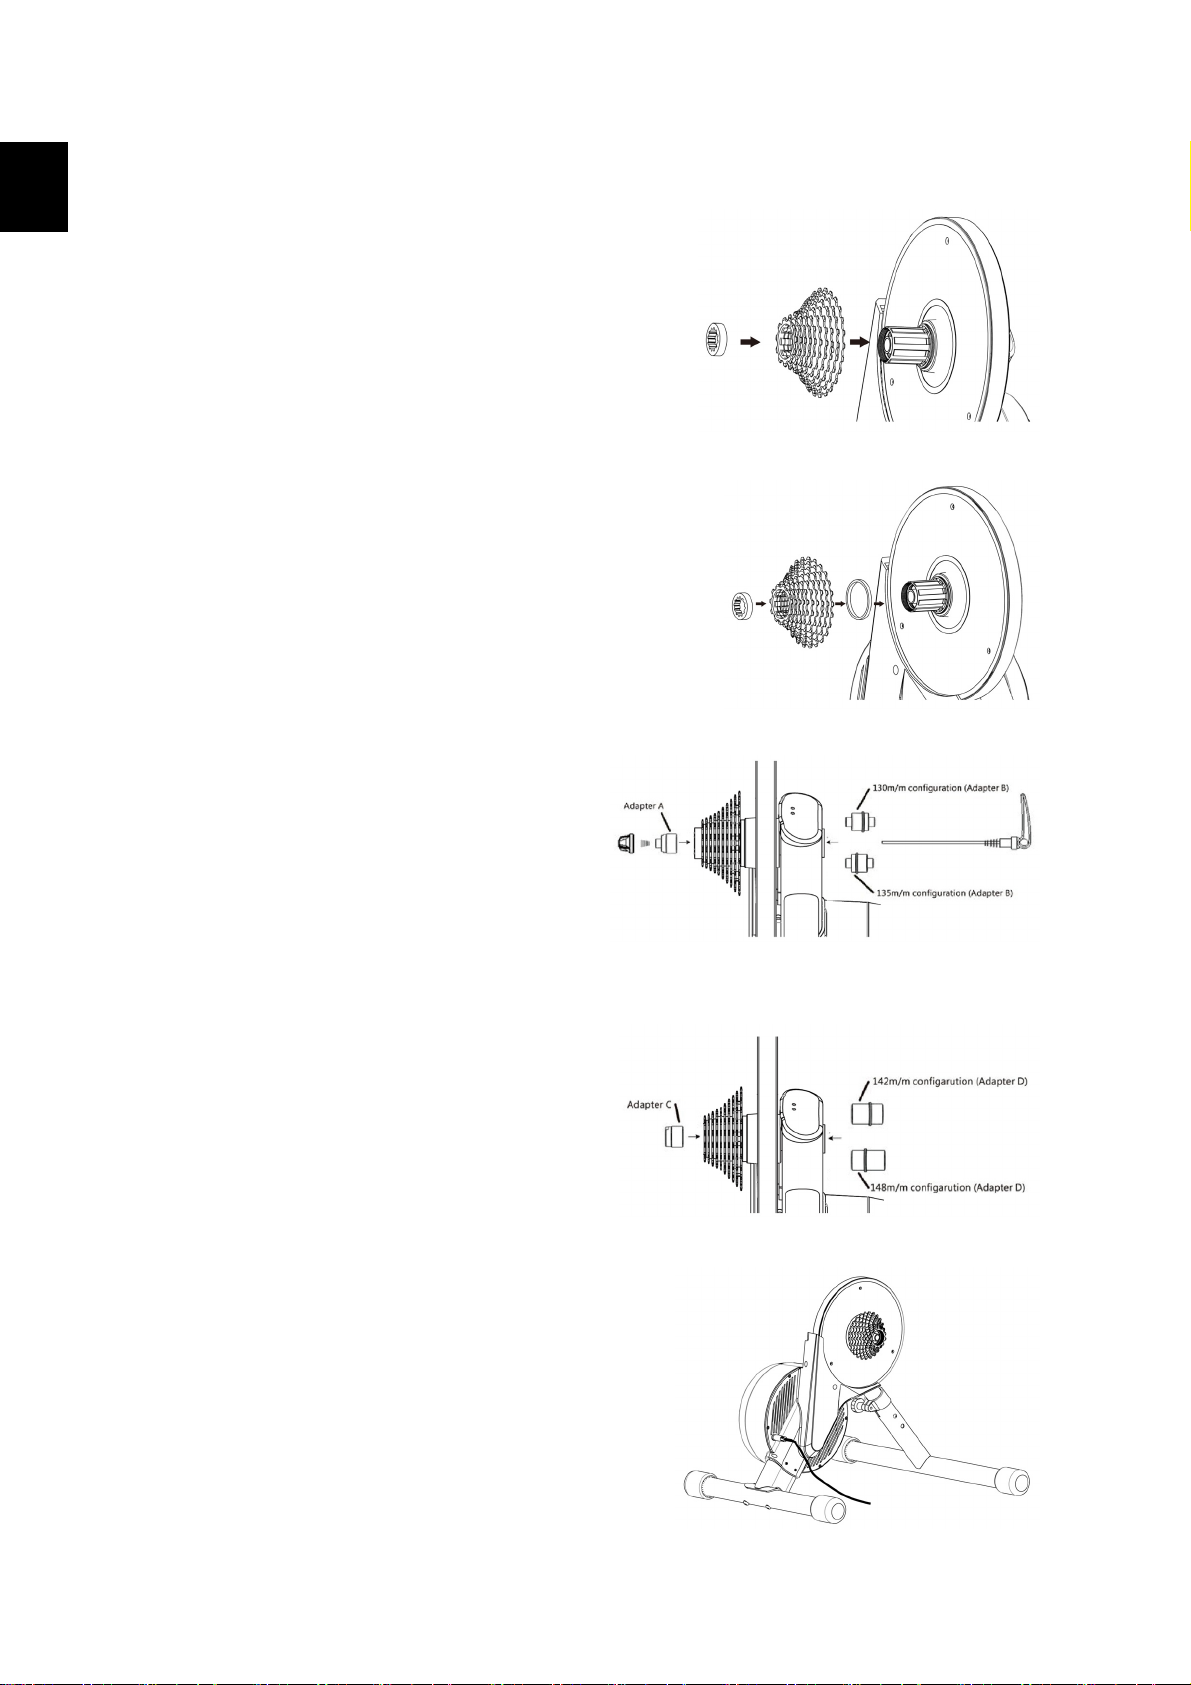
Attaching the cassette (sold separately)
•Attaching a compatible 11-speed
cassette
Attach the cassette onto the cassette
body manually and use the cassette nut
to secure it on the cassette body. Use the
cassette removal socket to secure it
tightly on the NOZA S cassette body (the
tool is not included).
•Attaching a 9-speed or 10-speed
cassette
Before attaching a 9-speed or 10-speed
cassette, you need to put the 1.8mm
cassette washer onto the cassette body
first and then secure the cassette tightly
on the NOZA S cassette body as
mentioned above.
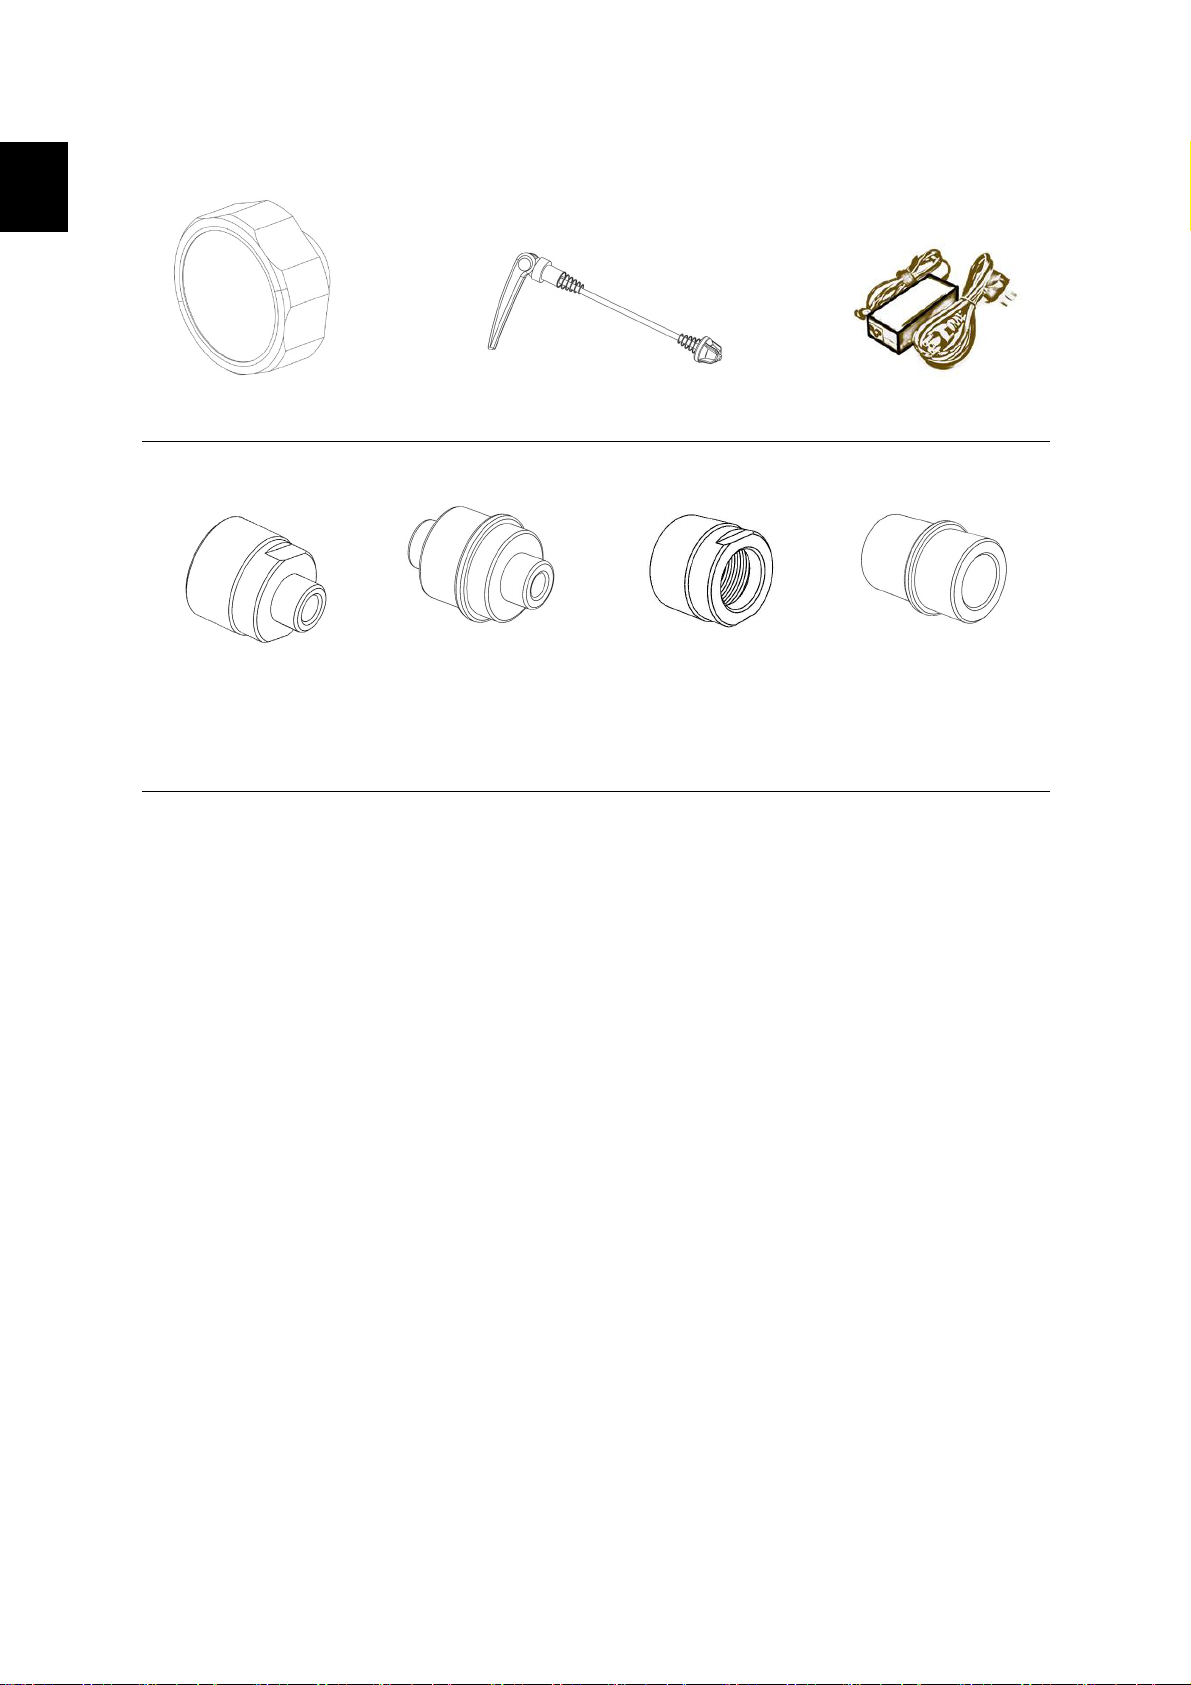
•130mm or 135mm quick release
installation
When installing on a quick release
bicycle frame, you need to use adapter A,
adapter B and the quick release kit (these
three accessories are included in the
package). Please refer to the illustration
on the right for the installation.
•142mm or 148mm thru axle
installation
When installing on a thru axle bicycle
frame, you need to use adapters C and D
(the two accessories are included in the
package). Please refer to the illustration
on the right for the installation.
Please use the supplied power adapter
and plug one end into a wall outlet.
Connect the other end to the power jack
on the bike trainer as shown in the
illustration on the right.


 Service manual")


