User Manual
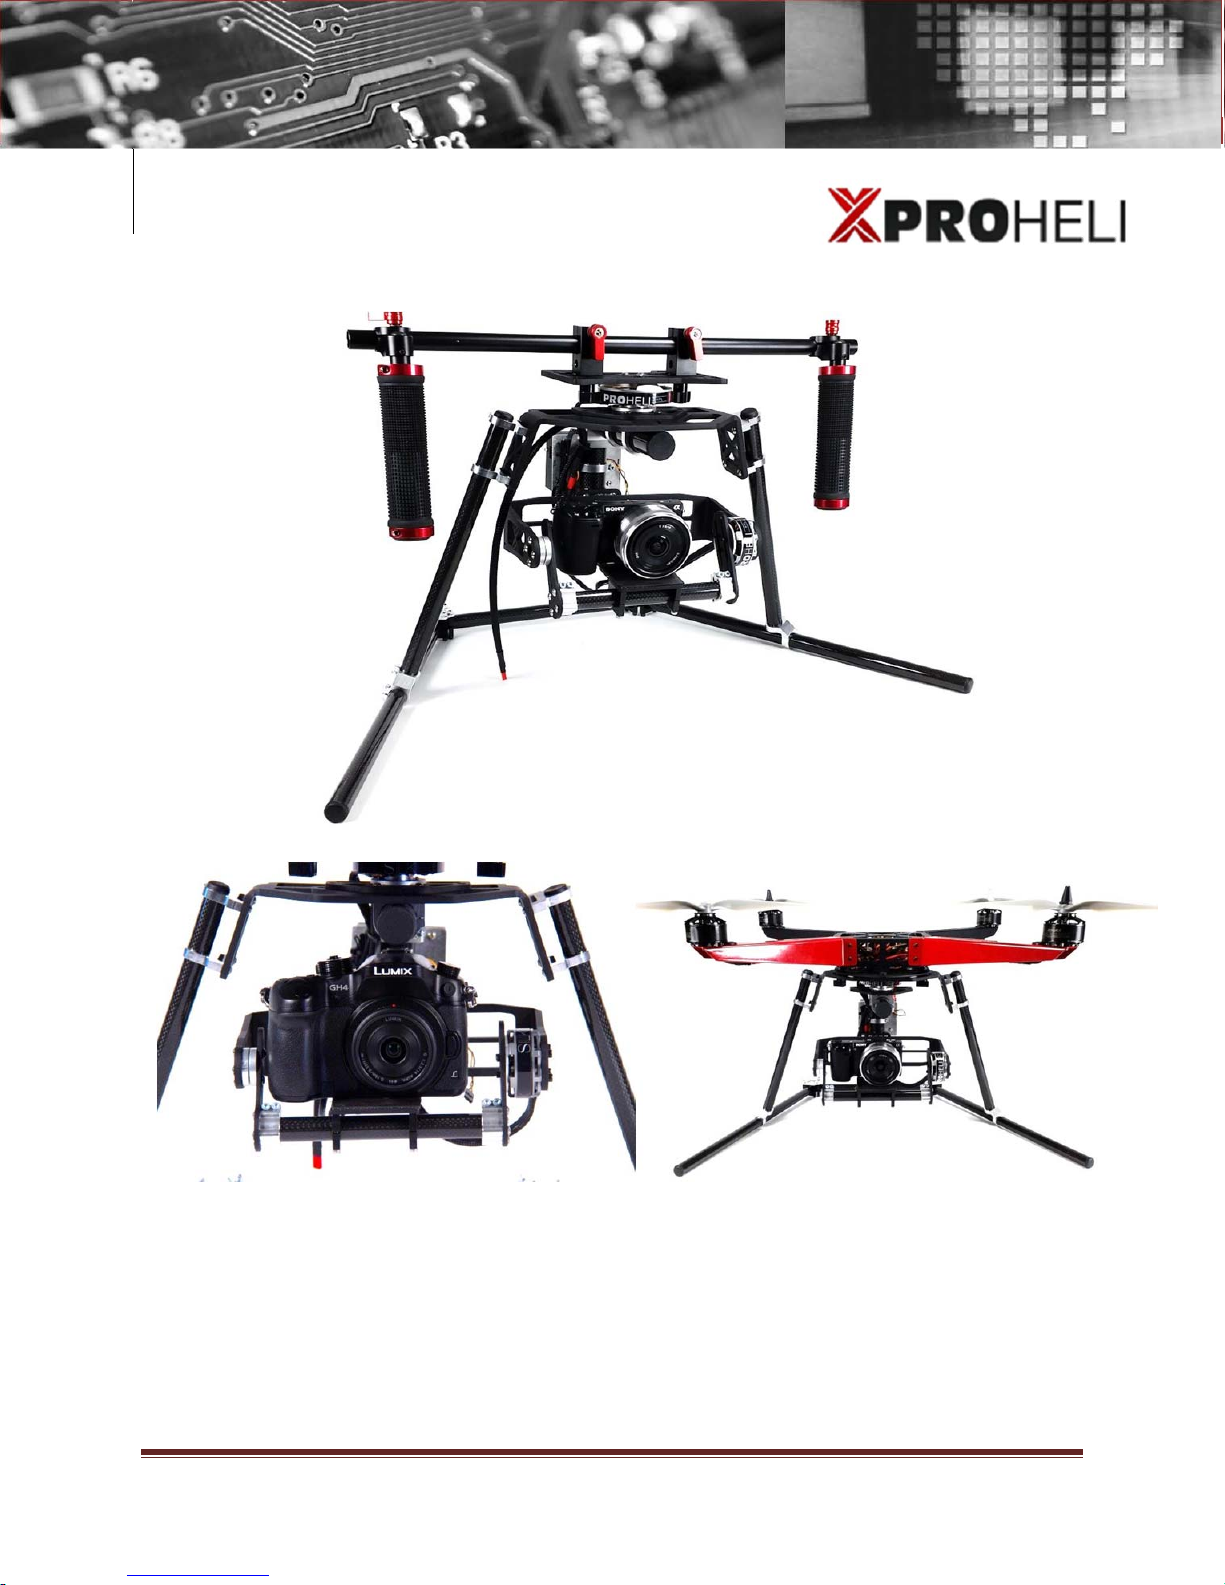
XProHeli Silk Gimbal
Silk Gimbal Page 0
©2013 XPROHELI. All Rights Reserved.
Table of Contents
Revision History .......................................................................................................................................ii
1. Welcome..............................................................................................................................1
Warning & Disclaimer! ............................................................................................................2
2. Overview..............................................................................................................................4
FPV Video...............................................................................................................................................5
Opertating Modes................................................................................................................................5
Remote Operation................................................................................................................................6
Supported Cameras.............................................................................................................................7
Silk Specifications..................................................................................................................................8
Silk Setup Videos:...................................................................................................................................9
Unpacking your SILK ...........................................................................................................................10
3. Silk Setup............................................................................................................................11
Overview................................................................................................................................11
Landing Gear / Stand...........................................................................................................12
Assembly...............................................................................................................................................13
Mount Silk to Landing Gear/Stand...................................................................................................15
Mounting and Balancing Your Camera .............................................................................17
Overview..............................................................................................................................................17
Mounting Camera..............................................................................................................................17
Adjusting Balance...............................................................................................................................19
Mounting Battery ................................................................................................................................23
Powering On Silk..................................................................................................................................25
4. XPX/XP2 Installation..........................................................................................................26
Overview................................................................................................................................26
Mounting to your XPX:..........................................................................................................26
Single Operator:..................................................................................................................................27
Dual Operator: ....................................................................................................................................29
Mounting XPX Flight Pack:...................................................................................................31
5. SILK SOFTWARE...................................................................................................................32
Overview................................................................................................................................32
Connecting Silk to Your Computer ..................................................................................................32