3
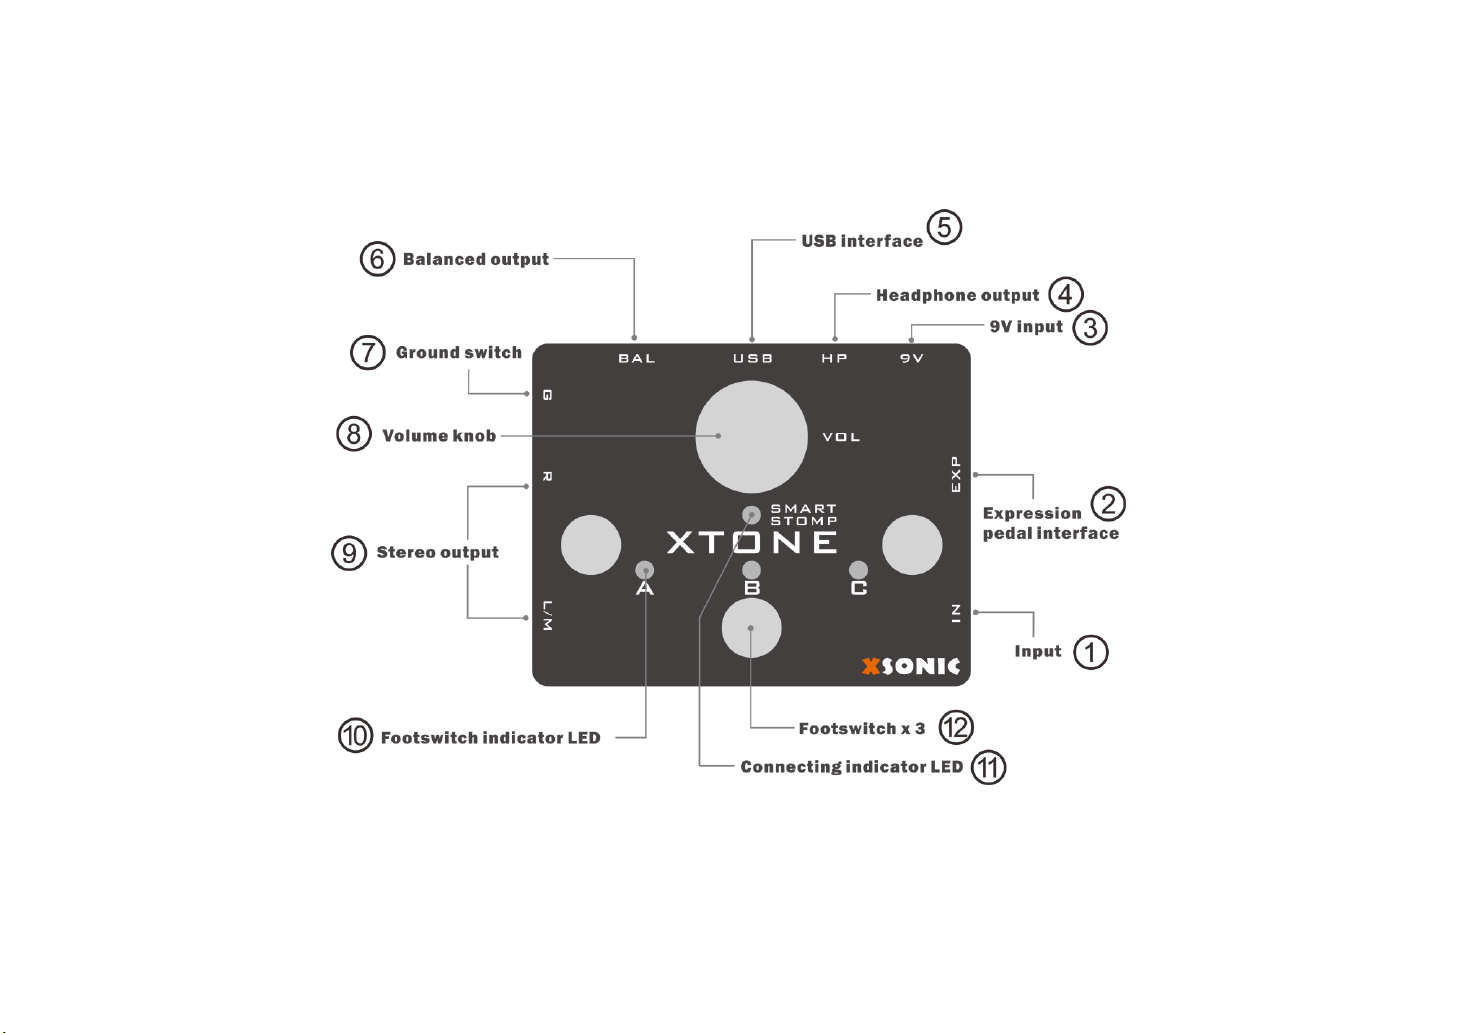
①Guitar and line input: Specialized input interfacefor guitar, bass, it is left channel. The interface does not pass any preamp, ensuring pure clear sound. This
also means that the interface can be used for line input.
②Expression pedal input: This interface can be connected to the expression pedal using the TRS cable. You can specify any desired expression control in
software effects. For more details, please refer to the MIDI chapter below.
③Auxiliary power input: Usually not connected. Connect the 9V DC adaptor, then XTONE will stop taking power from the USB interface.
④Headphone output: Used to connect headphones, support low and high impedance headphones.
⑤USB interface: Used to connect iPhone, iPad, PC, Mac. XTONE can be powered directly by these devices. Use the USB cable to connect to your PC or
Mac; use the OTG cable + USB cable to connect to your iPhone or iPad.
⑥Balanced Output: For long-distance anti-jamming transmission with ground switch. Professional audio equipment such as mixers can be connected. Toggle
the ground switch to eliminate noise caused by long-distance transmission.
⑦Ground switch: Toggle the ground switch to eliminate noise caused by long-distance transmission.
⑧Output volume control: This knob controls the output master volume, including stereo line, XLR, and headphone output.
⑨Stereo line output: Unbalanced stereo line output for connecting monitors, guitar amps, mixers, etc.
⑩Footswitch LED indicator: XTONE has 3 footswitches LED indicator(A, B, C).
⑪Working mode indicator: If XTONE is to work normally, this indicator must light up, otherwise it will not enter the normal working condition. This indicator
lights up when the smart device is connected. At the same time, the indicator has 3 light colors: green, blue and red, indicating that they are in different MIDI
command groups. For more details, please refer to the MIDI chapter below.
⑫Footswitch: When the foot switch is pressed, the corresponding LED lights up and XTONE sends MIDI commands outward. You can specify any features
that you want to control via MIDI in software effects. For more details, please refer to the MIDI chapter below.