XtraVac TS420 User manual

Safe Operation Practices
General Operation
.Read, understand, and follow all instructions in the manual and on the machine before starting.
Keep this manual in a safe place for further and regular reference and for ordering
replacement parts.
.Only allow people who familiar with the instructions to operate the machine. Be sure to know
controls and how to stop the machine quickly.
.Do not put your hands near moving parts.
.Remove all obstacles, which may interfere with the machine functions.
.Clear the work area such as electrical wires, gloves, knives etc.
.Be sure that everyone else is clear of your work area before operating the machine.
.Do not sit nor stand on the machine.
.Be sure turn off the machine after your work is finished. Never leave a running machine
unattended.
.Always disconnect and wait until the machine has cooled before doing any maintenance.
.Do not wear loose fitting clothes or jewelry as they may get caught in moving parts of the
machine.
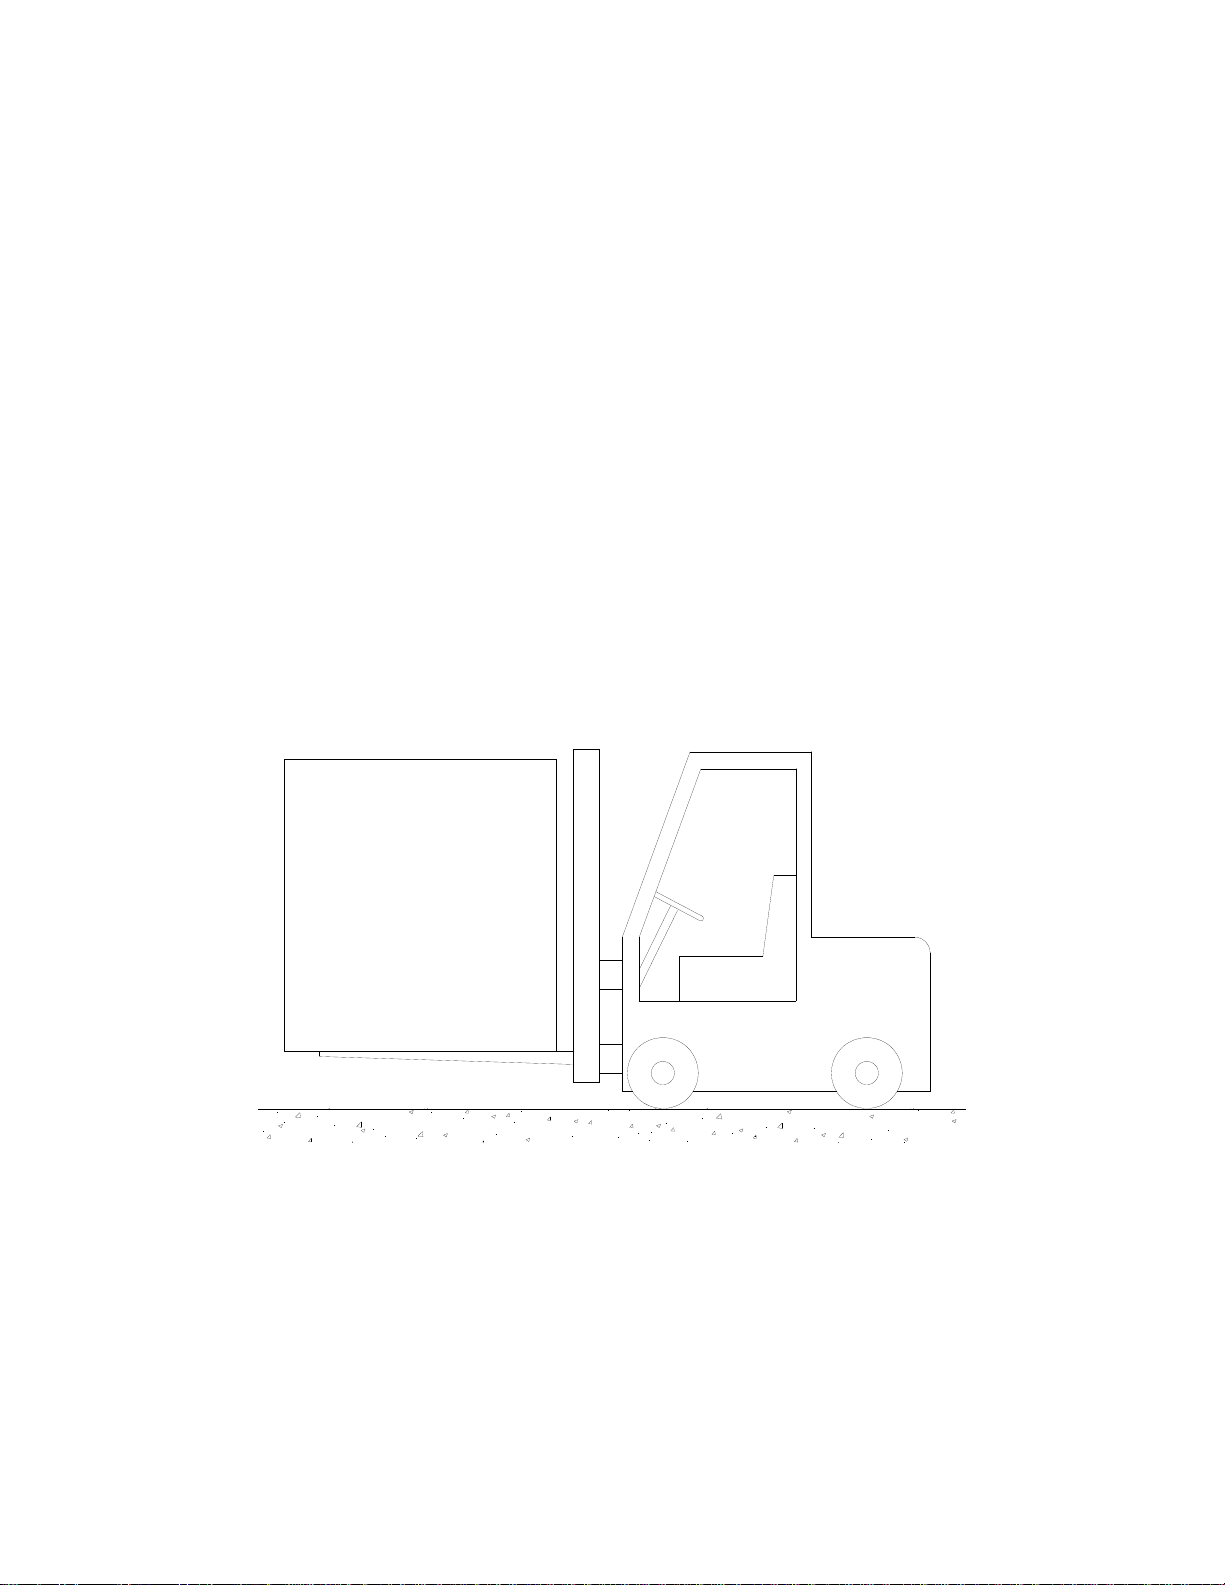
.Please wear security shoes, to avoid injury caused by moving the machine or objects falling
from the machine.
.Never exceed the time limit to seal, which is suggested by the manufacturer. This is to avoid
any damage that may be caused to the sealing bars and to reduce the risk of fire in the
machine.
.Never touch the sealing bars after they have been used, this will avoid corporal burns. Wait a
few minutes to let the machine cool down before touching.
.Make sure the sealing bars are well installed in their “Guide Blocks” before starting package.
.Never incline the machine more than 30 degrees, it may tip over and hurt someone seriously.
Your responsibility
This machine should only be operated by personal who can read, understand and respect
warnings and instruction regarding this machine in the owners manual.

1
Content
Chapter 1:Safety precautions
1.1 Precautions of transportation, installation and packing
1.2 Precautions before and after machine starting
Chapter 2:Overall description of the machine
2.1 Features of the machine
2.2 Function of the machine
2.3 Product proper for this machine
2.5 Marking location and content description
2.6 Specification of the machine
Chapter 3:Function description of the pushbuttons on
the panel
Chapter 4:Instructions of operation, maintenance and
troubleshooting
4.1 Operation sequence
4.2 Maintenance
4.3 Troubleshooting
Chapter 5:Related environment and accessories of the
machine
5.1 Accessory

2
5.2 Airborne noise level
5.3 Storage condition
5.4 Operation environment

3
Chapter 1:Safety precautions
1.1 Precautions of transportation, installation and packing
1.1.1 Preparations before installation
1.1.1.1 Power requirement:
Voltage: Look at the nameplate
Current: Look at the nameplate
Frequency: 50/60Hz
Phase: 3Ø
1.1.1.2 Installation requirement
1.1.1.2.1 Prevent to install the machine in the environment full of dust and corrosive
atmosphere with acid and alkali.
1.1.1.2.2 Prevent to install the machine in the environment with abnormal vibration.
1.1.1.2.3 Prevent to install the machine under direct sunlight or near vapor. Such will
affect its vacuum degree.
1.1.1.2.4 The ground circuit should be independently or parallel.
1.1.1.2.5 Don’t install the machine in the potentially explosive atmosphere.
1.1.1.2.6 Installation space includes the requirement of the operator and machine
Length × Width × Height = 1m×1.5m×2.5m

4
(Unit: mm)

5

6
1.1.2 Preparations during transportation
1.1.2.1 The weight of this machine is 100-150kg, so that the loading capacity of any handling
device is recommended to be more than 1000kg. If you are not sure of the safe
loading capacity, please contact the manufacturer of such handling device. If the
situation is clearly understood, don’t try to handle the machine by yourselves.
1.1.2.2 Either by lifting or by handling, it’s necessary to check the balance carefully in
advance.
1.1.2.3 The work of lifting or by handling should be carried out by means of qualified
operator.
1.1.2.4 During machine handling, any people or car is not allowed to approach the
surrounding of the machine.
1.1.2.5 During handling, notice that whether there is any person or barrier on the handling
path and the surrounding of the machine. If it is, clear it before machine handling.

7
1.1.3 Precautions during packing
1.1.3.1 Packing material: The base is wood and main part is cardboard box.
1.1.3.2 Packing sequence: Put the wood base on the ground. Then, put the machine on it.
Next, pack the machine with plastic film and put vibration-absorbing board around
the machine. Then, put the cardboard box on the machine. Use nails to fix the
cardboard box and wood base. At last, bind it with pp stripes.
1.2 Precautions before and after machine starting
1.2.1 Precautions before machine starting
1.2.1.1 Before using this machine, read and realize the contents of this manual in detail.
1.2.1.2 Check that whether the voltage is correct.
1.2.1.3 Confirm that whether the electric power and its rating is sufficient
1.2.1.4 Check that whether all the safety related devices are normal, and notice that whether
anyone within the danger zone.
1.2.1.5 Visual check that whether all mechanical and electric parts are normal, and also
notice that whether the surrounding environment is clean.
1.2.1.6 Sequences of power on:
1.2.1.6.1 Turn on the factory power.
1.2.1.6.2 Turn on the main switch of the machine.(31)
1.2.1.6.3 Connect the air to the machine by quick connector.(3-1)
1.2.1.6.4 Connect the connector of the nitrogen container to nitrogen inlet. (4)
1.2.2 Precautions after machine starting
1.2.2.1 Confirm that whether the display is correct.

8
1.2.2.2 Confirm that whether the sound coming from pump running is normal (refer to clause
3.12.2).
1.2.2.3 Confirm that whether the pneumatic pressure is sufficient. Normal pressure is 5 bars.
1.2.2.4 Wear safety shoes, protection clothes and mask to ensure safety and hygiene of the
operator.

9
Chapter 2:Overall description of the machine
2.1 Features of the machine
2.1.1 Use box packaging that can keep product original shape.
2.1.2 Design the mold according to different product size.
2.1.3 The machine main body is made of stainless steel with features of pretty appearance,
well endurance and easy cleaning.
2.1.4 The machine adopts high vacuum pump (imported from Europe) micro-computerized
auto control system with water-resistance design.
2.1.5 The machine is fitted with 10 sets of friendly memory function with independent
display.
2.2 Function of the machine
2.2.1 Keep food fresh, original taste, anti-septic
2.2.2 Extend the preservation limit.
2.2.3 It is proper for contents of solid, powder or liquid.
2.3 Product proper for this machine
2.3.1 Meat, seafood, agriculture products, dehydrated food, herbs, vegetarian food, pickles
and spices.
2.3.2 Electronic components, ironmongery components, medical equipment, clothes, powder
and flavoring

10
2.5 Marking location and content description
2.5.1 Nameplate: stuck on the right/upper side of the machine
2.5.2 CE marking: stuck on the right/upper side of the machine
2.5.3 Warning sign: stuck on the rear side of the machine

11
2.5.4 Warning sign:
WARNING

12
2.6 Specification of the machine
Type TS420
Machine dimension 880 x 920 x 1470 mm
Maximum packaging box
dimension 480 x 270 x 110 mm
Machine weight 120 kg
Motor 1.5 kW
Heater 2.2 kW
Max diameter of film roll 250mm

13
Chapter 3:Function description of the pushbuttons on the panel
A Memory set display (10 sets)
B Vacuum time display
C Nitrogen filling time display
D Sealing time display
E Cooling time display
F Memory release key
G Memory input key
H Reserved key
I E-stop key
J Time increase key
K Time decrease key

14
3.1 Memory set display(A): display the current memory set (e.g. ”3” means the 3rd set)
3.2 Vacuum time display(B): display the current setting of vacuum time (unit: 1/s)
3.3 Nitrogen filling time display(C): display the current setting of nitrogen filling time
(unit: 1/s)
3.4 Sealing time display(D): display the current setting of sealing time (unit: 0.1/s)
3.5 Cooling time display(E): display the current setting of cooling time (unit: 1/s)
3.6 Memory release key(F): press key for modifying memory function
3.7 Memory input key(G): press key for locking memory function
3.8 Reserved key(H): key reserved for further use.
3.9 E-stop key(I): make timing function stop, and release the upper lid.
3.10 Time increase key(J): press key for time adding
3.11 Time decrease key(K): press key for time reducing
3.12 Sequence of trial run:
3.12.1 Connect the power.
3.12.2 If the running condition sounds smoothly, it’s clockwise rotating. If there is abnormal
noise coming out, it’s counterclockwise rotating, and please turn off the machine
immediately. Then, change the power wires.
※Attention: remember to ground the machine.
3.12.3 Packaging test:
(A) Test the sealing temperature and adjust the sealing time in accordance with Chapter
3 page 10(D).
(B) Test the vacuum level and adjust the vacuum time in accordance with Chapter 3
page 10(B).
(C) Test the nitrogen filling time and adjust it in accordance with Chapter 3 page 10(C).
Too short will deform the packaging box.
(D) Test the controlled temperature and adjust it from temperature display.
3.12.4 If everything is OK, operate the machine according to the instructions in Chapter 4
for normal production.

15
L Cycle stop button
M Main switch
N Vacuum gauge
O Increase button
P Decrease button
Q Current temperature display unit : ゚C
R Temperature setting display unit : ゚C
S Shift
T Switch function
Note: recommended temperature will be 170 – 180 Celsius degree.
recommended inlet air pressure : 5-6 kg / m³
recommended inlet gas pressure : 2-3 kg / m³

16
Chapter 4 Instructions of operation, maintenance and
troubleshooting
4.1 Operation sequence:
4.1.1 Switch power switch (M) on, then the indicator of the display screen is lit. Pump starts
working, and heating system. It takes 20-30 mins to reach 180 ゚ C from normal
temperature.
4.1.2 Press memory release key (F), then the display screen starts flashing.
4.1.3 Press “↑” or “↓” to input set number and time.
Note: Optimal vacuum level will takes around 10-11 seconds.
4.1.4 Then, press Memory input key (G) to set program. After that, start packaging process.
4.1.5 If you want to start packaging process after setting, press start button both side (P36-17
or P38-21). Then, chamber moves automatically, the pump starts running for packaging
process. After cooling process, the sealing support will return to original position. At
this time, the machine will emit buzzer. Chamber comes back.
Note: first of all, test the position of film without tray is recommended.
4.1.6 If there is emergency situation happened during packaging process, press the Cycle-stop
(L) button to stop the cycle.

17
4.1.7. Rewind film
Note: Be aware the black detected point should go through sensor (P23-12)
4.1.9 Usage of the FRL:
1. Connect the air inlet.
2. Pull up the adjusting knob to adjust the required pressure (rotate clockwise to
increase the pressure, and counterclockwise to reduce the pressure). Then, push it
down. If the lubricant(5#) level is lower than “MIN” mark after a period of time, fill
the lubricant to “MAX” level.

18
No. Description
3-1 Air inlet
3-2 Pressure gauge
3-3 Adjusting knob
3-4 Oil cup
3-5 Oil adjusting knob
3-6 Oil filling hole
Note: recommended air pressure will be 5-6 kg/cm2.

19
4.2 Maintenance:
4.2.1 Cleaning of vacuum chamber
4.2.1.1 If the working process is finished, use clean and wet cloth to wipe the vacuum
chamber and sealing set.
4.2.2 Vacuum oil replacement.
4.2.2.1 Recommended vacuum oil: BP Engergol RC100, Esso Nuto H100, Mobil Rarus 427.
4.2.2.2 Drain the oil completely before filling new oil.
4.2.2.3 Oil capacity should be kept at least two-thirds of total amount.
4.2.3 Change the oil of the vacuum pump for every 300 hours. If the packaged product is full
of juice, shorten the oil replacing cycle time. Also check the oil level from oil sight
glass every week. Oil capacity should be kept at least two-thirds of total amount. If the
oil is dirty, please replace it immediately.
4.2.4 The disposal of discarded material should be in accordance with the local environmental
regulations.
4.2.5 Detail drawing of the oil pump
1. Oil filling hole
2. Oil sight glass
3. Oil draining hole
Table of contents