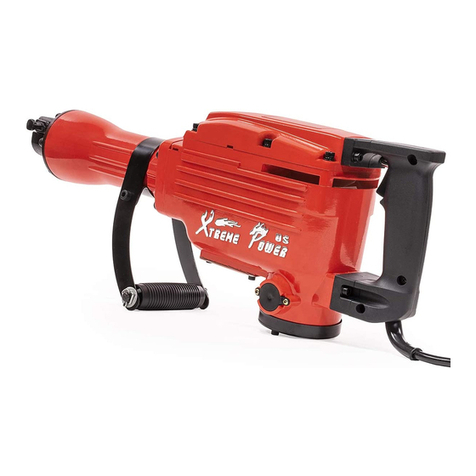
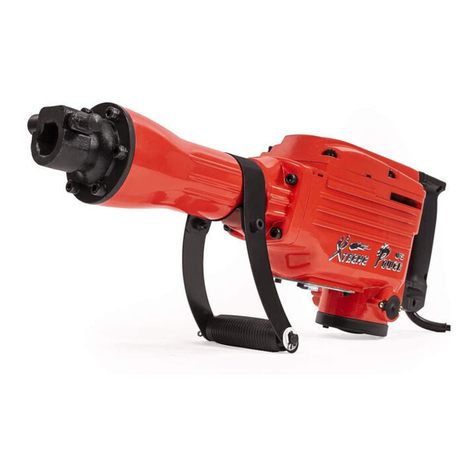
Xtreme Power 61105-XP Original instruction manual

SAVE THIS MANUAL: KEEP THIS MANUAL FOR SAFETY WARNINGS, PRECAUTIONS, ASSEMBLY,
OPERATING, INSPECTION, MAINTENANCE AND CLEANING PROCEDURES. WRITE THE PRODUCT’S
SERIAL NUMBER ON THE BACK OF THE MANUAL NEAR THE ASSEMBLY DIAGRAM (OR MONTH
AND YEAR OF PURCHASE IF PRODUCT HAS NO NUMBER).
OWNER’S MANUAL AND SAFETY INSTRUCTIONS
1000W 1-1/2” ELECTRIC JACK HAMMER CONCRETE BREAKER
WITH CHISEL BITS & CASE
ITEM: 61105-XP
FOR QUESTIONS PLEASE CALL OUR CUSTOMER SUPPORT: (909) 628 0880 MON-FRI 9AM TO 3PM PST

IMPORTANT SAFETY INFORMATION
GENERAL SAFETY WARNINGS
Read all safety warnings and instructions. Failure to follow the warnings and instructions may
result in electric shock, re and/or serious injury. Save all warnings and instructions for future
reference.
SAFETY
The warnings, precautions, and instructions discussed in this instruction manual cannot cover
all possible conditions and situations that may occur. It must be understood by the operator that
common sense and caution are factors which cannot be built into this product, but must be supplied
by the operator. Read carefully and understand all ASSEMBLY AND OPERATION INSTRUCTIONS
before operating. Failure to follow the safety rules and other basic safety precautions may result in
serious personal injury.
Read and understand all instructions. Failure to follow all instructions may result in serious injury
or property damage.
Do not allow persons to operate or assemble the product until they have read this manual and
have developed a thorough understanding of how it works.
Do not modify this product in any way. Unauthorized modication may impair the function and/or
safety and could affect the life of the product. There are specic applications for which the product
was designed.
Use the right tool for the job. DO NOT attempt to force small equipment to do the work of larger
industrial equipment. There are certain applications for which this equipment was designed. This
product will be safer and do a better job at the capacity for which it was intended. DO NOT use
this equipment for a purpose for which it was not intended.
Industrial or commercial applications must follow OSHA requirements.
Inspect the work area before each use. Keep work area clean, dry, free of clutter, and well-lit.
Cluttered, wet, or dark work areas can result in injury. Using the product in conned work areas
may put you dangerously close to cutting tools and rotating parts.
Do not use the product where there is a risk of causing a re or an explosion; e.g., in the
presence of ammable liquids, gases, or dust. The product can create sparks, which may ignite the
ammable liquids, gases, or dust.
Do not allow the product to come into contact with an electrical source. The tool is not insulated
and contact will cause electrical shock.
Keep children and bystanders away from the work area while operating the tool. Do not allow
children to handle the product.
Be aware of all power lines, electrical circuits, water pipes, and other mechanical hazards in
your work area. Some of these hazards may be hidden from your view and may cause personal
injury and/or property damage if contacted.
1

IMPORTANT SAFETY INFORMATION
Stay alert, watch what you are doing, and use common sense when operating the tool. Do not use the
tool while you are tired or under the inuence of drugs, alcohol, or medication.
Dress properly. Do not wear loose clothing, dangling objects, or jewellery. Keep your hair, clothing and
gloves away from moving parts. Loose clothes, jewellery, or long hair can be caught in moving parts.
Air vents on the tool often cover moving parts and should be avoided.
Wear the proper personal protective equipment when necessary. Use ANSI Z87.1 compliant
safety goggles (not safety glasses) with side shields, or when needed, a face shield. Use a dust mask
in dusty work conditions. Also use non-skid safety shoes, hard-hat, gloves, dust collection systems,
and hearing protection when appropriate. This applies to all persons in the work area.
Do not overreach. Keep proper footing and balance at all times.
Remove keys or wrenches before connecting the tool to an air supply, power supply, or turning on
the tool. A wrench or key that is left attached to a rotating part of the tool may cause personal injury.
Secure the work with clamps or a vise instead of your hand when practical. This safety
precaution allows for proper tool operation using both hands.
Do not force the tool. Products are safer and do a better job when used in the manner
for which they are designed. Plan your work, and use the correct product for the job.
Check for damaged parts before each use. Carefully check that the product will operate properly
and perform its intended function. Replace damaged or worn parts immediately. Never operate the
product with a damaged part.
Do not use a product with a malfunctioning switch. Any power tool that cannot be controlled with
the power switch is dangerous and must be repaired by an authorized service representative
before using.
Disconnect the power/air supply from the product and place the switch in the locked or
off position before making any adjustments, changing accessories, or storing the tool. Such
preventive safety measures reduce the risk of starting the tool accidentally.
Store the tool when it is not in use. Store it in a dry, secure place out of the reach of children. Inspect
the tool for good working condition prior to storage and before re-use.
Use only accessories that are recommended by the manufacturer for use with your product.
Accessories that may be suitable for one product may create a risk of injury when used with
another tool. Never use an accessory that has a lower operating speed or operating pressure than
the tool itself.
Keep guards in place and in working order. Never operate the product without the guards in place.
Do not leave the tool running unattended.
Always wear the proper protective equipment including ANSI Z87.1 compliant eye protection, NIOSH
compliant breathing protection, anti-vibration work gloves, steel toed work boots, and a helmet.
2

VIBRATION SAFETY
This tool vibrates during use. Repeated or long-term exposure to vibration may cause
temporary or permanent physical injury, particularly to the hands, arms and shoulders. To
reduce the risk of vibration-related injury: Do not smoke during use. Nicotine reduces the
blood supply to the hands and ngers, increasing the risk of vibration-related injury.
GROUNDED TOOL SAFETY
Check with a qualied electrician if you are in doubt as to whether an outlet is properly
grounded. Do not modify the power cord plug provided with the tool. Never remove the
grounding prong from the plug. Do not use the tool if the power cord or plug is damaged.
If damaged, have it repaired by a service facility before use. If the plug will not t the outlet,
have a proper outlet installed by a qualied electrician.
1. Tools marked with “Grounding Required” have a three wire cord and three prong grounding
plug. The plug must be connected to a properly grounded outlet. If the tool should electrically
malfunction or break down, grounding provides a low resistance path to carry electricity
away from the user, reducing the risk of electric shock.
2. The grounding prong in the plug is connected through the green wire inside the cord to
the grounding system in the tool. The green wire in the cord must be the only wire connected
to the tool’s grounding system and must never be attached to an electrically “live” terminal.
3. Tools marked “Double Insulated” do not require grounding. They have a special double
insulation system which satises OSHA requirements. Double insulated tools may be used
in either of the 120 volt outlets shown below.
3

EXTENSION CORD SAFETY
Grounded tools require a three wire extension cord. Double Insulated tools can
use either a two or three wire extension cord.
1. As the distance from the supply outlet increases, you must use a heavier gauge
extension cord. Using extension cords with inadequately sized wire causes a serious
drop in voltage, resulting in loss of power and possible tool damage.
4. If you are using one extension cord for more than one tool, add the nameplate
amperes and use the sum to determine the required minimum cord size.
2. The smaller the gauge number of the wire, the greater the capacity of the cord.
For example, a 14 gauge cord can carry a higher current than a 16 gauge cord.
5. If you are using an extension cord outdoors, make sure it is marked with the sufx “W-
A” (“W” in Canada) to indicate that it is acceptable for outdoor use
3. When using more than one extension cord to make up the total length, make sure
each cord contains at least the minimum wire size required.
6. Make sure the extension cord is properly wired and in good electrical condition.
Always replace a damaged extension cord or have it repaired by a qualied electrician
before using it.
7. Protect the extension cords from sharp objects, excessive heat, and damp or wet
areas.
4

SPECIFICATIONS AND FEATURES
APPLICATIONS
Crushing concrete, chipping, digging and squaring. Installation on piping, wiring, sanitary
facility installation, machinery installation, water supply and drainage work, interior jobs,
ahrbor facilitites and other civil engineering work.
Voltage: 110 V/60 HZ
Input Power: 1000W
Hammer frequency: 3000BPM( RPM)
Max. Drill Capacity Dia.: 1-1/2’’/38MM
1 x 1-1/2’’Demolition Jack Hammer
1 x Side Handle
1 x Point Chisel (5/8” Hex Shank)
FEATURES
1 x Flat Chisel (5/8” Hex Shank)
This 3000 RPM demolition jack hammer is ideal for easily tearing through concrete and
mortar. It features a ball bearing construction for extended longevity as well as an adjustable
360 degree side handle and an ergonomic D-grip handle for fully control. This jack hammer
is great for landscaping or extensive home remodeling.
PACKAGE CONTENTS
1 x Key Wrench
1 x Pair of Spare Carbon Brushes
1 x Carry Case
1 x User’s Manual
5

STANDARD ACCESSORIES
1. Steel Case
2. Hexagon Bar Wrench
3. Wrench
4. Bull Point
MAINTENANCE AND INSPECTION
1. Inspecting the tool. Use of a dull tool will cause the motor to malfunction and degrade.
Be sure to replace with a new fresh blade when wear or abrasions are noticed.
2. Inspecting the mounting screws. Regularly inspect all mounting screws and ensure
that they are properly tightened. If any of the screws are loose, tighten them immediately.
Failure to do this right away could result in serious injury or malfunction of the tool.
3. Maintenance of the motor. The motor unit winding is the core of the power tool.
Exercise care to ensure the winding does not become damaged and/or wet.
4. Inspecting the carbon brushes. An excessively worn carbon brush could result in
motor trouble. Replace the carbon brush with a new carbon brush of the same number
when worn or near the “wear limit”. In addition, always keep carbon brushes clean and
ensure that they slide freely within the brush holders.
5. Replacement of the carbon brush. The carbon brush can be removed by removing
the tail cover and brush cap in that order in the interior for brush replacement.
6. Inspection of the dust cover. When the interior of the dust cover is worn, replace with
a new dust cover. Simply remove the dust cover by pulling.
NOTE: Due to the continual research and development of this power tool, the
specications herein are subject to change without notice.
** Standard accessories are subject to change without notice
1 x User’s Manual
6

PARTS DIAGRAM
7

PARTS LIST
8

10
TROUBLESHOOTING
THE MANUFACTURER AND/OR DISTRIBUTOR HAS PROVIDED THE PARTS LIST AND ASSEMBLY
DIAGRAM IN THIS MANUAL AS A REFERENCE TOOL ONLY. NEITHER THE MANUFACTURER OR
DISTRIBUTOR MAKES ANY REPRESENTATION OR WARRANTY OF ANY KIND TO THE BUYER THAT
HE OR SHE IS QUALIFIED TO MAKE ANY REPAIRS TO THE PRODUCT, OR THAT HE OR SHE IS
QUALIFIED TO REPLACE ANY PARTS OF THE PRODUCT. IN FACT, THE MANUFACTURER AND/OR
DISTRIBUTOR EXPRESSLY STATES THAT ALL REPAIRS AND PARTS REPLACEMENTS SHOULD BE
UNDERTAKEN BY CERTIFIED AND LICENSED TECHNICIANS, AND NOT BY THE BUYER. THE BUYER
ASSUMES ALL RISK AND LIABILITY ARISING OUT OF HIS OR HER REPAIRS TO THE ORIGINAL
PRODUCT OR REPLACEMENT PARTS THERETO, OR ARISING OUT OF HIS OR HER INSTALLATION
OF REPLACEMENT PARTS THERETO.
Record Product’s Serial Number Here:
Note: If product has no serial number, record month and year of purchase instead.
Note: Some parts are listed and shown for illustration purposes only and are not available individually
as replacement parts.
PLEASE READ THE FOLLOWING CAREFULLY
Table of contents
Other Xtreme Power Power Hammer manuals
Popular Power Hammer manuals by other brands

Würth
Würth MH 11-XE Translation of the original operating instructions

Performance
Performance M550DB owner's manual

EINHELL
EINHELL TC-DH 1600/1 Original operating instructions

Graphite
Graphite 58G876 instruction manual

Ferm Industrial
Ferm Industrial HDM1040P Original instructions

DeWalt
DeWalt DCH832 instruction manual

Bosch
Bosch 11335K - 35 lb. Demolition Breaker Hammer Operating/safety instructions

VARO
VARO Powerplus POWX11831 manual

Clas Ohlson
Clas Ohlson ZK-101 manual

Makita
Makita HM1111C instruction manual

Bosch
Bosch 11316EVS - SDS Max Demolition Hammer 14A... Operating/safety instructions

NPK
NPK PH1 Operator's manual