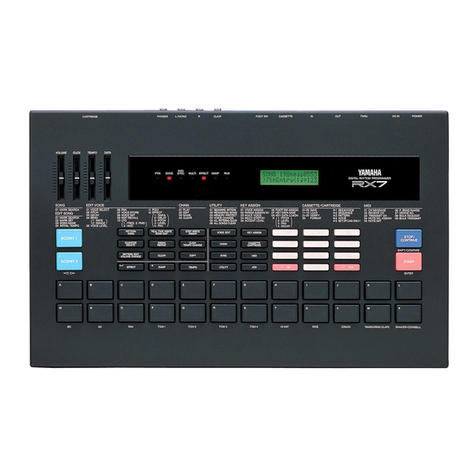
Yamaha RX-11 User manual

YAMAHA
^
DIGITAL RHYTHM PROGRAMMER
OWNER'S MANUAL

INTRODUCTION
Congratulations on your purchase of aYamaha RX11 Digital Rhythm
Programmer!
Your RX11 represents the crystallization of the most sophisticated
electronic music technology, combining advanced microcomputer
control with atop-quality digital PCM sound storage and reproduction
system. With the RX11 you will be able to program virtually any
type of rhythm pattern you required for your music, and since the
instrument sounds are digitally recorded, they are indistinguishable
from live percussion instruments.
To ensure that the RX11 will give you maximum performance and
versatility, we urge you to read this operation manual carefully before
attempting to operate the unit.
CONTENTS
CONNECTIONS 4
PRECAUTIONS
6
THE INSTRUMENTS
Getting to Know the RX11 Instruments 7
RX1 1Instrument Chart 7
Selecting Instruments 7
Some Instrument Limitations 8
Instrument Level 8
Stereo Positioning (PAN) 8
Accents 8
Setting Accent Levels 8
Instrument Output 9
PATTERN OPERATIONS
Pattern Selection 9
The START and STOP/CONTINUE Buttons 10
Tempo 10
Real-Time Pattern Programming 10
Step-Write Pattern Programming 12
Quantize 13
Click Time 14
Pattern Memory Usage Graph 14
Pattern Clear 14
Instrument Clear 15
Pattern Copy 15
The Swing Function 16
SONG OPERATIONS
The Song Mode &Song Selection 17
Editing (Assembling aSong} 17
The Level Set Function 17
The Insert Function 18
The Delete Function 18
Repeats 18
Programming Tempo Changes 19
Song Clear 20
The Chain Function 20
CASSETTE OPERATIONS
Save/Verify 21^
Load 2_
CARTRIDGE OPERATIONS
Format 23
All Save 23
Single Save 24
All Load 25
Single Load 25
MIDI FUNCTIONS
Sync Modes 27
MIDI Reception Parameters 27
Instrument Key Numbers .28
The Initialize Function 29
MIDI Transmission Parameters 29
ERROR MESSAGES
31
SPECIFICATIONS 32
BLOCK DIAGRAM 33
PATTERN CHART 34

CONTROL PANEL
VOLUME TEMPO DATA ENTRY
11
CARTRIDGE EXT CLK
PAN ACCENT LEVEL
INST LEVEL ACCENT
•
PATTERN ,WHITE ,
REALTIME STEP COPY SWING QUANTIZE CLICK CLEAR TEMPO -t 4 » +1
11
SONG
•
11
EDIT
1/4
11
INSERT
11/6
||1II II II 1
TEMPO
71/48
|I11
YES
91/19?
LZZ]
-OUT
DELETE
21/8
REPEAT TEMPO CHANGE CHAIN CLEAR
31/12 41/16 5t/24 6t/32
NO
81/64
II
IN MIDI-
11
FUNCTION 11
SYNC 11
CASSETTE 1 1
CARTRIDGE
111II II 1||
SAVE VERIFY LOAD FORMAT OUTPUT- INST CHANGE
SD1 TOM 1TOM 2BD1 HH OPEN ROE COWBELL SHAKER
BD2
3D2 TOM 3TOW4 BD2 HH CLOSED CRASH RIMSHOT CLAPS
CRASH
RUN
STOP CONTINUE
J

CONNECTIONS
MIDI EQUIPMENT
Awide variety of MIDI compotible equipment may
be used. These are just afew examples.
JBWS^aCD
Ed
:-j
iSSaQSHH
^DESHSQH
00 303
ana
|h|°]|:-i|r]|r-i|n|0| i~j
00
00
as
ui «u ... f.i j..- -.- —hhin
*hh ekt: l.j«.ai... n.,i..l.l.w.T.* '•'
II 1! Ill II III II III 1 1 I 1
QX SEQUENCER CX MUSIC COMPUTER DX SYNTHESIZER

OTHER
SOURCES
-OUTPUT TO SOUND/MONITOR SYSTEM
MULTITRACK RECORDER
PA OR
RECORDING MIXER
6O
OOO
CASSETTE "IN" OR "MIC" AC>
;
CASSETTE "OUT" OR "EAR" JACK
DATA CASSETTE RECORDER

PRECAUTIONS
•Avoid placing the RX11 in locations exposed to direct
sunlight or high temperatures, excessively high or low
humidity, high dust concentration, or vibration.
•Be sure to connect the RX11 to an AC power supply that
meets the power supply specifications listed on the rear of
the unit.
•If there is any danger of lightning occurrring nearby, remove
the power plug from the wall socket in advance.
•Be sure to make all connections properly, as described in
the "CONNECTIONS" section below.
•To avoid damaging your speakers and other playback
equipment, turn off the power of all related equipment
before making connections.
•Do not use excessive force in handling control switches and
knobs.
•To avoid broken cords and short circuits, be sure to unplug
all connectors by grasping the respective plugs—NOT the
cords.
•Remove the power plug from the AC mains socket if the
unit is not to be used for an extended period of time.
•Remove all plugs and connections if the unit is to be trans-
ported, to prevent damage to the cords and jacks.
•Do not use solvents such as benzene or paint thinner to
clean the unit. Do not use insecticides or other pressurized
spray products in proximity to the unit. Wipe off the
exterior with soft cloth.
EFFECTS ON OTHER ELECTRONIC
EQUIPMENT
•Since this unit incorporates digital circuitry, simultaneous
use of other equipment such as TVs, radios, etc. in close
proximity may cause noise and erroneous operation.
If this occurs, separate the affected units sufficiently to
eliminate the problem. It is also agood idea to use separate
line filters on each piece of equipment.
CAUTION
•The RX1 1pattern memory locations 00 through 36 contain
factory-programmed rhythm patterns when the unit is
shipped. Use the SAVE function (described on page **) to
save these patterns on cassette tape or memory cartridge
before programming your own patterns into these locations
in order to prevent loss of the pre-programmed patterns.

THE INSTRUMENTS
Getting to Know the RX11 Instruments
The RX11 instruments can be played in real-time (without
programming patterns or songs) by tapping on the black
instrument buttons.
Using either apair of headphones plugged into the RX11
PHONES jack, astereo sound system fed from the RX11 L
and ROUTPUT jacks, or asound system incorporating a
mixer fed from the RX11's individual instrument outputs,
turn the RX11 ON and repeatedly tap any of the black
instrument buttons (RIMSHOT, TOM1, TOM2, etc.) while
gradually increasing the level of the linear VOLUME control
until you can hear the instrument at acomfortable listening
level.
•Abrief output pulse appears at the RX11 outputs when
the power is initially turned on. To prevent this from
possibly damaging your speaker system, make sure the
fet master volume control of your sound system, or the volume
of the mixer channel to which the RX11 is connected, is
set to minimum before the RX11 is turned ON. Better
yet, turn the RX1 1on first, then your sound system.
You can now "play" all the instrument buttons to become
familiar with their sound. Some of the instrument buttons,
however, have more than one function. The following chart
lists all the instruments available with the instrument buttons:
(Instrument buttons with starts illustration)
Multi-Function Buttons are marked with astar
BD1
COWBELL SHAKER
EDDQ0D0D
mCLOSED CfWSH
HDD00D0Q
Dual-function buttons are marked with astar.
RX11 Instrument Chart
Instrument Button Instruments
SD1 Heavy snare
Medium snare
Light snare
Hi-tune snare 1
Hi-tune snare 2
Hi-tune snare 3
Hi-tune snare 4
Hi -tune snare 5
SD2 Heavy snare
Medium snare
Light snare
Hi-tune snare 1
Hi-tune snare 2
Hi-tune snare 3
Hi-tune snare 4
Hi-tune snare 5
TOM1 10" deep-body tom-tom
TOM2 12" deep-body tom-tom
TOM3 14" floor tom-tom
TOM4 **" floor tom-tom
Heavy bass drum
Medium bass drum 1
Medium bass drum 2
BD2 Heavy bass drum
Medium bass drum 1
Medium bass drum 2
HH OPEN Open Hi-Hat 1
Open Hi-Hat 2
HH CLOSED Closed Hi-Hat 1
Closed Hi-Hat 2
Pedalled Hi-Hat
RIDE Ride cymbal
CRASH Crash cymbal
COWBELL Cowbell 1
Cowbell 2
RIMSHOT Rimshot 1
Rimshot 2
CLAPS Hand claps 1
Hand claps 2
Selecting Instruments
First, enter the instrument select mode by holding down the
green FUNCTION button while pressing the white INST-
CHANGE button. The LCD panel will read "SELECT INST
MODE" indicating that the instrument mode is active. Then
press the black instrument button you wish to switch. Only
the multi-instrument buttons will have any effect in this
mode-SE, BD1, BD2, HH OPEN, HH CLOSED, COWBELL,
RIMSHOT and CLAPS.
If, in response to the "SELECT INST MODE" display, the
SD1 instrument button is pressed, the LCD panel will respond
with the currently selected SD1 voice (refer to above instru-
ment chart). This can be changed to any of the 8available
voices by using the +1/YES or -1/NO buttons to scroll
forward or backward through the voice list. Once the desired
snare has been selected, exit the instrument mode by pressing
the INST-CHANGE button.
The same method of selection applies to all multi-instrument
buttons: the +1/YES and -1/NO buttons select the instru-
ment, and the INST-CHANGE button exits the instrument
mode.
The instrument mode can be exited immediately (without
making an instrument selection) by pressing the INST-
CHANGE button.
Selecting Instruments (EX: SD1 Medium snare)
PATTERN 7l/j8
SHI +L_J^ ISELECT INST MODE
INST-CHANGE
^ISELECT LIGHT"
4ft- +1
IIII^|SELECT HEdTuF
©INST-CHANGE |SELECT PTN 00 j

Some Instrument Limitations
Some of the RX1 1instruments can not be used together on
the same beat: i.e. they can not be played simultaneously.
Instruments which can not be used on the same beat are:
•RIMSHOT, SD1 andSD2'.
•TOM3 and T0M4.
•BD1 and BD2.
•HH OPEN AND HH CLOSED.
Of course, all these instruments can be used in the same
pattern. It is advisable, therefore, to set similar instruments
to different voices permitting greater scope and variety in
pattern programming. SD1 and SD2 could be set to HEAVY
and LIGHT, for example.
Instrument Level
The RX11 lets you individually adjust the level (volume) of
each instrument so you can achieve the best overall balance
or "drum mix".
The instrument level mode is entered simply by pressing the
blue INST LEVEL button. The LCD panel will read "INST
LEVEL" to indicate that the instrument level mode is active.
Pressing any black instrument button then permits adjust-
ment of that instrument's level via the linear DATA ENTRY
control. The LCD panel will indicate the selected instrument
followed by the currently set level-e.g. "TOM1 LEVEL 15".
Maximum level for each instrument is 31, and minimum
level is 00 (no sound). The nominal level for all instruments
is 15. Once the instrument level mode is active, the instru-
ments can be selected using the corresponding instrument
buttons and adjusted in any sequence.
Press the INST LEVEL button asecond time to exit the
instrument level mode.
Instrument Level (EX: adjust TOM1 level)
INST LEVEL
©I I^flNST LEVEL
TOM1
a^|T0H1 LEVEL 15
Level =INST LEVEL
—00^31
=°°^3
Jf I!) |SELECT PTH 00
Stereo Positioning (PAN)
In addition to individually adjusting the level of each instru-
ments, the RX11 makes it possible to individually locate
instruments anywhere from left to right in the stereo sound
field. Actually, each instrument can be located at any one of
15 discrete stereo locations using the PAN function.
The pan mode is entered simply by pressing the blue PAN
button. The LCD panel will read "PAN LEVEL" to indicate
that the pan mode is active. The instrument to be positioned
is then selected by pressing the corresponding black instru-
ment button. The LCD panel will indicate the selected instru-
ment followed by the currently set PAN position-e.g. "RIM
L=08 R=08" would indicate that RIMSHOT is currently
panned to stereo center since the left and right channel
outputs are equal (08). "RIM L=1R=15" would indicate
that RIMSHOT is panned full-right (left channel output is
minimum while right output is maximum). Once an instru-
ment has been selected its PAN position is adjusted using
the linear DATA ENTRY control. Once the PAN mode is
active, instruments can be selected and adjusted in any
sequence.
Press the PAN button asecond time to exit the pan mode.
•The pan function only applies when the RX11 is in the
STEREO OUT mode (See "Instrument Output", below).
Stereo Positioning (EX: Pan RIMSHOT)
PAN
|^|PAN
®
©
LEVEL =H
RIM L=08"R =08
L=1-15
R=15-1 ACCENT LEVEL ^|SELECT PTH OQi
Accents
Pressing any instrument button while holding the green
ACCENT button causes that instrument to be output at its
accent level (set using the blue ACCENT LEVEL button)
rather than at its normal instrument level (set using the INST
LEVEL function). This applies whether the RX11 is beinr^i
played in real time or whether it is being programmed by—
either of the possible methods-real-time write or step write
(see PATTERN OPERATIONS section).
Setting Accent Levels
The accent level for each instrument can be set independent-
ly, making it possible to set the most natural level in relation
to the instrument's normal level.
The accent level mode is entered simply by pressing the blue
ACCENT LEVEL button. The LCD panel will read "ACCENT
LEVEL" to indicate that the accent level mode is active. The
instrument for which the accent level is to be set is then
selected by pressing the corresponding black instrument
button. The LCD panel will indicate the selected instrument
followed by its currently set accent level—e.g. "TOM1 AC
LEVEL 18". The accent level can then be adjusted using the
linear DATA ENTRY control.
The accent level range is the same as the instrument level
range: 00-31. The accent level setting, however, is added
to the instrument level setting to produce the actual accent
8

PATTERN OPERATIONS
level. For example, if the instrument level is set at 15 and
the accent level for that instrument is set at 05, then the
actual accent level will be 20.
Once the accent level mode is active, instruments can be
selected and adjusted in any sequence. Press the ACCENT
LEVEL button asecond time to exit the accent level mode.
Accent Level (EX: adjust TOM1 accent level)
^| ACCENT LEVEL ]
ACCENT LEVEL
©
©MT0H1 AC LEVEL 18
RATA ENTRY
AC LEVEL
=00-31ACCENT LEVEL
~$ =-fl SELECT PTN 00i
Instrument Output
The RX11 can be set to either the STEREO OUT or IN-
DIVIDUAL OUT output modes, depending on the appl ication
and sound system configuration. While output from the
individual outputs-COWBELL, CLAPS, SHAKER, TOM1,
TOM2, BD, SD/RM, HH, CRASH and RIDE-remains the
same in either mode, the output signal from the stereo R
and LOUTPUT jacks is different in each mode. In the
STEREO OUT mode, the Rand LOUTPUT jacks deliver
astereo mix of all the RX11 instruments, their positions in
the stereo field being determined by the PAN function,
described above. In the INDIVIDUAL OUT mode, however,
the Rand LOUTPUT jacks become the individual outputs
^jpr the TOM4 and TOM3 instruments, respectively.
he instrument output mode is selected by first pressing the
INST-OUTPUT button while holding the FUNCTION
button. The currently selected instrument output mode
will be displayed on the LCD panel: "STEREO OUT" or
"INDIVIDUAL OUT". Pressing the -1/NO button alternates
between the two modes, and pressing the +1/YES or INST-
OUTPUT button selects the displayed mode and returns to
the pattern or song mode.
An extra function is provided which determines whether
individual instruments are sent to the Rand LOUTPUT
jacks in the STEREO OUT mode. The stereo on/off funciton
is accessed by pressing the appropriate instrument button in
response to the "STEREO OUT" display, described above.
If you peress the SD1 button, for example, the display will
read "SD1 STEREO ON", indicating that the SD1 voice is
being fed to the stereo outputs. The +1/YES button selects
STEREO ON, and the -1/NO button selects STEREO OFF
for the specified instrument. Pressing the INST-OUTPUT
button returns to the pattern or song mode.
Pattern Selection
The RX11 is capable of storing up to 100 different patterns
(00—99) in its internal pattern memory. Each pattern can be
amaximum of 99 bars in length.
As shipped, the RX11 pattern memory contains 37 simple
factory-programmed patterns -in pattern memories 00
through 36-thatcan be played immediately.
To select apattern the RX11 must be in the pattern mode—
this is the mode that is active when the RX11 is initially
turned on. The red LED indicator above the PATTERN
label on the green PATTERN/SONG selector is lighted, and
the LCD panel reads either "SELECT PTN XX" (XX being
the selected pattern number) or "PLAY PTN XX:BRYY"
(XX being the selected pattern number and YY the currently
playing bar of that pattern). The red digital LED display also
indicates the number of the currently selected pattern.
Two methods of pattern selection are available:
1) Selecting Patterns Using the -1/NO and +1/YES Buttons
Pressing the -1/NO or +1/YES buttons decrements (de-
creases) or increments (increases) the selected pattern number
by one, respectively. This method of selection is easy when
going to an adjacent or nearby pattern number, but when
selecting apattern in adistant number range, the direct
numeric selection method is quicker.
2) Direct Numeric Pattern Selection
The row of white buttons below the uppermost row of
buttons on the panel can be used for direct numeric pattern
number selection. Note that each button has anumber-
from to 9—printed in white above its top left corner.
Entering the desired pattern number using these buttons
immediately selects that pattern. Input must be two digits—
e.g. pattern 00 requires the button to be pressed twice, to
select pattern number 7you would press the button and
then the 7button (07).
Selecting patterns (EX: pattern 00 -01 -» 24)
©|SELECT PTN 00
®SELECT PTN 01
tI/O 4V16 SELECT PTN 24

The START and STOp/CONTINUE Buttons Real-Time Pattern Programming
To play the selected pattern, simply press the red START
button. The red RUN LED will light to indicate that the
selected pattern is playing. If, for example, pattern number
15 is selected and played, the LCD panel will read "PLAY
PTN15:BR01" indicating that bar number 1(BR01 )of
pattern number 15 (PTN15) is playing.
To stop pattern playback press the blue STOP/CONTINUE
button. The pattern can be restarted by pressing the STOP/
CONTINUE button. In this case the pattern continues from
the point at which it was last stopped, rather than starting
from the beginning. Press START to start from the first
beat of the pattern.
New patterns can be selected in the pattern mode even if
another pattern is playing. When apattern is playing, the
newly selected pattern will begin immediately after the last
beat of the first pattern.
Tempo
The linear TEMPO control can be used to adjust the pattern
tempo. The TEMPO range is from 40 to 250 (40 to 250
quarter-note beats per minute).
For more precise tempo adjustment, however, use the TEMPO
function, activated by pressing the TEMPO key. When the
TEMPO key is pressed the LCD panel will indicate the
currently set tempo: e.g. "TEMPO =120". Although the
TEMPO control can still be used for coarse tempo adjust-
ment in this mode, finer control is available by using the
-1/NO and +1/YES buttons. Asingle, quick press on -1/NO
decrements the tempo by one beat, and +1/YES increments
by one beat. Holding either the —1 or +1 buttons down
causes continuous incrementing or decrementing in the
corresponding direction. The TEMPO function also makes
it possible to precisely set the desired tempo before beginning
playback.
TEMPO Function
TEMPO
NOTE
41TEMPO J=040
®~TEMPO«f r^n^fSELECT PTH
—40 -25CT tempo '
An understanding of the QUANTIZE function, des-
cribed below, is essential for effective use of the real-
time write function. We recommend that before
actually trying out the real-time write function you
should read through this section and then the
"Quantize" section below. Then come back to this
section and try out the function.
The RX11 permits programming your own rhythm patterns
using two different methods-REAL TIME WRITE and
STEP WRITE. The most direct of these is REAL TIME
WRITE. This function lets you "play" your rhythm on the
instrument keys, adding new instruments and rhythm lines
until the pattern is complete.
First, select the pattern number you wish to program (if
you're just starting, select aclear pattern—any pattern i
above 36). Enter the real time write mode (from the pattern -
mode) by pressing the REAL TIME WRITE button. The
LCD panel will indicate that the real time write mode is
active, and prompt you to input the time signature of your
pattern (the flashing block cursor will be located immediately
to the right of the first number of the time signature):
"REALT.W.04/4". The default time signature is 4/4 ("04/4"
on the LCD panel), and need not be entered if this is the
time signature you need. If you wish to enter another time
signature, however, use the white buttons labelled to 9
(1/4 to 1/192) in their top left corner. Each input must be
2digits. To input a3/8 time signature, first input the 3as
"03" and confirm that it has been entered correctly on the
LCD panel. Then press the REAL TIME WRITE button
again to enter the second part of the time signature (notice
that the flashing block cursor moves to the right of the
second time signature figure when the REAL TIME WRITE
button is pressed asecond time). The second part of the time
signature is entered using the fraction markings (1/4, 1/8,
1/6, etc.) over the number buttons. The RX11 will accept
time signatures up to 99/32; 1/48 and 1/192 inputs will be 1
ignored. Enter the 8 by pressing the button marked 1/8 and
confirm on the display. This completes entry of the time
signature. Now press the REAL TIME WRITE button again
and you will be prompted to input the length of your pattern
in bars: "REALT.W.01 BAR". The number of bars is entered
via the white number keys, and must be input as two digits:
2bars is input as "02", 4bars would be input as "04". A
pattern can have up to 99 bars.
To review, the real time write parameter input procedure is
as follows:
10
1
.
Press REAL TIME WRITE button to enter real time write
mode.
2. Enter first part of time signature via white number buttons
(integer markings, two digits).
3. Press REAL TIME WRITE button to move cursor to
second part of time signature.
4. Enter second part of time signature via number buttons
(fraction markings).
5. Press REAL TIME WRITE button to prompt for number
of bars in pattern.
6. Enter number of bars via number buttons, (integer mark-
ings, two digits).
•The real time write mode can be exited at any time by
pressing the STOP/CONTINUE button.
•Steps 2—6 above can be skipped if the default parameters
(4/4 time, 1bar) are acceptable.
You are now ready to program your pattern.
^Tap the red START button and you will hear the "click
.tack" rhythm guide. The first click of each bar is accented
(the actual time of the click function-whether the click
is heard on every 1/4 note, every 1/8 note, etc.—can be
adjusted using the CLICK function to be discussed later).
The RX11 will continue cycling through the full length of
the pattern while you record. Adjust the tempo using the
TEMPO control, and start playing. For multi-bar patterns
the first bar can be located by watching the LCD display
panel: e.g. "REALT.W BAR 02" indicates that the current
bar is bar 2. There's no need to try and input all instruments
at once. Just program one or two at atime, adding new
instruments on successive cycles of the pattern. Input accent-
ed beats by using the ACCENT button (See "Accents" in
the "THE INSTRUMENTS" section).
Make amistake? Single notes can be cleared by holding down
the CLEAR button (top row) and tapping the appropriate
instrument button at the timing of the note that is to be
cleared. When the pattern is complete, press the STOP/
CONTINUE button.
You can add new instruments and rhythm lines to already-
hprogrammed patterns by simply selecting the pattern, entering
the real time write mode, pressing the START button and
writing as usual. The time signature or bar length of apro-
grammed pattern CANNOT be changed. Time signature and
number of bars can only be programmed in clear patterns
(see the CLEAR function, below).
Real-Time Write (EX: 3/8 time, 2bars)
SELECT PTM XX "XX" =any clear pattern
number.
<D
REALTIME STEP
Eorr INSERT ^|REALT.W. 04 /4
1/4 3i/|2
SAVE VERIFY
REALTIME STEP
©LZZ]
»REALT.W. 03"/ 4
*REALT.W. 03 /4h
EDIT INSERT
©I ^|REALT.W. 03 /81
©REALTIME STEP
EOT INSERT f|REALT.W. 01 BAR
(T) \1^1I"f |REALT.W. 02 "BAR
CD m|REALT.W. BAR 02a |
f
|REALT.W. BAR Oil |
Enter pattern guided by click function.
STOP CONTINUE
^1SELECT PTN XX
I
11

Step-Write Pattern Programming
NOTE
An understanding of the QUANTIZE function, des-
cribed below, is essential for effective use of the step
write function. We recommend that before actually
trying out the step write function you should read
through this section and then the "Quantize" section
below. Then come back to this section and try out
the function.
While the REAL TIME WRITE function, described above,
lets you input rhythm patterns in real time by playing on the
instrument keys, the STEP WRITE function is used to input
notes one at atime. This method is ideal for programming
rhythm patterns from written scores, or from the pattern
charts provided in the RX11 PATTERN BOOK. It also
makes it possible to input extremely complex rhythm
patterns that would be impossible to program using the
real time method.
First select aclear pattern, then enter the step write mode
by pressing the STEP WRITE button (from the pattern
mode}. The LCD panel will indicate that the step write mode
is active, and prompt you to input the time signature:
"STEP W. 04/4". The default time signature is 4/4 ("04/4"
on the LCD panel), and need not be entered if this is the
time signature you need. Time signature entry is the same as
for real time write, as is entry of the pattern length in bars.
The entire STEP WRITE parameter input process is as
follows:
If aone-bar pattern has been selected, the RX11 will then
cycle back to the first beat of the bar, allowing you to
continue to add new instruments. In the step write mode,
only one instrument can be entered at atime. If more than
one instrument is to be entered on asingle beat, each instru-
ment must be entered on successive cycles through the bar.
If the pattern is more than one bar in length, the bar count
will advance by one once the maximum beat count has
been reached for each bar. The RX11 will cycle back to the
first beat of bar 1after the last beat of the last bar has been
entered.
Exit the step write mode by pressing the STOP/CONTINUE
button.
STEP WRITE mistakes can be corrected in the same way as
REAL TIME WRITE mistakes: when you reach the beat at
which the erroneous entry was made, simply hold down the
CLEAR button and press the instrument button correspond-
ing to the instrument to be cleared.
Patterns can be edited by adding new parts and deleting
unwanted parts simply by re-entering the step write mod* t
and stepping through the pattern using the +1/YES button ~
until the edit point is located. The addition of new parts
and deletion of unwanted parts are carried out as described
above. The time signature or bar length of aprogrammed
pattern CANNOT be changed. Time signature and number of
bars can only be programmed in clear patterns (see the
CLEAR function, below).
Step Write (EX: 4/4 time, 1bar)
©ISTEP PTN XX "XX" =any clear pattern
number.
1. Press STEP WRITE button to enter step write mode.
2. Enter first part of time signature via white number buttons
(integer markings, two digits).
3. Press STEP WRITE button to move cursor to second
part of time signature.
4. Enter second part of time signature via number buttons
(fraction markings).
5. Press STEP WRITE button to prompt for number of bars
in pattern.
6. Enter number of bars via number buttons, (integer mark-
ings, two digits).
•The step write mode can be exited at any time by pressing
the STOP/CONTINUE button.
•Steps 2—6 above can be skipped if the default parameters
(4/4 time, 1bar) are acceptable.
®: ^lSTEP V. 04 /4
In this example 4/4 time will be accepted
®z: f|STEP W, 04 /4i
You are now ready to enter your pattern.
Tap the START button and the LCD panel will respond with
"BAR 01 :BEAT 01", prompting you to input the first
beat of bar one. You can now enter an instrument on beat 1
by pressing the appropriate instrument button, or arest by
pressing the +1/YES button. In either case, the beat will
advance one count and you are then ready to enter the next
instrument or rest. This process is continued until the last
beat of the bar (the number of beats per bar is determined
by the setting of the QUANTIZE function, described below).
<SO f|STEP W. 01 BAR
1-bar pattern is accepted
START ^lBAR 01 :BEAT 01
12

Enter BD on first beat
©^|BAR 01 :BEAT 02
Enter rest on second beat
®BAR 01 :BEAT 03
etc.
STOP CONTINUE
(D ^|SELECT PTN XX
Quantize
Basically, QUANTIZE determines the smallest note-incre-
ments which can be programmed. The available quantize
values are 1/4, 1/6, 1/8, 1/12, 1/16, 1/24, 1/32, 1/48 and
1/192 note increments-these are the fraction markings on
the white number buttons. If, for example, QUANTIZE is
set to 1/16, then the shortest notes that can be entered in
either the real-time or step-write modes are 1/1 6th notes—
i.e. the maximum number of beats that can be entered in one
4/4-time bar is 16.
-QUANTIZE Applied to the Real-Time Write Mode-
In the real-time write mode, this has an "error correcting"
function. In other words if your timing while playing your
pattern on the instrument keys is alittle off, the off-time
beats will be recorded at the nearest quantized beat. Thus,
while simple patterns containing no more than 8beats of
any one instrument per measure will record with precise
timing if quantize is set to 1/8. Subtle syncopations and
rhythmic variations will only be recorded if quantize is set
to 1/32 or even 1/48. Setting quantize to 1/192 records your
pattern exactly as played. It is possible to quantize different
instruments or groups of instruments at different values.
Simply record the appropriate parts at value A, then exit the
real-time write mode, reset the quantize value to B, then
re-enter real-time write and add more parts.
-QUANTIZE Applied to the Step-Write Mode
In the step write mode, the quantize function can save pro-
gramming time by minimizing the number of steps required
to enter each part. If, for example, QUANTIZE is set to
1/16, the beat count will proceed from 1to 16 per bar. This
is fine if 1/1 6th notes are to be entered, but an 8-beat bass
drum line would require entry of several rests between each
drum beat. It would be better to quantize to 1/8, enter the
bass drum line, exit the step write mode and reset the
quantize value to 1/16, then re-enter the step write mode and
program a16-beat hi-hat line.
Minimizing Rest Entry: 16 Beats
rtt
o
j
t
6
o
oooooooo
-HH CLOSED
-SD
-BD
SD:1/4
BD:1/8_
HH CLOSED: 1/16
12345678-
oWriting in notes with the instrument button step.
•Extending rest with the +1/YES key step.
Changing the quantize value also facilitates programming of
complex rhythm lines. For example, 2-beat triplet snare
fills could be added to an 8-beat pattern as follows:
Adding polyrhthyms and Fill-ins: 2-beat triplets
9:%
I 1—IIIIII
IJ
C_J" <
mm-HH CLOSED
-SD
*-BD
QUANTIZE at 1/8 QUANTIZE at 1/2
Subtle rhythm variations within apattern can also be easily
programmed by programming certain instruments at extreme-
ly fine quantize values.
Programming subtle rhythm variations
I11 1
9:%\J
-HH CLOSED: 1/8
SD: 1/192
-BD: 1/8
Slighly delayed SD timing
13

The quantize value is set by pressing the QUANTIZE button
in the pattern mode (the QUANTIZE function cannot be
called while apattern is playing or during either of the write
functions). The LCD panel will read "QUANTIZE =X/XX"
where "X/XX" is the currently selected quantize value. The
quantize value can then be changed by pressing the white
number button with the fraction marking corresponding to
the desired quantize value: 1/4, 1/6, 1/8, 1/12, 1/16, 1/24,
1/32, 1/48, or 1/192. If 1/192 is selected, the display will
read "QUANTIZE =OFF" since this is the finest quantize
value. Exit the quantize mode by pressing the QUANTIZE
button.
Quantize (EX: QUANTIZE 1/16 -1/8 -1/32)
QUANTIZE
TEMPO CHANGE QUANTIZE= 1/16
^|QUANTIZE= 1/ 81
61/32
IZZI
OUTPUT- INST
®IZZ1 4IQUANTIZE= 1/32
©( 4|SELECT PTH XX
TEMPO CHANGE
Click Time
This function sets the rhythm guide to "click" on every 1/4,
1/6, 1/8, 1/12, 1/16, 1/24 or 1/32 note during the real time
write function. To change the click timing activate the click
function by pressing the CLICK button in the pattern mode
(the CLICK function cannot be called while apattern is
playing or during either of the write functions). The LCD
panel will respond with "CLICK =1/8" indicating that the
rhythm guide is set to click on every eighth note {the default
value). Change the click value simply by pressing the appro-
priate white number button, marked 1/4, 1/6, 1/8, 1/12,
1/16, 1/24 or 1/32. Inputs of 1/48 or 1/192 will be ignored.
Exit the click function simply by pressing the CLICK button
again.
Click Time (EX: CLICK 1/18^ 1/16)
4|CLICK= 1/ 8
*f 1CLICK= 1/16
(1/4, 1/6, 1/8, 1/12, 1/16, or 1/32 click times are acceptable)
Pattern Memory Usage Graph
If the LOAD button is pressed while holding the FUNCTION
button, the following display will appear.
USED
The bar-graph portion of the display is formed of ten blocks,
each of which is further divided into 5sections. Each block
represents 10% of the available memory space, and each
block division represents 2% of total memory space. 10 blocks
would represent 100% memory usage.
Pattern Clear
Single patterns can be cleared by selecting the pattern to be
cleared and then pressing the CLEAR button. To confirm
your intention to clear the pattern the RX11 LCD panel will
respond with "CLEAR PTN XX?"-where "XX" is th(*^
number of the selected pattern. Press the +1/YES button to _
clear the pattern, or the —1/NO button to cancel the clear
function.
Pattern Clear (Single)
(T) Select pattern number to be cleared.
(DCZZI
®
"CLEAR PTN XX" ?
^PTN XX CLEARED !
±
SELECT PTN XX
All patterns in memory—00 through 99-can be cleared
simultaneously if necessary. This is a"hidden function"
in the sense that it cannot be accessed directly—in order to
prevent accidental erasure of the entire memory contents.
First, press the CLEAR button from the pattern mode.
When the "CLEAR PTN XX?" display appears, simultaneous-
ly press the ACCENT button and STOP/CONTINUE button.
The LCD panel will respond with "CLEAR ALL PTNS?" to
confirm your intention to clear all patterns. Press +1/YES
clear the pattern memory, or press the -1/NO button to
cancel the clear function.
The "clear all patterns" function initializes the pattern
memory, and can be used to restore normal operation should
an operation error cause the RX11 software to malfunction.
f|SELECT PTN XX
14

Save the pattern memory contents onto acassette tape
(see "CASSETTE OPERATIONS" section) to prevent loss
of patterns you wish to keep.
Pattern Clear (All Patterns)
ULfcAH CLEAR PTN XX ?
STOP CONTINUE
©+
®
f[CLEAR all pths ?
^ALL PTNS CLEAR !
SELECT PTN XX
Instrument Clear
An entire instrument can be quickly cleared from any
pattern by first calling the clear function by pressing the
CLEAR button from the pattern mode. The LCD panel
will read "CLEAR PTN XX?", as in the clear pattern func-
tion. Then if instead of pressing the +1/YES button you press
the instrument button corresponding to the instrument to
be cleared-we'll use RIDE in pattern number 01 as an
example, the display will change to "CLEAR PT01 RIDE?".
Press +1/YES to clear the instrument or -1/NO to cancel
the clear function.
Instrument Clear (EX: Clear RIDE from pattern XX)
CLEAR .
©r—i-
©
®
CLEAR PTN XX ?
CLEAR PT XX RIDE?
|RIDE CLEARED !
*
SELECT PTN XX
Pattern Copy
The RX11 permits two different pattern copy functions:
COPY and CONNECT COPY.
1) COPY simply copies apattern from one pattern number
to any other pattern number. This is particularly handy
when you want to add more instruments or rhythm lines,
or otherwise alter an existing pattern, and still keep a
copy of the original pattern.
2) CONNECT COPY makes it possible to combine two
different patterns into one pattern. One pattern is ap-
pended (connected) to another pattern, and the combina-
tion is stored in anew pattern number. With this function
it is possible to connect two patterns having different
time signatures.
Both pattern copy functions are accessed by pressing the
COPY button in the pattern mode. When the COPY button
is pressed, the LCD panel will read "COPY ** +** =**».
Number of pattern to
be copied to.
COPY
Number of pattern to
be copied.
Number of pattern to be
appended to pattern to
be copied.
To simply copy from one pattern to another, first enter the
number of the pattern you wish to copy via the white number
buttons (the flashing block cursor should be located im-
mediately to the right of the first asterisk pair), press the
COPY key asecond time causing the cursor to move to the
right of the second (append pattern number) asterisk pair,
without entering anumber press the COPY again causing the
cursor to move to the last asterisk pair. Enter the number
of the pattern you wish to copy to, then press the COPY
button again to execute the copy operation.
To connect one pattern, to another and copy the combined
pattern to anew location, enter the number of the pattern
which is to be appended to the first pattern to be copied at
the second asterisk pair. All other steps are the same as for
normal copy, above.
If apattern is already programmed in the pattern number to
which apattern or connected pair of patterns will be copied,
the RX1 1will confirm your intention to write anew pattern
into that location with "REWRITE PTN XX?" on the LCD
panel. If it's OK to write over the pattern, press the +1 /YES
button to execute the copy. Press —1/NO to cancel the copy
function.
15

Pattern Copy
©*COPY (EX: pattern 10 to pattern 20)
COPY f|COPY *$ +$$ =$$~
CASSETTE SYNC D€LETE COPY 10 +** =$*
®^|COPY 10 +$=
21/8 1/4
®CZZI ^I1^[COPY 10 +** ^20i
®^ICOPY EXECUTING
SELECT PTN XX
•CONNECT COPY (EX: patterns 10 +15 to pattern 20)
COPY
cn n—
1
|copy »* +$$ =$$
11/6 1/4 COPY
(2J| |< 1 1
CASSETTE SYNC DELETE
11'6 5\m COPY
(SI M
CASSETTE FORMAT DELETE
2i/a lA
COPY 10 +** =*$
COPY 10 +15 =*i
0) \14I14ICOPY 10 +15 =201
®C APPEND EXECUTING
function works ONLY in the real time write mode, and must
be set to the required value before writing the pattern or
rhythm lines within apattern to which swing is to be applied.
Further, the swing function works only with quantize values
of 1/8 or 1/16.
Specifically, if the amount of time between the odd beats in
abar (1, 3, 5, etc.) is taken as 100%, then with no swing
applied the even numbered beats will fall precisely midway
between the odd beats—that is, 50%. The swing function
makes it possible to set the time between odd and even beats
to 50% {no swing), 54%, 58%, 63%, 67% or 71% of the time
between the odd beats. Asetting of 54% therefore produces
the most subtle swing effect, while 71% produces the most
pronounced swing effect.
Delaying the Timing of Even -numbered Notes with SWING
Odd Even Odd
SWING =50% JJJ
SWINGS 71%J+
50 71 100%
In the pattern mode, press the SWING button to call the
swing function (the swing function cannot be called when a
pattern is playing or when either of the write modes is active).
The LCD will read "SWING LEVEL 50%", 50% being the
default value (no swing). The +1/YES can then be used to
increment through the available swing values—50%, 54%,
58%, 63%, 67%, 75%-while the -1/NO button decrements
through the values. Once the desired swing value has been
selected, press the SWING button again to return to the
normal pattern mode and then begin the REAL TIME
WRITE process. Use real time write to enter only those parts
of the pattern to which you wish to apply the swing effect
(this could be the entire pattern). Non—swing parts can then
be added after exiting the real time write mode and return-
ing the SWING LEVEL to 50%.
A
Swing (EX: SWING -50% -> 54% -58%)
(Quantize must be set to 1/8 or 1/16)
®SWING LEVEL 50" Si
SELECT PTN XX ^|SWING LEVEL 54a X
The Swing Function ®
This unique function can make your rhythm swing—auto-
matically. It works by delaying the timing of the enven-
numbered beats in each bar (beat 2, 4, 6, 8, etc.) by apro-
grammable amount, creating ajazz swing feel. The swing CD I
^[SWING LEVEL 58a %
SELECT PTN XX
16

SONG OPERATIONS
The Song Mode &Song Selection
In the RX11 the term "song" refers to anumber of patterns
connected together to form the complete rhythm track for a
musical piece-e.g. intro pattern, main pattern, bridge pattern,
fill, etc. When used in asong, the individual patterns are
referred to as the "parts" of the song. The RX11 has asong
memory which is separate from the pattern memory, and is
capable of storing up to 10 different songs {numbered
through 9). The maximum number of parts that can be used
in asong is 255.
To perform any song-related operation—song programming,
editing or playback-the RX11 must be in the SONG mode.
To enter the song mode, press the green PATTERN/SONG
button while in the pattern mode (the song mode cannot
be entered while apattern is playing or either of the pattern
write functions are active). The red LED below the SONG
label on the PATTERN/SONG button should light, and the
^LCD will read "SELECT SONG 00". Pressing the PAT-
TERN/SONG button alternates between the pattern and
song modes.
Note that the SONG label below the PATTERN/SONG
button is printed in blue. Except for the —1/NO and +1/YES
buttons, all the buttons in the top row on the RX11 panel
perform the functions indicated by their blue labels (printed
below the buttons) when the song mode is active. The
functions printed in white above the top-row buttons apply
only in the pattern mode.
Once the song mode is active, songs through 9are selected
simply by pressing the appropriate white number button.
The START and STOP/CONTINUE buttons function in the
same way as they do in the pattern mode, except that while a
pattern cycles until it is stopped by pressing the STOP/
CONTINUE button, asong will stop automatically when the
end is reached.
Editing (Assembling aSong)
s^Select the song number you wish to program, then enter the
edit mode by pressing the EDIT (blue label) button. The
LCD panel will prompt you for the number of the pattern
which will be programmed into part 1of the song: "PART
001 =PTN **". The number of the pattern to be loaded
into the current part is entered via the white number buttons
(2 digits) and appears on the display in place of the asterisks.
When the first part has been entered, press the +1/YES
button to go on to the next part, which is programmed in
the same way. This process is repeated until the last part
of the song has been entered. Once the last part has been
entered, press the EDIT button again to exit the edit mode
and return to the song mode. The programmed song can
now be played.
While in the edit mode, the -1/NO and +1/YES buttons
increment and decrement through the programmed parts,
respectively. Holding either the +1 or -1 buttons down
causes continuous incrementing or decrementing in the
corresponding direction. This allows you to go back and
check the song program, and alter incorrect pattern number
entries.
Song Editing (EX: pattern 01+03 +12 +)
REALTIME PART 001=PTN **
PART 001=PTN 01
PART 002=PTN
(4) 1I"f I1^|PART 002 =PTN 03
1
CASSETTE CARTRIDGE PART 003=PTN 12
®^|SELECT SONG XX
The Level Set Function
This function memorizes the PAN, INST LEVEL and
ACCENT settings independently for each song. The level
set procedure must be carried out immediately after calling
the Edit mode (The LCD display should read "PART 001").
The level data is entered at this point simply by pressing the
corresponding function button—PAN, INST LEVEL or
ACCENT. When one of these buttons is pressed the LCD will
respond with "XXXX SET", where "XXXX" is the name of
the selected function {e.g. "ACCENT LEVEL SET"). Level
set data is always memorized immediately prior to the PART
001 data
For songs on which the Level Set function has been used,
the corresponding "XXXX SET" displays will appear im-
mediately after the Edit mode is called. The +1/YES button
is used to scroll through the Level Set displays to reach
PART 001. The DELETE function, described below, can
be used to delete Level Set data in the same way as it is
used to delete song parts. To alter previously programmed
Level Set data the corresponding PAN, INST LEVEL and
ACCENT values must be altered as described in "THE
INSTRUMENTS" section (page 8), and reset by calling
the corresponding Level Set display in the Edit mode
("PANNING SET" to reset the PAN value, for example)
function as described above, and then pressing the corres-
ponding function button. The LCD will then read "RE-
WRITE LEVEL?". Confirm your intention to rewrite the
selected function by pressing the +1/YES button. Press
-1/NO to cancel the level rewrite process.
17

The Insert Function
While in the edit mode, the insert function permits new
patterns to be inserted anywhere between already-pro-
grammed parts. For example, suppose you have already
programmed parts 1through 4, but want to add anew part
between parts 2and 3, leaving you with atotal of 5parts
instead of 4. Use the -1/NO and +1/YES buttons to locate
part 3, which will contain the new part—the original parts 3
and 4will be moved up to occupy parts 4and 5. Press the
INSERT button and the LCD panel will confirm your inten-
tion to insert part 3with "INSERT PART 003?". If you
then press the +1/YES button, the current parts 3and 4will
be re-written into parts 4and 5, leaving the original part 3
clear to receive the new part. The LCD panel will now read
"PART 003 =PTN **", and the new part number is pro-
grammed into part 3via the white number buttons. Editing
can now continue as normal. Press the —1/NO in response
to the "INSERT PART 003?" to cancel the insert function.
Insert (EX: insert new part-pattern 32- between parts 2and 3)
the DELETE button. The LCD panel will respond with
"DELETE PART 003?". If the +1/YES button is then
pressed, part 3will be deleted and parts 4and 5will be
re-written into parts 3and 4, leaving us with our 4original
parts. Editing can now continue as normal. Press -1/NO in
response to the "DELETE PART 003?" message to cancel
the delete mode.
The DELETE function is used in the same way to delete
level set data (PAN, INST LEVEL, ACCENT) inserted
prior to PART 001. Repeats and tempo changes—discussed
below—are also deleted with this function.
Delete (EX: delete part 3)
(J) Locate part 3using and
f|PART 003=PTN $* ^k
®f[DELETE PART 003?
(T) Locate part 3usi ng and
^IPART 003 =PTN XX
^|INSERT PART 003?
®m+ |PART 003=PTN *'>
(Parts 3and above all moved up one part)
©^|PART 003=PTH 32
Continue editing as normal
The Delete Function
While in the edit mode, the delete function can be used to
delete parts from asong program. For example, in the IN-
SERT function description above, we inserted anew part
between parts 2and 3 in a4-part program, leaving us with
original parts 1and 2, new part 3, and original parts 4and 5.
To delete the part we inserted (currently part 3), simply
locate part 3using the -1/NO and +1/YES keys and press
m+ |PART 003=PTH XX
Parts 4and above all moved back one part.
Repeats
The repeat function can save aconsiderable amount of
programming time by making it possible to repeat any part
or group of parts up to 100 times. The repeat function is
used in the edit mode. Suppose, for example, we want to
repeat part 3of our 4-part song 3times (this means part 3
would be played atotal of 4times-1 original and 3repeats).A
Locate part 3using the -1/NO and +1/YES buttons and^_
press the REPEAT button. This does the equivalent of enter-
ing a repeat end sign {)immediately after part 3-that is,
part 3will be the last part of the repeated segment. The LCD
panel will respond with "GO TO PART ***?". The number
of the part which is to be the first part of the repeated seg-
ment is then entered via the white number buttons-in this
case, since we only intend to repeat part 3, enter a"3".
We could repeat bars 1, 2, and 3, for example, by entering
a"1" instead of a"3" ("GO TO PART 001"). Press the
REPEAT button again and you will be prompted for the
number of repeats: "REP COUNTS **?". Enter the desired
number of repeats via the white number buttons-in this
case "3". Press the REPEAT button again to complete the
repeat entry procedure. Now editing can continue as normal.
Note that if you now increment through the parts, a"REPT
for 03 to 003" message will appear between parts 3and 4,
indicating that part 3will be repeated 3times. Repeats can
be deleted in the same way as parts by locating this message
and using the delete function (See "The Delete Function",
above).
18

Entering Repeats (EX: repeat part 3, 3 times)
-i *+i
(J) Locate part 3using ||and
^[PART 003=PTN XX
SWING
®| 1
REPEAT
31/12
(S)\ 1
SAVE VERIFY
SWING
(4)1 1
REPEAT
31/12
&>l 1
SAVE VERIFY
SWING
®l 1
REPEAT
(This co
CZJ| I
YES
+1
is; II
^IGO TO PART *** ?
^|GO TO PART 003 ?
^REP COUNTS $$ ?
^|REP COUNTS 03
"[PART 003=PTN XX
(This complete actual repeat entry)
^|REPT for03 to 003
^IPART 004=PTN XX
The TEMPO CHANGE function is used in the edit mode.
Locate the part IMMEDIATELY BEFORE the desired tempo
change using the -1/NO and -t-1/YES buttons, then press the
TEMPO CHANGE button. The LCD panel will respond
with "TEMPO IS 00 UP". The -1/NO and +1/YES buttons
are then used to set the desired tempo change. Pressing
either the -1/NO or +1/YES button once, quickly, decre-
ments or increments the tempo change by one, respectively.
Holding the -1/NO or +1/YES button down causes con-
tinuous incrementing or decrementing in the specified
direction. Once the desired tempo change has been set, press
the TEMPO CHANGE button again to return to the normal
edit mode.
Programming Tempo Changes
(EX: Increase tempo by 20 after part 3)
(£) Locate part 3using [ | ancj||
^|PART 003=PTN XX
®TEMPO CHANGE f|TEMPO IS 00 UP 1
(D Hold until f|TEMPO IS 20 UP
Anumber of repeats can be programmed in one song, and
repeats can be "nested"—i.e. repeats can be programmed
within repeats—to create complex progressions.
Tempo
The operation of the TEMPO function in the song mode is
identical to the TEMPO function in the pattern mode-see
T"Tempo" in the "PATTERN OPERATIONS" section.
Programming Tempo Changes
This function makes it possible to program tempo changes
to occur at any point during asong. Tempo changes are
entered as an increase or decrease in tempo relative to the
current tempo-determined by the TEMPO control, the
TEMPO function, or aprevious TEMPO CHANGE function.
For example, if the current tempo is 100 and atempo change
of "20 UP" is encountered, the new tempo will be 120. If
atempo change of "40 DOWN" is then encountered, the
tempo will drop to 80.
©TEMPO CHANGE fIPART 003 =PTH XX
Note that if you now increment through the parts, a"TEMPO
IS XX UP" or "TEMPO IS XX DOWN" message will appear
immediately after the part at which the tempo change
function was called ("XX" is the selected tempo change
value). Tempo changes can be deleted in the same way as
parts, by locating the tempo message and using the delete
function {see "The Delete Function", above). Anumber of
tempo changes can be programmed in one song.
Accelerando or ritardando effects can be produced by placing
anumber of small tempo changes between successive parts.
To save programming time, tempo changes can be used in
conjuction with repeats. For example, to produce aritar-
dando effect the tempo change and repeat functions could
be combined as follows:
"PART 001 =PTN 01" -»• "TEMPO IS 02 DOWN" -
"REPTfor09to001"
19

The tempo change must be entered before the repeat.
Basically, the tempo change range is +50. Larger tempo
changes can be programmed, however, by entering two
consecutive tempo changes. The only restriction is that the
total tempo range of the RX11 is from 40 to 250, and no
tempo change can exceed these limits.
Song Clear
Single songs can be cleared by selecting the song to be
cleared and then pressing the CLEAR button. To confirm
your intention to clear the pattern the RX11 LCD panel
will respond with "CLEAR SONG XX?"-where "XX"
is the number of the selected song. Press the +1/YES button
to clear the song, or the —1/NO button to cancel the clear
function.
Song Clear (Single)
(V) Select song number to be cleared
Song Clear (All Songs)
CLEAR
©I
©
©
4|CLEAR SONG XX ?
*SONG XX CLEARED
±
SELECT SONG XX
All songs in memory— through 9—can be cleared simul-
taneously if necessary. This is a"hidden function" in the
sense that it cannot be accessed directly— in order to prevent
accidental erasure of the entire song memory contents.
First, press the CLEAR button from the song mode. After
the "CLEAR SONG XX?" display appears, simultaneously
press the ACCENT button and STOP/CONTINUE button.
The LCD panel will respond with "CLEAR ALL SONGS?"
to confirm your intention to clear all songs. Press +1/YES
to clear the song memory, or press the -1/NO button to
cancel the clear function.
The "clear all songs" function initializes the song memory,
and can be used to restore normal operation should an
operation error cause the RX11 software to malfunction.
Save the song memory contents onto acassette tape (see
"CASSETTE OPERATIONS" section) to prevent loss of
songs you wish to keep.
CLEAR
ACCENT STOP CONTINUE
©+
4|CLEAR SONG XX ?
-|CLEAR ALL SONGS?
4|ALL SONGS CLEAR!
*
SELECT SONG XX
The Chain Function
The chain function makes it possible to connect up to 18
songs to be connected together for continuous playback,
permitting creation of drum tracks for extremely long
compositions. The chain mode is initially activated by ^^
pressing the CHAIN button in the song mode-the LCD- -
panel will respond with "SONG CHAIN MODE", and the
LED display will read "CH"—then any of the three available
chain functions can be called. The three functions are:
1. CHAIN EDIT: this function lets you specify the sequence
of songs to be played.
2. CHAIN CLEAR: this function clears the entire pro-
grammed chain.
3. CHAIN PLAY: this function plays the programmed
chain.
Chain edit
The chain edit function is activated by pressing the EDIT
button in response to the "SONG CHAIN MODE" display.
The LCD panel will then read "STEP 01 =SONG **",
prompting you to input the number of the first song in the
chain. The song number is entered by pressing the appropriate
number button. Once the first song number has been entered,
go on to step 2 by pressing the +1/YES button, and enter —
^
the second song in the same way. Up to 18 steps (songs) V
can be entered. The +1/YES and —1/NO buttons can be
used to scroll forward and backward through the chain,
permitting alteration of already-entered song numbers when
necessary. The chain edit mode can be re-entered at any
time for editing purposes. Return to the "SONG CHAIN
MODE" display by pressing the EDIT button.
Chain clear
The entire programmed chain can be cleared by pressing the
CLEAR button in response to the "SONG CHAIN MODE"
display. The LCD pannel will respond with "CLEAR CHAIN
?". Press +1/YES to clear the chain or -1/NO to cancel
the clear function.
20
Other manuals for RX-11
2
Table of contents
Other Yamaha Drum manuals

Yamaha
Yamaha EMR-1 User manual

Yamaha
Yamaha Drum Score DTX 402 Series User manual

Yamaha
Yamaha DTXTREME User manual

Yamaha
Yamaha DD-3 User manual

Yamaha
Yamaha DTS70 User manual

Yamaha
Yamaha YDD-60 User manual

Yamaha
Yamaha DRUM Pro DD-55C Assembly instructions

Yamaha
Yamaha PCY65 User manual

Yamaha
Yamaha DD65 YDD-60

Yamaha
Yamaha DTX900M Mounting instructions

Yamaha
Yamaha HH-65 User manual

Yamaha
Yamaha RX 5 Quick start guide

Yamaha
Yamaha DD-6 User manual

Yamaha
Yamaha DD-5 User manual

Yamaha
Yamaha RX-120 User manual

Yamaha
Yamaha DTX720K User manual

Yamaha
Yamaha MTS-810B User manual

Yamaha
Yamaha MSH9500 User manual

Yamaha
Yamaha DTX900 User manual

Yamaha
Yamaha DD-65 User manual