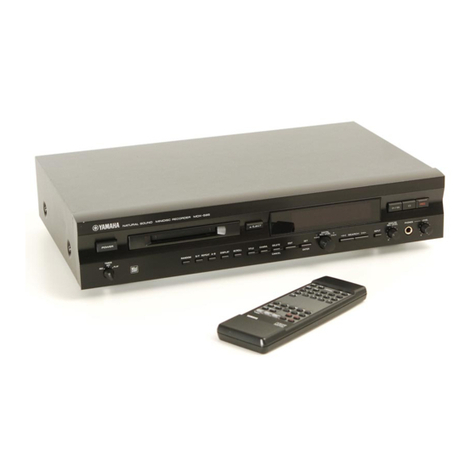
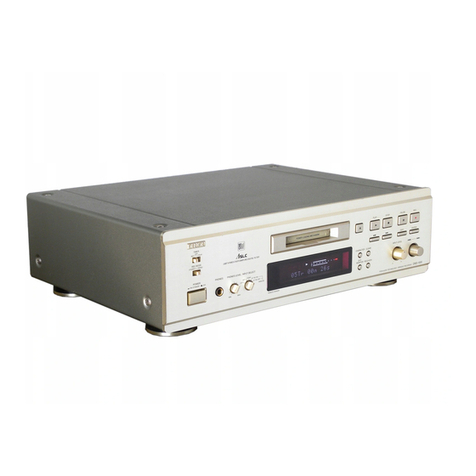
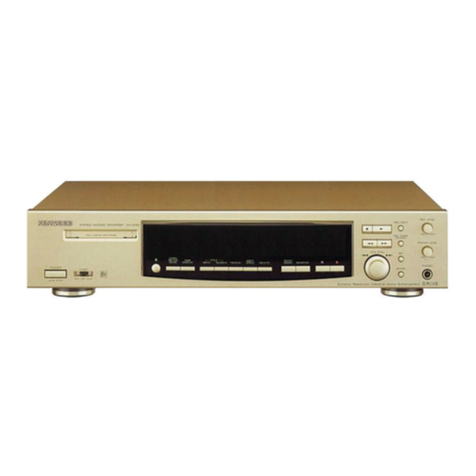
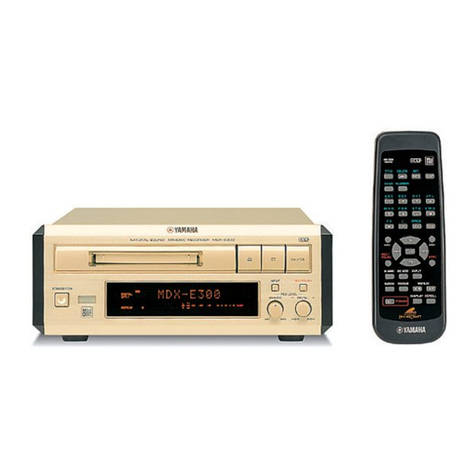
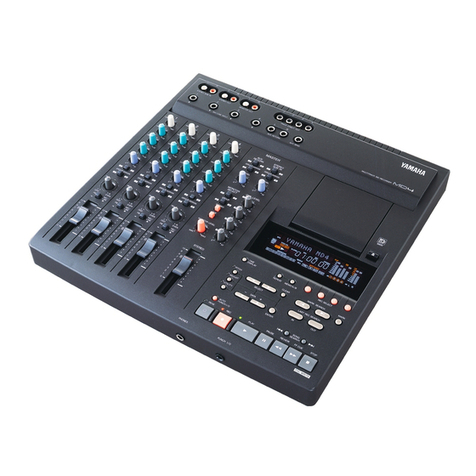
Yamaha MDX-596 User manual

MDX-596
MDX-596
100718
SERVICE MANUAL
MDX-596
IMPORTANT NOTICE
This manual has been provided for the use of authorized YAMAHA Retailers and their service personnel.
It has been assumed that basic service procedures inherant to the industry, and more specifically YAMAHA Products, are already
known and understood by the users, and have therefore not been restated.
WARNING: Failure to follow appropriate service and safety procedures when servicing this product may result in personal
injury, destruction of expensive components and failure of the product to perform as specified. For these reasons,
we advise all YAMAHA product owners that all service required should be performed by an authorized
YAMAHA Retailer or the appointed service representative.
IMPORTANT: The presentation or sale of this manual to any individual or firm does not constitute authorization, certification or
recognition of any applicable technical capabilities, or establish a principle-agent relationship of any form.
The data provided is believed to be accurate and applicable to the unit(s) indicated on the cover. The research, engineering, and
service departments of YAMAHA are continually striving to improve YAMAHA products. Modifications are, therefore, inevitable
and specifications are subject to change without notice or obligation to retrofit. Should any discrepancy appear to exist, please contact
the distributor's Service Division.
WARNING: Static discharges can destroy expensive components. Discharge any static electricity your body may have accumu-
lated by grounding yourself to the ground buss in the unit (heavy gauge black wires connect to this buss).
IMPORTANT: Turn the unit OFF during disassembly and parts replacement. Recheck all work before you apply power to the unit.
MINIDISC RECORDER
IC DATA . . . . . . . . . . . . . . . . . . . . . . . . . . . . . . . 25—34
BLOCK DIAGRAM . . . . . . . . . . . . . . . . . . . . . . . 35—37
TEST POINT WAVEFORMS . . . . . . . . . . . . . . . 38—39
PRINTED CIRCUIT BOARD . . . . . . . . . . . . . . . 40—46
MD VOLTAGES . . . . . . . . . . . . . . . . . . . . . . . . . . . . .47
SCHEMATIC DIAGRAM . . . . . . . . . . . . . . . . . . 48—50
REMOTE CONTROL TRANSMITTER . . . . . . . . . . .51
PARTS LIST . . . . . . . . . . . . . . . . . . . . . . . . . . . . 52—61
GREASE APPLICATION DIAGRAM . . . . . . . . . . . .62
■ CONTENTS
TO SERVICE PERSONNEL . . . . . . . . . . . . . . . . . 1—2
REAR PANELS . . . . . . . . . . . . . . . . . . . . . . . . . . . . . .2
SPECIFICATIONS . . . . . . . . . . . . . . . . . . . . . . . . . . . .3
INTERNAL VIEW . . . . . . . . . . . . . . . . . . . . . . . . . . . . .4
DISASSEMBLY PROCEDURES . . . . . . . . . . . . . . 4—6
ADJUSTMENT & TEST MODE . . . . . . . . . . . . . . 7—16
SPECIAL TEST MODE . . . . . . . . . . . . . . . . . . . . . . .17
ERROR DISPLAY . . . . . . . . . . . . . . . . . . . . . . . 18—19
TROUBLESHOOTING . . . . . . . . . . . . . . . . . . . . 20—24
+10
6
1
7
2
8
3
9
4
0
5
RNDM
S/F
PROG
A-B REPEAT
DISPLAY?! SCROLL
( ) ✽–&
ABC DEF GHI JKL MNO
PQR
SPACE
STU VWX YZ /
TITLE
SEARCH
SKIP
PLAY PAUSE STOP REC
REC
M-MARK MONO/ST
INPUT
CHAR. NUMBER DELETE SET
ER
TY
WDA SCD-P
SYNCTIME
MDX-596
MDX-596
AC LEAKAGE
TESTER OR
EQUIVALENT
EQUIPMENT
UNDER TEST
INSULATING
TABLE
WALL
OUTLET
■ TO SERVICE PERSONNEL
1
Critical Components Information
Components having special characteristics are marked Z
and must be replaced with parts having specifications equal
to those originally installed.
R, G, B models
R, G, B models
WARNING: Laser Safety
This product contains a laser beam component. This component may emit invisible, as well as visible radiation,
which may cause eye damage. To protect your eyes and skin from laser radiation, the following precautions must
be used during servicing of the unit.
1) When testing and/or repairing any component within the product, keep your eyes and skin more than 30 cm away from
the laser pick-up unit at all times. Do not stare at the laser beam at any time.
2) Do not attempt readjustment, disassembly or repair of the laser pick-up, unless noted elsewhere in this manual.
3) CAUTION : Use of controls, adjustments or performance of procedures other than those specified herein may result in
hazardous radiation exposure.
Laser Emitting conditions:
1) When the Cover (MD) is removed, and the POWER SW is turned to the "ON" position, the laser component will emit a
beam for several seconds to detect if a disc is present. During this time (5-10 sec.), the laser may radiate through the
lens of the laser pick-up unit. Do not attempt any servicing during this period!
If no disc is detected, the laser will stop emitting the beam. When a disc is set, you will not be exposed to any laser
emissions.
2) The laser power level can be adjusted with the VR on the pickup PWB, however, this level has been set by the factory
prior to shipping from the factory. Do not adjust this laser level control unless instruction is provided elsewhere in this
manual. Adjustment of this control can increase the laser emission level from the device.
Cover (MD)

MDX-596
MDX-596
2
■REAR PANELS
▼ R model
▼ G, B models
▼ A model
VARO! : AVATTAESSA JA SUOJALUKITUS OHITETTAESSA OLET ALTTIINA NÄKYMÄTTÖMÄLLE
LASER-SÄTEILYLLE. ÄLÄ KATSO SÄTEESEEN.
VARNING! : OSYNLIG LASERSTRÅLNING NÄR DENNA DEL ÄR ÖPPNAD OCH SPÄRREN ÄR URKOPPLAD.
BETRAKTA EJ STRÅLEN.
Laser Diode Properties
Material : GaAlAs
Wavelength : 785 nm
Emission duration : Continuous
Pulse Durations and Max. Output at the lens of the Laser Pick Up Unit ;
Read mode : 0.8 mW (Continuous)
Write mode : Max 10 mW for 0.5s, Min. Cycle 1.5s
ANSI Class : Class 1
* This output is the value measured at a distance of about 200 mm from
the objective lens surface on the Optical Pick-up Block.
Magnetic head
Optical pick-up

MDX-596
MDX-596
3
■SPECIFICATIONS
Units : mm (inch)
265.9 (10–1/2")
287.8 (11–5/16")
15.2
(5/8") 6.7
(1/4")
435 (17–1/8")
16
(5/8") 80
(3–1/8")
96
(3–3/4")
Digital audio system
System
MiniDisc digital audio system
Disc
MiniDisc
Recording method
Magnetic field variation overwrite
Reading method
Non-contact optical pickup (using semiconductor laser)
Laser
Semiconductor laser
Laser Diode Properties
Material: GaAIAs
Wavelength: 785 nm
Pulse time:
Read mode ... 0.8 mW Continuous
Write mode ... max 10 mW 0.5S
min cycle 1.5S
Repetition
Record/playback time
Max. 80 minutes
80 minutes (stereo)
160 minutes (mono)
Revolutions
Approx. 400~900 rpm (CLV)
Error Correction
ACIRC (Advanced Cross Interleave Reed-solomon Code)
Sampling frequency
44.1 kHz (32 kHz and 48 kHz signals converted to 44.1 kHz
for recording)
Coding
ATRAC (Adaptive TRansform Acoustic Coding)
Modulation system
EFM (Eight-to-Fourteen Modulation)
Number of channels
2 (stereo) or 1 (mono, for extended recording)
Frequency Response
5 ~ 20,000 Hz ±0.5 dB
Signal-to-Noise Ratio
More than 99 dB during playback
Wow and Flutter
Below measurable limit
Inputs
LINE IN (REC)
Type: pin jack
Input impedance: greater than 50 k-ohms
Standard input level: 300 mV
DIGITAL IN (OPTICAL) 1/2
Type: square optical connector jack
Outputs
LINE OUT (PLAY)
Type: pin jack
Standard output level: 2.0 ±0.5 Vrms
DIGITAL OUT (OPTICAL)
Type: square optical connector jack
PHONES
Standard output level
(Input 150 ohms shorted, –20 dB): 300 ±60 mV
GENERAL
Power Supplies
A model AC 240 V, 50 Hz
G, B models AC 230 V, 50 Hz
R models AC 110/120/220/240 V, 50/60 Hz
Power Consumption
18 W
Dimensions (W x H x D)
435 x 96 x 288 mm (17-1/8" x 3-3/4" x 11-5/16")
Weight
4.0 kg (8 lbs. 13 oz.)
Finish
Titanium color/Black color
Accessories
Remote Control.... 1
Audio cord... 2
Optical cord... 1
Batteries (size AA, R6, UM-3).... 2
Specifications subject to change without notice.
R : General model A : Australian model
B : British model G : European model
* US and foreign patents licensed from Dolby Laboratories
Licensing Corporation.

MDX-596
MDX-596
■DISASSEMBLY PROCEDURES
(Remove parts in disassembly order as numbered.)
Fig. 2
4
■INTERNAL VIEW
1. Removal of Top Cover
a. Remove 4 screws ( q ) and 3 screw
( w
)
in Fig. 1.
2. Removal of Front Panel
a. Remove 4 connectors.
CB5, CB6, CB7, CB401
b. Remove 3 screws
( e )
in Fig. 1
.
* Arrow marks ( ) are printed to identify the screws to be
removed.
c. Remove 2 screws
( r )
in Fig. 1
.
3. Removal of MD Recorder Unit
a. Remove 1 connector.
CB1
b. Remove 4 screws ( t) in Fig. 1.
c. Remove 4 screws ( y) in Fig. 2.
q w
e r t
CB7
CB6
CB1
CB401 CB5
qPOWER TRANSFORMER
wMAIN (1) P.C.B.
ePOWER SWITCH
rMD RECORDER UNIT
tMAIN (2) P.C.B.
Fig. 1
q
q
Top Cover
w
MD Recorder Unit
Front Panel
r
e
r
t
MD Recorder Unit
t
y
ySupport (Mechanism)

MDX-596
MDX-596
5
Disassembly of MD Recorder Unit
Remove the MD Recorder unit according to Steps 1 and 3 of the disassembly procedure (page 4).
Removal of Magnetic Head (Fig.4)
•Once the magnetic head is removed, it will be neces-
sary to perform “Confirmation of magnetic head
installation Position”. (See page 13.)
1. Remove screw (A1). Caution
a. When removing the magnetic head, hold its base and
do not touch the magnetic head itself or the leaf
spring.
b. Place the magnetic head upside down.
c. Use special care so as not to cause any damage to
the magnetic head when installing it.
Removal of MD Main P.C.B. and MD Mechanism (Fig. 3)
1. Remove 3 screws (K1) and then remove the Top Cover.
2. Remove 2 screws (K2) and then remove the Bottom Cover.
3. Disconnect 3 flat connecting cables (K3).
4. Disconnect the flexible P.C.B. for the optical pickup (K4).
5. Disconnect a connector (K5).
6. Remove 2 screws (K6) and then remove the MD Main
P.C.B.
7. Remove the spring (K7).
8. Remove 1 screw (K8) and then remove the Side Cover.
9. Remove 4 cushions (K9) from the bosses of the MD
Mechanism.
Fig. 4
Fig. 3
(K3)x2
(K2)x1
ø2x 2mm
(K1)x1
ø2x 3mm
(K1)x1
ø2x 3mm
(K1)x1
ø2x 3mm
(K3)x1
(K5)x1
(K2)x1
ø2x 3mm
(K6)x2
ø1.7x 3mm
(K4)x1
(K8)x1
ø2x 3mm
(K7)x1
Top Cover
MD Mechanism
Cushion
Cushion
Side Cover
MD Main P.C.B.
Flexible P.C.B. for
optical pickup (*1)
Bottom Cover
(*1) After pulling off the flexible
P.C.B.for the optical pickup
from the connector, cover its
end with aluminum foil or the
like which is electrically
conductive so as to prevent the
optical pickup from being
damaged by static electricity.
Pull
Pull
Spring
(K9)x2
(K9)x2
Boss
Boss
(A1)x1
ø1.7x 5mm Magnetic Head
Leaf Spring
MD Mechanism

MDX-596
MDX-596
6
Fig. 5
Removal of MD Loading P.C.B./Loading Motor (Fig. 5)
1. Remove 1 screw (B1).
2. Remove 3 hooks (B2) and then remove the MD
Loading P.C.B.
3. Remove 2 screws (B3) and then remove the Loading
Motor.
(B3)x2
ø1.7x 3mm
(B1)x1
ø1.7x 6mm
(B2)x2
(B2)x1
MD Loading P.C.B.
Loading Motor
Removal of Sled Motor/Optical Pickup Head (Fig. 6)
•Once the MD mechanism switch P.C.B. is removed, it
will be necessary to perform “Adjustment of Lead-in
Switch Position”. (See page 13.)
•Once the optical pickup head is removed, it will be
necessary to perform “Confirmation of magnetic head
installation Position”. (See page 13.)
1. Remove 3 screws (C1) and then remove the sled
motor.
2. Remove the Optical Pickup Head.
Caution
Use care so as not to cause any damage to the gear.
(The damaged gear will cause abnormal noise to occur
while searching.)
(C1)x2
ø1.4x 4.5mm
(C1)x1
ø1.4x 5mm
Sled Motor
MD Mechanism P.C.B.
Optical Pickup Head
Fig. 6
Removal of Spindle Motor (Fig. 7)
•Once the spindle motor is removed, it will be neces-
sary to perform “Pickup Rating”. (See page 14.)
1. Remove 3 screws (D1) and then remove the Spindle
Motor.
Caution
a. Be careful not to scratch the gear.
(Scratched gear will produce noises during searching.)
b.As the turn-table is magnetized, keep foreign objects
from being attracted.
(D1)x3
ø1.4x 3mm Spindle Motor
Fig. 7

MDX-596
MDX-596
7
TEST MODE
1. How to enter the test mode
1) Press the POWER button while pressing the SET/ENTER button and the PLAY/PAUSE button.
Version of microprocessor is displayed about 1 second.
t s m 1 C * * e * *
Version of EEPROM protect data (from 01)
Version of microprocessor ROM (from 01)
“EJECT”on display
2) Load either a disc for reproduction or a disc for recording.
“AUTO AJST”on display
●Extension cable
(see connection diagram on page 14.)
High reflecting disc TDYS1 (SONY) [for reproduction] (P/No. TX945850)
Low reflecting disc Commercially available mini disc for recording
Low reflecting disc MMD-318 [for pre-adjustment] (P/No. AAX04890)
––––––––Clear disc for checking the head (P/No. AAX18050)
Type Test disc
1. Extension P.C.B. for servicing AAX16660
2. 2-pin extension connector for servicing AAX16620
3. 6-pin flat cable for servicing AAX16640
4. 5-pin flat cable for servicing TX946190
5. 28-pin flat cable for servicing TX946220
Type Part No.
■ADJUSTMENT & TEST MODE
Preparation before Adjustment
●Test disc
Servicing Procedure
Perform adjustment and setup in the TEST mode. Specific adjustments and procedures vary depend-
ing on the type of servicing performed.
Type of servicing
PICKUP replacement
Magnetic head replacement
Mechanical unit replacement
(including PICKUP)
MD main PCB replacement
MD microprocessor (IC1401)
replacement
MD LSI (IC1201) replacement
RF IC (IC101) replacement
EEPROM IC (IC1402) replacement
TEMP standard
setting
TEMP
–
–
–
q
–
–
q
q
EEPROM setting
value confirmation
EEPROM SET
q
–
q
w
q
_
w
w
AUTO preliminary
adjustment
AUT YOBI
w
–
w
e
–
q
e
e
AUTO
adjustment
AUTO AJST
e
–
e
r
_
w
r
r
AUTO AFB
adjustment
AUTAFB
r
–
r
t
_
e
t
t
EEPROM adjustment
value entry (*1)
TEST mode cancel
t
–
t
y
w
r
y
y
Operation confirmation
(With AUTO main adjustment done in advance)
TEST-PLAY
y
–
y
u
e
t
u
u
TEST-REC
u
q
u
i
r
y
i
i
Required item
Numbers in the table, e.g., q, w, e, indicate the order in which required items should be performed.
"–" means that item needs not be performed.
(*1): The result of EEPROM entry is displayed at the end of the TEST mode.
OK_EEPROM: Both "setting value" and "preliminary adjustment completed" have been entered properly.
WR_EEPROM: The "setting value" has been entered properly but not "preliminary adjustment completed".
Perform preliminary adjustment properly and then enter "preliminary adjustment completed".
NG_EEPROM: The "setting value" has not been entered.
Check the MD microprocessor and EEPROM for connection.

MDX-596
MDX-596
8
3. How to cancel test mode (Entry of EEPROM adjustment value)
1) Be sure to perform AUTO preliminary adjustment, AUTO adjustment and AUTO AFB adjustment.
( “COMPLETE”appears on the display)
2) After completing above ajustments, press the REC button. (Entry to EEPROM initiates then.)
The TEST mode is completed. ( “Test End”appears on the display)
3) Press the EJECT button to take out the disc.
4) Turn off the power.
2. How to set to each mode
Every time the DISPLAY (forward) or EDIT (reverse) button is pressed, the mode changes. (For operation of each
mode, refer to the section describing each mode.)
Since this mode is not required for servic-
ing , proceed to another mode promptly.
*
AUTO_AJST (AUTO adjustment)
@
AUT_AFB (AUTO AFB adjustment)
@
RST_YOBI (RESULT preparation)
@
RESULT (RESULT)
@
MNU_YOBI (MANUAL preliminary adjustment)
@
MNU_AJST (MANUAL adjustment)
@
EEPROM_SET (EEPROM setting)
@
AUT_YOBI (AUTO preliminary adjustment)
@
Panel key Function
Command code
REC TEST mode end (entry of EEPROM) 1FH
EJECT Eject B3H
DISPLAY Menu feeding in TEST mode (1) / (Feeding of menus mainly related to adjustment and EEPROM) B2H
TITLE
Menu feeding in TEST mode (2) / (Feeding of menus mainly related to continuous playback and continuous recording)
B4H
CHARA.
Menu feeding in TEST mode (3) (Feeding of menus mainly related to INNER mode and JUMP SELECT)
F2H
EDIT Menu feeding in reverse in TEST mode (Menu feeding in reverse in each TEST mode) A8H
SET/ENTER Finalization of menu selection or starting of its execution A2H
DELETE/CANCEL Stopping each test item and shifting to menu selection at one step upper level A7H
SEARCH wForced feeding of the slide (in FWD direction) / Execution of JUMP function (FWD) AAH
ADDRESS setting value increased / Specification of direction when setting the tracking
SEARCH eForced feeding of the slide (in REV direction) / Execution of JUMP function (REV) ACH
ADDRESS setting value reduced / Specification of direction when setting the tracking
JOG DIAL yForced feeding of the disc to EJECT / setting value increased F3H
JOG DIAL tForced feeding of the disc to LOAD / setting value reduced F4H
INPUT
Switching of laser power at EJECT / switching of display for continuous playback / switching of digit setting when settingADDRESS
F5H
RANDOM –
REPEAT S/F –
REPEATA-B –
SCROLL –
PLAY/PAUSE –
STOP –
●Panel keys used in TEST mode

MDX-596
MDX-596
Description of TEST modes
1. EJECT mode To TEMP setting (of EEPROM setting)
[ _ _ EJECT _ _ _ ] To CONTROL setting (of EEPROM setting)
Laser power setting (record/reproduction power) is performed.
2. AUTO preliminary adjustment mode Automatic preliminary adjustment is performed.
[ _ AUT _ YOBI _ ] Adjusted values are output by using the interface.
3. AUTO adjustment mode Automatic adjustment is performed. (Grating adjustment mode after this adjustment.)
[ AUTO _ AJST _ ] Adjusted values are output by using the interface.
Continuous reproduction is performed. (Error rate on display, jump test)
4. AUTO AFB adjustment mode Automatic focus balance adjustment is performed.
[ _ AUT _ AFB _ _ ] Adjusted values are output by using the interface.
RESULT preparation mode Not used (Do not use this function as it is not for servicing)
[ _ RST _ YOBI _ ]
RESULT mode (main adjustment) Not used (Do not use this function as it is not for servicing)
[ _ RESULT _ _ _ ]
MANUAL preliminary adjustment mode Not used (Do not use this function as it is not for servicing)
[ _ MNU _ YOBI _ ]
MANUAL adjustment mode Not used (Do not use this function as it is not for servicing)
[ _ MNU _ AJST _ ]
5. EEPROM setting mode Various factors of the digital servo function are changed manually.
[ EEPROM _ SET ] The voltage is measured at the temperature detect terminal and the standard value is set.
6. TEST-PLAY mode Continuous reproduction from the specified address is performed.
[ TEST _ PLAY _ ] C1 error rate is measured and ADIP error rate is measured.
7. TEST-REC mode Continuous recording from the specified address is performed.
[ TEST _ REC _ _ ]
8. INNER mode The position where the INNER switch is turned ON is measured.
[ _ _ INNER _ _ _ ]
9
1. EJECT mode
Step Setting method Remark Display
1
2
3
4
5
6
7
8
EJECT status in the TEST mode
Press the INPUT button.
Press the TITLE edit button.
Press the CHARA. button.
Press the DISPLAY button.
Press the DELETE/CANCEL button.
EJECT menu (No disc is loaded.)
Reproduction power output status
Recording power output status
Since this mode is not required for servicing , proceed to another mode promptly.
To TEMP setting
(Refer to TEMP setting)
To CONTROL1 setting
To CONTROL2 setting
EJECT menu
[ _ _ EJECT _ _ _ ]
[ ppw _ _ _ _ _ _ _ ]
[ rpw _ _ _ _ _ _ _ ]
[ xpw _ _ _ _ _ _ _ ]
[ TEMP _❍ ❍ _◆ ◆]
[ CONTROL1 _ 8 ]
[ CONTROL2 _ 2 ]
[ _ _ EJECT _ _ _ ]

MDX-596
MDX-596
10
●Confirmation of pick-up laser power
Recording and reproduction can be checked by using the laser power meter. However it should be
used for checking only because there is variation in its measurement.
When the measured value is excessively deviated from the reference value, replace the pick-up.
Reference value (measured at room temperature of 25 °C)
During reproduction (ppw) : 0.72 ±0.1 mW
During recording : 5.5 ±0.5 mW
Note :Be very careful when using the laser power meter. The laser beam would cause damage to
your eye if exposed to it directly.
●TEMP (temperature standard) setting
(Make this setting quickly when the room temperature is within the range of 21 ˚C to 29 ˚C and
the P.C.B. is cold.)
(1) Set to the TEMP setting mode menu.
[ TEMP ❍ ❍ ◆ ◆ ]
❍ ❍ : Temperature measured value
◆ ◆ : Temperature setting value
(2) Make temperature correction based on the ambient temperature and according to the following
table.
Example : When the temperature measured value is 7AH and the ambient temperature is 22 ˚C:
7AH(measured value) - 01H(correction value) = 79H(setting value)
* If the temperature measured value deflects between two values, use the smaller value (If 7AHand 79Hin the
above example, use 79H.)
(3) Using the jog dial, match the value obtained in Step (2) with the temperature setting value.
Example : When the temperature measured value is 7AH and the ambient temperature is 22 ˚C:
[ TEMP 7A 79 ]
Ambient temperature Correction value
+ 21.0 ˚C ~ + 23.2 ˚C–1H
+ 23.3 ˚C ~ + 26.8 ˚C±0H
+ 26.9 ˚C ~ + 30.7 ˚C+ 1H
Check procedure Mode Check item Judgement
Possible cause and check content
(Pin 3 of IC1401)
qPlayback power output “ppw”DC 0.2V OK (Move on to check w.) –
DC 1.5V NG Perform *1.
wRecording power output “rpw”DC 1.8V OK (End of checking.) –
Less than DC1.5V NG Perform *2.
“rpw”not achieved. –NG Perform *1.
*1: Poor soldering of the line at Pin 100 of IC1401.
Check the line of Pin 93 of IC1401 for short and poor soldering. (Check all the way to the SW P.C.B.)
*2: Check the line of Pin 3 of IC1401 for poor soldering and short with other patterns.
Check the pick-up laser for breakage.
Temperature setting value

MDX-596
MDX-596
11
3. AUTO adjustment mode Disc in use: TDYS1 (SONY) [for reproduction] or commercially available
mini disc for recording
Step Setting method Remark Display
1
2
3
4
5
6
Set the TEST mode.
Load a disc.
Press the SET/ENTER button once.
Adjusted values are output.
Adjustment is completed.
When adjustment is OK, press the
SET/ENTER button.
Press the INPUT button.
Press the DELETE/CANCEL button.
When adjustment is NG, press the
DELETE/CANCEL button.
No disc is loaded.
AUTO adjustment menu
Automatic adjustment is started after sliding to the innermost
track.
“*** ”changes in the following order when a high reflecting disc
(disc for reproduction) is used.
PEG -> HAG
“*** ”changes in the following order when a low reflecting disc
(disc for recording) is used.
PEG -> LAg -> GCG -> GEG -> LAG
Proceed to Step 4 when adjustment is OK.
Proceed to Step 6 when adjustment is NG.
Continuous reproduction (bit section) (Address + C1 error display)
Continuous reproduction (group section) (Address + C1 error display)
Continuous reproduction (group section) (Address + ADIP error display)
Display returns to the AUTO adjustment menu display.
There is an abnormality at the adjusted point such as PEG.
Refer to “Troubleshooting”. (page 20)
[ EJECT ]
[ LOADING ]
[ AUTO _ AJST _ ]
[ *** : _ _ _ _ _ _ ]
[ _ COMPLETE _ ]
[ Can't _ ADJ. ]
[ sXXXX cYYYY ]
[ aXXXX cYYYY ]
[ aXXXX aYYYY ]
[ AUTO _ AJST _ ]
[ Can't _ ADJ. ]
Note) *** : Adjustment name, XXXX: Address, YYYY: Measured value
2. AUTO preliminary adjustment mode Disc in use: MMD-318 [for pre-adjustment]
Step Setting method Remark Display
1
2
3
4
5
6
Set the Test mode.
Load a disc.
Press the EDIT button once.
Press the SET/ENTER button once.
Adjusted values are output.
Adjustment is completed.
When adjustment is OK, press the
DELETE/CANCEL button.
When adjustment is NG, press the
DELETE/CANCEL button.
No disc is loaded.
Auto adjustment menu
Auto preliminary adjustment menu
Auto preliminary adjustment is started after sliding to the
innermost track.
“*** ”changes in the following order during automatic
adjustment.
HAo -> ................. -> TCO
Proceed to Step 5 when adjustment is OK.
Proceed to Step 6 when adjustment is NG.
The display returns to the AUTO preliminary adjustment menu.
There is an abnormality at the adjusted point such as HAo.
Refer to “Troubleshooting”. (page 20)
[ EJECT ]
[ LOADING ]
[ AUTO _ AJST _ ]
[ _ AUT _ YOBI _ ]
[ *** : _ _ _ _ _ _ ]
[ _ COMPLETE _ ]
[ Can't _ ADJ. ]
[ _ AUT _ YOBI _ ]
[ Can't _ ADJ. ]
4. AUTO AFB adjustment mode Disc in use: Commercially available mini disc for recording
Step Setting method Remark Display
1
2
3
4
5
Set the Test mode.
Load a disc.
Press the DISPLAY button once.
Press the SET/ENTER button once.
Press the DELETE/CANCEL button.
No disc is loaded.
Auto adjustment menu
Auto AFB adjustment menu
Auto AFB adjustment is started.
Adjusted values are output.
The display returns to the AUTO AFB adjustment menu.
[ EJECT ]
[ LOADING ]
[ AUTO _ AJST _ ]
[ _ AUT _ AFB _ _ ]
[ FAB YY _ ZZZZ ]
[ YY _ ZZZZ _ _ _ ]
[ _ AUT _ AFB _ _ ]
Note) YY, ZZZZ: Measured value

MDX-596
MDX-596
7. TEST-REC mode Disc in use: Commercially available mini disc for recording
(It is used to check the REC function at the specified address.)
Step Setting method Remark Display
1
2
3
4
5
Load a disc.
Press the TITLE button twice.
Press the SET/ENTER button.
Press the DELETE/CANCEL button.
AUTO adjustment menu
TEST-REC menu
ADDRESS setting (The initial value of the address is displayed.)
Continuous recording
TEST-REC menu
[ AUTO _ AJST _ ]
[ TEST _ REC _ _ ]
[ a 32 _ pw ZZ ]
[ aXXXX _ pw ZZ ]
[ TEST _ REC _ _ ]
•Every time the TITLE button is pressed in the address setting mode, the address changes in the order of 32-> 3C -> 7 -> 8A
-> 95 -> —
•Pressing the DISPLAY button in the TEST-REC menu changes to the AUTO adjustment menu.
8. INNER mode Disc in use: Commercially available mini disc for recording
Step Setting method Remark Display
1
2
3
4
Load a disc.
Press the CHARA. button.
Press the SET/ENTER button.
Press the DELETE/CANCEL button.
AUTO adjustment menu
INNER menu
INNER switch position is measured.
(Both SUBQ address and C1 error are displayed.)
INNER menu
[ AUTO _ AJST _ ]
[ _ _ INNER _ _ _ ]
[ sXXXX cYYYY ]
[ _ _ INNER _ _ _ ]
•Pressing the DISPLAY button in the INNER menu changes to the AUTO adjustment menu.
12
6. TEST-PLAY mode Using the disc: Commercially available mini disc for recording
(Use this mode to check that the playback function is provided at the specified address.)
Step Setting method Remark Display
1
2
3
4
5
6
Load a disc.
Press the TITLE button.
Press the INPUT button.
Press the SET/ENTER button.
Press the INPUT button.
Press the DELETE/CANCEL button.
AUTO adjustment menu
TEST-PLAY menu
ADDRESS setting (The initial value of the target address is displayed.)
Continuous reproduction (bit section) (Address + C1 error display)
Continuous reproduction (group section)
(Address + C1 error display)
Continuous reproduction (group section) (Address + ADIP error display)
TEST-PLAY menu
[ AUTO _ AJST _ ]
[ TEST _ PLAY _ ]
[ ADRES _ 32 ]
[ sXXXX cYYYY ]
[ aXXXX cYYYY ]
[ aXXXX aYYYY ]
[ TEST _ PLAY _ ]
•Every time the TITLE button is pressed in the address setting mode, the address changes in the order of 32-> 3C -> 7 -> 8A
-> 95 -> —
•Pressing the DISPLAY button in the TEST-PLAY menu changes to the AUTO adjustment menu.
5. EEPROM setting mode Disc in use: Commercially available mini disc for recording
(used to confirm/adjust setting values)
Refer to p.15 for EEPROM setting.

MDX-596
MDX-596
●Forced rotation of loading motor
It is possible to force the loading motor to rotate by turning the jog dial when the microprocessor version (tsm1C**e**)
of the test mode or EJECT appears on display. (This is used when the disc cannot be ejected.)
JOG DIAL y: Forced feeding of the disc to EJECT
JOG DIAL t: Forced feeding of the disc to LOAD
* To obtain the microprocessor version on display when a disc is loaded, “AUTO _ AJST _ ”appears on display. Press
the DELETE/CANCEL key in this state, and the microprocessor version will appear.
●Lead-in switch position adjustment
Adjust the lead-in switch position so that it is between FF85 and FFD2.
1. Load a TDYS1 (SONY) (P/No. TX945850) disc for reproduction.
2. Loosen the screw (A1) (1 pc) attaching the mechanical switch P.C.B.
3. Retighten the screw (A1) (1 pc) while pressing the mechanical switch P.C.B in the arrow A direction in the figure for
FF85 or less and in the arrow B direction for FFD2 or more.
Measure the lead-in switch position again and check that it is in the range between FF85 and FFD2.
Fig.8
Note) Apply thread lock to the screw (A1) (1 pc) of
the P.C.B. after tightening it.
●Confirmation of magnetic head installation position
•After replacing the magnetic head and the optical pick-up, be
sure to confirm their installation positions.
•To facilitate adjustment of their installation positions, bring the
optical pick-up to the center position and follow the procedure
described below.
1.Load a clear disc (P/No. AAX18050) for checking the head.
2.Push down the up-shift arm of the magnetic head with a finger to
raise the magnetic head.
3.Looking at the unit from above, check if the magnetic head
matches with the optical pick-up objective lens.
4.Check to ensure that the magnetic head moves up and down
smoothly.
13
(A1) X1
AB
Magnetic head
Circumferentical direction
Objective lens
Radial direction
Push down with a finger.
Fig.9

MDX-596
MDX-596
14
Fig. 11
MECHANISM ADJUSTMENT
When making an adjustment, be sure to connect an extension cable for servicing and an expansion P.C.B. as shown in
Fig.12.
Oscilloscope
GND CH1 CH2
XY
IC1201 No.4 pin
GND (TP1202)
IC1201 No.11 pin
EIN (TP1253)
IC1201 No.12 pin
FIN (TP1254)
100K
470p
470p
a
b
Lissajous waveform
a:b = Within 4:1
100K
After performing automatic adjustment in the AUTO mode
selected from the test mode by using a TDYS1 (SONY) (P/
No. TX945850) disc for reproduction (COMPLETE status
on display), adjust the EOUT to FOUT Lissajous waveform
(x-y).
1. Loosen 3 screws of the spindle motor a little and make
adjustment while watching the Lissajous waveform.
2. After adjustment, tighten screws in the order of (q), (w)
and (e).
Fig. 10
Fig. 12
(Externally attached)
1. Optical pickup rating inspection method
(See page E41/J39)
2
31
2
31
Check the Lissajous waveform
while adjusting the installation
position by using a screwdriver in
the adjustment hole in the
spindle motor.
Adjustment hole
FFC for 28P extension
TX946220
Mechanism
P.C.B.
MD Main P.C.B.
Connector for 2P extension
AAX16620
From magnetic head
Extension P.C.B. for servicing
(AAX16660)
Install an Extension P.C.B. for servicing
to the mechanism.
FFC for 5P extension
TX946190
From optical pickup
FFC for 6P extension
AAX16640

15
EEPROM SETTING MODE TRANSITION DIAGRAM
Note) To return to the SUB MENU or MAIN MENU display of the test mode, press the DELETE/CANCEL button.
5. EEPROM setting mode Disc in use: Commercially available mini disc for recording
(used to confirm/adjust setting values)
1) Start the TEST mode.
2) Load the disc.
[AUTO AJST]
3) Press the DISPLAY button 6 times.
[EEPROM SET]
4) Execute the procedure to have “EEPROM setting mode transition diagram”displayed and adjust
the jog dial so that the same setting values as those in “EEPROM contents list”are obtained.
(Refer to p.10 for TEMP setting.)
5) Press the REC button to cancel the TEST mode.
(Entry into EEPROM can be started here.)
6) Set to the TEST mode again and perform AUTO preliminary adjustment, AUTO adjustment and
AUTO AFB adjustment.

16
SLG ❍ ❍ 3E H
SL2 ❍ ❍ 10 H
SLDLIM ❍ ❍ 7F H
SLDLEV ❍ ❍ 12 H
SLKLVk ❍ ❍ 55 H
SLKLVt ❍ ❍ 2E H
SLKLVm ❍ ❍ 55 H
SLBKm ❍ ❍ 08 H
SLKrio ❍ ❍ 60 H
SLKroi ❍ ❍ 68 H
SLK1io ❍ ❍ 68 H
SLK1oi ❍ ❍ 60 H
●Slide setting (Sled)
Item on display Set value
●Control setting (Control)
Item on display Set value
CONTROL1 ❍ ❍ 08 H
CONTROL2 ❍ ❍ 02 H
ADJTTM ❍ ❍ 14 H
HDEQAD ❍ ❍ 92 H
LDEQAD ❍ ❍ 8E H
GDEQAD ❍ ❍ 91 H
MDEQBC ❍ ❍ 8C H
LDEQBC ❍ ❍ 8F H
GDEQBC ❍ ❍ 8A H
HALSG ❍ ❍ 11 H
LALSG ❍ ❍ 11 H
GALSG ❍ ❍ 11 H
HALSOFS ❍ ❍ FC H
LALSOFS ❍ ❍ 00 H
GALSOFS ❍ ❍ 00 H
Item on display Set value
COK ❍ ❍ 58 H
FAT ❍ ❍ C0 H
TAT ❍ ❍ 3E H
CAT ❍ ❍ 40 H
FAB ❍ ❍ 5C H
STR ❍ ❍ 0B H
SFS ❍ ❍ 0D H
STC ❍ ❍ 0D H
●Adjust setting (ADJSET)
●Focus setting (Focus)
Item on display Set value
FG ❍ ❍ B1 H
FF ❍ ❍ 10 H
FF1 ❍ ❍ 70 H
FF2 ❍ ❍ E0 H
FZHLEV ❍ ❍ ED H
FOKLEVh ❍ ❍ 07 H
FOKLEVL ❍ ❍ 09 H
FOSTn ❍ ❍ 2C H
DISCJG ❍ ❍ 14 H
●Spin setting (Spindle)
Item on display Set value
SPG ❍ ❍ 10 H
SPG-in ❍ ❍ 5C H
SPG-mid ❍ ❍ 48 H
SPG-out ❍ ❍ 38 H
SP1 ❍ ❍ 10 H
SP2 ❍ ❍ 93 H
SP3 ❍ ❍ ED H
SP4 ❍ ❍ EE H
SP5 ❍ ❍ 20 H
SPDLIM ❍ ❍ 64 H
SPKLEVm ❍ ❍ 15 H
Item on display Set value
TG ❍ ❍ 6B H
TF ❍ ❍ 10 H
TF1 ❍ ❍ 6B H
TF2 ❍ ❍ F0 H
FT3 ❍ ❍ 08 H
SVCNT4 ❍ ❍ 01 H
TRBLVo ❍ ❍ 68 H
TRBLVt ❍ ❍ 50 H
TRKLVo ❍ ❍ 60 H
TRKLVt ❍ ❍ 2E H
TDPWo ❍ ❍ 67 H
TDPWt ❍ ❍ 21 H
SLCTo ❍ ❍ 00 H
SLCTt ❍ ❍ 50 H
SLCTm ❍ ❍ 53 H
TCRSC1P ❍ ❍ 16 H
TCRSC h ❍ ❍ 00 H
TCRSC L ❍ ❍ FA H
TCRSCHh ❍ ❍ 02 H
TCRSCHL ❍ ❍ 02 H
COTLVP ❍ ❍ 05 H
COTLVr ❍ ❍ 15 H
JPint ❍ ❍ 00 H
KIK1 ❍ ❍ 64 H
●Tracking setting (Tracking)
EEPROM CONTENTS LIST

MDX-596
MDX-596
■SPECIAL TEST MODE
●How to set to the special test mode
Press the POWER button while pressing the SET/ENTER button and the STOP button. Then all the indicators will light up.
●Operation procedure
Every time the SET/ENTER button is pressed, lighting of indicators and items on the display change as follows.
1) All indicators light up.
2) All indicators turn off.
3) Segments not sharing the border light up.
4) Above segments turn off and other segments light up.
5) The date when the software was entered appears on the display.
6) The version of the micro processor appears on the display. [ CPU Ver:TP 3 ]
7) The time of auto-marking appears on the display. [ AM Time :C8h ]
8) The analog level of auto-marking appears on the display. [ AM Lv1_A:24h ]
9) The digital level of auto-marking appears on the display. [ AM Lv1_D:1Ah ]
10) The parameter of the bit distribution during recording on the display. [ Rec Bit :C h ]
11) The parameter of the bit distribution during recording on the display. [ Rec Bit1:FEh ]
12) Write/read check for EEPROM appears on the display [ EE W/R Check ]
When the INPUT button is pressed at this point, whether the micro processor executed data write/read function into
EEPROM or not is checked.
If [OK] appears on the display and the pin 6 of IC6 is at “H”, the check result is satisfactory.
[NG] is displayed when there is an error while writing or reading the data.
In such a case, check EEPROM (IC7).
●How to cancel the special mode
Press the STOP button, and the mode will change from the special test mode to the factory preset mode and the data in
RAM will be cleared.
Note : Turning off the power will cancel the special test mode but will not clear the data in RAM (ie., user settings are
maintained).
17
Data to write in EEPROM (IC7) Initial settings
INPUT mode ANALOG
REPEAT mode OFF
RANDOM mode OFF
PROGRAM mode OFF
REC mode (STEREO/MONO) STEREO
AUTO MARK/MANUAL AUTO (“MANUAL”does not light up.)
DISPLAY mode DISC TITLE

MDX-596
MDX-596
18
Can't REC
Can't Copy
DIGin Unlock
TOC Full
UTOC ERR R
UTOC ERR A
UTOC ERR L0 ~ 4
Not Audio
Disc Full
Playback MD
Protected
Error on display Description Countermeasure
■ERROR DISPLAY
•DEFECT occurred 10 times continuously during REC-
PLAY.
•Recordable cluster became “0”due to occurrence of
DEFECT during REC-PLAY.
•REC mode cannot be set for 20 seconds even after
repeatedly trying to read the read disabled address.
•One of the following judgments has been made
depending on the channel status of the digital signal
input from D-IN during REC-PAUSE or REC-PLAY.
(1) Other than audio
(2) Other than civil purpose
(3) Copy NG due to reversed COPY bit of CD (ie., copy
protected)
•Either of the following symptoms occurred for the digital
signal input from D-IN during REC-PAUSE or REC-
PLAY.
(1) Digital IN PLL is unlocked.
(2) Locked under conditions other than FS=44.1kHz.
•No space is left to register music No and character data
(song name, disc name, etc.) while the REC-PLAY
function is used.
•No recordable space is left when trying to activate the
REC-PAUSE function.
•“FTNO > LTNO”occurred.
•“FTNO = 0 or 1”occurred.
•UTOC recorded in the disc could not be read.
•“Start address > end address”occurred.
•Any one of the UTOC0 ~ 4 data was looped.
•Data not for audio purpose is recorded in the track mode
of TNO which is currently selected.
•No recordable space is left when trying to activate the
REC-PAUSE function.
•The loaded disc was for reproduction only when trying to
activate the REC-PAUSE function or trying to edit.
•Recording or editing was attempted while the data
protector of the disc for recording and reproduction is
set to the data protected state.
•Editing the track subject to write protect function was
attempted by using the data written in UTOC.
•Check that the disc is free from any scratch,
dust, finger print, black spot, etc. and that
decentering, face deflection, etc. are not
excessive.
•Check if the CD is a copy inhibited on (e.g., CD-
R, etc.)
•Check that the D-IN signal line is free from
abnormality.
•Use a disc for recording and reproduction with a
space left to register UTOC.
•As an abnormality exists in the UTOC data, use
another disc.
•Select another TNO or use another disc.
•Use another disc for recording with a recordable
space left.
•As the loaded disc is for reproduction only, use
a disc for recording.
•Try again with the data protector set to the
original position.
•As the track to be edited is write protected, try
again with another track.

MDX-596
MDX-596
19
Can' t Edit
TMP Over!!
DISC ERR R
DISC ERR S
DISC ERR W
TOC ERR S
TOC ERR R
U TOC W ERR
FOCUS ERR
BLANK DISC
TOC W ERROR
EEPROM ERROR
Error on display Description Countermeasure
Mechanism Error
Error on display Description
Er_MD2_* The head fails to move up.
Er_MD3_* The head fails to move down.
HINF (IC1401 No.93 pin)
*= E Eject completed position < 1.0 V
*= M Horizontal midway position > 3.01 V
*= L Load completed position 1.31 —2.36 V
*= D Head down position 1.01 —1.31 V
•Editing conditions were not satisfied with respect to
each editing function.
•The temperature in the set (MD unit) went up exces-
sively high due to occurrence of some abnormality.
•The data was not correct or it was not possible to read it
correctly.
•Recording the music data failed as an abnormality
occurred while recording it.
•The TOC data was not correct.
•It was not possible to read the TOC data.
•It was not possible to rewrite UTOC correctly and an
abnormality occurred while rewriting it.
•The disc was loaded but it was not possible to achieve
FOCUS.
•The total number of TNO and NAME characters was “0”
as a result of reading UTOC.
•UTOC can be read but cannot be rewritten.
•The EEPROM data is not correct
•Wrong operation procedure was used. Try
again by using the correct procedure.
•Check according to troubleshooting.
•Check the temperature of the area where the
unit is used.
•Use another disc as there is an abnormality in
TOC or UTOC data or the disc has a scratch or
other faulty condition.
•The TOC data recorded in the disc is not in
compliance with the MD standard.
•Use another disc as the disc has a scratch or
other faulty condition.
•Use another disc as the disc has a scratch or
other faulty condition.
•Check that the disc is free from any scratch,
dust, finger print, black spot, etc. and that
decentering, face deflection, etc. are not
excessive.
•Check if the disc is recordable by actually
recording.
•Check if the recording head contacts properly
and if wiring from the circuit board to the
recording head is free from breakage.
•Try again after resetting and if still NG, replace
EEPROM.
Other manuals for MDX-596
2
Table of contents
Other Yamaha Mini Disc Recorder manuals

Yamaha
Yamaha MDX-595 User manual

Yamaha
Yamaha MDX-596 User manual

Yamaha
Yamaha MDX-E100 User manual

Yamaha
Yamaha MDX-595 User manual

Yamaha
Yamaha MD4 Instruction Manual

Yamaha
Yamaha MDX-793 User manual

Yamaha
Yamaha MDX-E300 User manual

Yamaha
Yamaha MDX-E300 User manual

Yamaha
Yamaha MDX-E300 User manual

Yamaha
Yamaha MDX-9 User manual