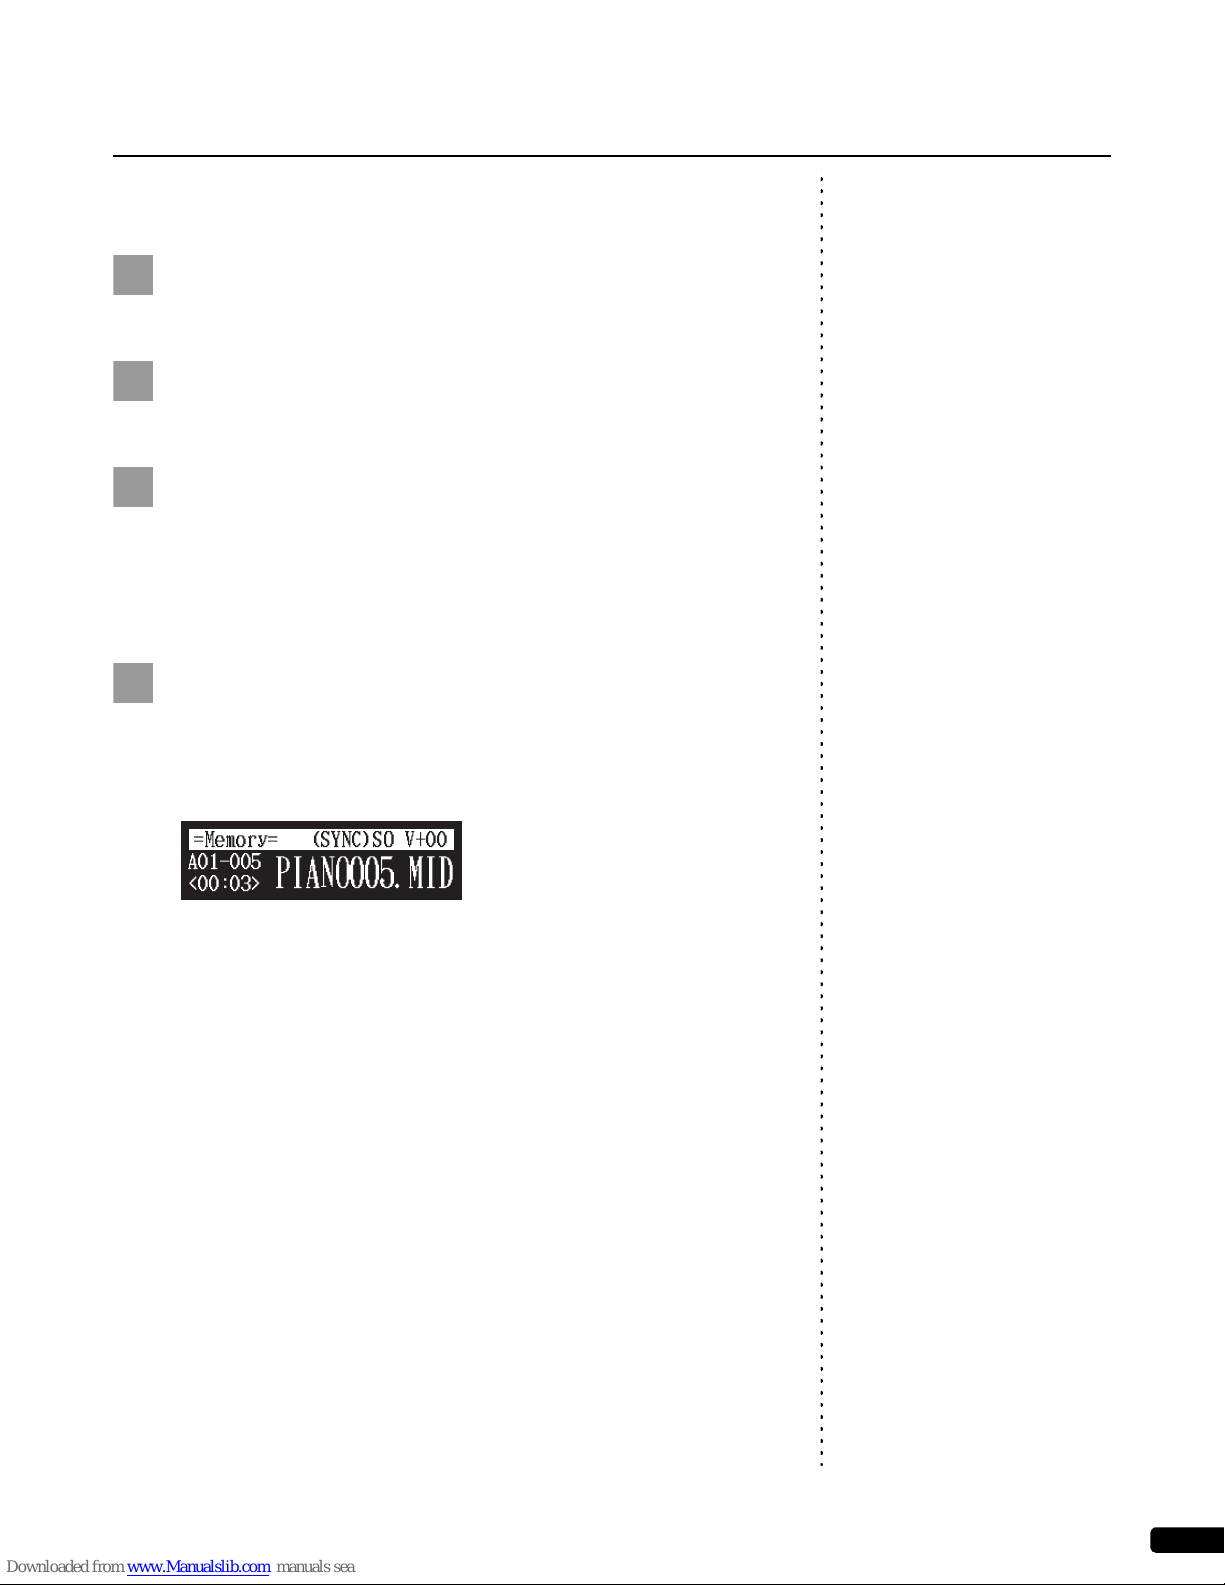
Yamaha Disklavier E3 Technical manual
Other Yamaha Musical Instrument manuals

Yamaha
Yamaha Clavinova CVP-205 User manual

Yamaha
Yamaha Electone EL-25 User manual

Yamaha
Yamaha CLAVINOVA CLP- 685 User manual

Yamaha
Yamaha PSR-E223 User manual

Yamaha
Yamaha Silent Viola SV130 User manual

Yamaha
Yamaha YC-30 User manual

Yamaha
Yamaha YC-20 User manual

Yamaha
Yamaha Electone B-2R User manual

Yamaha
Yamaha Arius YDP-144 User manual

Yamaha
Yamaha Electone C-405 Assembly instructions

Yamaha
Yamaha Clavinova CLP-130 Quick start guide

Yamaha
Yamaha SILENT Piano SD Series User manual

Yamaha
Yamaha PSRE413 - KEYBOARD USB 100 PATTERNS User manual

Yamaha
Yamaha YV-3910 User manual

Yamaha
Yamaha TransAcoustic TA3 User manual

Yamaha
Yamaha Disklavier E3 User manual

Yamaha
Yamaha Clavinova CVP-401 User manual

Yamaha
Yamaha Electone E-5AR Assembly instructions

Yamaha
Yamaha DGX-230/YPG-235 User manual

Yamaha
Yamaha Silent Violin SV-200 User manual