manuals.online logo
Brands
  1. Home
  2. •
  3. Brands
  4. •
  5. Yamaha
  6. •
  7. Musical Instrument
  8. •
  9. Yamaha Electone 305D User manual

Yamaha Electone 305D User manual

Welcome
to
the
YAMAHA
world
of
music.
;
You
are
now
a
member
of
the
select
group
of
proud
YAMAHA
Electone
owners.
We
are
confident
that
your
selection
of
the
305D,
315D
Electone
marks
the
beginning
of
a
lifelong
partnership
in
musical
creativity.
Please
read
this
manual
carefully
to
familiarize
yourself
with
all
of
the
unique
features
of
this
instrument
and
thus
realize
the
Electone’s
full
potential.
Contents
Caution
(Read
The
Following
Before
Playing)
.......,..
1
Your
YAMAHA
305D,
315D
Electone
...........
sss.
2,3
Keyboards
and
Pedals
........
cee
eee
eee
ee
eee
4
Tone
Levers.....
eee
eee
rh
hr
nnn
5
Upper
Special
Presets,
Upper
Custom
Voices,
Vibrato,
Upper
Slow
Attack,
Upper
Sustain,
Pedal
Sustain,
Reverb,
Expression
Pedal,
Foot
Switch
...............
6,7
Tremolo
Section,
Symphonic
Chorus,
Manual
Balance,
Master
Vole
s.
v
ose
echo
NT
e
RI
Re
rore
aS
8
Auto
Rhythm
Section
2...
0.0.0.0
cee
eee
ee
9,
10
Auto
Bass/Chord
Fun
Blocks
.......
vee
re
11,
12,
13
Auto
Arpeggio
........
ee
cee
ee
ee
ram
nnn
14
To
Obtain
Maximum
Enjoyment
From
Your
308D,;
9335D/
i.
ce
rr
err
ee
doma
aera
eae
15
Important
Advice
2.0...
6...
eee
cee
tere
cresa
16
Specifications:
«1
22
os
kak
Wale
wie
vile
peu
ta
17
Italics
apply
only
to
315D
hereinafter.
Caution
(Read
The
Following
Before
Playing)
Always
treat
your
Electone
Organ
with
the
same
care
you
would
any
fine
musical
instrument.
The
follow-
ing
points
are
suggested
to
ensure
the
best
perform-
ance
of
the
Electone
Organ.
Check
for
correct
power
voltage.
Consult
your
Yamaha
serviceman
regarding
any
changes.
nV
A
Your
Electone
contains
no
user
serviceable
components.
Refer
all
service
to
qualified
service
technicians
only.
Always
turn
the
power
switch
OFF
after
play-
ing.
Clean
the
Electone
Organ
cabinet
with
a
damp
cloth
containing
a
neutral
cleaning
agent.
Use
only
soft
and
dry
cloth
on
the
keyboards,
Never
use
paint
thinner,
alcohol
or
other
chemicals
on
either
the
keys
or
the
cabinet.
S
ZZ,
Keep
the
Electone
Organ
in
a
position
away
from
direct
sunlight,
excess
humidity
and
heat
to
protect
the
cabinet
finish.
c
Do
not
hit
or
scratch
the
cabinet
with
a
hard
object.
Do
not
set
heavy
objects
on
the
rolltop
fall-
board.
The
finish
on
your
Electone
Organ
may
under-
go
a
chemical
reaction
if
placed
in
direct
contact
with
polyvinyl
products.
Do
not
set
vinyl
items
on
the
surface
or
use
polyvinyl
material
to
cover
the
organ
for
any
extended
period
of
time.
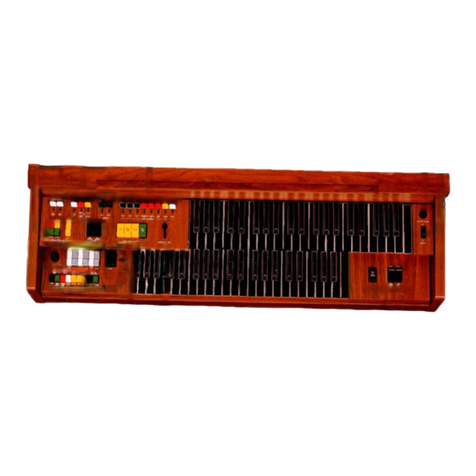
Your
YAMAHA
305D
Electone
Upper
Special
Presets
Volume
race
6
PAGE
5
Lower
Keyboard
Tone
Levers
Upper
Keyboard
Tone
Levers
race
O
Upper
Special
Presets
ease(A)
—
«cs
(5
Vibrato
Pace
G
Pedal
Keyboard
Tone
Levers
Break
Variation
race
(BY
Auto
Rhythm
,,¢¢
C)
Section
Auto
Bass/Chord
Fun
Blocks
"(D
PAGE
8
Master
Volume
Auto
Rhythm
pce
Power
Switch
Controls
©
fase
O
Upper
Keyboard
Auto
Arpeggio
vof)
a
a
|
11!
;
Es
—
(6)
Foot
Switch
Selector
Rhythm
Variation
"as:
&
0)
"
o)
PAM
Tremolo
Section
moe}
Symphonic
Chorus
race
(
7
Power
Light
nase
7
Sustain
Lower
Keyboard
PAGE
4
Face
7
Expression
Pedal
Presel'Ensemble
sace
(^
Manual
Balance
e)
taor
Foot
Switch
Z7)
Upper
Slow
Attack
cc
y
Pedals
Specifications
subject
to
change
wihtout
notice,
Cabinet
shown
model
305D-I.
Your
YAMAHA
315D
Electone
i
race
(D)
Custom
Voices
Volume
Upper
Custom
Voices
race:
(3
rig
Q
Vibrato
Upper
Special
Preset
Volume
race
(C
ss
o
Lowor
Keyboard
Tone
Loves
Q
——
ii
rele
tr
TAGE
5
Pedal
Keyboard
Tone
Levers
Upper
Keyboard
Tone
Levers
race
Upper
Special
Presets
race
Break
Variation
race
e
\uto
Rhythm
Section
race
(C)
PAGE
®
Auto
Bass/Chord
«Fun
Blocks
ney
Master
Volume
ae
L
' x
BA
SEAT
Power
Switch
“Auto
Rhythm
|.
O
"
E
:
=
Controls
:
"
aa
R
d)
Upper
Keyboard
Auto
Arpeggio
"ceg
G)
[
ia
E
i
MER
i
E
7
Foot
Switch
Selector
Rhythm
Variation
nce
10)
G)
Reverb
Power
Light
7)
Sustain
"st
iu)
Upper
Slow
Attack
Tremolo
Section
not)
Symphonic
Chorus
ve)
:
PAGE
4
Lower
Keyboard
]
Preset
Ensemble
race
(^
PAGE
4
Pedals
PAGE
e)
Expression
Pedal
Manual
Balance
race
8
PAGE
Foot
Switch
Specifications
subject
to
change
without
notice,
3
Cabinet
shown
model
315D-1.
`
LOWER
KEYBOARD:
Keyboards
and
Pedals
alld
cc
UPPER
KEYBOARD
(MELODY?
i
lbi
HORD)
MIDOLE
C-
9
d
p—
PEDALS
(BASS)
COE
FG
AB
C
These
Electones
have
two
sets
of
keys,
the
upper
keyboard
and
lower
keyboard
and
a
set
of
pedals.
The
keys
and
octaves
are
as
follows:
Upper
Keyboard
44
keys
(3-2/3
octaves)
Lower
Keyboard
—
44
keys
(3-2/3
octaves}
Pedals
13
keys
(1
octave)
The
upper
keyboard
is
for
the
melody
played
with
the
right
hand,
the
lower
keyboard
is
for
chords
with
the
left
hand
and
the
pedals
are
for
producing
bass
notes
with
the
left
foot.
Note:
A
maximum
of
seven
sounds
may
be
produced
on
both
the
upper
and
lower
keyboard
at
one
time,
but
only
one
sound
may
be
produced
at
a
time
with
the
bass
pedals.
Precedence
is
given
to
the
higher
note
if
two
or
more
pedals
are
pressed
simultaneously.
This
assures
tonal
clarity.
Tone
Levers
o
yi
a
4
(down)
(full
effect)
The
tone
levers
control
the
sounds
of
the
keyboards
and
pedals.
They
are
divided
into
three
groups,
the
upper
keyboard,
the
lower
keyboard
and
pedals,
so
that
different
tones
can
be
set
for
each.
305D
Upper
Tone
Levers
15
315D
Upper
Tone
Levers
19
Lower
Tone
Levers
6
Lower
Tone
Levers
8
Pedal
Tone
Levers
3
Pedal
Tone
Levers
4
Each
lever
can
be
controlled
by
two
methods.
One
is
by
continuously
moving
the
lever
from
"off"
to
"full"
to
obtain
the
exact
setting
for
that
tone,
thus
balancing
the
overall
tone
setting
with
perfect
precision.
The
other
method
is
to
use
the
two
easy-to-feel
click
stops,
at
the
1/3
and
2/3
positions
of
each
lever.
This
enables
you
to
obtain
exactly
the
right
tonal
balance,
mathematically
speaking,
without
the
need
for
calculation.
ATTACK
4',
2-2/3',
2':
This
lever
gives
sharper
definition
to
the
beginning
of
notes
played
on
the
upper
keyboard.
tt
is
like
the
"'pizzicato'"
sound
of
notes
played
by
plucking
strings.
Note:
The
effect
is
not
obtained
with
a
new
key
if
you
are
still
pressing
the
one
before.
Think
in
terms
of
one
key
for
one
sound
at
a
time.
ATTACK
LENGTH:
This
lever
is
used
to
adjust.the
decay
time
effect.
COMBINATION
1,
2:
By
pulling
a
single
lever,
preset
combinations
of
upper
tone
lever
can
be
obtained.
The
combination
1
consists
of
attack
2-2/3',
flute
16’,
flute
8',
and
flute
5-1/3',
and
delivers
a
tone
color
resembling
jazz
tone.
The
attack
length
can
be
controlled
by
the
attack
length
lever.
The
combina-
tion
2
comprises
flute
16',
flute
8’,
flute
4’,
flute
2’,
trombone
16’,
string
8',
and
string
4',
and
gives
a
color
tone
similar
to
fuli
sounds,
Pulling
anyone
of
these
levers
cancels
other
upper
tone
lever
effects.
WAH-BRASS:
This
blends
a
Fantastic
Wah
sound
with
the
Trombone
16°
tone.
DIAPASON:
A
rich,
resonant
burst
of
deep,
clear
organ
harmony
is
pro-
duced
by
this
effect.
RHYTHMIC
WAH:
A
fantastic
coloration
can
be
given
to
the
lower
key-
board
sound
by
pulling
this
lever.
The
Rhythmic
Wah
can
be
teamed
with
the
Auto
Rhythm
(to
be
explained
later)
so as
to
produce
an
even
more
interesting
effect.
Note:
This
effect
cannot
be
obtained
with
Waltz
1,
Ballad,
and
Bossanova
2,
and
also
while
Break
Variation
is
ON.
PITCHES
OR
FOOTAGE
Several
different
pitch
levels
are
generated
by
the
tone
levers.
These
are
designated
with
the
numbers
16',
8'
and
4'
for
example.
These
are
standard
organ
abbreviations
showing
the
tone's
pitch
in
relation
to
the
fundamental
(written)
note.
An
8'
tone
will
sound
just
as
it
has
been
written.
A
16'
tone
will
provide
a
tone
exactly
one
octave
lower
than
the
written
note.
Similarly,
4'
tones
are
one
octave
higher
than
the
written
note.
By
combining
these
tone
values,
you
can
obtain
the
effect
of
several
keyboards
by
simply
pressing
the
notes
on
one
keyboard
(i.e.,
the
coupler
effect).
The
result
is
a
full,
deep
organ
sound.
Note:
Refer
to
the
previous
page
for
the
relationship
between
B'
tones
and
the
notes.
1
Upper
Special
Presets
SPECIAL
„|
PRESETS
(315D
only)
On
the
panel
above
the
upper
keyboard
you
wil!
find
seven
Special
Preset
Tone
selectors.
With
the
Special
Presets
tablet
ON,
you
can
flick
ON
a
selector
switch
for
the
following
tonal
blends:
Piano,
Harpsichord,
Guitar,
Vibraphone,
Accordion,
Banjo
and
Mandolin.
{f
two
buttons
are
pressed
at
the
same
time,
only
the
one
on
the
right
takes
effect.
If
the
Special
Presets
tablet
is
turned
ON,
the
Upper
Tone
lever
settings
are
canceled,
but
if
the
tablet
is
switched
OFF,
the
tone
lever
settings
immediately
take
effect
once
more,
allowing
you
to
switch
back
and
forth
smoothly
and
easily.
The
symphonic
effect
is
applied
to
the
special
preset
sound,
UPPER
SPECIAL
PRESETS
VOLUME
You
can
adjust
the
volume
of
the
Special
Preset
Tones
independently.
UPPER
ENSEMBLE
If
the
Special
Presets
tablet
is
left
ON
and
you
turn
ON
the
Upper
Ensemble
tablet,
you
can
enjoy
a
blend
of
the
preset
tones
and
upper
tones
in
a
striking
Ensemble
effect.
Note:
This
effect
is
canceled
when
you
use
the
Upper
Special
Presets
Lower
tablet
for
the
feature
hereinafter
explained.
UPPER
SPECIAL
PRESETS
LOWER
If
the
Special
Presets
tablet
is
left
ON
and
you
turn
ON
the
Upper
Special
Presets
Lower
tablet
(LOWER),
you
can
obtain
the
preset
tones
on
the
lower
keyboard
one
octave
higher.
And
the
Ensemble
effect
can
be
used
on
either
keyboard
at
the
same
time,
since
the
tone
lever
settings
can
be
cut
back
in.
The
Ensemble
effect
can
also
be
enjoyed
by
combining
the
lower
keyboard
preset
tones
with
its
tone
lever
settings.
Note:
The
Special
Presets
Lower
effect
is
canceled
whenever
you
use
the
Auto
Bass/Chord.
Upper
Custom
Voices
csom
Five
buttons
next
to
the
Special
Preset
Tone
Selectors
are
the
Custom
Voice
Selectors.
When
the
Custom
Voices
tablet
is
ON
and
you
select
and
push
one
of
these
buttons,
you
can
obtain
a
tone
color
of
Piccolo,
Trombone,
Trumpet,
Clarinet
or
Violin
on
the
upper
keyboard
depending
on
your
selection.
Once
the
keyboard
is
depressed,
these
tone
colors
start
to
vary
every
moment
in
the
so
manner
as
to
resemble
the
musical
instruments,
Putting
the
Custom
'
Voices
tablet
ON
cancels
setting
of
the
Upper
Tone
Lever,
But,
by
putting
the
Upper
Ensemble
tablet
ON,
you
can
enjoy
an
ensemble
play
with
these
tones
on
the
upper
keyboard.
The
symphonic
effect
is
applied
to
the
custom
voice
sound.
UPPER
CUSTOM
VOICE
VOLUME
It
permits
independent
control
of
Custom
Voices
only.
Vibrato
Vibrato
is
a
waving
of
the
tone.
Violinists
and
cello
players
produce
this
effect
frequently
by
an
oscillating
motion
of
the
left
hand.
[t
enhances
the
emotional
and
tonal
"feeling"
of
the
instrument.
DEPTH
Vibrato
effect
can
be
produced
by
moving
the
lever
toward
you.
It
provides
continuous
adjustment
of
the
vibrato
depth.
DELAY
VIBRATO
(Controlled
by
Upper
Keyboard)
7
This
lever
regulates
the
length
of
time
between
the
very
beginning
of
the
note
sound
and
the
moment
when
the
actual
vibrato
cuts
in.
The
more
you
puli
the
lever
toward
you,
the
longer
it
takes
for
the
vibrato
to
cut
in.
SPEED
(315D
only)
This
lever
is
to
adjust
Vibrato
speed.
The
further
you
pull
the
lever
toward
you,
the
faster
the
speed
becomes.
:
Upper
Slow
Attack
This
tablet
produces
a
slower,
more
modulated
overall
effect
to
the
attack
executed
with
the
upper
keyboard
tone
lever
16‘,
8',
4'
and
2’
sounds.
Upper
Sustain
When
the
Upper
Sustain
tablet
is
turned
ON,
a
natural-fadeout
of
the
16’,
8’,
4’
and
2’
tones
is
heard
after
a
key
is
released
on
the
upper
keyboard.
This
sustain
effect
is
lengthened
by
pulling
out
the
Sustain
lever.
Note:
The
sustain
effect
is
not
possible
with
the
following
Special
Preset
Tones:
Accordion,
Banja
and
Mandolin,
The
Vibraphone
has
a
built-in
sustain
effect
that
takes
over
without
any
connection
with
the
Sustain
tablet.
With
the
other
Special
Preset
tones,
however,
the
Sustain
tablet
must
be
turned
ON. The
length
of
the
sustain
effect
may
not
be
regulated
by
the
lever
in
any
of
these
cases,
Sustain
is
not
produced
on
Custom
Voices.
Pedal
Sustain
Pulling
this
lever
toward
you
produces
a
sustain
effect
in
the
notes
played
on
the
bass
pedals.
The
time
during
which
the
sustain
effect
works
can
be
continuously
adjusted.
Reverb
The
reverberation
effect,
which
makes
your
playing
sound
full-
and.
rich
as
if
you
were
playing
in
a
concert
hali,
can
be
adjusted
continuously
and
smoothly
to
suit
your
taste.
Expression
Pedal
|
ON/OFF
Foot
Switch
$
^
Expression
Pedal
By
using
your
right
foot
to
continuously
vary
the
volume,
you
can
match
any
passage
you
are
playing
with
just
the
right
mood
through
expressive
phrasing.
Foot
Switch
The
Foot
Switch
attached
to
the
Expression
Pedal
delivers
two
different
functions,
'Glide'
effect
and
Rhythm
Stop,
and
a
selection
of
these
func-
tions
is
offered
by
two
Foot
Switch
Selectors
provided
on
the
panel
to
the
right
of
the
lower
keyboard.
GLIDE
When
the
Glide
Tablet
is
kept
ON
and
the
foot
switch
is
depressed
with
the
right
foot,
is
obtainable
'Glide'
effect
which
reduces
an
interval
to
almost
a
half.
By
releasing
the
Foot
Switch,
the
preceding
interval
gets
restored.
With
this
Glide
effect,
Vibrato
is
canceled.
RHYTHM
STOP
This
function
relates
to
Auto
Rhythm
which
will
be
described
later.
When
the
Rhythm
Stop
tablet
is
turned
ON
and
the
Foot
Switch
is
used,
it
is
possible
to
stop
or
re-start
Rhythm
in
the
simple
manner
without
using
your hand
and
at
any
time
during
the
play.
When
Rhythm
is
functioning
and
you
once
depress
the
foot
switch,
Rhythm
is
immediately
brought
to
a
stop,
and
another
depressing
given
to
the
switch
makes
Rhythm
re-start
from
the
first
beat.
Rhythm
also
re-starts
when
Rhythm
is
left
at
a.
stop
through
the
foot
switch
and
the
rhythm
stop
tablet
is
turned
OFF.
Tremolo
Section
LOWER
T
CHORUS
HEMOLO
GRCHEETEA
You
can
also
add
a
richer,
stereophonic
sound
so
as
to
achieve
fuller
ex-
pression.
This
Tremolo
can
produce
two
different
effects
depending
on
a
change
of
the
speed.
To
obtain
an
ordinary
Tremolo
effect,
turn
ON
the
Tremolo
tablet.
The
Chorus
effect
with
a
slower
tempo,
on
the
other
hand,
is
obtained
by
turning
ON
the
Chorus
tablet,
In
general,
the
Tremolo
effect
is
used
with
popular
music,
and
the
Chorus
effect
with
grand
and
dignified
music.
Please
determine
an
extent
of
Tremolo
effect
by
means
of
other
four
tablets.
UPPER
FLUTE:
Use
this
tablet
to
give
the
Tremolo
to
the
Flute
tone
on
the
upper
keyboard.
UPPER
ORCHESTRA:
Use
this
tablet
to
produce
the
Tremolo
effect
with
the
Orchestra
tone
on
the
upper
keyboard.
LOWER
FLUTE:
Use
this
tablet
to
give
the
Tremolo
to
the
Flute
tone
on
the
tower
keyboard.
LOWER
ORCHESTRA:
Use
this
tablet
to
produce
the
Tremolo
effect
with
the
Orchestra
tone
on
the
lower
keyboard.
Note:
When
a
tablet
and
a
symphonic
chorus
tablet
with
the
same
designation
as
the
former
are
turned
ON
simultaneously,
Tremolo
effect
is
canceled.
Symphonic
Chorus
UPPER
FLUTE
By
turning
ON
the
four
tablet
switches
above
next
to
the
Tremolo
section,
lively
and
extensive
‘Symphonic
Chorus’
effect
can
be
given
to
the
tone
coler
of
each
Upper
Flute,
Upper
Orchestra,
Lower
Flute,
and
Lower
Orchestra.
'
When
the
CELESTE
tablet
is
set
to
ON,
the
sound
reverberates
slowly
and
this
gives
the
music
a
settled
and
‘picturesque’
effect.
Manual
Balance
This
control
governs
the
relative
strength
of
the
upper
and
lower
keyboards.
It
is
normally
left
in
the
center
position,
but
can
be
shifted
to
stress
the
melody
or
accompaniment
in
a
selection:
or
passage.
Master
Volume
The
master
volume
control
adjusts
the
overall
volume
of
the
whole
function
of
the
Electone
voices,
rhythm
section
voice
and
auto
bass
chord.
Auto
Rhythm
Section
MARCH
WALTZ
2
SW
WALTZ
1
BALLAD
JAZZ
ROCK
SLOW
ROCK
DISCO
ING
|
[=]
4/4
4/4
4/4 3/4
4/4
4/4
TANGO
BOSSANOVA
2
MAMBO
LATIN
ROCK
BOSSANOVA
1
RHUMBA
SAMBA
16
BEAT
This
section
provides
a
selection
of
16
rhythms,
which
can
be
produced
at
the
press
of
a
button.
By
combining
more
than
two
of
the
buttons
on
the
two
rows,
you
can
create
more
complex
rhythms.
However,
the
rhythms
in
the
upper
row
have
counterparts
with
those
directly
beneath
in
the
lower
row.
When
both
rows
of
buttons
are
used
together,
the
upper
row
takes
precedence.
In
addition
to
the
Tempo,
Volume
and
Balance
control
knobs,
the
ordinary
START
switch
and
the
unique
Yamaha
SYNCHRO-
START
switch
are
equipped.
The
latter
cuts
in
the
rhythm
accompaniment
on
the
first
beat
of
a
bar,
when
you
play
the
first
note
on
the
lower
keyboard
or
a
pedal
note.
The
specia!
expression
pedal
foot
switch
is
to
cut
and
restart
the
rhythm
at
any
point
during
your
play.
"
RHYTHM-START
For
rhythm
independent
of
keyboard
play,
push
the
rhythm
selection
button
desired,
then
flick
the
START
switch
ON.
The
Auto
Rhythm
can
be
switched
OFF
with
the
foot
switch.
To
restart
the
Auto
Rhythm,
switeh
ON
with
the
foot
switch.
SYNCHRO-START
Select
the
rhythm
on
the
SYNCHRO-START
and
begin
to
play
once
you
have
established
the,beat.
The
rhythm
will
begin
as
soon
as
you
strike
a
lower
keyboard
or
peda!
note.
This
switch
permits
you
to
lead
in
with
a
rhythm-free
melody
on
the
upper
keyboard
if
so
desired.
(Fst)
|
LOUD
€
TREBLE
TEMPO
VOLUME
-$-
BALANCE
TEMPO
You
can
"tune
in"
the
right
tempo
before
or
after
you
begin
playing
by
flicking
ON
the
Start
switch
and
adjusting
the
tempo
by
ear,
Another
way
is
to
select
the
rhythm,
then
switch
ON
the
Synchro-Start,
No
sounds
are
produced,
but
you
may
visually
check
the
tempo
because
the
Tempo
Indica-
tor
lamp
will
flash
each
quarter
note.
Once
the
rhythm
has
begun,
the
lamp
flashes
at
every
measure.
VOLUME
Use
this
to
balance
the
volume
of
the
rhythm
section
and
the
keyboards.
The
volume
is
then
varied
during
play
by
the
expression
pedal,
just
like
that
of
the
other
tones.
BALANCE
This
control
lets
you
balance
the
low
rhythm
sounds,
such
as
drums,
and
the
high
sounds
(i.e,
cymbals)
according
to
your
mood
and
selection.
It
makes
for
a
great
difference
in
the
overall
effect
even
when
using
the
same
rhythm.
Turn
the
knob
to
the
right
to
accentuate
the
higher
(treble)
sounds,
to
the
left
to
accentuate
the
lower
(bass).
If
you
accentuate
the
treble
sounds,
the
rhythm
takes
on
more
tonal
clarity.
10
NORMAL
4
BAR
8
BAR
ON
RHYTHM
_
BREAK
_
VARIATION
VARIATION
RHYTHM
VARIATION
These
are
used
tb
add
variation
to
the
rhythm
patterns
selected
by
the
rhythm
selectors.
The
selector
switch
selection
of
the
rhythm
variation
has
NORMAL,
4
BAR
and
8
BAR
variation
buttons.
When
the
4
BAR
button
is
pushed,
the
rhythm
pattern
is
automatically
added
every
4
bars.
The
same
effect
is
produced
every
8
bars
when
the
8
BAR
button
is
pushed.
When
the
NORMAL
button
is
pushed,
the
selected
rhythm
returns
to
the
normal
Auto
Rhythm
without
switching
to
the
rhythm
variation
pattern.
BREAK
VARIATION
s
This
is
used
when
an
accent
is
desired
on
the
rhythm.
The
moment
the
Break
Variation
button
is
pushed,
the
green
light
lights
up
and
the
Break
Variation
rhythm
start.
They
both
stay
ON
till
the
end
of
the
bar
in
which
the
button
is
released.
At
the
termination
of
the
Break
Variation
rhythm,
the
original
rhythm
takes
over
automatically.
Seven
different
kinds
of
Break
Variation
patterns
and
two
kinds
of
INTRO
patterns
are
provided.
And
each
of
them
is
assigned
to
the
original
rhythms
as
follows.
Kind
of
Break
VAR.
Original
Rhythm
INTRO
1
All
4/4
time
family
rhythms
Break
VAR.
1
|
MARCH,
TANGO
Break
VAR.
2
|
JAZZ
ROCK,
DISCO,
16
BEAT
Break
VAR.
3
|
RHUMBA,
MAMBO,
SAMBA,
LATIN
ROCK
Break
VAR.
4
|
BOSSANOVA
1,
BOSSANOVA
2
INTRO
2
All
3/4
time
family
rhythms
Break
VAR.
5|
WALTZ
1,
WALTZ
2
INTRO
1
All
12/8
time
family
rhythms
Break
VAR.
6
|
BALLAD
Break
VAR.
7
|
SLOW
ROCK
Note:
While
the
Break
Variation
or
INTRO
rhythm
is
ON,
Auto
Bass/Chord,
Auto
Arpeggio
and
Rhythmic
Wow
don’t
work,
*
Operation
of
INTRO
pattern
Push
the
Break
ON
button
while
the.
rhythm
is
at
a
stop.
(The
button
ON
causes
the
light
of
the
Break
ON
button
to
light
up
showing
that
the
INTRO
pattern
ís
at
the
stand-by.)
Then
flick
the
START
switch
ON,
and
the
INTRO
pattern
in
accordance
with
the
original
rhythm
(4/4,
3/4
or
12/8)
is
played
for
the
first
two
bars.
From
the
third
bar
on,
however,
the
rhythm
is
switched
to
the
original
one
auto-
matically.
Note:
1.
If
the
SYNCHRO
START
switch
has
been
ON
before
the
Break
ON
button
is
pushed,
the
INTRO
pattern
will
not
work.
2.
Flicking
the
SYNCHRO
START
switch
ON
while
the
INTRO
pattern
is
play-
'
—
ed
cancels
this
INTRO
pattern
at
the
very
moment.
3.
After
the
rhythm
was
stopped
with
the
foot
switch,
if
the
Break
ON
button
is
pushed
and
the
rhythm
is
started
again
with
the
foot
switch,
the
INTRO
pattern
will
not
work.
Instead,
the
Break
VAR.
rhythm
is
played
for
the
first
bar
and
the
original
rhythm
takes
over
from
the
second
bar.
4.
While
the
rhythm
is
ata
stop,
the
INTRO
rhythm
is
canceled
by
pushing
the
Break
ON
button
again
and
the
lamp
also
turns
off,
Auto
Bass/Chord
Fun
Blocks
These
Electones
are
equipped
with
a
"Fun
Block”
section
of
seven
buttons
which
can
be
used
in
conjunction
with
the
Auto
Rhythm
section.
It
enables
you
to
play
a
variety
of
alternating
bass
notes
and
chords
of
the
lower
keyboard,
depending
upon
which
fun
block
button
you
push
From
your
very
first
keyboard
attempt,
the
fun
block
feature
will
let
you
sound
like
a
pro,
making
full
rhythmic
use
of
the
lower
keyboard
and
pedals.
Here
is
how
it
works.
Note:
When
you
use
the
Auto
Bass/Chord,
Diapason
8’
changes
to
Piano
1,
Horn
8°
becomes
Piano
2,
and
Cello
8'
converts
to
Guitar
tone
also
Cello
4'
to
Harpsi-
chord
on
the
lower
keyboard.
Auto
Bass/Chord
doesn't
work
while
the
Break
Variation
rhythm
is
ON.
MULTI
BASS
The
Multi
Bass
enables
you
to
give
a
fuller,
more
sophisticated
sound
to
the
Auto
Bass
rhythm
for
even
greater
variation.
SINGLE
FINGER
CHORD
(THE
EASY
PLAY
WAY)
*
Set
the
tone
levers
for
the
tone
you
want
on
the
lower
keyboard
and
pedals.
Use
one
or
more
levers
to
adjust
the
Auto
Bass
Chord
tone
color
and
volume
as
in
the
normal
way.
*
Push
the
button
for
whatever
rhythm
you
wish.
*
Set
the
Rhythm
Start
switch
ON.
*
Adjust
the
rhythm
tempo
and
volume.
*
Push
the
Single
Finger
Chord
button.
NORMAL
SINGLE
FINGERED
CUSTOM
MULTI
CON-
MEMORY
FINGER
CHORD
ABC
BASS
STANT
CHORD
C
Major
chord
Now,
if
you
press
a
C
key
on
the
lower
keyboard,
a
C
major
chord
and
bass
note
wil!
play
in
an
alternating
pattern
which
matches
the
rhythm
pattern
and
tempo
set.
As
long
as
the
key
is
held
down,
the
bass
chord
rhythm
continues.
When
the
Black-key
pedal
is
pressed,
the
chord
changes
from
major
to
minor,
and
when
released,
the
chord
returns
to
major.
When
the
White-key
pedal
is
pressed,
the
chord
changes
from
major
to
seventh,
and
when
released,
the
chord
returns
to
major.
When
both
Black-
and
White-key
pedals
are
pressed,
a
minor
seventh
results.
11
12
jM
SES
X
ERE
NORMAL
SINGLE
FINGERED
CUSTOM
FINGER
CHORD
ABC
CHORO
EHE
EET
E
NORMAL
SINGLE'
FINGERED
CUSTOM
FINGER
CHORD
ABC
CHORD
NORMAL
SINGLE
FINGERED
CUSTOM
FINGER
CHORD
ABC
CHORD
MULTI
BASS
MULTI
BASS
o#
no
MULTI
BASS
CON-
STANT
CON-
STANT
MEMORY
MEMORY
FINGERED
CHORD
*
Select
the
rhythm
and
set
both
its
tempo
and
volume
as
explained
earlier.
@
Push
the
Fingered
Chord
button.
*
Play
a
desired
chord
(major,
minor,
seventh,
minor-seventh)
on
the
lower
keyboard.
f
Now
as
long
as
you
hold
that
chord,
it
will
play
according
to
the
rhythm
and
tempo
you
have
set.
The
pedal
notes
sound
automatically
for
the
chord
you
play
on
the
lower
keyboard.
CUSTOM
A.B.C.
*
Push
a
desired
rhythm
button
and
set
both
tempo
and
volume
as
ex-
plained
earlier.
*
Push
the
Custom
A.B.C.
button.
The
chord
notes
on
the
lower
keyboard
are
independent
of
the
pedal
notes.
They
will
both
be
played
automatically
in
terms
of
the
Auto
Rhythm
selected.
Note:
Bass
sound
depends
on
the
pedal
key,
whereas
chord
depends
on
the
Lower
key.
CONSTANT
*
Push
the
Constant
button
and
either
the
Single
Finger
Chord
or
the
Fingered
Chord
button.
*
Play
the
desired
key
or
chord
on
the
Lower
Keyboard.
As
long
as
the
keys.are
held
down,
the
chord,
as
well
as
a
pedal
note
will
sound
as
if
they
were
held
down
during
normal
play
without
any
rhythm
pattern.
As
soon
as
the
key
or
keys
are
released,
the
chord
stops.
MEMORY
This
feature
permits
chords
and
or
pedal
notes
to
continue
to
play
after
the
pedal
or
chord
has
been
released,
The
Memory
Fun
Block
will
function
with
the
Normal,
Single
Finger,
Fingered,
Custom
A.B.C.
and
Constant
Fun
Blocks,
as
illustrated.
Normal/Memory
The
chord
notes
can
be
played
continuously
on
the
lower
keyboard
as
long
as
the
Auto
Rhythm
is
ON.
Constant/Single
Finger
(Fingered)/Memory
Bass
and
Chord
will
play
continuously
with
or
without
Auto
Rhythm.
Single
Finger
(Fingered)/Memory
Bass
and
Chord
will
alternate
continuously,
according
to
your
preselected
Rhythm
pattern,
until
another
Single
Finger
(or
Fingered)
Chord
is
selected.
Custom
A.B.C./Memory
This
feature
permits
you
to
continue
to
alternate
a
Rhythm
after
you
have
released
the
pedal
or
chord,
until
another
peda!
key
or
chord
is
selected.
This
enables
you
to
expand
the
capabilities
of
the
Fun
Block
system
to
your
Pedal
and
Chord
harmonic
tastes.
Note:
Custom
A.B.C./Constant/Memory
or
Finger
Chord/Constant/Memory
.
.
.
Bass
will
play
continuously
with
or
without
Auto
Rhythm,
until
another
pedal
key
or
chord
is
selected.
NORMAL
This
button
cancels
the
other
Fun
Blocks,
returning
the
lower
keyboard
and
the
pedals
to
normal
playing
functions.
NORMAL
SINGLE
FINGERED
CUSTOM
FINGER
CHORD
CHORD
NORMAL
SINGLE
FINGERED
CUSTOM
FINGER
CHORO
CHORD
NORMAL
SINGLE
FINGERED
CUSTOM
FINGER
CHORD
CHORD
NORMAL
SINGLE
FINGERED
CUSTOM
FINGER
CHORD
CHORD
ABC
ABC
ABC
ABC
eS
MULTI
BASS
MULTI
BASS
BASS
emen
CON-
STANT
CON-
STANT
STANT
MEMORY
ILL
MEMORY
13
14
*
Auto
Arpeggio
gf
pF)
py
TTT
Up
Mode
Up
Mode
Turn
Mode
Turn
Mode
Variation
1
Variation
2
Eighth
Sixteenth
Eighth
Sixteenth
note
note
note
note
system
system
system
system
ri
The
repeated
use
of
arpeggio
during
a
piece
adds
real
flair
to
your
playing.
You
can
combine
the
Auto
Arpeggio
with
the
Auto
Rhythm
section,
or
you
can
also
blend
in
the
Auto
Bass/Chord.
Note:
Auto
Arpeggio
is
canceled
while
the
Break
Variation
rhythm
is
ON.
AUTO
ARPEGGIO
START
e
Make
your
Auto
Rhythm
selection
and
switch
ON
the
Synchro-Start.
è
|f
you
wish
to
bring
in
the
Auto
Bass/Chord,
make
the
appropriate
setting.
The
Auto
Arpeggio
can
be
put
on
Memory
by
pushing
the
MEMORY
button.
button.
*
Push
VOICE
1
or
VOICE
2
button
for
the
arpeggio
you
prefer.
'
Set
one
of
the
six
pattern
selectors
for
the
arpeggio
pattern
you
wish
to
use.
Set
the
Arpeggio
Volume
Control.
The
moment
you
play
a
note
on
the
lower
keyboard,
the
Auto
Arpeggio
you
have
activated
will
cut
in
together
with
the
Auto
Rhythm
from
the
very
beginning.
1
2
——
ARP.
VOICE
VOICE
The
VOICE
switches
determine
the
tonal
quality
of
the
arpeggio.
Button-
activation
of
Voice
1
and
Voice
2
produces
4’
and
2'
tone
arpeggio,
respec-
tively.
Auto
Arpeggio
cannot
be
obtained
when
both
switches
are
OFF.
When
they
are
both
ON,
a
blend
of
both
tones
is
achieved.
PATTERN
SELECT
SWITCH
These
switches
enable
you
to
play
any
of
six
different
arpeggio
patterns.
From
left
to
right:
Up
Mode
(eighth),
Up
Mode
(sixteenth),
Turn
Mode
(eighth),
Turn
Mode
(sixteenth),
and
Variation
1
and
2,
in
combination
with
the
Auto
Rhythm.
If
all
of
the
Pattern
Select
switches
are
put
OFF,
the
Turn
Mode
sixteenth
arpeggio
takes
effect.
VOLUME
This
contro!
regulates
only
the
volume
of
the
Auto
Arpeggio.
No
arpeggio
sound
is
heard
when
it is
at
the
lowest
setting.
SUSTAIN
By
pulling
the
Arpeggio
Sustain
lever,
a
sustain
effect
can
be
produced
in
the
arpeggio.
The
sustain
effect
can
be
adjusted
at
any
time.
To
Obtain
Maximum
Enjoyment
From
Your
305D,315D
HEADPHONES
(3900)
A
set
of
Yamaha
headphones
(optional)
can
be
plugged
into
the
HEAD-
PHONES
jack
under
the
keyboard.
With
the
headphones
connected,
the
speakers
are
automatically
shut
off,
allowing
you
to
play
or
practice
at
any
volume
level!
without
disturbing
anyone.
MONAURAL
EXP.
IN
(50kQ)
CT.
"il
|
This
jack
accepts
any
sound
source
(Guitar,
Synthesizer,
etc.)
and
repro-
HEADPHONES
duces
it
through
the
Electone
speakers,
Note:
The
output
level
of
the
sound
source
can
be
controlled
by
the
expression
pedal.
AUX
OUT
(4702)
For
recording,
connect
the
AUX OUT
jack
with
the
tape
deck’s
LINE
IN
^
f
9
i
J
p
PON
==
jack.
Control
the
recording
levels
on
the
tape
deck.
L
LINE
IN
AUX
IN
(23kQ)
For
playback,
connect
the
AUX
IN
jack
with
the
tape
deck's
LINE
OUT
oU
Ux
jack.:Control
the
playback
levels
on
the
tape
deck.
Note:
These sound
sources
(tape
recorder,
etc.)
are
not
affected
by
the
expression
pedal.
n
am
TONE
CABINET
CONNECTOR
&
:
LINE
OUT
«
*
When
a
concert
is
given,
connection
of
a
tone
cabinet
makes
further
dynamic
OUT
IN
EXP.
IN
sounds
obtainable.,
YAMAHA:
This
connector
is
exclusively
for
the
YAMAHA
Tone
Cabinet,
and
is
connectable
to
the
new
type
tone
cabinet
in
which
an
electronic
Tremolo
effect
is
built-in,
It'
cán
deliver
Tremolo/Chorus
effect
respectively
to
the
flute
and
orchestra
tones
on
the
upper/lower
keyboards,
deslie
:
This
connector
is
directly
connectable
to
a
destie
speaker,
Note:
Consult
your
nearby
Yamaha
dealer
for
the
detail
as
the
number
of
pins
may
be
different
in
some
tone
cabinets.
16
Important
Advice
(Electone
is
not
necessarily
out
of
order
if...)
the
unit
does
not
go
ON
when
the
power
switch
1
is
turned
ON.
Check
the
following.
Is
the
AC
plug
fully
inserted
into
the
wall
power
outlet?
Reinsert
it
to
make
sure.
Is
there
.power
coming
from
that
outlet?
If
the
outlet
is
live
but
the
Electone
does
not
work,
unplug
the
cord
and
contact
your
Yamaha
dealer.
occasional
unpleasant
static
occurs.
2
In
the
majority
of
such
cases,
the
cause
can
be
traced
to
the
turning
ON
or
OFF
of
refrigerators,
washing
machines,
electric
pumps
or
other
household
appliances.
Electrical
faults
in
a
neighboring
outdoor
neon
sign
may
also
be
a
cause.
If
the
cause
is
a
fault
in
a
neon
or
fluorescent
lighting
fixture,
it
should
be
repaired.
When
the
cause
cannot
be
determined,
or
in
case
of
doubt,
contact
your
Yamaha
dealer.
`
i
the
Electone
reproduces
radio
or
TV
signals.
3
If
there
is
a
powerful
transmitter
such
as
a
radio
station
in
the
vicinity,
this
can
occur.
Contact
your
Yamaha
dealer.
pedal
notes
sound
too
high,
upper
keyboard
notes
too
low.
This
is
especially
noticeable
when
comparing
the
Electone
and
piano.
Piano
notes
are
combinations
of
harmonics
which
are
influenced
by
the
surroundings,
whereas
Electone
harmonics
are
simpler
(multiples
of
the
fundamenta!
tone)
and
require
a
different
kind
of
adjustment
at
the
assembly
stage.
rattling
(sympathetic
vibration)
occurs.
5
All
materials
have
critical
resonance
frequencies
at
which
they
vibrate.
The
Electone's
continuous
tones
will
naturally
cause
other
objects
(windows,
objects
on
shelves,
etc.)
to
vibrate.
Change
the
place
of
installation
whenever
such
diffi-
culty
occurs.
The
Yamaha
Electone
Organ
is
a
very
unique
instrument
capable
of
reproducing
the
sounds
of
an
entire
orchestra,
-
of
producing
special
effects
and
of
imitating
solo
iristru-
ments..
Your
Yamaha
organ
features
numerous
controls,
levers
and
tabs
which
enable
you
to
create.a
wide
variety
of
combinations.
Each
combination
is
called
à
REGISTRA-
TION.
Sixteen
different
instrumental
combinations
and
special
effects
are
listed
on
this
Registration
Chart.
In
some
cases,
alternate
registrations
are
suggested;
these
are
in-
dicated
with
an
asterisk
(*).
-
1.
General
Flutes
10.
Piano
2.
Full
Flutes
11.
Hawaiian
Guitar
3,
Pull
Organ
(Flutes/Strings)
12.
Accordion
n
4.
Full
Organ
(Flutes/Reeds)
.
13.
Banjo/Harpsichord
5.
Open
Flutes
14.
Marimba/Vibes
-
6.
Reed/String
Ensemble
15.
Mandolin/Organ/
7.
Classical
Organ
.
Solo
Clarinet
8.
Church
16.
Chimes/Harp
9,
Jazz
Organ/Rock
Organ
A
suggested
registration
number
is
shown
on
each
song
sheet
in
the
Yamaha
Family
Fun
Box.
Locate
your
organ
model
on
the
Registration
Chart,
and
then
set
the
organ
controls
accordingly.
Before
setting
up
a
new
registration,
make
sure
all
tone
levers
and
controls.are
in
the
“OFF”
position.
The
organ
models
which
have
similar
features
are
grouped
together
in
the
listings.
A
model
which
has
a
control
or
lever
unlike
any
of
the
models
in
that
group
is
marked
with
an
asterisk,
and
the
particular
feature
or
features
which
are
exclusive
on
that
model
are
also
marked
with
asterisks.
In
most
cases,
an
instrument
name
is
followed
by
a
num-
ber
(16’,
8',
4',
etc.).
The
number
indicates
the
footage
of
an
organ
pipe.
On
a
pipe
organ,
the
various
lengths
(footages)
of
pipes
produce
various
degrees
of
pitch.
Al-
though
an
electronic
organ
does
not
have
pipes,
the
foot-
age
markings
still
indicate
the
high
and
low
pitches
of
the
particular
instrumental
sounds.
For
example,
a
Flute
16°
is
the
lowest
pitch,
the
8’
is
an
octave
higher
in
pitch,
the
4’
an
octave
higher
than
the
8'
and
so
on.
Therefore,
all
instruments
with
the
same
footage
number
have
the
same
degree
of
pitch.
On
some
Yamaha
models,
there
is
a
slider
labelled
TRANSPOSITION.
This
slider
controls
the
various
pitches
available
for
certain
sections
of
the
organ.
E
Yamaha
Electone
Organ
Registration
Chart
The
tonal
effects
on
your
Yamaha
are
controlled
by
the
exclusive
variable
"click-stop"
Tone’
Levers.
These
pro-
vide
unlimited
flexibility
to
voices
and
effects,
Each
lever
can
be
set
at
three
different
positions,
allowing
you
three
main
settings
for
each
voice.
As
you
move
a
Tone
Lever
down,
it
will
"click"
into
three
successive
notches:
first
click
—
soft,
second
click.
—
medium
volume,
and
the
third
click
—
full
volume,
These
are
referred
to
as
“I”,
“2”,
and
“3”
on
the
Registration
Chart.
`
TONE
LEVER
.
(Side
View)
It
is
also
possible
to
set
a
lever
“in-between”
any
of
the
:
lick:
notches:
This.
type
of
setting
will
be.indicated
on
the
chart
as
“1.5”
or
“2.5”.
A
setting
for
a
switch
or
a
dial
is
indicated
on
the
chart
by
the
use
of
three
dots
and
an
arrow
pointing
to
one
of
them
or
to
a
setting
between
thé
dots.
-s
v
A.
Changing
registration
within
a
song
is
introduced
in
the
Special
Arrangements
Manual.
In
most
cases;
just
adding
or
deleting
one
or
two
tabs
is
suggested
. .
.
it
will
not
be
necessary
to
change
every
lever
from
the
original
regis-
tration:
As
you
become
mere
familiar
with
your
Yamaha,
you'll
discover
combinations
not
listed
on
the
Registration
Chart.
When
you
review
arrangements,
feel
free
to
exper-
iment
with
settings
other
than
those
recommended
on
the
song
sheet,
and
add
variety
to
your
playing
by
chang-
ing
registration.
$
MODEL
305
—
315
+
Model
315
only
1.
2
UPPER
UPPER
UPPER
Flute
16’
8°
4’
*2'
(3)
Flutes
*
(3)
Flutes
.
LOWER
16’
8'5
1/3'
4'
22/3'
2
16°
8°
4’
*z
{3}
16’
8’
4'
*2'
(3)
‘Flute
B
{3}
String
|
g
{2)
Oboe
8
(2)
Flute
g
(2)
LOWER
PEDAL
(3)
Flute
a’
(2
Bass
16'
(3)
Flute
4
(2)
Flute
4
(2)
Bass
Sustain
(Med)
Cello
8'
(2)
Horn
8°
12)
CONTROLS
Bass
Sustain
(Med)
PEDAL
Manual
Balance
ED
Manual
Balance
one
Bass
16’
(3)
Bass
.
16
{2
Reverb
.
{Med)
Reverb
(Med)
Bass
Sustain
{Med}
Bass
Sustain
-
(Med!
TREMOLO
CONTROLS
TREMOLO
CONTROLS
CONTROLS
-
G
CONTROLS
Upper
Flute
Rotary
{On}
Upper
Flute
(On)
Manual
Balance
ode
Manual
Balance
one
Lower
Flute
Rotary
(On)
Lower
Flute
>
{On)
Reverb
(Med)
Reverb
(Med}
Tremolo
(On)
Tremolo
(On)
TREMOLO
CONTROLS
TREMOLO
CONTROLS
-
Upper
Flute
(On)
Upper
Flute
`
(On)
Lower
Flute
-
^
{On}
Lower
Flute
(On!)
Tremolo
{On)
Tremolo.
*
(On)
8.
UPPER
rn
UPPER
UPPER
`
Flutes
16’
4’
(3)
Flute
16'8'4'*2'
(3)
Flute
16'8'4'*2'
(3)
LOWER
Trombone
Aen
s
(2):
LOWER
Flute
8
(3)
(1).
Fiute
B
(3)
Flute
g
(4)
}
Nc
Horn
8°
(3!
PEDAL
Flute
`.
8
(GP
PEDAL
dae
Bass
16*
(3)
E
(2)
Bass:
de
ae
(3)
Bass
Sustain
(Med)
CONTROLS
CONTROLS
7
i
{3)
Manual
Balance
x
Manuai
Balance
ome
Bass
Sustain
(Med)
Bass
Sustain,
.
(Med).
Reverb
Reverb
(Med)
'
CONTROLS
f
CONTROLS
.
:
TREMOLO
CO
TREMOLO
CONTROLS
Manual
Balance
DI
Manual
Balance
:
Upper
Flute
Upper
Flute
(On)
Reverb
]
(Med)
Reverb
.
{Me
Lower
Flute
Lower
Flute
(On)
SYMPHONIC
CHORUS
SYMPHONIC
CHORUS
`
Chorus
Tremolo
(On)
Upper
Orchestra
(On)
Upper
Orchestra
‘
(Ori)
E
Lower
Orchestra
(On)
Lower
Orchestra...
(On)
TREMOLO
CONTROLS
TREMOLO
CONTROLS
eem
Upper
Elute
(On)
Upper
Fluté
(On)
Lower
Flute
Lower
Flute
(On)
Tremolo
Chorus
(On)
9.
10.
|:
11-77
UPPER
UPPER'
Srt
UPPER
Preset
#
1
»"
(On)
Piano
Preset
^
=
-
(On).
.
Flute
16°
"(3j
(On)
Flute
16°
8'51/3
{3}
LOWER
idi
Clarinet
16°
43)
LOWER
Flute
8
(On)
LOWER
a
weer
(3)
Flute
8
i3)
PEDAL
Flute
8
PEDAL
,
Bass
16"
:
(On)
PEDAL
(On)
Bass
8
(3)
Bass
Sustain.
.
.
(Med)
Bass
3
Bass
Sustain
(Med)
Bass
Sustain’
.
(Med!
CONTROLS
Bass
Sustain
CONTROLS
CONTROLS
Mariual
Balance
ode
CONTROLS:
:
Manual
Balance
ate
Manual
Balance
E
Reverb
(Med)
Manual
Balanée
Reverb
(Med)
Reverb
(Med)
Preset
Volume
(Max)
Reverb
TREMOLO
CONTROLS
TREMOLO
CONTROLS
TREMOLO
CONTROLS
Upper
Sustain’
(Max)
Lower
Flute
(On}
Upper
Flute
(On)
Upper
Flute
(On)
Vibrato,
Depth
&
payis
Tremolo
(On)
Lower
Flute
(On)
Lower
Fiute
(On)
Speed
Chorus
(On)
Tremolo
(On)
TREMOLO
CONTROLS”
Upper
Flute
(On)
Lower
Flute
ton)
Tremolo
(Om
13.
14.
15."
16.
UPPER
UPPER
UPPER
a
UPPER
Banjo/Harpsichord
Vibraphone
Preset
(On)
Mandolin
Preset
(On}
Flute
&
String
8”
{3)
Preset
(On}
LOWER
Flute
16’
8’
4"
(3)
LOWER
LOWER
;
Flute
g
{3}
or
Solo
Clarinet
Preset*
(On)
Flute
g
{3)
Flute
g
(3)
PEDAL
-LOWER
PEDAL
PEDAL
Bass
8
(3)
Flute
B
4’
(3)
Bass
16"
{3}
Bass
8
(3)
Bass
Sustain
(Med)
PEDAL
P
Bass
Sustain
(Med)
Bass
Sustain
(Med)
CONTROLS
Bass
16°
(3
CONTROLS
CONTROLS
Manuai
Balance
ake
Bass
Sustain
(Med)
Manua!
Balance
P
Manual
Balance
he
Reverb
-
(Med)
CONTROLS
Reverb
(Med)
Reverb
(Med)
Preset
Volume
(Max)
Manual
Balance
"E
Upper
Sustain
(Full)
Preset
Volume
(Max)
TREMOLO-CONTROLS
Reverb
(Med)
SYMPHONIC
CHORUS
TREMOLO
CONTROLS
Lower
Fulte
{Ont
Preset
Volumes
(Max)
Upper
Orchestra
(On)*
Lower
Fulte
{On}
Tremolo
(On).
TREMOLO
CONROLS
TREMOLO
CONTROLS
Tremolo
(On)
Upper
Flute
(On)
..
Upper
Flute
(On)
Lower
Flute
{On}

Other manuals for Electone 305D

2

This manual suits for next models

1

Other Yamaha Musical Instrument manuals
Yamaha Electric Grand CP-70B User manual

Yamaha

Yamaha Electric Grand CP-70B User manual

Yamaha TP-4000 User manual

Yamaha

Yamaha TP-4000 User manual

Yamaha Clavinova CLP-955 User manual

Yamaha

Yamaha Clavinova CLP-955 User manual

Yamaha PortaTone PSR-A1000 User manual

Yamaha

Yamaha PortaTone PSR-A1000 User manual

Yamaha Performance User manual

Yamaha

Yamaha Performance User manual

Yamaha CF III S User manual

Yamaha

Yamaha CF III S User manual

Yamaha AES820 User manual

Yamaha

Yamaha AES820 User manual

Yamaha Clavinova CLP-525 User guide

Yamaha

Yamaha Clavinova CLP-525 User guide

Yamaha RGX TT-D6 User manual

Yamaha

Yamaha RGX TT-D6 User manual

Yamaha YM-460 User manual

Yamaha

Yamaha YM-460 User manual

Yamaha YFP-70 User manual

Yamaha

Yamaha YFP-70 User manual

Yamaha RY8 User manual

Yamaha

Yamaha RY8 User manual

Yamaha Electone FS-30 User manual

Yamaha

Yamaha Electone FS-30 User manual

Yamaha Silent Guitar SLG-100S User manual

Yamaha

Yamaha Silent Guitar SLG-100S User manual

Yamaha AES RS7 User manual

Yamaha

Yamaha AES RS7 User manual

Yamaha Electone ME-30BX User manual

Yamaha

Yamaha Electone ME-30BX User manual

Yamaha PortaSound PSS-9 User manual

Yamaha

Yamaha PortaSound PSS-9 User manual

Yamaha Clavinova CVP-105 User manual

Yamaha

Yamaha Clavinova CVP-105 User manual

Yamaha Electone FC-20 User manual

Yamaha

Yamaha Electone FC-20 User manual

Yamaha YM-41 User manual

Yamaha

Yamaha YM-41 User manual

Yamaha PCY130 User manual

Yamaha

Yamaha PCY130 User manual

Yamaha 501 Instruction Manual

Yamaha

Yamaha 501 Instruction Manual

Yamaha YDS-120 User manual

Yamaha

Yamaha YDS-120 User manual

Yamaha CHH920 User manual

Yamaha

Yamaha CHH920 User manual

Popular Musical Instrument manuals by other brands

Suzuki DP-77 Easy Assembly Guide

Suzuki

Suzuki DP-77 Easy Assembly Guide

Kawai K-15E ATII owner's manual

Kawai

Kawai K-15E ATII owner's manual

Blackstar Amplification Carry-on FOLDING PIANO 49 owner's manual

Blackstar Amplification

Blackstar Amplification Carry-on FOLDING PIANO 49 owner's manual

Optek Music Systems Fretlight owner's manual

Optek Music Systems

Optek Music Systems Fretlight owner's manual

Marimba One One Vibe owner's manual

Marimba One

Marimba One One Vibe owner's manual

Majestic B7634S / 3.4 octave Assembly manual

Majestic

Majestic B7634S / 3.4 octave Assembly manual

Hammond A-405SP owner's manual

Hammond

Hammond A-405SP owner's manual

Roland HP 1800 owner's manual

Roland

Roland HP 1800 owner's manual

Roland FP-E50 quick start

Roland

Roland FP-E50 quick start

TOUCH GUITARS T8 owner's manual

TOUCH GUITARS

TOUCH GUITARS T8 owner's manual

Roland DP-990F Specifications

Roland

Roland DP-990F Specifications

Kawai AnytimeX owner's manual

Kawai

Kawai AnytimeX owner's manual

Casio DG-20 Service manual & parts list

Casio

Casio DG-20 Service manual & parts list

Korg S3 Service manual

Korg

Korg S3 Service manual

Turboharp TurboSlide TH-09 user guide

Turboharp

Turboharp TurboSlide TH-09 user guide

Antigua Soprano owner's manual

Antigua

Antigua Soprano owner's manual

Casio AP-20 Service manual

Casio

Casio AP-20 Service manual

Roland DJ-70 Supplemental notes

Roland

Roland DJ-70 Supplemental notes

manuals.online logo
manuals.online logoBrands
  • About & Mission
  • Contact us
  • Privacy Policy
  • Terms and Conditions

Copyright 2025 Manuals.Online. All Rights Reserved.