CONTENTS
BEFORE USING THE UNIT 4
Accessories................................................................................................ 4
How to use this manual............................................................................ 4
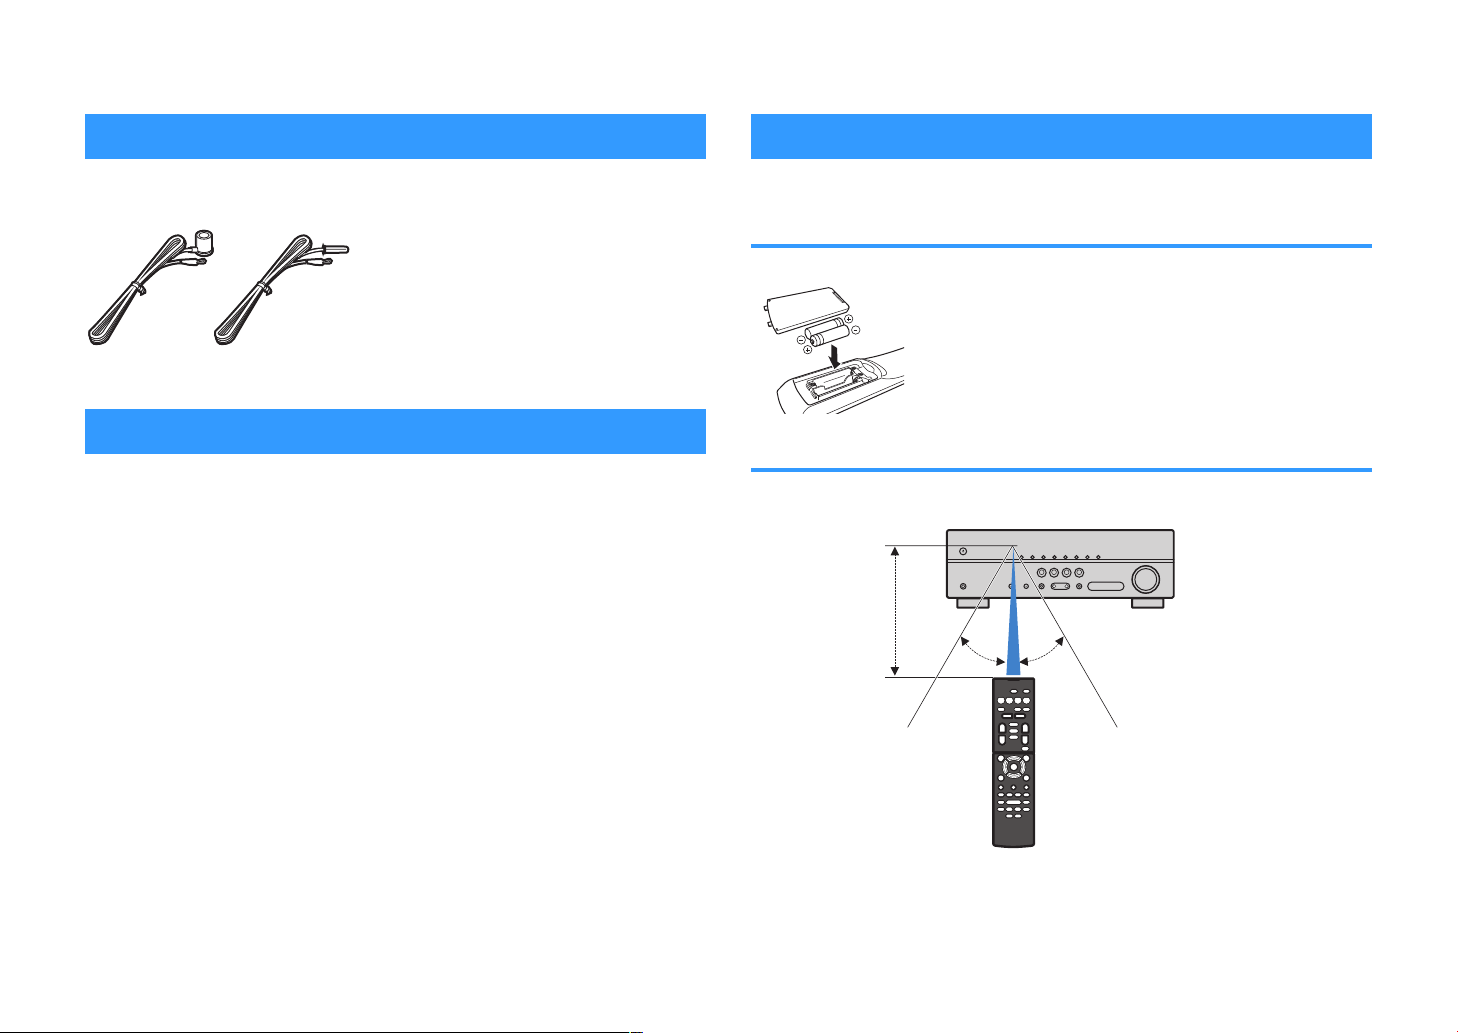
Remote control.......................................................................................... 4
Insert the batteries................................................................................................................................................................... 4
Operating range of the remote control........................................................................................................................... 4
FEATURES 5
What you can do with the unit................................................................. 5
Part names and functions......................................................................... 7
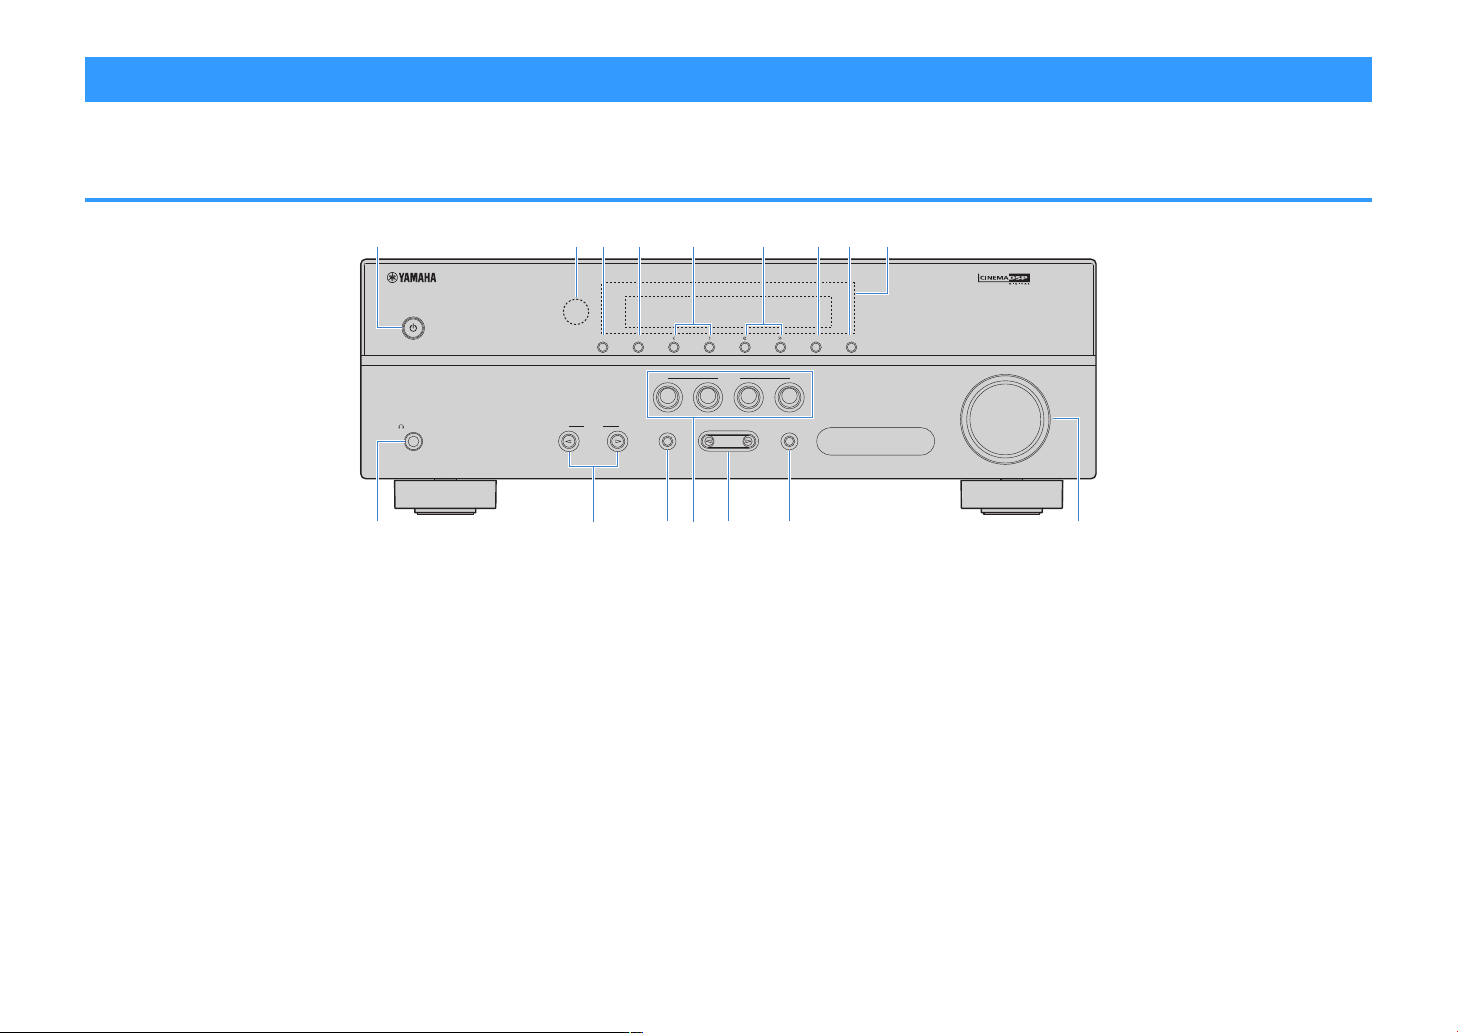
Front panel................................................................................................................................................................................. 7
Front display (indicators)....................................................................................................................................................... 8
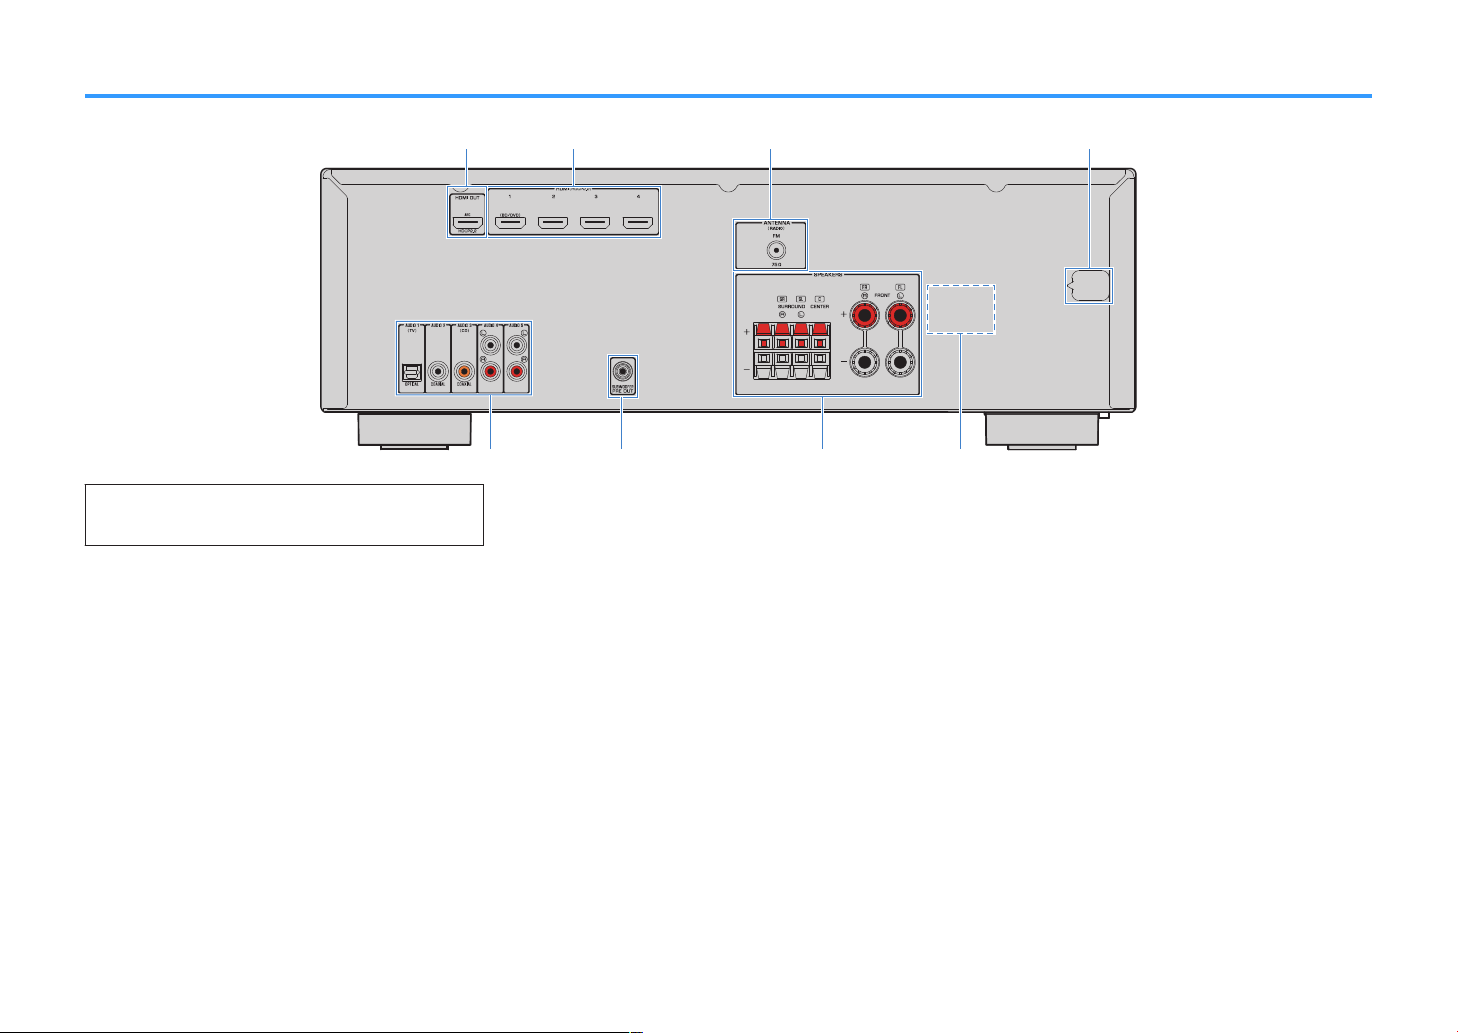
Rear panel................................................................................................................................................................................... 9
Remote control....................................................................................................................................................................... 10
PREPARATIONS 11
1Placing speakers............................................................................... 12
Typical speaker layouts....................................................................................................................................................... 13
Other speaker layouts.......................................................................................................................................................... 14
2 Connecting speakers........................................................................ 15
Connecting speaker cables................................................................................................................................................ 16
Connecting the subwoofer (with built-in amplifier)................................................................................................. 16
3Connecting a TV/playback devices.................................................. 17
Input/output jacks and cables.......................................................................................................................................... 17
Connecting a TV..................................................................................................................................................................... 18
Connecting video devices (such as BD/DVD players).............................................................................................. 18
Connecting audio devices (such as CD players)......................................................................................................... 20
4Connecting the FM antenna............................................................. 20
5Connecting the power cable............................................................ 21
6Selecting an on-screen menu language.......................................... 22
7Configure the speaker settings....................................................... 23
PLAYBACK 25
Basic playback procedure...................................................................... 25
Enjoying playback................................................................................................................................................................. 25
Switching information on the front display................................................................................................................. 25
Selecting the input source and favorite settings with one touch
(SCENE).................................................................................................... 26
Selecting a registered scene.............................................................................................................................................. 26
Registering a scene............................................................................................................................................................... 26
Selecting the sound mode..................................................................... 27
Enjoying sound field effects (CINEMA DSP)................................................................................................................. 28
Enjoying unprocessed playback...................................................................................................................................... 30
Enhancing the bass (Extra Bass)....................................................................................................................................... 31
Playing back digitally compressed formats (such as MP3, etc.) with enriched sound (Compressed
Music Enhancer)..................................................................................................................................................................... 31
Listening to FM radio.............................................................................. 32
Setting the frequency steps............................................................................................................................................... 32
Selecting a frequency for reception............................................................................................................................... 32
Registering favorite radio stations (presets)................................................................................................................ 33
Radio Data System tuning.................................................................................................................................................. 36
Configuring playback settings for different playback sources
(Option menu)......................................................................................... 37
Option menu items............................................................................................................................................................... 37
En
2