Yamaha UB-DXRDHR10 User manual

ZH
KO
JA
RU
IT
PT
ES
FR
DE
EN
SPEAKER BRACKET
Owner’s Manual
Benutzerhandbuch
Mode d’emploi
Manual de instrucciones
Manual do Proprietário
Manuale di istruzioni
Руководство пользователя
U-BRACKET
UB-DXRDHR10

2
Introduction
Thank you for purchasing the Yamaha UB-DXRDHR10 U-BRACKET. This product is a bracket designed
for use in installation of the Yamaha DXR10, DHR10 and CHR10 speakers. This manual explains how to
attach the bracket to a speaker when installation personnel use this bracket to install the speaker to a
wall or ceiling. Please read this manual thoroughly before you begin using this product in order to use it
properly. After reading this manual, please keep it available for future reference.
• The example illustrations used in this manual are taken from the DXR10, if not otherwise specified.
Contents
Introduction ........................................................................... 2
PRECAUTIONS ..................................................................... 2
Package Contents................................................................. 3
Check Before Installation ...................................................... 3
Installation Instructions ..........................................................4
Specifications ......................................................................46
Optional Brackets (sold separately) ....................................47
Dimensions ..........................................................................48
PRECAUTIONS PA_en_12 1/3
PLEASE READ CAREFULLY BEFORE PROCEEDING
Please keep this manual in a safe place for future reference.
WARNING
Always follow the basic precautions listed below to avoid
the possibility of serious injury or even death from
electrical shock, short-circuiting, damages, fire or other
hazards. These precautions include, but are not limited
to, the following:
Setting
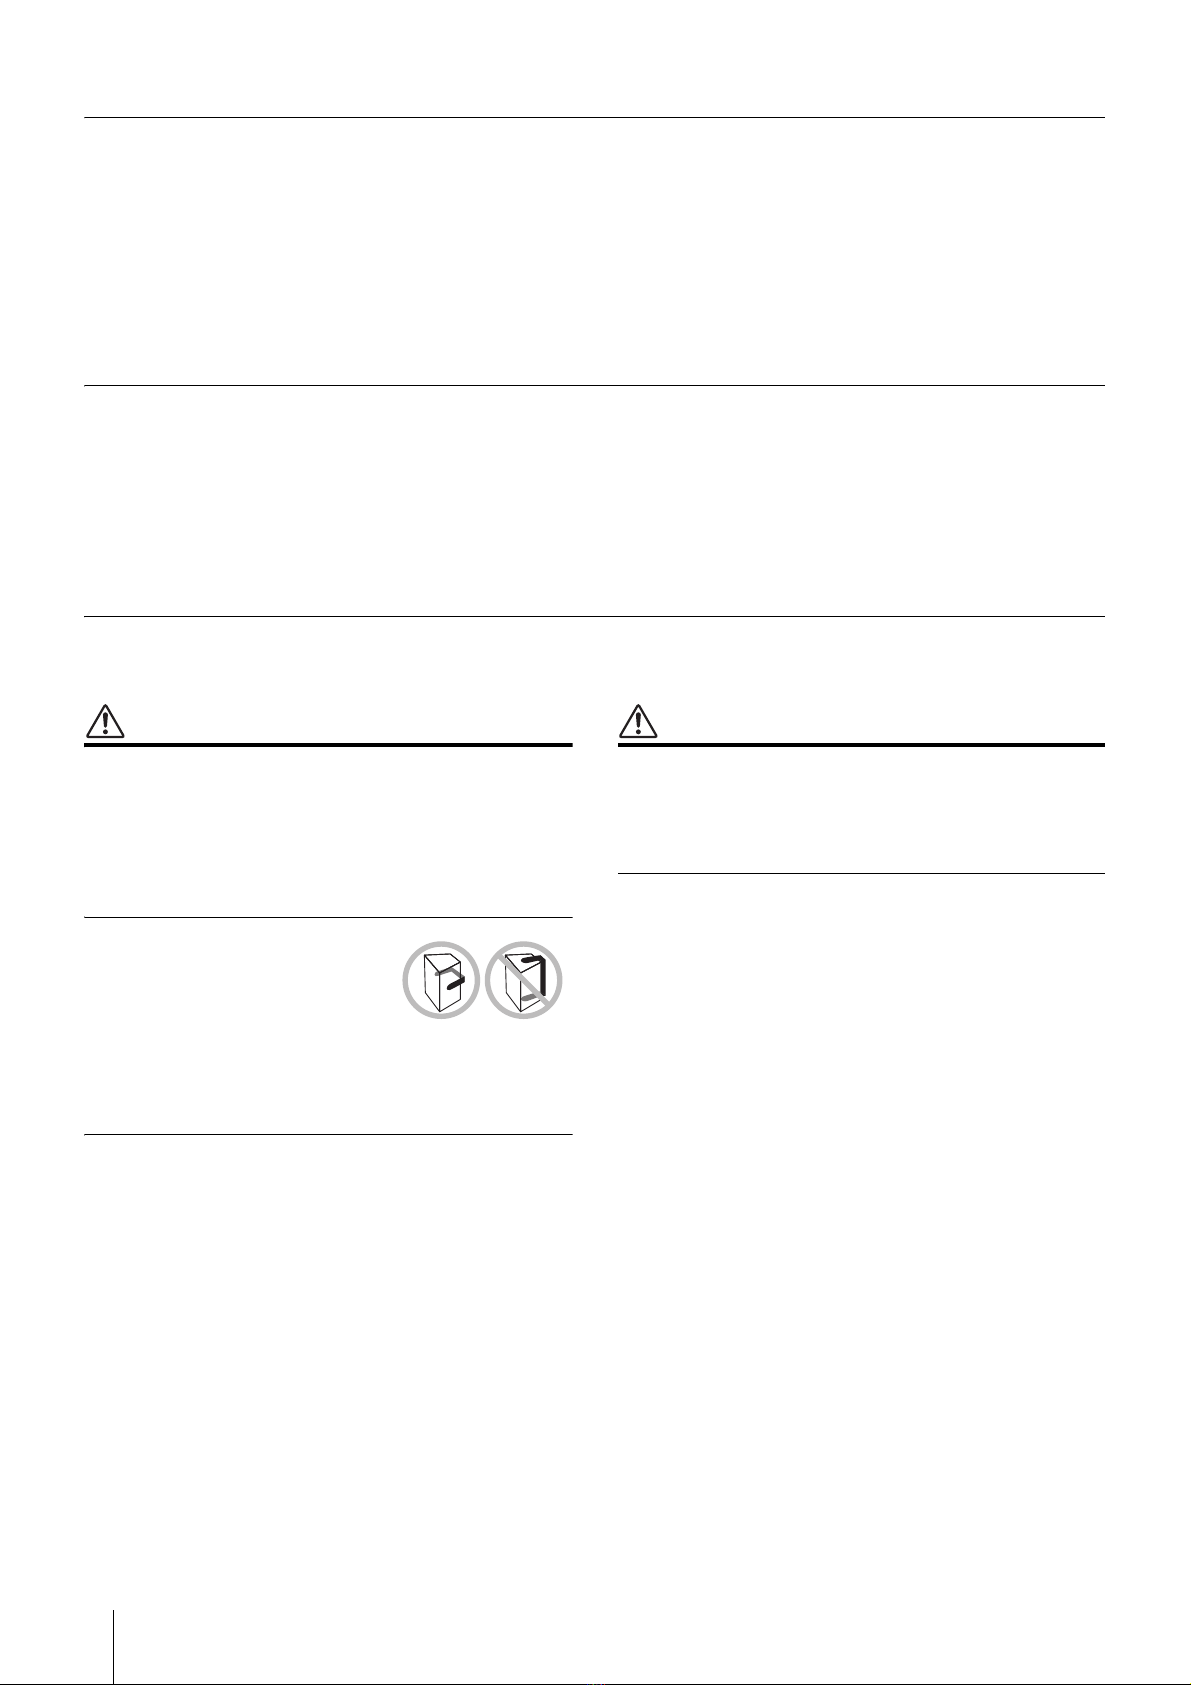
• When mounting on a wall, do not use
the bracket vertically or at an angle
to the ground. Otherwise, the
speaker weight may cause the
bracket to bend.
• Do not attach this product to any speaker not specified as
compatible. Doing so may result in damage or injury.
Do not modify
• Do not attempt to modify the product. Doing so can result in
damage or injury.
CAUTION
Always follow the basic precautions listed below to avoid
the possibility of physical injury to you or others. These
precautions include, but are not limited to, the following:
Setting
• Keep this product out of reach of children. This product is not
suitable for use in locations where children are likely to be
present.
• Always consult qualified Yamaha service personnel if the
product installation requires construction work, and make sure
to observe the following precautions.
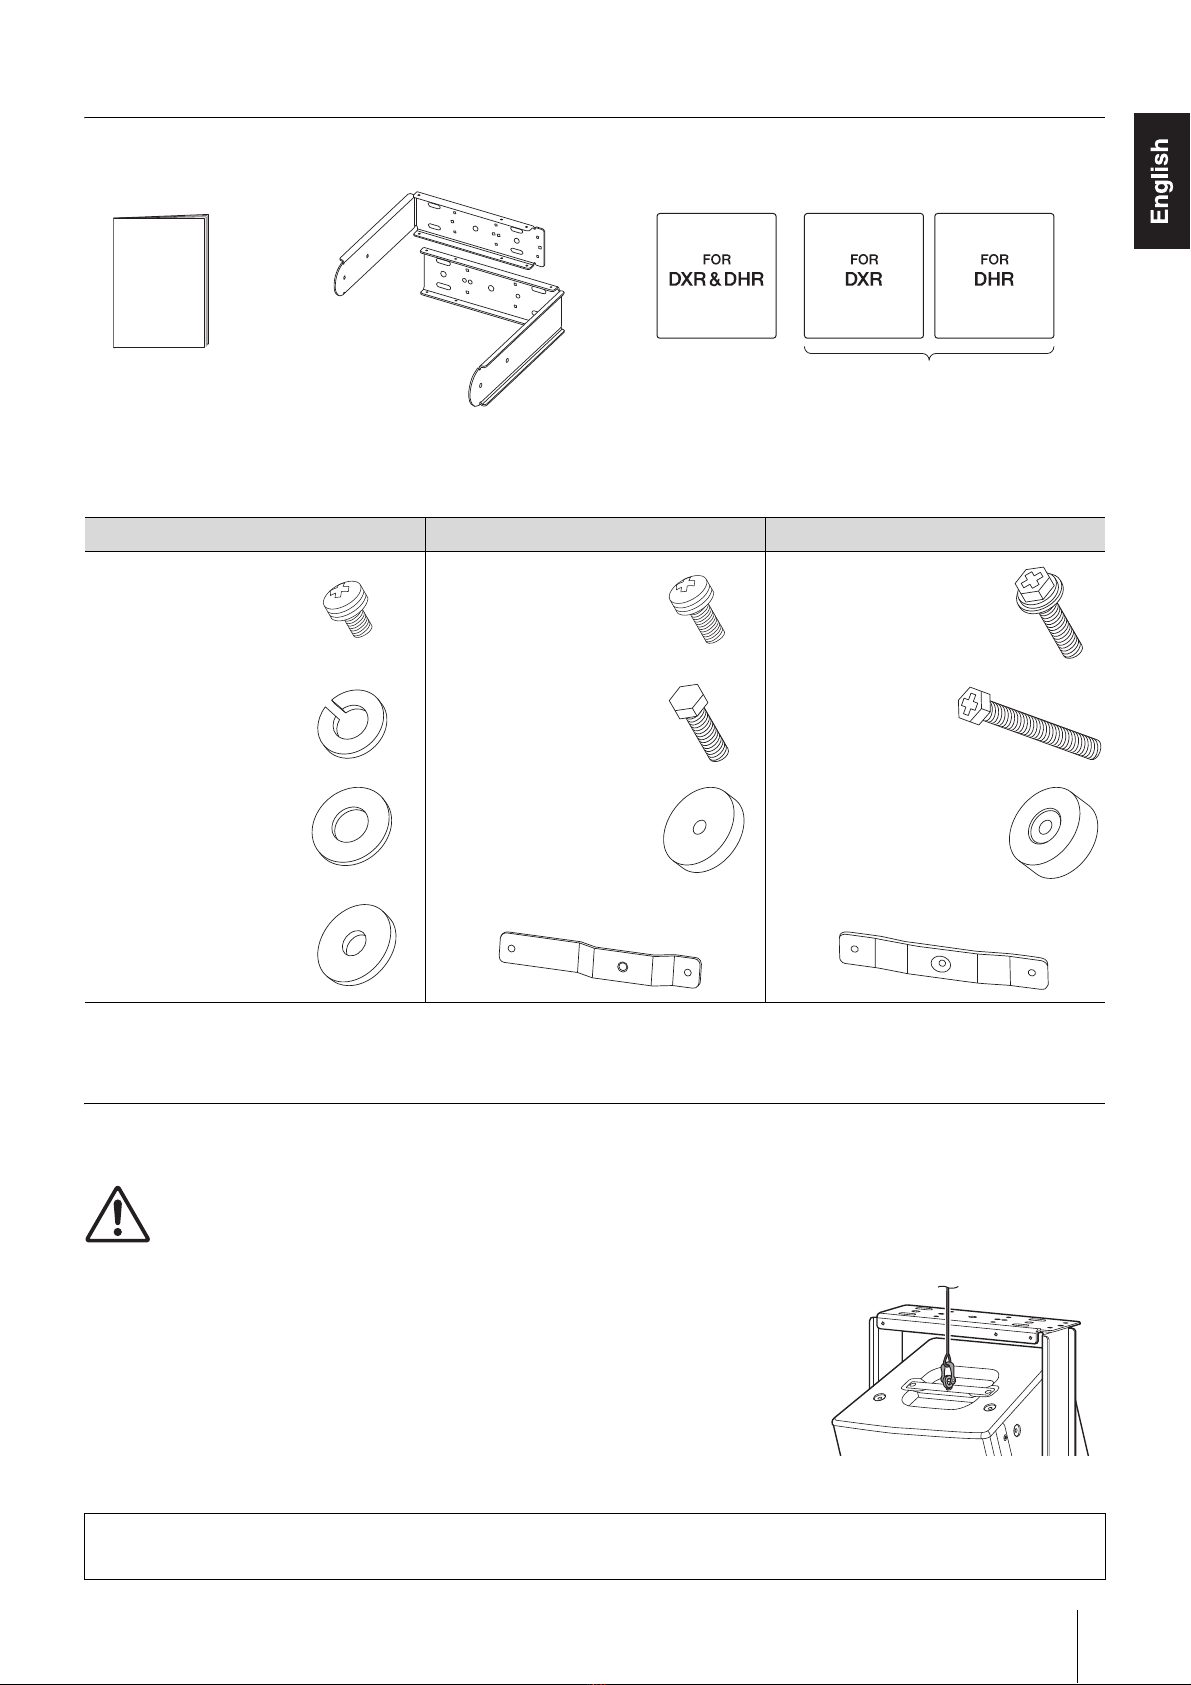
- Choose mounting hardware and an installation location that
can support the weight of the product.
- Avoid locations that are exposed to constant vibration.
- Use the required tools to install the product.
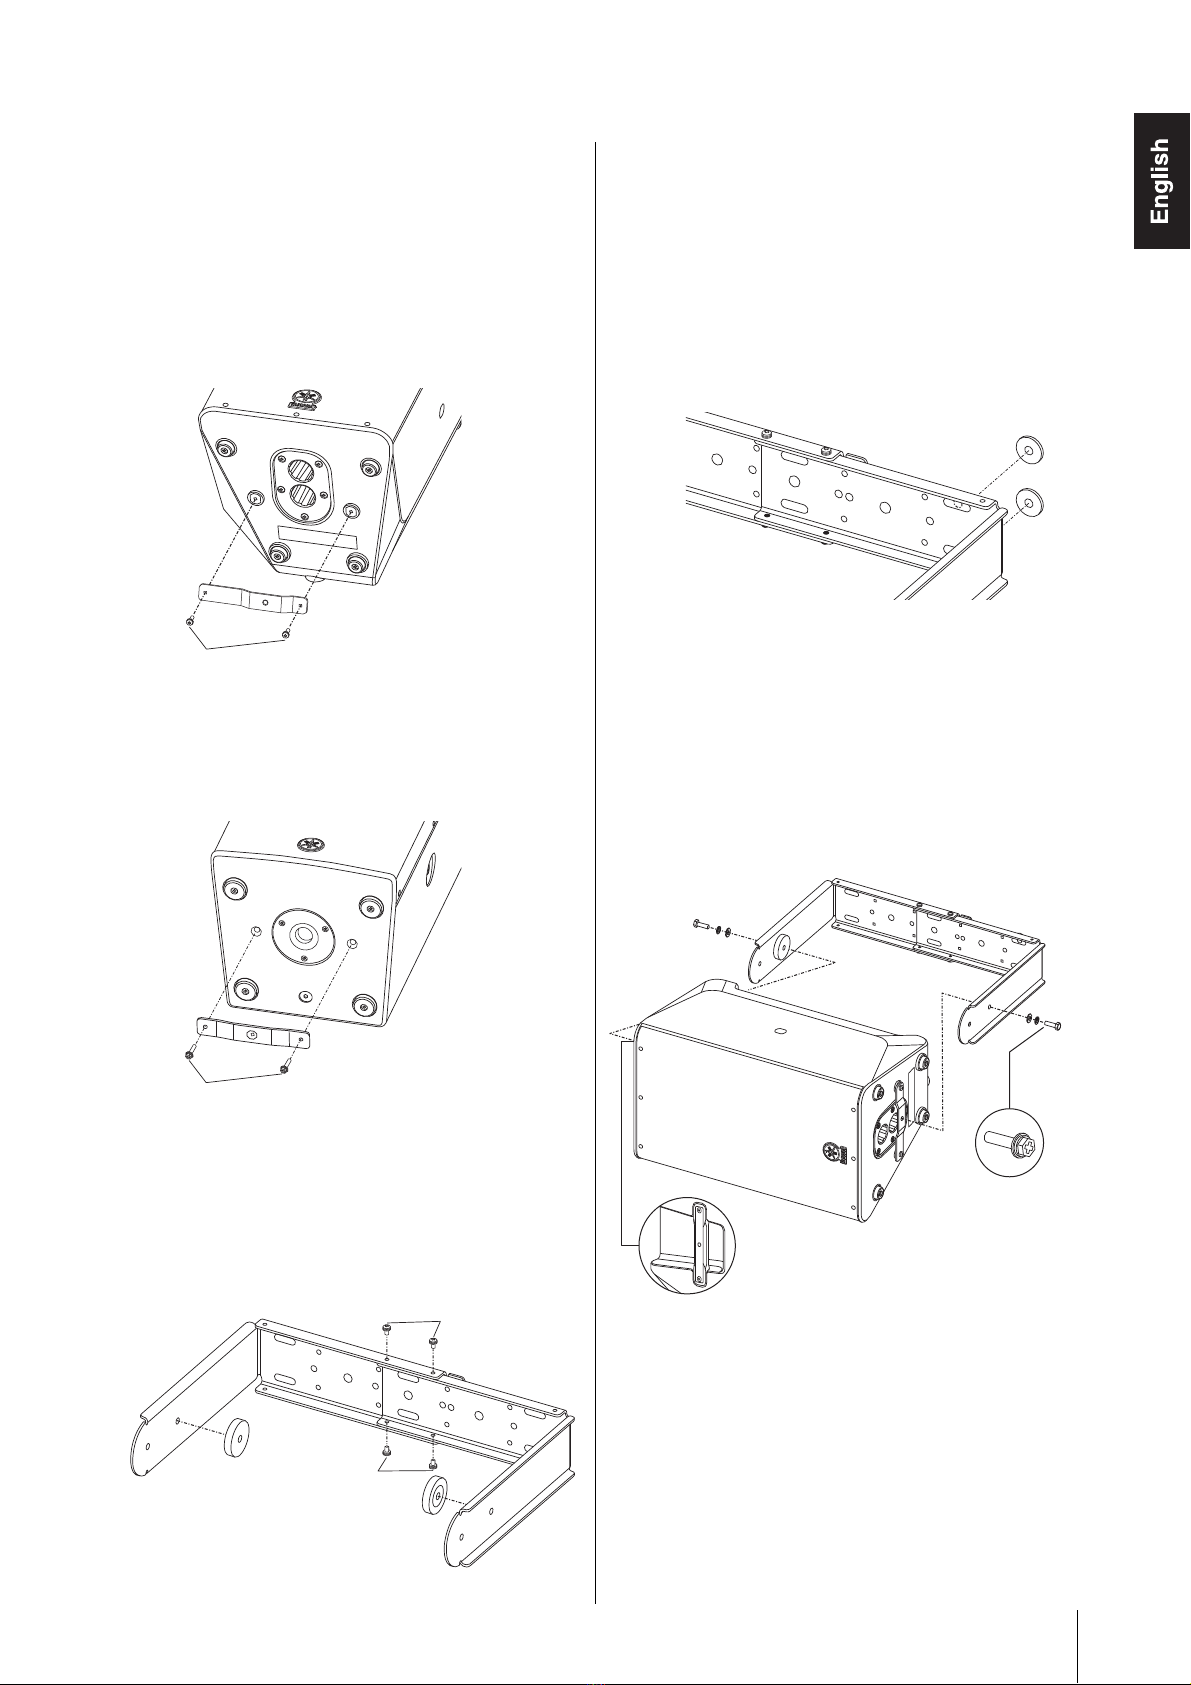
- Use bolts and nuts as well as washers for installation and
tighten them firmly so that the speaker is secure and does
not move.
- Always loosen the corresponding screw before adjusting the
angle or direction of the speaker. Never force this adjustment
with the screw still tightened.
- Inspect the product periodically.
Improper installation might cause accidents, injuries,
damage or malfunction of this product.
About this manual
• The illustrations as shown in this manual are for instructional
purposes only.
• The company names and product names in this manual are
the trademarks or registered trademarks of their respective
companies.
About disposal
• This product contains recyclable components.
When disposing of this product, please contact the
appropriate local authorities.

3
Package Contents
Parts bag contents
Check Before Installation
Fittings, bolts, and other items for installing the bracket to a wall or ceiling are not included. If you are not sure what fittings to
use, consult a specialist.
FOR DXR & DHR FOR DXR (DXR10) FOR DHR (DHR10, CHR10)
M5×10 screws
with flat washer and
spring washer × 4
M5×16 screws
with flat washer and
spring washer × 2
M8×35 hexagon bolts
with flat washer and
spring washer × 4
M8 spring washers × 2 M8×25 hexagon bolts × 2 M8×55 hexagon bolts
× 2
M8 flat washers × 2 Rubber spacers
(∅50 mm, 10mm thickness)
× 2
Rubber spacers
(∅50 mm, 18 mm thickness)
× 2
Spacers,
3.2 mm thickness × 2
Bottom plate, 16 mm height × 1 Bottom plate, 7 mm height × 1
CAUTION
• Make sure that the installation surface is strong enough to support the total weight of the speaker and the U-bracket. If you
are not sure about the installation surface, consult a specialist. Avoid attaching the U-bracket to drywall such as acoustic
tiles.
• Make sure to take precautionary measures using wires to prevent the speaker
from falling down in the event of an installation failure. Attach commercially-avail-
able M8 eye bolts to the screw holes for the U-bracket, and attach M8 for DXR10 or
M10 for DHR10/CHR10 to the screw holes (rigging points) located at the top (two
locations) and on the lower rear (one location) of those units. For the DHR10 and
CHR10, use eye bolts 30–50 mm in length.
• When installing the safety wire to the wall, install it higher than the wire’s attach-
ment point on the speaker, with as little slack as possible. If the wire is too long,
and the speaker happens to fall, the wire may snap as a result of too much strain.
Yamaha cannot be held responsible for damage or injury caused by insufficient strength of the support structure or
improper installation.
Owner’s Manual
(this book)
Required.
Brackets × 2 Parts bags × 3
Use two of these.
Select one with the name of the speaker
you are using.
For the CHR10, select “FOR DHR.”

4
Installation Instructions
Vertical installation
1. Assemble two L-shaped brackets into a U-shape using
the included M5 × 10 screws as shown in the figure
below. Peel off the sheet from each rubber spacer, and
then attach the spacers to the inside of each bracket arm
by aligning the holes so that the hexagon bolts can be
inserted.
2. Make sure that the width of the U-bracket matches the
speaker width.
3. Affix the U-bracket on the wall or ceiling using appropri-
ate metal brackets and bolts. These metal brackets or
bolts are not included in the package. If you are not sure
what to use to affix the U-bracket, consult a specialist.
4. Use the included hexagon bolts (M8×25 for DXR10,
M8×55 for DHR10 and CHR10), M8 spring washers, and
M8 flat washers to attach the speaker to the U-bracket.
The mounting position of the speaker is sealed before
shipment, so remove the seal for DXR10, and remove the
M8 screws (2 total) for DHR10 and CHR10 with a 5 mm
hexagon wrench in advance.
DXR10
DHR10, CHR10
5. Adjust the speaker angle, then tighten the bolts until the
speaker is securely affixed. The recommended torque is
12.4 Nm.
CAUTION
Make sure that you do not pinch your fingers
between the U-bracket and speaker.
(DHR10, CHR10 only) Carefully store the screws removed from the
speaker so that they are not lost. Using the speaker with the screws
removed will negatively affect sound quality due to air leakage
because the screw holes penetrate the inside of the speaker cabi-
net. Re-install the screws to the original screw holes after removing
the U-bracket.
NOTE
M5 × 10
M5 × 10
M5 × 10
M8 × 25
hexagon bolt
M8 × 25
hexagon bolt
M8 × 55
hexagon bolt
M8 × 55
hexagon bolt

5
Installation Instructions
Horizontal Installation
1. Attach the bottom plate to the bottom of the speaker
using the included M5 × 16 screws for the DXR10, and
use the M8 × 35 hexagon bolts for the DHR10 and
CHR10, as shown in the figure below. The recommended
torque is 3 Nm for DXR10, and 12.4 Nm for DHR10 and
CHR10.
DXR10
DHR10, CHR10
The mounting position of the plate is sealed with screws,
so remove them (two total) with a 5 mm hexagon wrench
in advance.
2. Assemble two L-shaped brackets into a U-shape using
the included M5 × 10 screws as shown in the figure
below. Peel off the sheet from each rubber spacer, and
then attach the spacers to the inside of each bracket arm
by aligning the holes so that the hexagon bolts can be
inserted.
3. Make sure that the width of the U-bracket matches the
speaker width.
4. Affix the U-bracket on the wall or ceiling using appropri-
ate metal brackets and bolts. There will be a slight gap
between the U-bracket and the wall surface. Insert spac-
ers into the gap and affix them with bolts. These metal
brackets or bolts are not included in the package. If you
are not sure what to use to affix the U-bracket, consult a
specialist.
5. For the DXR10, use the included hexagon bolts, M8
spring washers, and M8 flat washers to attach the
speaker to the U-bracket. For the DHR10 and CHR10,
use the included M8 × 35 hexagon bolts with spring
washer and flat washer to attach the speaker to the U-
bracket.
Use the bolt hole in the center of the handle on the top of
the speaker.
6. Adjust the speaker angle, then tighten the bolts until the
speaker is securely affixed. The recommended torque is
12.4 Nm.
M5 × 16 screw
M8 × 35 hexagon bolt
M5 × 10
M5 × 10
Hexagon bolt
Hexagon
bolt
For DHR10, CHR10:
Use hexagon bolt with flat
washer and spring
washer
Top
Table of contents
Other Yamaha TV Mount manuals

Yamaha
Yamaha SPM-K20 Manual

Yamaha
Yamaha VAF2-2115 User manual

Yamaha
Yamaha VAF2-3115 User manual

Yamaha
Yamaha UB2112 User manual

Yamaha
Yamaha UB2108 User manual

Yamaha
Yamaha UB2000 User manual

Yamaha
Yamaha UB-DXR10 User manual

Yamaha
Yamaha UB2208 User manual

Yamaha
Yamaha UB2205 User manual

Yamaha
Yamaha UB2115 User manual