SAFETY NOTES
DEVICE FEATURES
HARDWARE PACKAGE
HARDWARE
COMPONENTS
APP INSTALL
BATTERY INSERTION
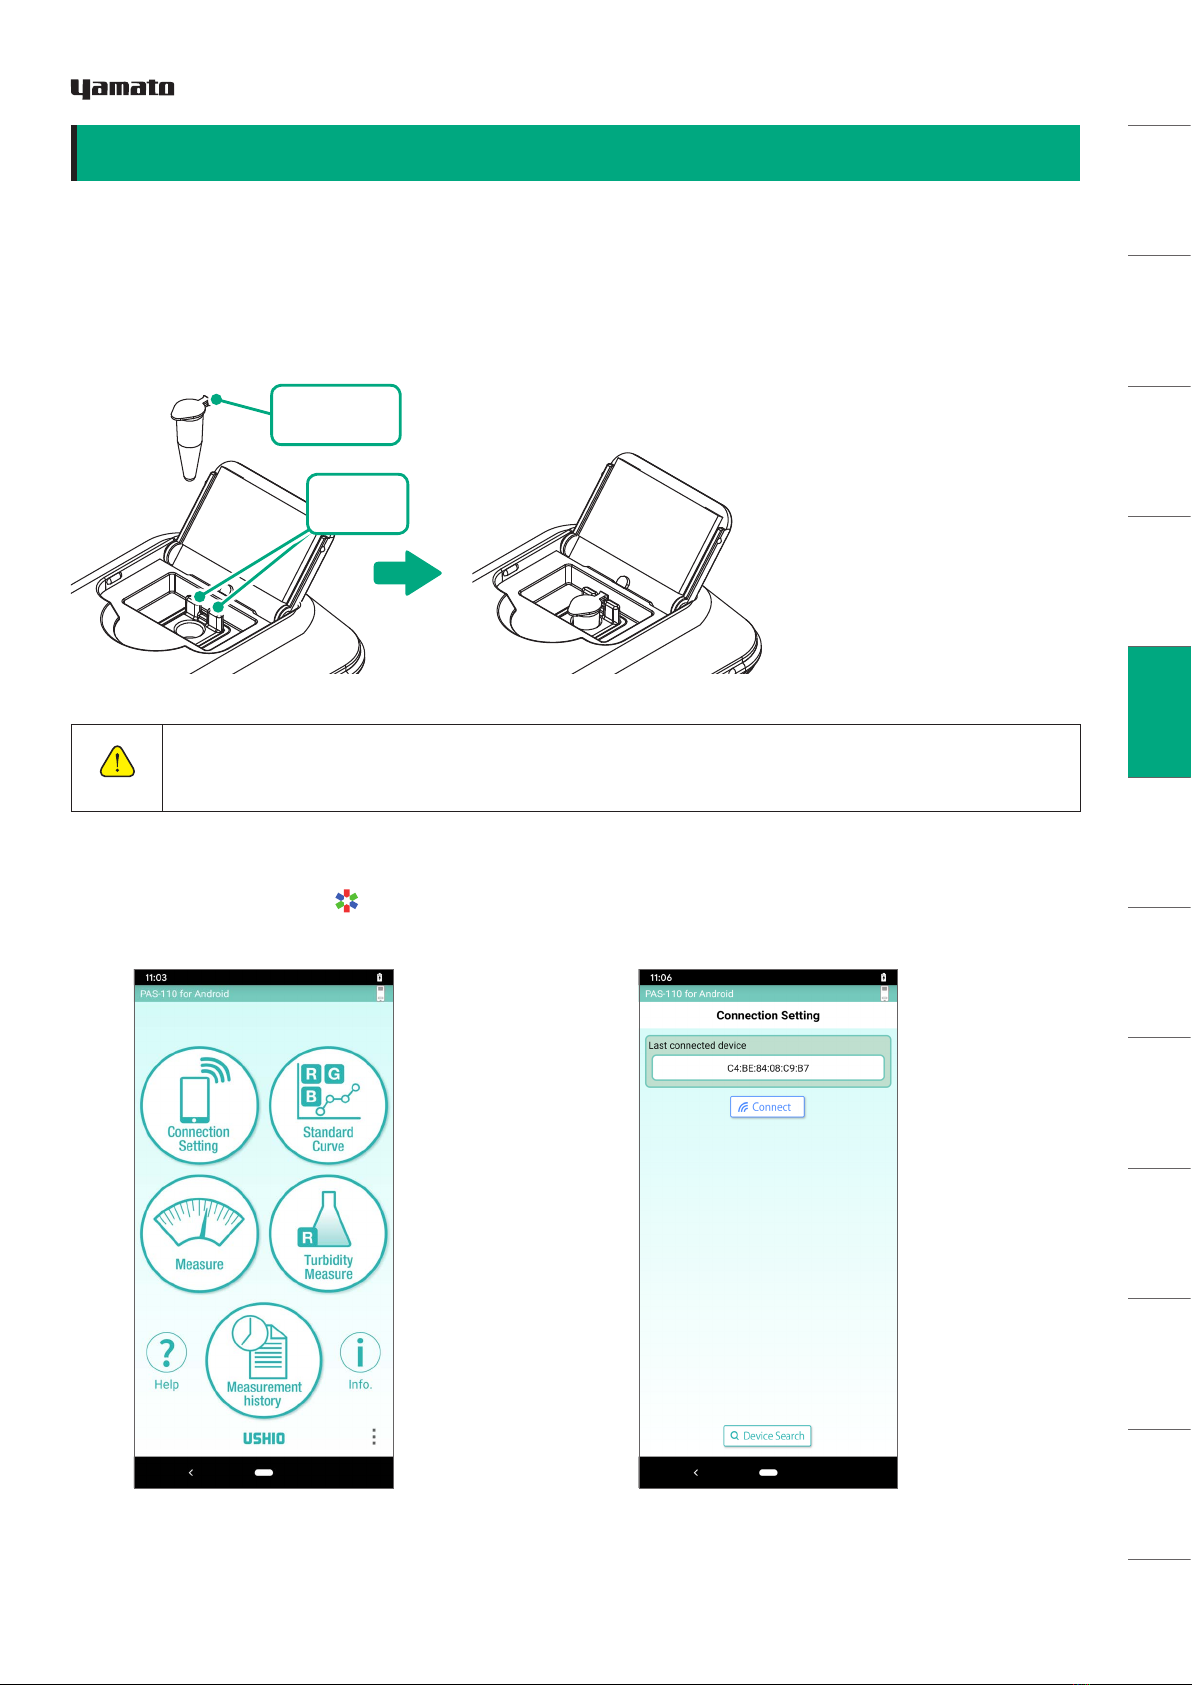
TAKING
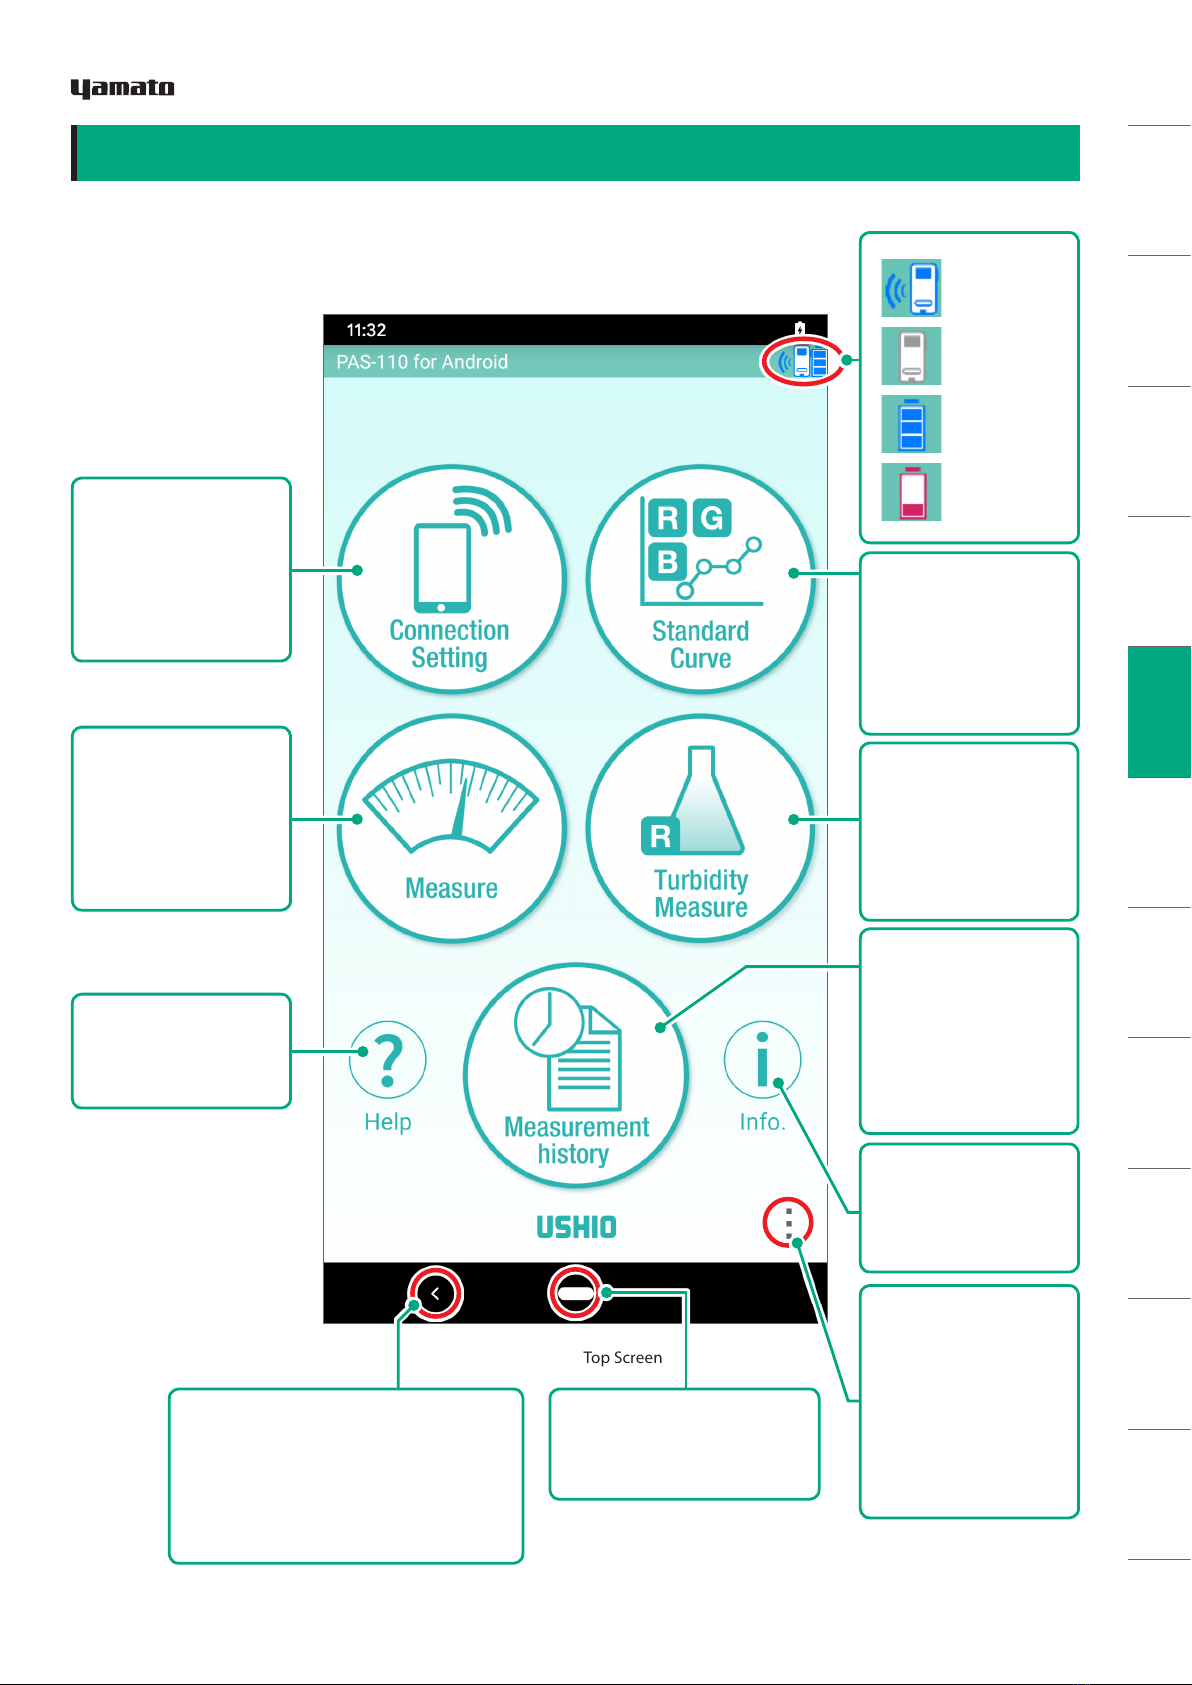
MEASUREMENTS OTHER SCREENS MAINTENANCE
TROUBLE-
SHOOTING
WARRANTY AND
AFTER-SERVICE
SPECIFICATIONS
LAWS AND
REGULATIONS
Thank you for purchasing the PiCOEXPLORERTM PAS-110-YU photo absorbance sensor.
This manual contains detailed descriptions, instructions for use, and specifications of this device.
Please print out and store this manual in a safe place, and refer to as needed.
These safety notes are intended to help you use this device properly and safely. These notes contain
essential and crucial instructions that must be followed at all times. Please read and understand these notes
before reading the rest of the manual and guide.
SAFETY NOTES
WARNING
●
Do not use the device near medical equipment. The radio waves emitted by wireless communica-
tion module could have an adverse effect on nearby pacemakers or electrical medical devices.
●
Do not use near automatic doors, alarms, or other automatic electrical control devices.
The wireless communication module could cause malfunctioning in these devices.
●
Do not use any USB cables that have been damaged or deformed. Doing so could result in smoke,
overheating, or fire.
● Carefully read and correctly follow the instruction in this user’s manual about the use of USB ca-
bles. Replace any cable that looks defective or damaged.
● Do not wash the device with water, or disassemble or tamper with it in any way.
Doing so could result in electric shock, fire, or smoke.
●
When powering the device thru a USB connector, use a PC with a limited-energy circuit USB out-
put, or an AC adapter with a limited-energy circuit used to power PCs.
CAUTION
HANDLING OF PHOTO ABSORBANCE SENSOR
●This device is for general analytic use. It was not designed for, nor should it be used for, medical
diagnostic purposes requiring very high levels of reliability and/or accuracy.
Yamato Scientific Co., Ltd. cannot be held responsible for any damages or liabilities resulting from
the inappropriate use of this device for such purposes.
●To avoid eye injury, never look directly at the light source in the device.
●When connecting and removing the USB cable, do so carefully; do not jam the connector or yank
the cord.
●Avoid dropping the unit or otherwise exposing to shocks or extreme forces.
HANDLING OF BATTERIES
●Follow all instructions of this manual on the handling and use of dry-cell batteries.
●Use only the battery type specified (AAA type). Other types may damage the unit.
●Insert batteries properly, matching the plus and minus ends to the equivalent connections inside
the unit.
●When replacing batteries, always replace all 3 batteries together.
●Keep batteries out of the hands of small children.
●If the unit will not be used for some time, remove the batteries before storage. Leaking batteries
can cause severe damage.
WARNING
CAUTION
This icon indicates a possible danger of loss of life or injury.
This icon indicates a possible danger of injury to personnel or physical damage.
This icon indicates important information concerning easy-to-make mistakes that can adversely
affect operation and maintenance. Not following the instructions given could result in damage to
the device.
IMPORTANT
SAFETY NOTES
2Copyright © 2019, USHIO INC. All Rights Reserved.