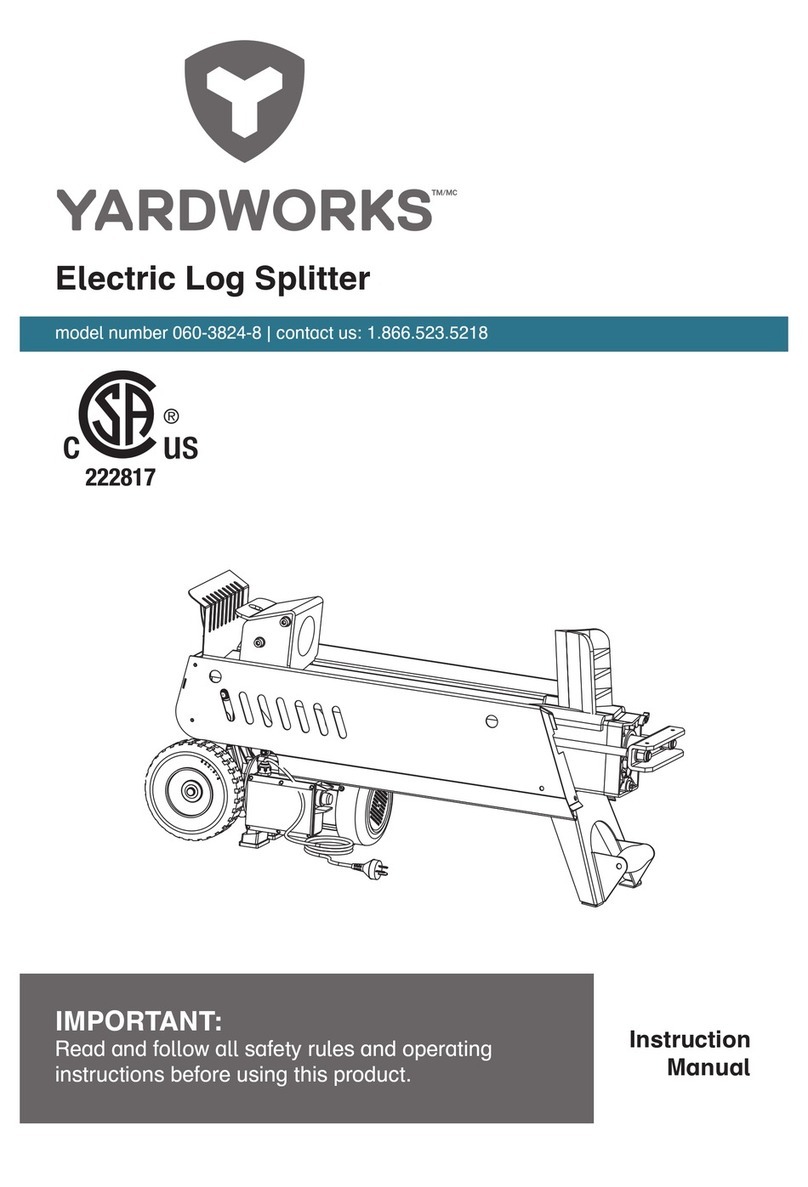
Yard Works 60-3800-4 User manual

CUS
218549
4

Table of Contents
Technical data . . . . . . . . . . . . . . . . . . . . . . . . . . . . . . . . 2
Warranty . . . . . . . . . . . . . . . . . . . . . . . . . . . . . . . . . . . . 2
General safety rules . . . . . . . . . . . . . . . . . . . . . . . . . . . . 3
Specific safety rules for log splitters . . . . . . . . . . . . . . . . . . 4
Electrical information . . . . . . . . . . . . . . . . . . . . . . . . . . . 6
Know your log splitter . . . . . . . . . . . . . . . . . . . . . . . . . . . 8
Assembly . . . . . . . . . . . . . . . . . . . . . . . . . . . . . . . . . . . . 9
Operation . . . . . . . . . . . . . . . . . . . . . . . . . . . . . . . . . . .10
Maintenance . . . . . . . . . . . . . . . . . . . . . . . . . . . . . . . . .13
Troubleshooting . . . . . . . . . . . . . . . . . . . . . . . . . . . . . . .15
Technical Data
MODEL NUMBER: 60-3800-4
MOTOR: 120 V AC, 60 Hz, 15 A, 2HP
LOG CAPACITY:
Diameter: 10” (25.4 cm)
Length: 20 1/2” (52 cm)
SPLITTING FORCE: 5 tons
HYDRAULIC PRESSURE: 16MPa
CYCLE TIME: 10 sec. forward; 15 sec. backward
OIL CAPACITY: 3.2 L
OPERATING CONDITIONS:
Ambient Temperature: 41˚F (5˚ C) to 104˚F (40˚ C)
Humidity: less than 50% at 104˚F (40˚ C).
Altitude: less than 3,280’ (1000 m) above MSL
WEIGHT: 98 lb (44.5 kg)
Warranty
This power tool is guaranteed for a period of two (2) years against defects in
workmanship and materials. Should this power tool become defective within the
stated warranty period, return it to the store with proof of purchase, and it will be
replaced or repaired free of charge.
This power tool is not guaranteed if used for industrial or commercial purposes.
2
YW Log Split 60-3800-4 E 1/3/04 2:20 PM Page 2

General Safety Rules
Safety is a combination of common sense, staying alert, and knowing how to
use the log splitter.
1. READ and become familiar with this entire instruction manual. LEARN the
tool’s applications, limitations, and possible hazards.
2. AVOID DANGEROUS CONDITIONS. DO NOT use in wet or damp areas
or expose to rain.
3. DO NOT use in the presence of flammable liquids or gases.
4. KEEP BYSTANDERS AT A SAFE DISTANCE. NEVER allow children near
the tool.
5. DRESS FOR SAFETY. DO NOT wear loose clothing, gloves, neckties, or
jewellery (rings, watches, etc.) when operating tool. They can get caught
and draw you into moving parts.
6. ALWAYS WEAR EYE AND FACE PROTECTION.
7. ALWAYS remove the power cord plug from the electric outlet when making
adjustments, changing parts, or cleaning.
8. AVOID ACCIDENTAL START-UPS. Make sure the power switch is in the
OFF position before plugging in the power cord.
9. DO NOT abuse the power cord. Keep cord away from heat, oil, sharp
edges, or moving parts. Replace damaged cord immediately; it may create
a shock or fire hazard.
10. NEVER LEAVE A RUNNING TOOL UNATTENDED. Turn the power switch
to OFF. Do not leave the tool until it has come to a complete stop.
11. DISCONNECT THE POWER. Unplug the tool when not in use, before
making adjustments, changing parts, cleaning, or working on the tool.
12. DO NOT OVERREACH. Keep proper footing and balance at all times.
SAVE THESE SAFETY RULES
⁄ WARNING: TO AVOID MISTAKES THAT COULD CAUSE SERIOUS
INJURY, DO NOT PLUG IN THE LOG SPLITTER UNTIL THE FOLLOWING
STEPS HAVE BEEN READ AND UNDERSTOOD.
3
!
YW Log Split 60-3800-4 E 1/3/04 2:20 PM Page 3

General Safety Rules - continued
13. MAINTAIN TOOLS PROPERLY. ALWAYS keep tools clean and in working
order.
14. CHECK FOR DAMAGED PARTS. Check for alignment of moving parts,
binding, breakage, or any other conditions that may affect the tool’s
operation. Any part that is damaged should be properly repaired or
replaced before use.
Specific Safety Rules for Log Splitters
1. IF YOU ARE NOT thoroughly familiar with the operation of the log splitter,
obtain advice from a qualified person.
2. MAKE SURE wiring codes and recommended electrical connections are
followed. When servicing, use only identical replacement parts. Disconnect
log splitter from the power source before making adjustments or repairs.
3. Place the log splitter on a stable, flat, and level work surface where there is
plenty of room for handling logs.
4. INSPECT THE LOG SPLITTER before each use. Keep guards in place
and in working order. Replace damaged, missing, or failed parts before
using.
5. Do not alter the log splitter. Altering the tool or exceeding its design
capabilities and capacities could result in serious injury or fatality and will
void the warranty.
6. MAKE SURE THE EXTENSION CORD is no longer than 33’ (10 m) and is
rated for outdoor use. Ground the log splitter and avoid contact with
grounded surfaces during operation.
7. MAKE all adjustments with the switch in the OFF position and the log
splitter disconnected from the power source.
SAVE THESE SAFETY RULES
4
ALWAYS WEAR EYE PROTECTION.
A log splitter can throw foreign objects into your eyes which
could cause permanent eye damage.
ALWAYS wear safety goggles (not glasses). Ordinary
eyeglasses have only impact-resistant lenses—they are
NOT safety goggles.
YW Log Split 60-3800-4 E 1/3/04 2:20 PM Page 4

Specific Safety Rules for Log Splitters -
continued
8. Never use the log splitter for any other purpose than splitting wood. Any
other use can result in injury. Use extreme caution at all times.
9. PREPARE LOGS FOR SPLITTING. Make sure the ends of the logs to be
cut are square. Cut off any branches flush with the trunk.
10. INSPECT EACH LOG before splitting. Make sure there are no nails or
foreign objects in the log.
11. Only a single operator should load and operate the log splitter. Keep all
others, including pets and children, a minimum of 20’ (6.1 m) away from
the work area.
12. NEVER TRY TO SPLIT LOGS larger than the rated capacity of the tool.
Attempting to do so could result in personal injury and damage to the tool.
13. Split only one log at a time. Do not attempt to split two logs on top of each
other.
14. Do not place your hands or feet between the log and the splitting wedge or
between the log and the push rod during operation.
15. Do not attempt to load a log while the push rod is in motion. When loading,
place your hands on the sides of the log, not on the ends.
16. WAIT FOR THE PUSH ROD TO STOP MOVING before loading another
log onto the log splitter. Do not try to remove a split log until the entire
splitting cycle is completed.
17. Use only your hands to operate the control lever. Never use your foot,
knee, rope, or any extension device.
18. Never use your hands to remove a jammed log. If a jam should occur,
release the ON/OFF push button. Follow the instructions in this manual for
removing a jammed log.
19. Stack logs as you work. This will provide a safer, less cluttered work area.
SAVE THESE SAFETY RULES
5
⁄WARNING: KEEP HANDS AWAY FROM SPLITS AND CRACKS
WHICH OPEN IN THE LOG. THEY MAY CLOSE SUDDENLY AND CRUSH
OR AMPUTATE YOUR HANDS.
!
YW Log Split 60-3800-4 E 1/3/04 2:20 PM Page 5

Electrical Information
This log splitter has a 3-prong plug that
is intended for use on a circuit that has a
receptacle like the one illustrated in Fig. A.
Do not modify the power cord plug. If it
does not match the electrical outlet, have
the proper outlet installed by a qualified
electrician.
GROUNDING INSTRUCTIONS
IN THE EVENT OF A MALFUNCTION OR BREAKDOWN, grounding provides
the path of least resistance for electrical current and reduces the risk of electric
shock. This tool is equipped with an electric cord that has a POLARIZED plug.
The plug MUST be plugged into a matching outlet that is properly installed and
grounded in accordance with ALL local codes and ordinances.
DO NOT MODIFY THE PLUG PROVIDED. If it will not fit the outlet, have the
proper outlet installed by a qualified electrician.
SAVE THESE SAFETY RULES
⁄WARNING: TO AVOID ELECTROCUTION:
1. Use only identical replacement parts when servicing this tool. Servicing
should be performed by a qualified technician.
2. Do not use in wet or damp areas or expose to rain.
⁄ WARNING: DO NOT TOUCH THE METAL BLADES ON THE POWER
CORD PLUG WHEN REMOVING OR INSTALLING THE PLUG INTO AN
ELECTRICAL OUTLET OR EXTENSION CORD.
⁄ WARNING: TO AVOID INJURY, WHEN SERVICING THE LOG
SPLITTER, USE ONLY IDENTICAL REPLACEMENT PARTS.
1
2
⁄ WARNING: TO AVOID ELECTRICAL HAZARDS, FIRE HAZARDS, OR
DAMAGE TO THE TOOL, USE PROPER CIRCUIT PROTECTION. THE LOG
SPLITTER IS WIRED AT THE FACTORY FOR 120 V OPERATION.
CONNECT TO A 120 V, 15 A CIRCUIT AND USE A 15 A TIME DELAYED
FUSE OR CIRCUIT BREAKER. TO AVOID SHOCK OR FIRE WHEN THE
POWER CORD IS WORN, CUT, OR DAMAGED IN ANY WAY, REPLACE IT
IMMEDIATELY.
6
!
!
!
!
1) 3-prong plug
2) Receptacle with grounding conductor
Fig. A
YW Log Split 60-3800-4 E 1/3/04 2:20 PM Page 6

Electrical Information - continued
CAUTION! IN ALL CASES, MAKE CERTAIN THE RECEPTACLE IN
QUESTION IS PROPERLY GROUNDED. IF YOU ARE NOT SURE, HAVE A
CERTIFIED ELECTRICIAN CHECK THE RECEPTACLE.
GUIDELINES FOR USING EXTENSION CORDS
USE THE PROPER EXTENSION CORD. Make sure your extension cord is in
good condition. When using an extension cord, be sure to use one heavy
enough to carry the current your product will draw. An undersized cord will cause
overheating. The table below shows the correct size to use depending on cord
length and nameplate ampere rating. If in doubt, use the next heavier gauge.
The smaller the gauge number, the heavier the cord.
Minimum Gauge for Extension Cords (AWG)
(when using 120 V only)
Make sure your extension cord is properly wired and in good electrical condition.
Always replace a damaged extension cord or have it repaired by a qualified
person before using it. Protect your extension cords from sharp objects,
excessive heat and damp or wet areas.
Use a separate electrical circuit for your tools. This circuit should not be less than
#12 wire and should be protected with a 15 A time delayed fuse. Before
connecting the motor to the power line, make sure the switch is in the OFF
position and the electric current is rated the same as the current stamped on the
motor nameplate. Running at a lower voltage will damage the motor.
SAVE THESE SAFETY RULES
Ampere Rating Total Length of Cord in feet (meters)
More Than Not More Than 25’ (7.6 m) 50’ (15 m) 100’ (30.4 m) 150’ (45.7 m)
0 6 18 16 16 14
610 18161412
10 12 16 16 14 12
12 16 14 12 Not Recommended
⁄ WARNING: IMPROPER USE OF EXTENSION CORDS MAY CAUSE
INEFFICIENT OPERATION WHICH CAN RESULT IN OVERHEATING. USE
AN EXTENSION CORD RATED FOR OUTDOOR OPERATION.
7
!
⁄WARNING: THE EXTENSION CORD AND RECEPTACLE MUST BE
GROUNDED WHILE IN USE TO PROTECT THE OPERATOR FROM
ELECTRICAL SHOCK.
!
YW Log Split 60-3800-4 E 1/3/04 2:20 PM Page 7


Assembly
UNPACKING
The log splitter is fully assembled. The enclosed hex wrench is for turning the
fluid drain bolt to check and/or replace hydraulic fluid.
Note: Do not discard box or any packing material until all parts are examined.
9
⁄WARNING: IF ANY PART OF THE LOG SPLITTER IS MISSING OR
DAMAGED, DO NOT PLUG IN UNTIL THE DAMAGED PART IS REPAIRED
OR REPLACED.
!
YW Log Split 60-3800-4 E 1/3/04 2:20 PM Page 9
1 Log splitter
2 Hex wrench
3Manual (not shown)

Operation
BEFORE OPERATING
Select a work area
Place the log splitter in a flat, stable area. Make sure there is sufficient room for
the unsplit logs and stacks of split logs. Make sure there is a safe electrical
connection no more than 33’ (10 m) from the work area.
Note: Transporting and lifting the log splitter is a two-person job. The wheels
are designed for moving the log splitter very short distances.
Loosen the bleed screw (Fig. 2)
1. Turn the bleed screw (1)
counter-clockwise one or two turns
to allow air to be released from the
hydraulic system.
Note: A flow of air through the
bleed screw should be detectable
while the log splitter is in use.
2. Close the bleed screw after
operation.
Note: Check the bleed screw and
make sure it is closed before and
during moving. Hydraulic fluid may
leak through the bleed screw
opening if the bleed screw is not fully tightened.
Select/prepare a log for splitting
1. Make sure there are no nails or foreign objects in the log.
2. Make sure the end of each log to be split is square.
3. Remove any branches by cutting them flush with the trunk.
4. Make sure each log is no longer than 20 1/2” (52 cm) and the diameter is
10” (25.4 cm) or less.
Fig. 2
WARNING: ALWAYS LOOSEN THE BLEED SCREW PRIOR TO
OPERATION. THIS WILL REMOVE ANY AIR TRAPPED IN THE HYDRAULIC
SYSTEM. FAILURE TO RELEASE AIR FROM THE HYDRAULIC SYSTEM
MAY DAMAGE THE SEALS AND PERMANENTLY DAMAGE THE LOG
SPLITTER.
!
WARNING: NEVER TRY TO SPLIT LOGS LARGER THAN THE RATED
CAPACITY OF THE TOOL. ATTEMPTING TO DO SO COULD RESULT IN
PERSONAL INJURY AND DAMAGE TO THE TOOL.
!
10
YW Log Split 60-3800-4 E 1/3/04 2:20 PM Page 11

Operation - continued
Place a log on the log splitter (Fig. 3)
Place a properly prepared log (1) firmly on the worktable (2) between the two
worktable guards (3). The log should fit between the push rod (4) and the splitting
wedge (5).
Operate the log splitter (Fig. 3 and 4)
Two controls, a hydraulic control lever (7) and an ON/OFF push button (6),
must be activated to operate the log splitter. Both controls must be held during
the splitting process. If either control is released, the log splitter will not continue
to operate.
1. Loosen the bleed screw (9) one
or two turns, if needed.
2. Depress and hold the power push
button (6) with your right hand
and allow the motor to cycle up to
speed.
3. Push down on the hydraulic lever
(7).
4. Release the push button (6) and
the lever (7) when the log is split.
The push rod (4) will retract.
11
Fig. 3
WARNING: WHEN LOADING A LOG, PLACE HANDS ON THE SIDES
OF THE LOG, NOT THE END. DO NOT LOAD A LOG WHEN THE PUSH
ROD IS IN MOTION.
!
YW Log Split 60-3800-4 E 1/3/04 2:20 PM Page 12
Fig. 4

Operation - continued
Remove a jammed log (Fig. 5 and 6)
1. Release the push button (1) and the hydraulic lever (2) to turn off the
power and retract the push rod (3).
2. Insert a wooden wedge (4) under the jammed log (5).
3. Activate the push button (1) and the hydraulic lever (2) to start the log
splitter and push the wedge under the log.
4. Release both controls when the log is freed or when it is at the height of
the wooden wedge (4).
5. If log is not freed, insert another wedge with a sharper slope and restart
the splitter.
6. Repeat steps 3 through 5 until the log is freed.
⁄WARNING: IF THE LOG DOES NOT BEGIN TO SPLIT AFTER
5 SECONDS OF OPERATION, RELEASE BOTH CONTROLS. THE MOTOR
OR HYDRAULIC FLUID MAY OVERHEAT AND DAMAGE THE MACHINE.
!
WARNING: DO NOT ATTEMPT TO REMOVE A JAMMED LOG WITH
YOUR HANDS OR TRY TO KNOCK IT OFF THE WORKTABLE. DOING SO
MAY CAUSE INJURY AND MAY ALSO DAMAGE THE SPLITTING WEDGE.
!
Fig. 5
YW Log Split 60-3800-4 E 1/3/04 2:20 PM Page 13
12
Fig. 6

Maintenance
Check the level of hydraulic fluid before each use. Replace the hydraulic fluid at
the beginning of each season or if the fluid level is low. Use only the type of
fluid recommended by the manufacturer (DTE 24).
Check the hydraulic fluid level (Fig. 7 and 8)
1. Make sure the bleed screw (1) is closed.
2. Raise the motor end of the log
splitter. Make sure the splitter is
resting securely and will not fall.
3. Use the hex wrench to loosen the
fluid drain bolt (2).
4. Pull out the bolt with attached
dipstick.
5. Wipe the fluid off the dipstick.
6. Put the dipstick back in the fluid
tank and then pull it out again.
7. Check the fluid level. It should be
between the two notches (3) near
the end of the dipstick.
8. Add fluid if needed.
9. Replace the dipstick and tighten
the fluid drain bolt.
!
!
13
YW Log Split 60-3800-4 E 1/3/04 2:20 PM Page 14
Fig. 7
⁄WARNING: LIFTING THE LOG SPLITTER IS A TWO PERSON
OPERATION. ONCE RAISED, MAKE SURE THE LOG SPLITTER IS STABLE
BEFORE PERFORMING ANY MAINTENANCE.
Fig. 8
⁄WARNING: DISCONNECT THE LOG SPLITTER FROM THE POWER
SOURCE BEFORE PERFORMING ANY MAINTENANCE.

Maintenance - continued
Replace hydraulic fluid (Fig. 9 and 10)
1. Place a 4 L (or larger) pan (1)
under the motor end of the log
splitter.
2. Use the hex wrench to loosen the
fluid drain bolt (2) and remove the
bolt with attached dipstick.
3. Raise the splitting wedge end of
the log splitter to allow the fluid to
drain into the pan. Lower the
splitter when it is empty.
Note: Dispose of used fluid
properly.
4. Raise the motor end of the splitter
and make sure it is secure
(Fig. 10).
5. Pour approximately 3.2 L of
approved hydraulic fluid into the
tank.
6. Check the fluid level with the
dipstick. Add more fluid if needed.
7. Replace the fluid drain bolt (2) and
tighten securely.
8. Lower the log splitter.
Sharpen the splitting wedge
After a period of use, the splitting
wedge may need to be sharpened.
Use a fine-toothed file or rasp to
remove burrs or to refresh crushed
areas.
⁄WARNING: LIFTING THE LOG SPLITTER IS A TWO PERSON
OPERATION. ONCE RAISED, MAKE SURE THE LOG SPLITTER IS STABLE
BEFORE PERFORMING ANY MAINTENANCE.
!
14
YW Log Split 60-3800-4 E 1/3/04 2:20 PM Page 15
Fig. 9
Fig. 10

Troubleshooting
Use this troubleshooting information to remedy problems that may occur during
the operation of the log splitter.
Logs will not split
The problem may be with the log or with the machine:
• Make sure the log is properly positioned on the worktable. See
Select/prepare a log for splitting
in the Operation section.
• The size or hardness of the log may exceed the capacity of the splitter.
Reduce the log size before placing it on the splitter.
• Splitting wedge cutting edge is blunt. See
Sharpen the splitting wedge
in the
Maintenance section.
• The bleed screw was not loosened and air is trapped in the hydraulic tank.
Loosen the bleed screw one or two turns.
• The hydraulic fluid is low and may need to be replenished. See
Check the
hydraulic fluid level
in the Maintenance section.
• The maximum pressure limiting adjustment setting has changed. Contact the
dealer.
Hydraulic fluid leaks
• The bleed screw may not have been tightened before transporting the splitter.
Tighten the bleed screw.
• The bleed screw may not have been loosened before operation and air is
trapped in the hydraulic system. Loosen the bleed screw one or two turns.
• The fluid drain bolt may be loose. Use the hex wrench to tighten the bolt.
• The hydraulic control valve assembly and/or seals may be worn. Contact the
dealer.
Push rod movement is jerky, makes unfamiliar noise or vibration
• The hydraulic fluid level may be low. Check the fluid level and refill if needed.
See
Check the hydraulic fluid level
in the Maintenance section.
• There may be air in the hydraulic system. Loosen the bleed screw one or two
rotations.
Printed in China
YW Log Split 60-3800-4 E 1/3/04 2:20 PM Page 16
15

YW Log Split 60-3800-4 E 1/3/04 2:20 PM Page 16
16
Parts Breakdown

YW Log Split 60-3800-4 E 1/3/04 2:20 PM Page 16
17
No. Model Num. Qty Description
Parts List
1
2
3
4
5
6
7
8
9
10
11
12
13
14
15
16
17
18
19
20
21
22
23
24
25
26
27
28
29
30
31
60-3800-1
60-3800-2
60-3800-3
60-3800-4
60-3800-5
60-3800-6
60-3800-7
60-3800-8
60-3800-9
60-3800-10
60-3800-11
60-3800-12
60-3800-13
60-3800-14
60-3800-15
60-3800-16
60-3800-17
60-3800-18
60-3800-19
60-3800-20
60-3800-21
60-3800-22
60-3800-23
60-3800-24
60-3800-25
60-3800-26
60-3800-27
60-3800-28
60-3800-29
60-3800-30
60-3800-31
1
1
1
1
1
1
1
1
2
10
4
3
3
1
3
2
1
1
2
6
1
8
8
6
3
12
12
2
8
2
1
Motor
Rubber Washer
Nut M5
Column Pin φ2.5×4
Oil Seal φ11×φ26×7
Rubber Washer
Nut M8
Front Cover For Motor
Front Rubber Feet
Bolt M6×12
Bearing
Flat Washer φ5
Spring Washer φ5
Clapboard
Bolt M5×25
Steel ring φ10
Gear shaft
Steel Ball φ2.5
Gear
Oil Seal 9.5×2.65G
Cover For Gear Pump
Flat Washer φ8
Spring Washer φ8
Bolt M8×55
Bolt M8×30
Flat Washer φ6
Spring Washer φ6
Locknuts M10
Flat Washers φ10
Wheels
Support For Wheel

YW Log Split 60-3800-4 E 1/3/04 2:20 PM Page 16
18
No. Model Num. Qty Description
Parts List
32
33
34
35
36
37
38
39
40
41
42
43
44
45
46
47
48
49
50
51
52
53
54
55
56
57
58
59
60
61
62
60-3800-32
60-3800-33
60-3800-34
60-3800-35
60-3800-36
60-3800-37
60-3800-38
60-3800-39
60-3800-40
60-3800-41
60-3800-42
60-3800-43
60-3800-44
60-3800-45
60-3800-46
60-3800-47
60-3800-48
60-3800-49
60-3800-50
60-3800-51
60-3800-52
60-3800-53
60-3800-54
60-3800-55
60-3800-56
60-3800-57
60-3800-58
60-3800-59
60-3800-60
60-3800-61
60-3800-62
1
3
1
1
5
1
2
1
2
1
1
1
1
1
2
1
1
1
1
1
1
1
1
1
1
5
1
1
1
1
1
Bolt
Ball Nut M10
Rubber Handle
Hydraulic Control Lever
Spring Washer φ10
Cover For Hydraulic Control Lever
Nuts M10
Bolts
Oil Seal 11.8×1.8G
Bolts
Oil Valve
Front Cover
Prick Valve
Adjustment Spring
Oil Seal 4.87×1.8G
Shaft
Bush For Shaft
Hex Nut
Locked nut M6×20
Nut M6
Plastic Cover
E-ring
Spring?
Oil Seal 5.6×1.8G
Journey valve
Oil seal 11.2×1.8G
Control valve(GS)
Spring?
Oil seal 14×1.8G
Copper washer Φ14
Orientation Bolt

YW Log Split 60-3800-4 E 1/3/04 2:20 PM Page 16
19
No. Model Num. Qty Description
Parts List
63
64
65
66
67
68
69
70
71
72
73
74
75
76
77
78
79
80
81
82
83
84
85
86
87
88
89
90
91
92
93
60-3800-63
60-3800-64
60-3800-65
60-3800-66
60-3800-67
60-3800-68
60-3800-69
60-3800-70
60-3800-71
60-3800-72
60-3800-73
60-3800-74
60-3800-75
60-3800-76
60-3800-77
60-3800-78
60-3800-79
60-3800-80
60-3800-81
60-3800-82
60-3800-83
60-3800-84
60-3800-85
60-3800-86
60-3800-87
60-3800-88
60-3800-89
60-3800-90
60-3800-91
60-3800-92
60-3800-93
1
1
1
1
1
1
1
2
1
2
4
1
1
1
1
1
2
2
1
1
1
1
1
1
1
1
1
1
2
2
1
Squareness washer for front cover
Oil seal 48.7×3.55G
Push rod
Down pad
Up pad
Left worktable guard
Right worktable guard
Nut M14
Worktable guard
Plug
Bolt M6×30
Front support/Lift handle
Cylinder
Piston
Oil seal 46.2×3.55G
Piston ring
Long screw
Long screw
Diaplasis spring
Squareness washer for rear cover
Rear cover
Oil seal 3.6×1.8G
Bleed screw
Dustproof washer FC30×38×5
Oil lever stick
Oil seal 11.8×2.65G
Fluid drain bolt w/ Dipstick
Piston rod
Spring washer 14
Nut M14
ON/OFF AKS7-30F

YW Log Split 60-3800-4 E 1/3/04 2:20 PM Page 16
20
No. Model Num. Qty Description
Parts List
94
95
96
97
98
99
100
101
102
103
104
105
106
60-3800-94
60-3800-95
60-3800-96
60-3800-97
60-3800-98
60-3800-99
60-3800-100
60-3800-101
60-3800-102
60-3800-103
60-3800-104
60-3800-105
60-3800-106
1
1
1
1
1
1
1
1
2
1
1
1
6
Circuit breaker
Locked washer φ4
Washer φ4
Power cord14AWG-UL
Screw M4×6
Spring washer 4
Locked nut for power cord φ20
Thread clip
Screw ST3.5×14
Capacitance
Squareness washer for switch box
Cover for switch box
Screw ST3.3×14
Table of contents
Other Yard Works Log Splitter manuals
Popular Log Splitter manuals by other brands

Priefert
Priefert LOG22 owner's manual

Fieldmann
Fieldmann FZLS 1008V-E manual

Black Diamond Equipment
Black Diamond Equipment BD201258 Operator's manual

Oxdale
Oxdale E300 Operating and maintenance manual

Scheppach
Scheppach HL1800G Original instruction manual

yellow Gardenline
yellow Gardenline YGL N.G. 4000 Translation from original manual