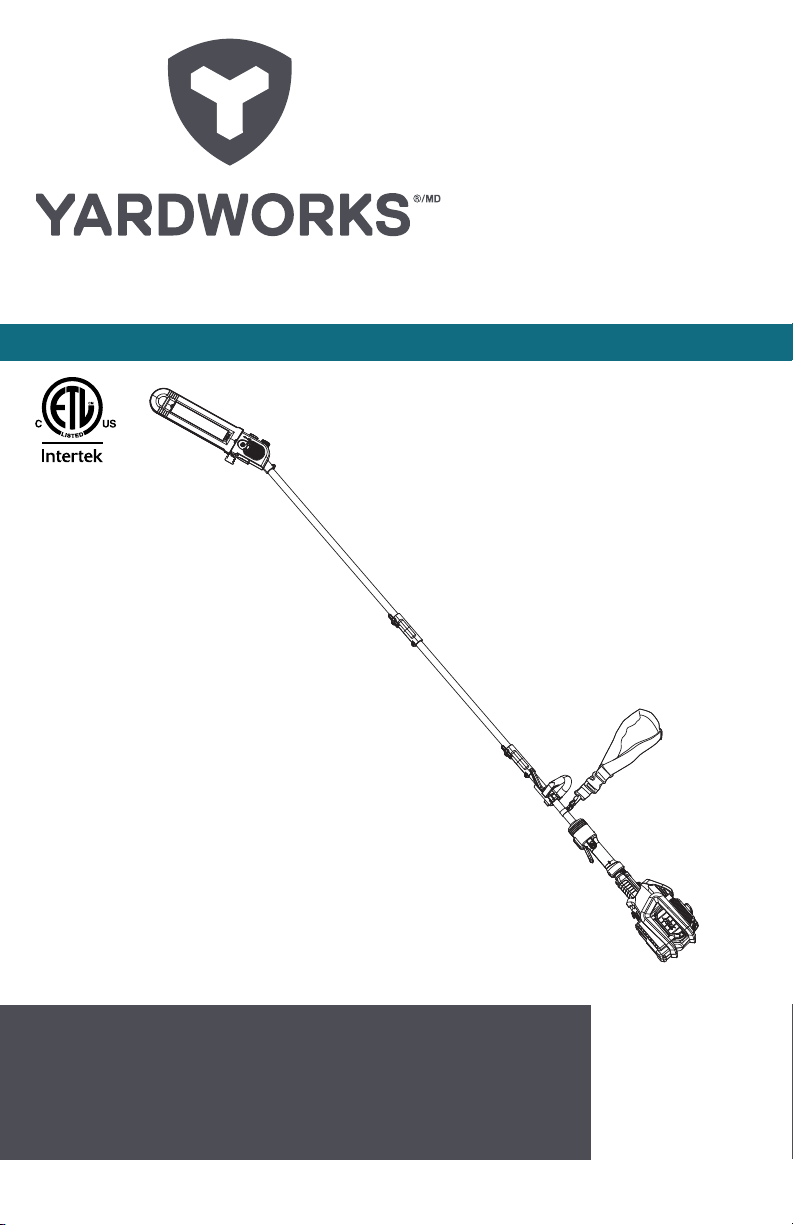
model no. 054-0367-0 | contact us: 1.866.523.5218
6
Safety Instructions
away from other metal objects, like paper
clips, coins, keys, nails, screws or other
small metal objects, that can make a
connection from one terminal to another.
Shorting the battery terminals together
may cause burns or a re.
6. Under abusive conditions, liquid may be
ejected from the battery; avoid contact.
If contact accidentally occurs, ush with
water. If liquid contacts eyes, additionally
seek medical help. Liquid ejected from
the battery may cause irritation or burns.
7. Do not use a battery pack or appliance
that is damaged or modied. Damaged
or modied batteries may exhibit
unpredictable behaviour resulting in re,
explosion or risk of injury.
8. Do not expose a battery pack
or appliance to re or excessive
temperature. Exposure to re or
temperature above 265°F (130°C ) may
cause explosion.
9. Follow all charging instructions and do
not charge the battery pack or appliance
outside of the temperature range
specied in the instructions. Charging
improperly or at temperatures outside
of the specied range may damage the
battery and increase the risk of re.
10. Have servicing performed by a qualied
repair person using only identical
replacement parts. This will ensure that
the safety of the product is maintained.
11. Do not modify or attempt to repair
the appliance or the battery pack (as
applicable) except as indicated in the
instructions for use and care.
POLE SAW SAFETY WARNINGS
WARNING – Do not operate near electrical
power lines. The unit has not been designed
to provide protection from electric shock in the
event of contact with overhead electric lines.
Consult local regulations for safe distances
from overhead electric power lines and ensure
that the operating position is safe and secure
before operating the pole saw.
a) Keep all parts of the body away from the
saw chain. Make sure the switch is off
when clearing jammed material. Saw chain
continues to move after the switch is turned
off. A moment of inattention while operating
the pole saw may result in serious personal
injury.
b) Carry the pole saw by the handle with the
saw chain stopped. When transporting or
storing the pole saw, always t the saw
chain device cover. Proper handling of the
pole saw will reduce possible personal
injury from the saw chain.
c) Hold the pole saw by insulated gripping
surfaces only, because the saw chain
may contact hidden wiring or its own cord.
A saw chain contacting a “live” wire may
make exposed metal parts of the pole
saw “live” and could give the operator an
electric shock.
d) Keep cable away from cutting area. During
operation the cable may be hidden in
shrubs and can be accidentally cut by the
saw chain.
e) Do not use the pole saw in bad weather
conditions, especially when there is a risk
of lightning. This decreases the risk of
being struck by lightning.
f) To reduce the risk of electrocution, never
use near any electrical power lines.
Contact with or use near power lines may
WARNING: Read all safety warnings and instructions. Failure to
follow the warnings and instructions may result in electric shock,
re and/or serious injury.