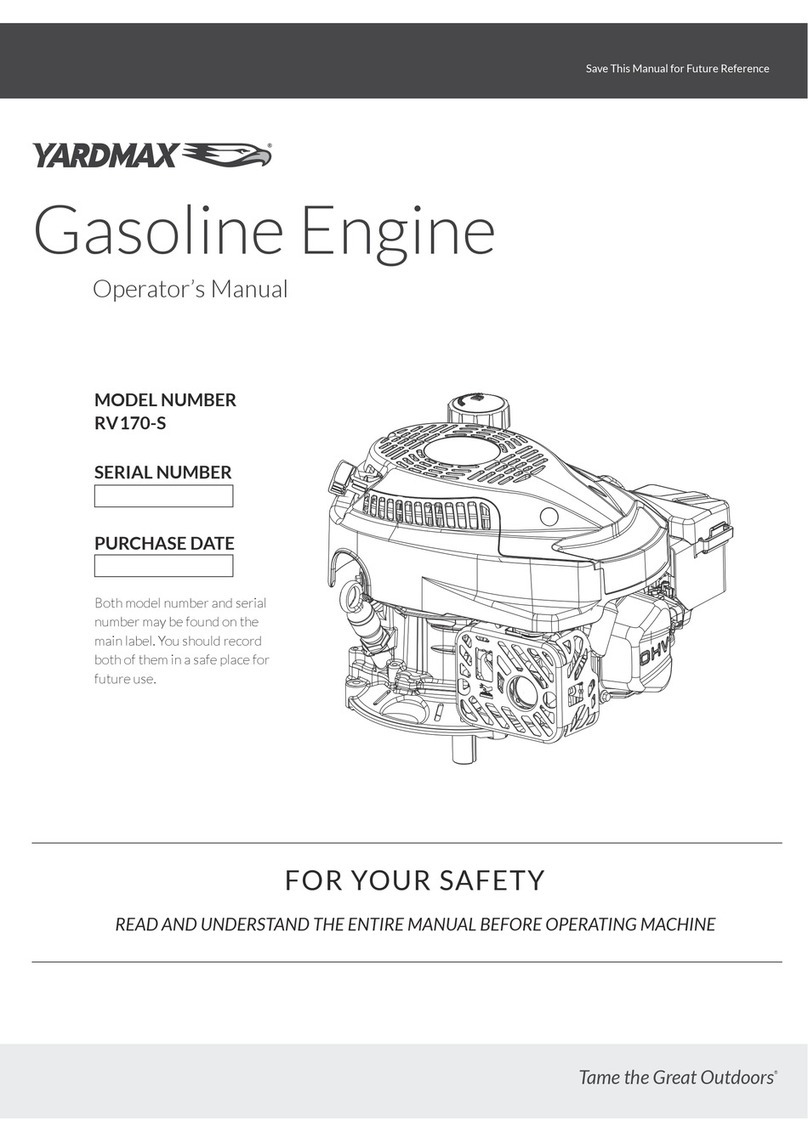
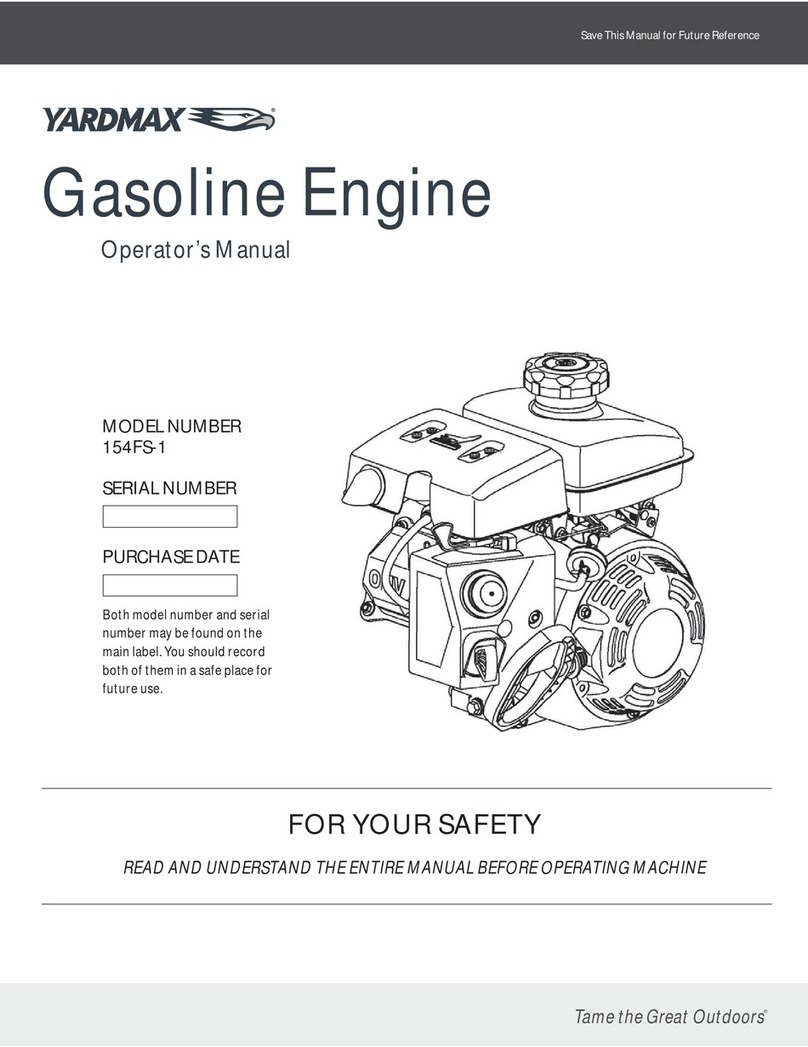
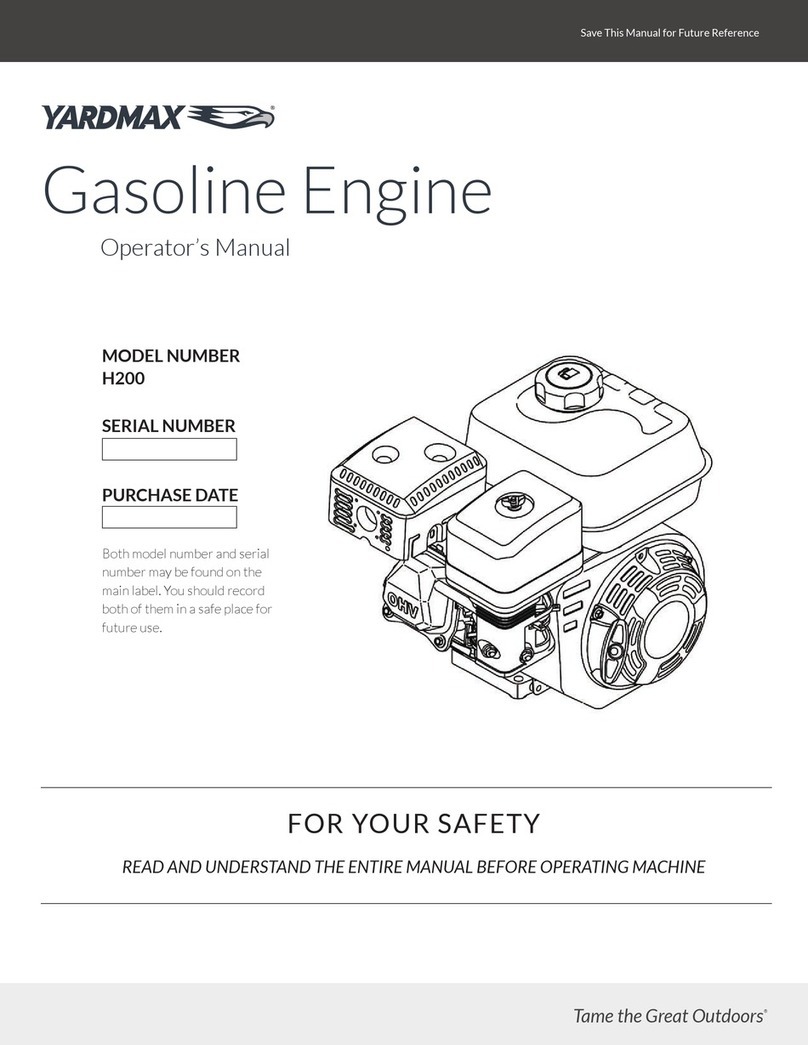
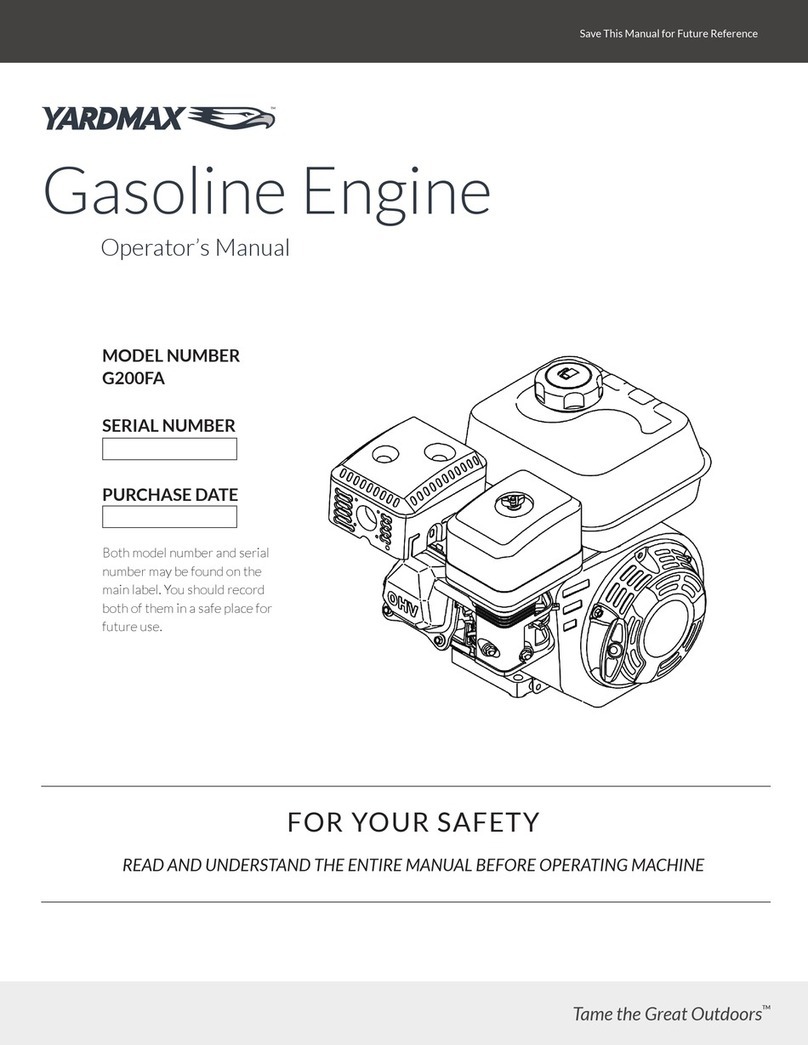
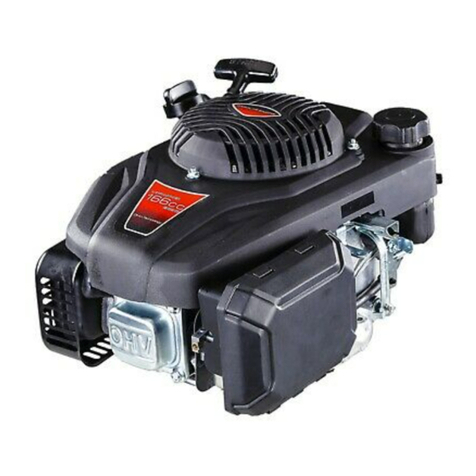
YARDMAX R210-S User manual

YARDMAX~
Q-5
Gasoline
Engine
Operator's Manual
MODEL NUMBER
R210-S
SERIAL
NUMBER
PURCHASE
DATE
Both model number and serial
number may be found on the
main label.
You
should record
both
of
them in asafe place
for
future
use.
FOR
YOUR
SAFETY
Save This Manual
for
Future Reference
READ
AND
UNDERSTAND
THE
ENTIRE
MANUAL
BEFORE
OPERATING
MACHINE
Tame
the
Great
Outdoors·

1
Your newYARDMAX®engine offers qualityconstruction,
and
is
easy and safe
to
operate.
With
proper
use and
care,
it
is
designed
to
give you many years
of
dependable
service.
Prepare
to
experience the durability
to
take on any
job
with
the
ease,
portability,
and
convenience
of
your
new
engine!
Discover
theYARDMAXAdvantage
At
YARDMAX,
we
understand
that
land
ownership
definitely
has its privileges,
but
it
also comes
with
a
great
deal
of
responsibility.
When
duty
calls and you
need
to
respond, will you have what
it
takes
to
tame the
greatoutdoors?
When looking
for
outdoorpowerequipment
(OPE)
to
get
the job done right, at the right price, YARDMAXdelivers
the perfect combination
of
performance
and
practicality.
YARD
MAX
has
asolution that's right
for
you.
MAX
Performance,
MAX
Value,
MAX
Support -
that's YARDMAX
J
Backed
by decades
of
proven manufacturingexpertise
J Enhanced design features come standard
J Engineered
for
the best user experience
J Quality metal parts are
used
instead
of
plastic
J A robustwarrantysupports
all
products
J Budget-friendly prices
make
it
practical
YARDMAX~
Up
for
the
job?
YARD
MAX
is.
TABLE
OF
CONTENTS
Introduction 1 Operation 6
Specifications
3 Maintenance 8
Safety
3
Storage/Transporting
14
Know
Your
Engine
4
Troubleshooting
16
Controls
5
Technical
&
Consumer
Information 20
Check
before
Operation 6 Wiring
Diagram
23
California
And
Federal
Exhaust
And
Evaporative
Emissions
Control Warranty 24
Statement
I
Introduction

DISCLAIMER
Keep this owner's manual handy,
so
you
can
refer
to
it
at
anytime.
This owner's manual
is
considered a permanent part
of
the engine
and
should remain with the engine
if
resold.
The
information
and
specifications
included
in
this
publication
were
in
effect
at
the
time
of
approval
for
printing.
READ
THIS
OWNER'S
MANUAL
CAREFULLY.
Pay
special
attentiontothese symbols
and
any
instructionsthatfollow:
,
Warning!
Indicates serious
injury
or
death
will
result
if
instructions
are
not
followed.
Danger!
Indicates a strong possibility thatserious injury
or
death
could
result
if
instructions
are
not
followed.
Caution!
Indicates apossibility that minor injury or
an
result
if
instructions
are
not
followed.
Notice:
Indicates that equipment or property
damage
can
result
if
instructions
are
not
followed.
If
a problem should arise,
or
if
you have any questions
aboutyour engine, consultyourengine dealer.
Carefully
read
through this entire operator's manual
before using your new
engine.
Pay
attention to all
cautions
and
warnings.
ENVIRONMENTAL
Recycle
unwanted materials instead ofdisposing
of
0
#0J~
them
as
waste.
All
tools,
hoses,
and
packaging
should
-
be
taken
to
the
local
recycling
center
and
disposed
of
in
an
environmentally
safe
way.
Gasoline Engine » Operator's Manual
ENGINESERIAL
NUMBER
Record theengine serial numberon the
front
cover
of
this
manual.
You
will need this serial number when ordering
parts,
and
when makingtechnical
or
warranty inquires.
DISCLAIMER
YARDMAX reserves
the
right
to
discontinue, change,
and
improve
its
products
at
any
time
without
notice
or
obligation
to
the
purchaser. The
descriptions
and
specifications contained in this manual were in effect at
printing. Equipment described within this manual may
be
optional.
Some
illustrations may not
be
applicable
to
your
unit.
SUPPORT
Have questions aboutyour
YARD
MAXequipment?
Call
us
at
847-327-0566
or
844-YARDMAX, email
us
or
contact
us
via your
favorite social media site.
Introduction I 2

SPEC
IF
I
CAT
I0
NS
Model
Type
Net
Power
(KW/3600rpm)
Max.
torque
(N•m/rpm)
Fuel consumption
(g/kW•h)
Idlespeed
Speed Fluctuating
Ratio
Transmission Mode
Reduction Ratio
BorexStroke(mm)
Displacement
(cc)
Compression Ratio
R210-S
Single cylinder, 4-Stroke,
Forced
Air
Cooling,
OHV
4.3
12.4/2500
:S10%
74.5x48
209
8:3:1
_,
Lubricatingmode Splash
Starting
Mo
:J_
e Recoil
start
R t t. Counter-clockwise (from
o a
1on
p-ro
.d
)
.1
••
SI
e
Valve Clearance
Sparkplug
clearance
Igniting Mode
Air
cleaner
input
valve: 0.05 mm
-0.10mm,
output
valve: 0.05
mm-0.10mm
0.7 mm
-0.8mm
Transistorized Magneto
Ignition
Semi-dry, Oil bath,
Foam
filter
Dimension
(Length) (mm)
Dimension
(Width) (mm) +-
360
290
Dimension (High)
(mm)
Net
weight(kg) r
325
12.5
The power rating
of
the engine indicated in this document is the
net
power
output
tested on a production engine
for
the
engine model and
measured in accordance
with
SAE
J1349
at
3,600 rpm (Net Power) and
at
2,500 rpm (Max.
Net
Torque). Mass productionengines may
vary
from
thisvalue.
Actual power
output
for
the
engine installed in thefinal machine will
vary
dependingon numerous factors, including
the
operatingspeed
of
theengine in application, environmental conditions, maintenance, and
other
variables.
SAFETY
IMPORTANT
SAFETY
INFORMATION
Most
accidents
with
engines can be prevented
if
you
follow
all
instructions in this manual and on
the
engine. Some
of
the
most
common hazards are discussed below, along
with
the
best
way
to
protect
yourselfand others.
OWNER
RESPONSIBILITIES
• Theengines aredesigned
to
givesafeand dependableservice
if
operated according
to
instructions.
Read
and understand this
owner's manual before operating
the
engine. Failure
to
do
so
could resultin personal
injury
or
equipmentdamage.
•
Know
how
to
stop
the
engine quickly, and understand
the
3 I
Specifications
&Safety
operation
of
all controls. Never
permit
anyone
to
operate
the
engine
without
proper
instructions.
•
Do
not
allow
children
to
operate
the
engine. Keep children and
pets
far
away
from
the
area
of
operation.
REFUEL
WITH
CARE
Gasoline
is
extremely flammable, and gasoline vapor can explode.
Refuel outdoors, in awell-ventilated area,
with
the
engine stopped.
Neversmoke neargasoline, and keep
other
flamesand sparks away.
Always storegasolinein
an
approvedcontainer.
If
anyfuel
is
spilled,
make sure
the
area is
dry
beforestarting
the
engine.
HOT
EXHAUST
• The
muffler
becomes
very
hot
during
operation and remains

hot
for
a while after stopping the engine.
Be
careful not
to
touch the muffler while
it
is
hot. Let the engine cool before
storing
it
indoors.
•
To
preventfire hazards
and
to
provideadequateventilation
for
stationary equipment applications, keep the engine at least 3
feet
(1
meter) away from building walls
and
other equipment
duringoperation. Do
not
place flammable objects close
to
the
engine.
CARBON
MONOXIDE
HAZARD
Exhaust
gas
contains poisonous carbon monoxide. Avoid
Gasoline Engine » Operator's Manual
inhalation
of
exhaust
gas.
Never run theengine in aclosed garage
or
confined
area.
OTHEREQUIPMENT
Review the instructions provided
with
the equipment powered
by this engine
for
any additional safety precautions
that
should
be
observed in conjunction
with
engine startup, shutdown,
operation,
or
protective apparel
that
may
be
needed
to
operate
the equipment.
KNOW
YOUR ENGINE
FEATURES
AND
CONTROLS
Muffler
Oil Filler
Cap
I Dipstick
Safety&
Know
Your
Engine
I 4

CONTROLS
FUEL
VALVE
LEVER
The fuel valve opens and closes
the
passage between the fuel
tank
and
the carburetor.
Thefuel valve levermust
be
in
theON position
for
the engine
to
run.
When the engine
is
not
in
use,
leave the fuel valve lever in the
OFF position
to
prevent carburetor flooding and
to
reduce
the
possibility
of
fuel leakage.
FUEL
VALVE
LEVER
THROTILE
LEVER
The
throttle
levercontrols engineTHROTILE
LEVER
speed.
Moving
the
throttle
lever in
the
directions
shown makes
the
engine run faster
or
slower.
ENGINE
SWITCH
The engine switch enables
and
disables the ignitionsystem.
The engineswitch must
be
in theON position
for
theengine
to
run.
Turningthe engine switch
to
theOFF position stops the engine.
5 I
Controls
CHOKE
LEVER
The
choke
lever
opens
and closes
the
choke
valve
in
the
carburetor.
The
CLOSE
position enriches the fuel mixture
for
starting a cold
engine.
The OPEN
position
provides
the
correct
fuel
mixture
for
operation afterstarting,
and
for
restartingawarm engine.
Some
engine applications
use
a remotely-mounted choke control
ratherthan theengine-mounted choke levershown here.
RECOIL
STARTER
GRIP
Pull the startergrip
to
crankthe engine.

Gasoline Engine » Operator's Manual
CHECK
BEFORE
OPERATION
IS
YOUR
ENGINE
READY
TO
GO?
For
your
safety,
and
to
maximize
the
service
life
of
your
equipment,
it
is
veryimportant
to
take a
few
moments beforeyou
operate
the
engine
to
check its condition.
Be
sure
to
take care
of
any problem you find,
or
have your servicing dealer correct it,
beforeyou operatetheengine.
Improperly maintaining this engine,
or
failing to
correct a problem before operation, could
cause
a
malfunction
in
which
you
could
be
seriously
injured.
Alwaysperform a
preoperation
inspection,
and
correct
any
problem.
Before beginning your preoperation checks,
be
sure the engine
is
level
and
theengine switch
is
in theOFF position.
CHECK
THE
GENERAL
CONDITION
OF
THE
ENGINE
e Look around and
underneath
the
engine
for
signs
of
oil
or
gasoline leaks.
eRemove
any excessive
dirt
or
debris, especially around
the
muffler
and
recoil starter.
e Look
for
signs
of
damage.
eCheck
that
all shields
and
covers are in place,
and
all nuts, bolts,
and
screws are tightened.
CHECK
THE
ENGINE
Check the engine oil level. Running theengine
with
a
low
oil level
can
cause
engine damage.
The Oil
Alert
system (applicable engine types) will automatically
stop
the
engine
before
the
oil
level
falls
below
safe
limits.
However,
to
avoid the inconvenience
of
an
unexpected shutdown,
always checkthe engine oil level before startup.
Check the air filter. A
dirty
air
filter
will
restrict
air
flow
to
the
carburetor, reducing engine performance.
Checkthe fuel level. Starting
with
afull tankwill help
to
eliminate
or
reduce operatinginterruptions
for
refueling.
CHECK
THE
EQUIPMENT
POWERED
BY
THIS
ENGINE
Review the instructions provided
with
the equipment powered
bythis engine
for
any precautions
and
procedures
that
should
be
followed beforeengine startup.
OPERATION
SAFE
OPERATING
PRECAUTIONS
Before operating the engine
for
the
first
time, please review the
IMPORTANT SAFETY INFORMATION and
the
chapter
titled
BEFORE
OPERATION.
Carbon
monoxide
gas
is
toxic. Breathing
it
can
cause
unconsciousness
and
even
kill
you.
Avoidany
areas
oractions that
expose
you
to
carbon
monoxide.
Review the instructions provided
with
the equipment powered
bythis engine
for
any safetyprecautions
that
should
be
observed
in conjunction
with
engine startup, shutdown,
or
operation.
STARTING
THE
ENGINE
1.
Movethefuel valve lever
to
theON position.
FUEL
VALVE
LEVER
2.
To
start
a cold engine, move
the
choke lever
to
the
CLOSE
position.
Check
Before
Operation
&Operation I 6

To
restart awarm engine, leave the choke lever in the
OPEN
position.
Some engine applications use a remotely-mounted choke
control rather than the engine-mounted choke lever shown
here.
3.
Movethe
throttle
leverawayfrom the SLOW position, about
1/3
of
thewaytoward the
FAST
position.
Some
engine applications
use
a remotely-mounted
throttle
control
rather
than
the
engine-mounted
throttle
lever
shown here.
4.
Turn theengine switch
to
the ON position.
5.
Operatethestarter.
RECOIL
STARTER
(all engine types):
Pull the startergrip lightlyuntil you feel resistance, then pull
briskly.
Return thestartergripgently.
7 I Operation
6.
If
the choke lever
has
been
moved
to
the
CLOSE
position
to
start the engine, gradually move
it
to
the
OPEN
position
as
the enginewarms
up.
CLOSE OPEN
STOPPING
THE
ENGINE
To
stopthe engine in
an
emergency, simplyturn theengine switch
to
the OFF position. Under normal conditions,
use
the following
procedure.
1.
Movethe
throttle
lever
to
theSLOW position.
Some
engine applications
use
a remotely-mounted
throttle
control
rather
than
the
engine-mounted
throttle
lever
shown here.
2.
Turn the engine switch
to
the OFF position.
3.
Turn thefuel valve lever
to
the
OFF
position.

FUEL
VALVE
LEVER
SETIING
ENGINE
SPEED
Position the
throttle
lever
for
thedesired engine
speed.
Gasoline Engine » Operator's Manual
Some engine
applications
use a
remotely-mounted
throttle
control
rather
than
the
engine-mounted
throttle
lever shown
here.
For engine speed recommendations,
refer
to
the
instructions
provided
with
the equipmentpowered bythis engine.
MAINTENANCE
THE
IMPORTANCE
OF
MAINTENANCE
Good maintenance
is
essential
for
safe,
economical,
and
trouble-
free operation.
It
will also help reduce airpollution.
Improperly
maintaining
this
engine,
or
failure
to
correct
a problem before operation, can cause a
malfunction in which you can be seriously
hurt
or
killed.
Always
follow
the
inspection
and
maintenance
recommendations
and
schedules in
this
owner's
manual.
To
help you properly care
for
your
engine, the following pages
include a maintenance schedule, routine inspection procedures,
and
simple maintenance procedures using basic hand tools.
Other
service tasks
that
are more difficult,
or
require special tools, are
best handled by professionals
and
are normally performed by a
technician
or
other
qualified mechanic.
The
maintenance
schedule
applies
to
normal
operating
conditions.
If
you operate your engine under unusual conditions,
such
as
sustained high-load
or
high-temperature operation,
or
use
in unusually
wet
or
dusty conditions, consult your servicing
dealer
for
recommendations applicable
to
your individual needs
and
use.
MAINTENANCE
SAFETY
PRECAUTIONS
Some
of
the
most
important
safety precautions are
as
follows:
However,
we
cannot
warn
you
of
every
conceivable hazard
that
can arise in performing maintenance. Only you can decide
whether
or
notyou should perform agiven task.
1.
Failure
to
properly follow maintenance instructions
and precautions
can
cause
you
to
be
seriously
hurt
or
killed.
Always follow the procedures and precautions in the
owner'smanual.
Make
sure
the
engine
is
off
before
you
begin
any
maintenance
or
repairs. This will eliminate several potential
hazards:
e Carbon monoxidepoisoning
from
engineexhaust.
Be
sure there
is
adequate ventilation wheneveryou operate
theengine.
e Burns
from
hot
parts.
Lettheengine
and
exhaustsystem cool beforetouching.
elnjury
from
movingparts.
Do notrun theengine unless instructed
to
do
so.
2.
Read
the instructions before you begin,
and
make sure you
have thetools and skills required.
3.
To
reduce the possibility
of
fire
or
explosion,
be
careful when
working around gasoline.
Use
only a nonflammable solvent,
not
gasoline,
to
clean parts. Keep cigarettes, sparks and
flames awayfrom all fuel-related parts.
Remember
that
your
servicing dealer knows
your
engine best
and
is
fully
equipped
to
maintain
and
repairit.
To
ensure the best quality
and
reliability, use only new, genuine
parts
or
their
equivalents
for
repair
and
replacement.
Operation
&
Maintenance
I 8
MAINTENANCE
SCHEDULE
The engine must be properlymaintained
to
ensure itsoperation be safe, economyand trouble-free,
as
well
as
eco-friendly.
In
order
to
keep
your
gasoline engine in good
working
condition,
it
must be periodically serviced. The
following
maintenance schedule
and
routine
inspection procedures mustbe carefullyfollowed
REGULAR
SERVICE
PERIOD
Performed ateveryindicated month
or
operating
hourinterval,whichever comes first.
ITEM
Check- Refill
• Engine oil Replace
Check- Refill
• Reduction gearoil Replace
Check
•
Air
cleaner Clean
Replace
• Sedimentcup Clean
• Spark plug Check-Adjust
Spark arrester Clean
(optional parts)
• Idlespeed Check-Adjust
• Valve clearance Check-Adjust
•
Fuel
tankand
Fuel
filter
Clean
•
Fuel
line Check
• Cylinder head, piston Clean up
carbon
e Emission-related items.
T:l
These itemsshould be replaced
if
replacement needed.
(1) Service more
frequently
when used in dustyareas.
Firstmonth
Every3
Everyyear
Each
use
or20
Hrs. months
or or
100
Hrs.
50
Hrs.
0
0 0
0
0 0
0
0(1)
0
0
OY:l
0
0(2)
0(2)
0(2)
Every 2years( change
if
necessary)
<225cc, Every 125hrs
~225cc,
Every250hrs (2)
(2) These items should be serviced
by
your
servicing dealer unless you have
the
proper
tools
and are mechanically proficient.
Refer
to
manual
for
service procedures.
elf
the
gasoline engine
frequently
work
underhigh temperature
or
heavyload,change
the
oil every
25
hours.
elf
the
engine
frequently
work
under
dusty
or
other
severe circumstances, clean
the
air
filter
elementevery
10
hours;
If
necessary, change
the
air
filter
elementevery
25
hours.
eThe maintenance period and
the
exact
time
(hour),
the
onewhich comes
first
should govern.
9 I
Maintenance

REFUELING
Fuel
tank
capacities:0.68gallons(2.6L)
With
the
enginestopped, remove
the
fuel
tank
cap andcheck
the
fuel level.Refill
the
tank
if
the
fuellevelislow.
Gasoline
is
highly
flammable
and
explosive.
You
can
be
burned
or
seriously
injured
when
handling
fuel.
•
Stop
the
engine
and
keep
heat,
sparks,
andflame
away.
•
Handle
fuel
only
outdoors.
• Wipe
up
spills
immediately.
MAXIMUM
FUEL
LEVEL
Refuel in awell-ventilated area before starting
the
engine.
If
the
engine
has
been running,allow
it
to
cool. Refuel carefully
to
avoid
spillingfuel.
Do
not
fill
above
the
fuel
strainer
shoulder.
After
refueling,tighten
the
fuel
tank
capsecurely.
Never refuel
the
engine insidea building
where
gasoline fumes
may reach flames
or
sparks. Keepgasolineaway
from
appliance
pilot
lights,barbecues,electricappliances,
power
tools,etc.
Spilled
fuel
is
not
only
a
fire
hazard,
it
causes
environmental
damage.
Wipe
up
spillsimmediately.
Fuel
can
damage
paintandplastic.
Be
careful
not
to
spill
fuel
when
(riling
your
fuel
tank.
Damage
caused
by
spilled
fuel
is
not
covered
under
waiTOnty.
FUEL
RECOMMENDATIONS
Use
unleaded
gasoline
with
a
pump
octane
rating
of
86
or
higher.
These engines
are
certified
to
operate
on unleaded gasoline.
Unleadedgasolineproduces
fewer
engineand sparkpiugdeposits
andextendsexhaustsystem life.
Never
use
stale
or
contaminated
gasoline
or
an
oil/gasoline
mixture.Avoidgetting
dirt
or
water
in
the
fueltank.
Occasionally
you
may hear a
light
"spark
knock"
or
"pinging"
(metallicrappingnoise) whileoperatingunderheavyloads. Thisis
no
cause
for
concern.
Gasoline Engine • Operator'sManual
If
spark knock
or
pingingoccurs
at
a steadyengine speed, under
normal load, change brands
of
gasoline.
If
spark knock
or
pinging
persists,seean authorizedservicingdealer.
Running the
engine
with persistentspark knock or
pinging
can
cause
engine
damage.
Running the
engine
with persistentspark knock or
pingingis considered
misuse,
andthe Distributor's
LimitedWarranty
does
not
cover
parts
damaged
by
misuse.
ENGINE
OIL
LEVEL
CHECK
Check
the
engine
oil
level
with
the
engine stopped and in a level
position.
1.
Remove
the
fillercap/dipstickand wipe
it
clean.
FILLERCAP/DIPSTICK
\ UPPER LIMIT
LOWER LIMIT
2. Insertand remove
the
dipstick
without
screwing
it
into
the
filler
neck.Check
the
oil levelshownon
the
dipstick.
3.
If
the
oil level islow,
fill
to
the
edge
of
the
oil
filler
hole
with
the
recommendedoil.
4. Screw
in
the
fillercap/dipsticksecurely.
Running the engine with a low oil level
can
cause
engine
damage.
The
OilAlertsystem (applicable
engine
types)
will
automatiwllystap
the
engine
before
the
oil
level
fa/Is
below
safe
limit
However,
toavoid the
inconvenience
of
an
unexpected
shutdown,
always
check
the
engine
oil
level
before
startup.
ENGINE
OIL
CHANGE
Drain
the
used
oil
while
the
engine is
warm.
Warm
oil
drains
quicklyandcompletely.
1. Place a
suitable
container
below
the
engine
to
catch
the
usedoil,and then remove
the
filler
cap/dipstickand
the
drain
plug.
2.
Allow
theused oil
to
draincompletely,andthen reinstall
the
drain plug, and tighten
it
securely.
Maintenance
I
10

Please
dispose
of
used
motoroil in
an
environmental friendly
way.
We
suggestyoutake
used
oil ina
sealed
container
to
your
local recyclingcenter
or
service station
for
reclamation. Do
not
throw
it
inthetrash;pour
it
ontheground;
or
downadrai
n.
3.
With
the
engine in a level position,
fill
to
the
outer
edge
of
theoil fillerhole
with
the recommended oil.
Engine oilcapacities: 16.9
oz.(O
.
SL)
Running
the
engine
with
a
low
oil
level can cause engine
damage.
The
Oil
Alert
system
(applicable
engine
types)
will
automaticallystop
the
engine before
the
oil level falls below
thesafelimit.
However,
to
avoid
the
inconvenience
of
an
unexpected
shutdown,
fill
to
the
upper
limit,
and check
the
oil
level
regularly.
4. Screwin
the
fillercap/dipsticksecurely.
-
""
OIL
LEVEL
DRAIN BOLT
ENGINE
OILRECOMMENDATIONS
Oil
is a major
factor
affecting performance and service life. Use
4-strokeautomotiveengine oil.
SAE
10W-30
is recommended
for
general
use.
Other
viscosities
shown in
the
chartmaybe used whentheaveragetemperaturein
your
area
is
within
the
recommended range.
The
SAE
oilviscosityand service classification are in
the
API label
on
the
oil container.
We
recommend
that
you use API
SERVICE
Category
SE
or
SF
oil.
SAEViscosity Grades
-20
-1
0 0 10 20
AMBIENT TEMPERATURE
11
I Maintenance
AIR
FILTER
INSPECTION
Remove
the
air
cleaner cover and inspect
the
fi
lter. Clean
or
replace
dirty
filter
elements. Always replace damaged
filter
elements.
If
equipped
with
an oil-bath aircleaner, also check
the
oil
level.
AIR
CLEANER
SERVICE
A
dirty
air
filter
will
restrict air
flow
to
the
carburetor, reducing
engine performance.
If
you operate
the
engine in
very
dustyareas, clean
the
air
filter
moreoftenthanspecified in
the
MAINTENANCESCHEDULE.
Operatingthe
engine
withoutan airfilter,
or
with a
damaged
air
filter,
will allowdirt
to
enterthe
engine,
causing
rapid
engine
wear.
This
type
of
damage
is
not
covered
by
the
Distributor'sLimitedWarranty.
1. Remove
the
aircleanercover.
2. Remove
the
foam
filter.
3.
Inspect
air
fi
lter
elements, and replace
them
if
they
are
damaged. Always replace
the
paper air
filter
elementat
the
scheduled interval.
4. Clean
the
air
filter
elements
if
they
are
to
be reused.
5. Foam
air
filter
element: Clean in
warm
soapy
water
, rinse,
and
allow
drying
thoroughly.
Or
clean
in
nonflammable
solvent
and
allow
drying.
Dip
the
fi
l
ter
element
in clean
engineoil,
and
thensqueeze
out
all
excess
oil.Theengine
will
smokewhenstarted if
too
muchoil is
left
inthefoam.
6.
Wipe
dirt
from
the
inside
of
the
air
cleaner base and cover,
using a moi
st
rag. Be careful
to
prevent
dirt
from
entering
the
air
duct
that
leads
to
the
carburetor.
7. Reinstall
the
cleaned airfilter. Be sure the gasket is in place
beneath
the
airfilter.Tighten
the
air
filter
wing
nut
securely.
SEDIMENT
CUP
CLEANING
1. Move
the
fuel valve
to
the
OFF position, and
then
remove
thefuel sedimentcup
and
0-ring.
Gasoline
ishighly
flammable
and
explos
i
ve
.
You
can
be
burned
or
seriously
injured
when
handling
fuel
.
•
Keep
heat,
sparks
and
flame
away.
•
Handle
fuel
only
outdoors
.
e
Wipe
up
spills
immediately.

2.
Wash thesedimentcup and
0-ring
in
nonflammablesolvent,
and
dry
themthoroughly.
3.
Place
the
0-ring
in
the fuel valve, and install
the
sediment
cup.Tightenthesedimentcupsecurely.
4. Move thefuel valve
to
theON position, and check
for
leaks.
Replace the
0-ring
ifthere
is
any leakage.
0-RING
SEDIMENTCAP
SPARK
PLUG
SERVICE
Recommended spark plugs:
F7RTC
or
otherequivalents.
~
An
incorrect
spark
plug
can
cause
engine
damage.
1. Disconnect the spark plug cap, and remove any
dirt
from
aroundthesparkplugarea.
2.
Remove
thesparkplug
with
asparkplugwrench.
3. Inspect thesparkplug. Replace
it
if
theelectrodesare worn,
or
if
theinsulator
is
cracked
or
chipped.
4. Measurethesparkplugelectrodegap
with
asuitable
gauge.
The gap should be 0.028
in
-0.031
in
(0.70
mm-
0.80 mm).
Correct
the
gap,
if
necessary, bycarefully bending theside
electrode.
Gasoline Engine » Operator'sManual
5.
Install
the
spark plug carefully,
by
hand,
to
avoid cross-
threading.
6.
After
thespark plugseats, tighten
with
aspark plugwrench
to
compressthewater.
A
loose
spark plug
can
overheat and
damage
the
ensine.
Over
tightening
the
spark
plug
can
damage
the
threads
in
the
cylinder
head.
7.
Attachthesparkplug
cap.
IDLE
SPEED
ADJUSTMENT
1.
Start
the
engine
outdoors,
and
allow
it
to
warm
up
to
operatingtemperature.
2.
Movethe
throttle
lever
to
itsslowestposition.
3.
Turn
the
throttle
stop screw
to
obtain
the
standard idle
speed.
Standardidlespeed: 1800±150rpm
SPARK
ARRESTER
SERVICE
(optionalequipment)
Your engine is
not
factory-equipped
with
a spark arrester. In
some areas,
it
is illegal
to
operate an engine
without
a spark
arrester.Check local laws and regulations. A spark arrester is
availablefromauthorized servicingdealers.
The sparkarrestermust
be
serviced every
100
hours
to
keep
it
functioning
as
designed.
lfthe
engine
has
been running,
the
mufflerwill beveryhot.
Allow
the muffler
to
cool beforeservicingthesparkarrester.
1.
Remove
thethree4
mm
screws from theexhaust deflector,
and removethedeflector.
2.
Remove
the
four
5
mm
screws from
the
muffler
protector
and removethemufflerprotector.
Maintenance
I
12

3.
Remove
the
4 mm
screw
from
the
spark
arrester,
and
remove thespark arresterfrom the muffler.
MUFFLER
PROTECTOR
MUFFLER
Bmm NUTS
SCREEN
4. Use a brush
to
remove carbon deposits
from
the
spark
arresterscreen.
Be
careful
to
avoid damagingthe screen.
The spark arrester must
be
free
of
breaks
and
holes. Replace
thespark arrester
if
it
is
damaged.
5.
Install
the
spark arrester,
muffler
protector, and exhaust
deflectorin the reverse order
of
disassembly.
Never
use
an
engine
without
an
appropriate spark
arrester
in
the
forest
areas!
Doing
so
may
cause
afire!
13
I Maintenance

Gasoline Engine » Operator's Manual
STORAGE/
TRANSPORT!
NG
STORAGE
PREPARATION
Proper storage preparation
is
essential
for
keeping your engine
trouble free
and
looking good. The following steps
will
help
to
keep rust
and
corrosion from impairing your engine's function
and appearance, and
will
make
the
engine easier
to
start
after
storage.
CLEANING
If
the engine
has
been
running, allow
it
to
cool
for
at least half
an
hour before cleaning. Clean all exterior surfaces, touch up any
damaged paint,
and
coat
other
areas
that
may rust
with
a light
film
of
oil.
FUEL
e
Using
a
garden
hose
or
pressure
washing
equipment
can
force water into the
air
cleaner or muffler
opening.
Water
in
the aircleaner will
soak
the air
filter,
and
water that
passes
through
the
airfilter or
muffler
can
enter
the
cylinder,
causing
damage.
e Water contacting a hot
engine
can
cause
damage.
If
the
engine
has
been
running,
allow
it
to
cool
for at
least
half
an
hour
before
washing.
Gasoline will oxidize
and
deteriorate in storage. Old gasoline will
cause
hard starting,
and
it
leaves gum deposits
that
clog the fuel
system. Ifthegasoline in yourengine deterioratesduringstorage,
you may need
to
have
the
carburetor
and
other
fuel system
components serviced
or
replaced.
The Distributor's Limited Warranty does
not
cover fuel system
damage
or
engine
performance
problems
resulting
from
neglected storage preparation.
You
can
extend fuel storage life by adding afuel stabilizer that
is
formulated
for
that purpose,
or
you
can
avoid fuel deterioration
problems by drainingthefuel tank
and
carburetor.
ADDING A
FUEL
STABILIZER
TO
EXTEND
FUEL
STORAGE
LIFE
When
adding
a
fuel
stabilizer,
fill
the
fuel
tank
with
fresh
gasoline.
If
only partially filled, air in the tank will promote fuel
deterioration during storage.
If
you keep a container
of
gasoline
for
refueling,
be
sure that
it
contains onlyfresh gasoline.
1.
Add fuel stabilizerfollowingthe manufacturer's instructions.
2.
After
adding afuel stabilizer, run the engine outdoors
for
10
minutes
to
be
sure
that
treated gasoline
has
replaced the
untreatedgasoline in thecarburetor.
3. Stop theengine,
and
move thefuel valve
to
the
OFF
position.
DRAINING
THE
FUEL
TANKAND
CARBURETOR
1.
Place
an
approved gasoline container below the carburetor,
and
use
afunnel
to
avoid spillingfuel.
2.
Remove
the
carburetor
drain
bolt
and sediment cup, and
then move thefuel valve lever
to
the ON position.
3.
FUEL
VALVE
LEVER
WASHER
After
all
the
fuel
has
drain
into
the container, reinstall the
drain bolt
and
sediment
cup.
Tighten them securely.
e
The
length
of
time that
gasoline
can
be
left
in
your
fuel
tank
and
carburetor without
causing
functional
problems will vary with
such
factors
as
gasoline
blend,
your
storage
temperatures,
and
whether
the
fuel
tank
is
partially
or
completely
filled.
The
air
in
a
partiallyfilled
fuel
tank
promotes
fuel
deterioration.
Very
warm storage temperatures accelerate fuel
deterioration.
Gasoline
will
oxidize
and
deteriorate
in
storage.
Deteriorated gasoline will
cause
hard
starting, and
it
leaves
gum
deposits that clog the
fuel
system.
As
a
result,
If
the
engine
is
not
used
for
more
than
one
month,
the
fuel
oil shall
be
drained
thoroughly to
prevent
from
deterioration
of
the
fuel
in
fuel
system
and
carburetor.
e
The
failures
of
fuel
system
or
engine
performance
arising
from
improper
storage
are
beyond
the
scope
of
the
warranty.
Storage
&Transporting I
14

STORAGE
PRECAUTIONS
1.
Change the engine oil.
2.
Remove
thespark plugs.
3.
Pour a tablespoon
(5-10
cc)
of
clean engine oil
into
the
cylinder.
4.
Pull the starter rope several times
to
distributethe oil in the
cylinder.
5.
Reinstall thespark
plugs.
6.
Pull
the
starter
rope
slowly
until
resistance is
felt.
This
will
close
the
valves
so
moisture cannot
enter
the
engine
cylinder. Return the starterrope gently.
If
your engine
will
be
stored
with
gasoline in the fuel tank
and
carburetor,
it
is
important
to
reduce
the
hazard
of
gasoline
vapor ignition. Select awell-ventilated storage area away from
any appliance
that
operates
with
a flame, such
as
a furnace,
water heater, or clothes dryer. Also avoid any area with a spark-
producingelectricmotor,
or
where powertools are operated.
If
possible, avoid storage areas
with
high humidity, because
that
promotes rust
and
corrosion.
Unless all fuel
has
been
drained from the fuel tank, leave the fuel
valve lever in the OFF position
to
reduce the possibility
of
fuel
leakage.
Position the equipment
so
the engine
is
level. Tilting
can
cause
fuel
or
oil leakage.
15 I
Storage
&
Transproting
With
the
engine
and
exhaust system cool, cover
the
engine
to
keep
out
dust. A
hot
engine and exhaust system
can
ignite
or
melt some materials. Do not
use
sheet plastic
as
a dust cover. A
nonporous coverwill trapmoisture around theengine, promoting
rust
and
corrosion.
If
equipped
with
a battery
for
an
electric starter, recharge
the
batteryonce amonth whilethe engine
is
in storage. This will help
to
extend theservice life
of
thebattery.
REMOVAL
FROM
STORAGE
Check your engine
as
described in the chapter CHECK
BEFORE
OPERATION.
If
the fuel was drained during storage preparation, fill the tank
with
fresh gasoline.
If
you keep a
container
of
gasoline
for
refueling,
be
sure
that
it
contains only fresh gasoline. Gasoline
oxidizes
and
deterioratesover time, causing hard starting.
If
the cylinders were coated with oil duringstorage preparation,
theengine maysmoke brieflyatstartup.This
is
normal.
TRANSPORTING
If
the
engine
has
been running, allow
it
to
cool
for
at least 15
minutes before loading
the
engine-powered equipment on
the
transport vehicle. A hot engine
and
exhaust system
can
burn you
and
can
ignitesome materials.
Keep
the engine level when transporting
to
reduce the possibility
of
fuel leakage. Movethefuel valve lever
to
the
OFF
position.

Gasoline Engine » Operator's Manual
TROUBLESHOOTING
Start
Engine
Difficultly
(By
usingrecoil
starter)
TROUBLE CAUSE REMEDY
Fuel supply
is
not
smooth
or
nofuel supply
1.
There
is
no enough fuel infuel
tank
and fuel 1. Fill fuel, open fuel cock.
E cock
is
closed.
2.
Dredge airvent.
Q)
2.
Air
vent
in
the
fuel
filler
cap
is
clogged 3. Clean
first
and then dredge
......
~
~
V'l
3.
Fuel cock
is
clogged 4. Readjust
or
clean, blow
to
getthrough
....
a:;
ra
::I
a.
-4. Improper
or
clogged main oil
flow
hole
5.
Dismantle needlevalve and repair, clean,
V'l
Q)
bO
.s::.
::I
......
5.
Needlevalve is
not
closed properly
or
start
blow
to
get
through
a.
.s::.
......
~
"3:
hole
is
clogged 6. Repair
float
....
ra
a.
bO
V'l c
6.
Float
is
damaged
or
sticking
"iii
0
....
E
==
....
bO
c 0 c Fuel supply
is
normal 1. Replace
0 z
:c
"iii
......
V'l
Q)
1.
Fuel
is
too
filthy
or
deterioratd
2.
Replace
Q)
E
....
a. 0
E
V)
2.
There
is
water
infuel
3.
Drainextra fuel, diyupsparkplugelectrodes
0
u
3.
Too muchfuel in engine 4. Select properfuel brand corresponding
....
Q)
"'C
with
the
requirements..!: 4.
Wrong
fuel brand
~
"iii
c Spark plug
is
in bad conditions
E 0
....
"iii
0
1.
Too much carbon depositand
dirt
aroundz c 1. Clearaway.
Q)~
......
....
J
ra
electrodes
E
.s::.
a.
2.
Replace sparkplug.
Q)
•
!!!!
V'l
......
.s::.
Q)
2.
Electrodes are birni damaged seriously
or
~
- c 3. Adjust
to
propervalue.
ra
·-
insulatorsdamaged.
V'l
E-
>-
....
a. 0
a.
z
3.
Improperelectrodesgap.
::I
V'l
a:;
::I
Q)
Normal sparkplug
-
"iii
.!:
1. Replace
E
c~
1.
High tension line
is
damaged.
....
0
....
2.
Replace
0
"iii
ra
z a.
2.
Ignition coil
is
damaged
c V'l
Q)
3. Replace
......
0
J c
3.
Magneto loses magnetism
.s::.
bO
4. Adjustgap between ignition and flywheel
:C
4. Wronggap between ignitioncoil
and
flywheel
1. Replace
c
1.
Piston ring
is
worn
to
or
even over its
wear
2.
Replace
0
"iii
E
limit
3. Clear upcarbon fouling
V'l
Q)
Q)
......
....
V'l
bO
2.
Piston ring
is
broken
a.
>-
::I
4. Tighten
with
agasket in
E V'l a.
0
>-
3.
Piston ring
is
sticking
u a.
~
5.
Checkcylindergasket,
and
theflatness
....
....
a.
ra
Q)
::I a. 4. Spark plug
is
not
installed tighten
or
"'C V'l V'l
of
thesurface bywhich cylinderblock
c
a:;
"iii
> ::I E
without
agasket contacting
with
cylinder
head
u -
....
"iii
"iii
0
5.
Air
leakage between cylinder blockand Tighten cylinderhead bolts in stipulated
E E z
....
....
cylinder head
0 0
order
to
stipulated torque.
c z
..c
6.
Air
leakage in
the
valves 6. Checkvalve. Clearance and tightness,
<(
repair
if
necessary.
16

Gasoling
Engine
Power
Output
Insufficiency
TROUBLE
CAUSE
REMEDY
Fuel supplysystem
1.
Air
in fuel line
or
fuel lineclogged
2.
Mainoil
flow
hole
is
not
adjusted properly
1.
Exhaust air
or
dredgefuel line
3. In carburetor, needlevalve hole and main
2.
Readjust
oil
flow
hole clogged
3.
Clean and
biow
to
get
through
4. Fuel cock
is
clogged up 4. Clean, replace damaged
part
5.
Too much carbon deposit in combusting
5.
Clear away
chamber
6.
Clear away
When increasing 6. Too much car bon fouling in
muffler
and
throttle,
speed
7.
Clean aircleaner
filter
element
increaseslow
or
even exhaust pipe. 8. Repair
or
replace
decrease and stop 7.
Air
cleaner
is
clogged up
running 8. Intake pipe is leaking
Poorcompression
1. Piston
or
cylinder
or
piston ringis
worn
1.
Replace
the
worn
2.
Air
leakage
from
the
surface by which
2.
Replace
the
cylindergasket
cylinder block contacting
with
cylinder
3.
Readjust
head.
3. Too big
or
too
small valveclearance 4. Repair
4. Valve tightness
is
poor
Gasoline
Engine
Gan
not
Running
Smoothly
TROUBLE
CAUSE
REMEDY
1. Piston, cylinder
or
piston ring
is
worn
excessively
1.
Replace
the
worn
2.
Piston pin and piston pin hole are won
2.
Replace piston
or
piston pin
Knockingsound excessive
3. Tie rod small head
is
worn
excessively
3.
Replace
tie
rod
4. Roller bearing
for
crankshaftmain shaft
is
4. Replace roller bearing
worn
1. Engine
is
too
hot
2.
Too much carbon deposit in combustion
1.
Shoot
trouble
Abnormal
combustion chamber
2.
Clear away
3. Impropergasoline brand
or
low
gasoline
3.
Replace
with
qualified gasoline
quality
1. There
is
water
in
float
chamber
1.
Clean
Spark lacking
2.
Improperspark plug electrodes clearance
2.
Adjust
3. Somethingwrong
with
induced coil,
and
so
on
3.
Checkand replace damaged parts
17 I
Troubleshooting

Gasoline Engine » Operator's Manual
Stop
Suddenly
When
Running
TROUBLE CAUSE REMEDY
Fuel
supplysystem
1.
Refill fue
1. Fuel
is
finished
2.
Checkfuel line and dredge
2.
Carburetor
is
clogged
3.
Repair
3.
Floatchamber
is
leaking 4. Dismantle
float
chamber and eliminate
4. Needlevalye
is
sticked
it
Ignitionsystem
Stopsuddenlywhen 1. Spark plug
is
punctured,
or
short-circuited
1.
Replace spark plug
running bycarbon deposit
2.
Replace spark plug
2.
Side electrode
of
spark plug
is
dropped
out
3.
Weldon
3.
High-tension
wire
is
dropped
out
4. Replace ignition coil
4. Ignitioncoil
is
punctured
or
short-circuited
5.
Find
out
meeting and insulate
5.
Parking
wire
is
located on engine body
The
other
1. Cylinderis seriouslyscored and valve
1.
Repair
or
replace damaged parts
dropped
out
Gasoline Engine Is
Overheat
TROUBLE CAUSE REMEDY
1. Oil insufficient
or
wrong
oil ratioin the
gasoline
2.
Exhaust pipe blocked up
1.
Refill engine oil
3.
Shroud leaking
2.
Clean exhaust pipe
4. Coolingfins blocked byforeign
matter
3.
Repair damaged
part
5.
Coolingfan loosen and misfunction 4. Clearcoolingfins
Gasoline engine
is
6.
Connection rod deformation
to
make
5.
Reinstall well
overheat piston and cylinder bushingsidewear
6.
Replace connection rod
7.
Cylinder
or
piston
or
piston ring
is
worn
7.
Replace thewon parts
to
make huntingbetween cylinderand
crankcase
8.
Readjust enginegovernor
8.
Improperadjustment
of
enginegovernor
to
9.
Replace main bearing
produce speed high
9.
Crankshaft main bearing
burnt
out
Troubleshooting
I 18

Abnommal
NoiseExist
When
EngineRunning
TROUBLE CAUSE REMEDY
1. Piston, piston ring
or
cylinder
is
worn
1.
Replace the
worn
part
2.
Connection rod
or
piston pin and piston pin
2.
Replace the
worn
part
Beatingsound hole are
worn
3.
Replace bearing
3.
Crankshaft main neckis
worn
4. Piston ring
is
broken 4. Replace piston ring
1. Too much carbon deposit in combusting
1.
Clear awaycarbon deposit
chamber
Metal beatingsound
2.
Too small electrode clearance
of
spark plug
2.
Adjustelectrodeclearance properly
3.
Check relative parts such
as
carburetor
when abnormal
3.
Engine fuel
is
too
much 4. Replace fuel
combustion occurs 4. Improperfuel brand
5.
Engine
is
overheat
5.
Find acause and eliminate
it
1. Impropervalve clearance
1.
Readjustvalve clearance properly
The
other
2.
Flywheel
is
not
connected
with
crankshaft
2.
Connect
tightly
tightly
19 I
Troubleshooting
Table of contents
Other YARDMAX Engine manuals

YARDMAX
YARDMAX G200FA User manual

YARDMAX
YARDMAX RV170-S PRO User manual

YARDMAX
YARDMAX LC152F-1 User manual

YARDMAX
YARDMAX 154FS-1 User manual

YARDMAX
YARDMAX YT5565 User manual

YARDMAX
YARDMAX 154FS-1 User manual

YARDMAX
YARDMAX LC1P65FE-2 User manual

YARDMAX
YARDMAX H200 User manual

YARDMAX
YARDMAX RV 170-S User manual

YARDMAX
YARDMAX 154FS-1 User manual
Popular Engine manuals by other brands

Mercury
Mercury Optimax 150 Operation, maintenance and installation manual

SEW-Eurodrive
SEW-Eurodrive DRN71M4 Assembly instructions

Volvo Penta
Volvo Penta D4 Operator's manual

Bombardier-Rotax
Bombardier-Rotax 462 Operator's manual

Speed Passion
Speed Passion Reventon Series user manual

Briggs & Stratton
Briggs & Stratton 31N800 Series Illustrated parts list