YEDI EVOLUTION User manual

For more recipes and cooking videos go to: www.yedihousewareappliances.com
Follow us on Instagram @yedihouseware
THE YEDI EVOLUTION
AIR FRYER

This instruction manual can be found online in English at:
https://www.yedihousewareappliances.com/manuals
El manual de instrucciones en Español se puede encontrar en:
https://www.yedihousewareappliances.com/manuals
Le manuel d'instructions est disponible en Français sur:
https://www.yedihousewareappliances.com/manuals

CONTENTS
Important Safeguards ....................................................................3
Parts and Accessories ....................................................................5
Control Panel Presentation ...........................................................7
Using The Appliance......................................................................8
Selecting & Using Functions .........................................................9
Troubleshooting .............................................................................12
FAQ ..................................................................................................13

IMPORTANT SAFEGUARDS
1. Read all instructions.
2. Do not touch hot surfaces, use handle and cooking mitts.
3. To protect against electrical shock do not immerse cord,
plugs, or the main unit housing in water or other liquid.
4. Close supervision is necessary when any appliance is used
by or near children.
5. Unplug from outlet when not in use and before cleaning.
Allow to cool before putting on or taking off parts.
6. Do not operate any appliance with a damaged cord or
plug after the appliance.
7. The use of accessory attachments not recommended by
the appliance manufacturer may cause injuries.
8. Do not use outdoors.
9. Do not let the cord hang over the edge of a table or count-
er, or touch hot surfaces.
10. Do not place near hot gas, an electric burner, or in a
heated oven.
11. Extreme caution must be used when moving an appliance
containing hot oil or other hot liquids.
12. To disconnect, turn any control off, then remove the plug
from the wall outlet.
13. Do not use the appliance for other than its intended use.
3

IMPORTANT SAFEGUARDS
14. Use extreme caution when removing tray or disposing of
hot grease.
15. Do not clean with metal sourcing pads. Pieces can break
off the pad and touch electrical parts, creating a risk of
electric shock.
16. Oversized foods or metal utensils must not be inserted in
the air fryer as they may create a fire or risk of electric
shock.
17. A fire may occur if the air fryer is covered or touching
flammable material, including curtains, draperies, walls,
and the like, when in operation. Do not store any item on
top of the appliance when in operation.
18. Extreme caution should be exercised when using contain
ers constructed of other than metal or glass.
19. Do not store any materials, other than the manufacturer's
recommended accessories, in this air fryer when not in use.
20. Do not place any of the following materials in the air fryer:
Paper, cardboard, plastic, and the like.
21. Do not place the appliance against a wall or other
appliances, 6 inches of space is required to remain all
around the appliance.
22. When stopping use, press the power on/off button to turn
off and then unplug.
23. For household use only.
4
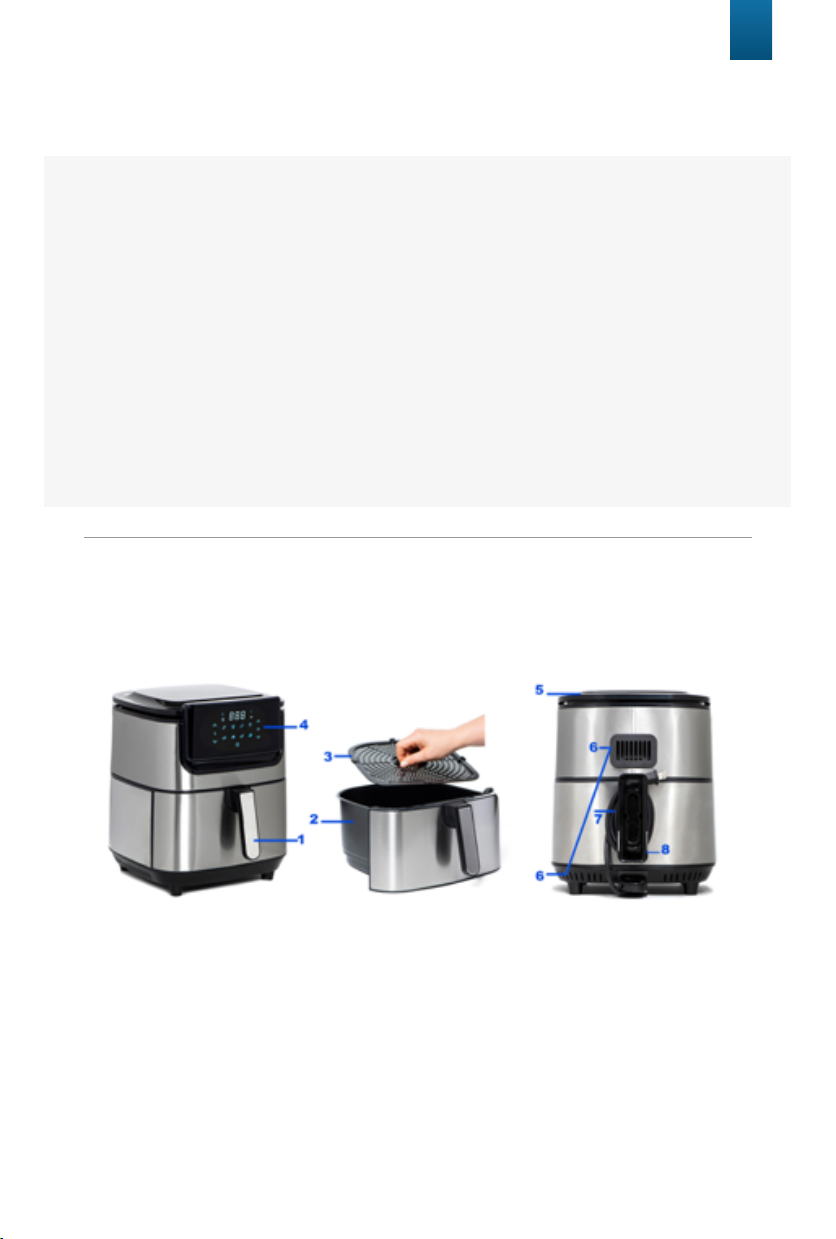
PARTS AND ACCESSORIES
1. Basket handle
2. Basket
3. Fry Pan
4. Digital display screen
5. Air inlet
6. Air outlet openings.
7. Main cord
8. Power cord storage
5
Before First Use
1. Remove all packaging materials, stickers, and labels.
2. Thoroughly wash the basket, tray and accessories in warm soapy water
and wipe down the inside with a wet cloth, and then run at 400F for 5
minutes before first use. You may detect a slight smell and/or smoke.
Don’t worry this is normal. Then wash the basket and tray again, wipe
down the inside again, and you are ready to use your Yedi!
PARTS AND ACCESSORIES
6
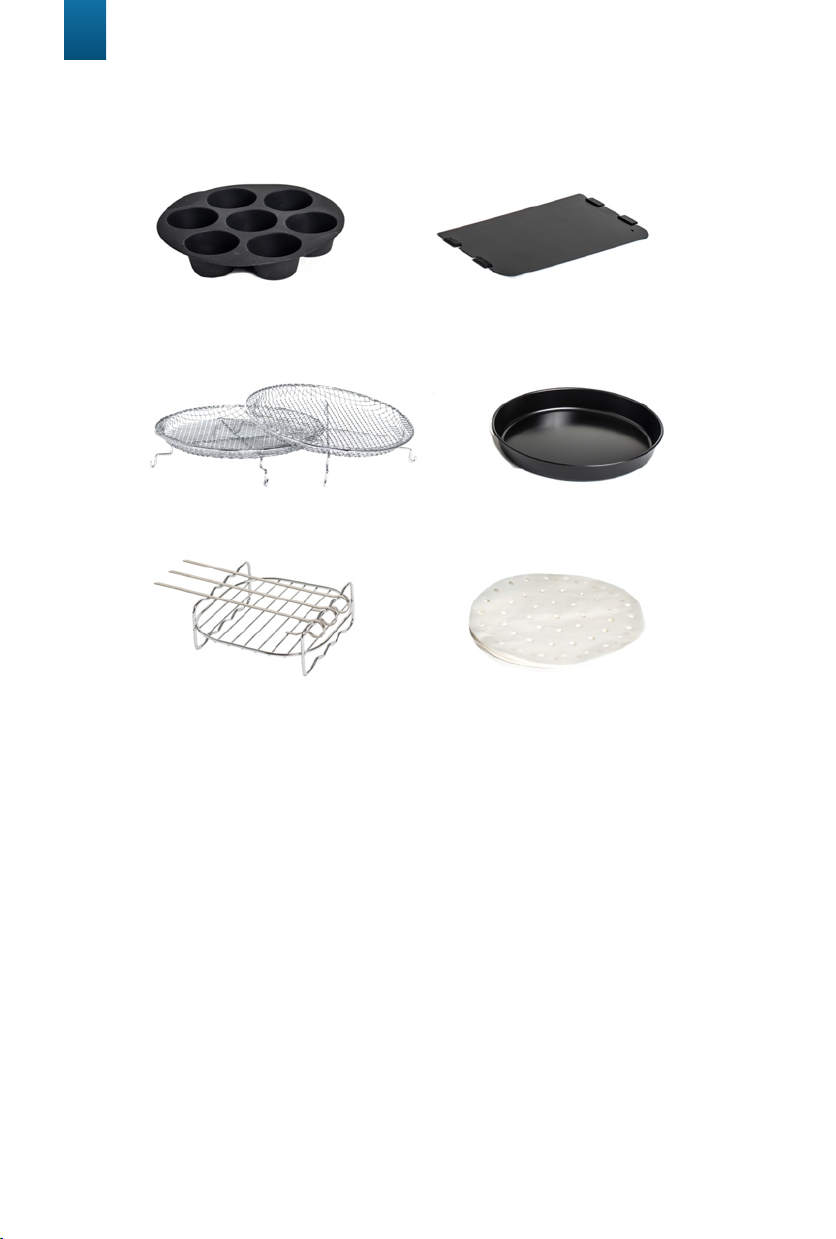
9. Mini Cake Silicone Pan
Use: Cook cupcakes, and other favorite desserts or egg bites.
10. Basket Divider with ceramic coating
Use: lets you cook 2 different foods at the same time without them
coming into contact.
11. Dehydrator Racks Use: Creates more space to dehydrate all your favorite
fruits, vegetables and meats bay layering/stacking them. Rotate positions
of dehydrator racks throughout the cooking process so all foods are
dehydrated evenly.
12. Pizza pan with ceramic coating
Use: Cook delicious pizza or pies in the pan.
13. Multi-purpose rack with stainless steel skewers
Use: Make kebabs with the multi-purpose rack and also maximize your
cooking space.
14. Perforated Parchment Steaming Papers
Use: keep the food clean and hygienic and make clean up easier. Place
under food while cooking.
910
11 12
13 14
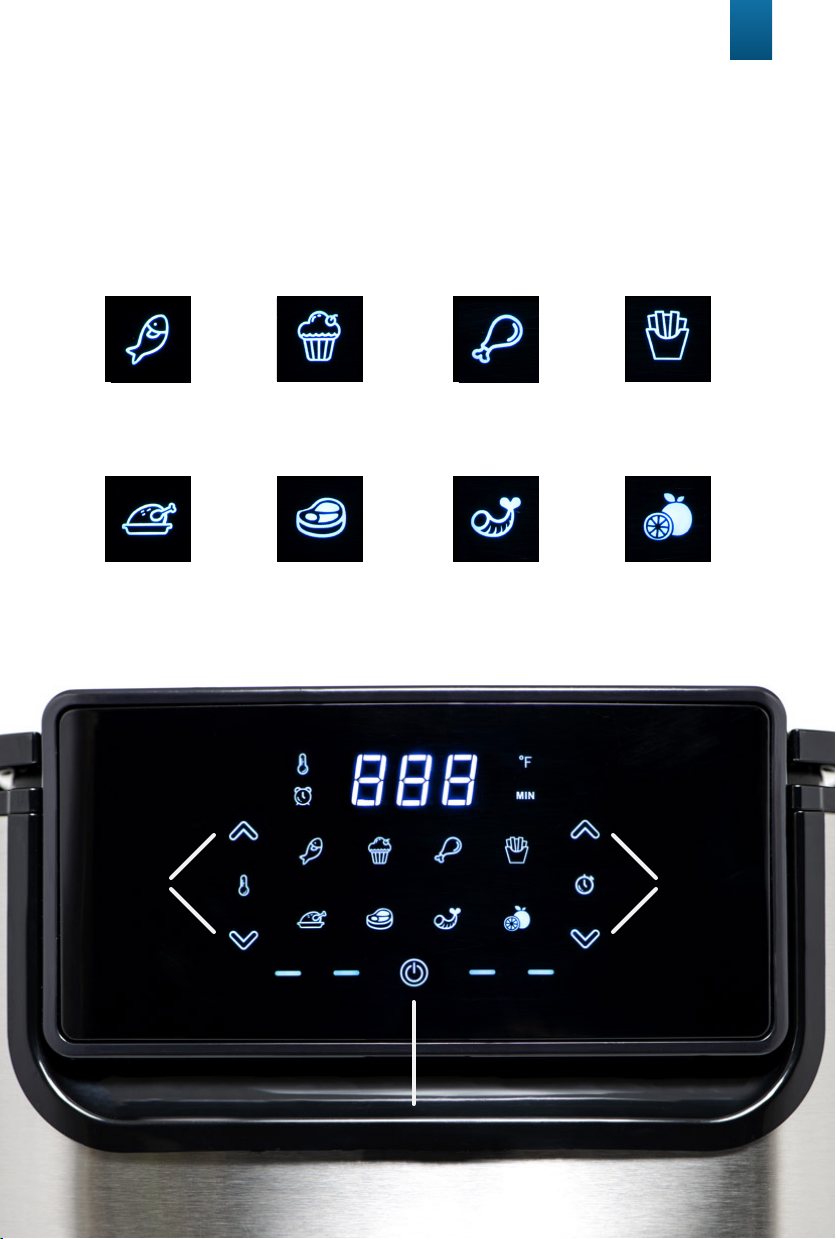
CONTROL PANEL PRESENTATION
7
8 FUNCTIONS:
POWER ON/OFF
FISH BAKE CHICKEN LEG FRIES
CHICKEN STEAK SHRIMP DEHYDRATOR
TEMP.
ADJUSTMENT
TIMER
ADJUSTMENT

8
1. Connect the main plug into an earthed wall socket.
4. Then place the ingredients/foods into the basket.
2. Carefully pull the
basket out of the air fryer
3. Always put the fry pan into the
very bottom of the basket. Ensure
the fry pan is securely placed in the
basket so it doesn’t shake around
5. Slide the basket
into the air fryer
6. Tap Power on/off
7. Finger touch Menu
to choose your
desired function.
USING THE APPLIANCE

SELECTING AND USING FUNCTIONS
8. Finger touch each recipe icon to choose and change the cook-
ing function. More flexible time & temperature setting can be
adjusted, and adjustment can be made easily by touching corre-
sponding icons. When you want to adjust time, kindly tap the
arrow up/down the time icon on screen- Increases/Decreases
1 minute per tap or increase/decrease rapidly in the unit of 1
minute by pressing and holding down. When you want to adjust
temperature, kindly tap the arrow up/down the temperature icon
on screen- Increases/Decreases 5 degrees per tap or
increase/decrease rapidly in the unit of 5 degrees by pressing and
holding down.
After choosing your desired function,
tap the Power icon to start cooking
9. Some ingredients require to shake halfway during the prepara-
tion time. By this way, pull the basket out of the appliance by the
handle and shake it. Then slide the basket back into the air fryer.
Shake side to side do not shake up and down. Also, you can use
tongs or any heat safe utensils to stir mix food around instead of
shaking.
10. Machine will have Auto ready bell after cooking. When you
hear bell/beep 5 times, this means the cooking cycle is finished.
Pull the basket out of the appliance and place it on a heat-resistant
counter or surface.
NOTE:After the time ends, the heating element stops working, but the fan will
continue to run about 3-5 seconds to blow away the hot air for safety. Finally, the
timer bell will ring for 5 times as the ending alarm.
11. Check if the ingredients are ready.
9
Table of contents
Other YEDI Fryer manuals


