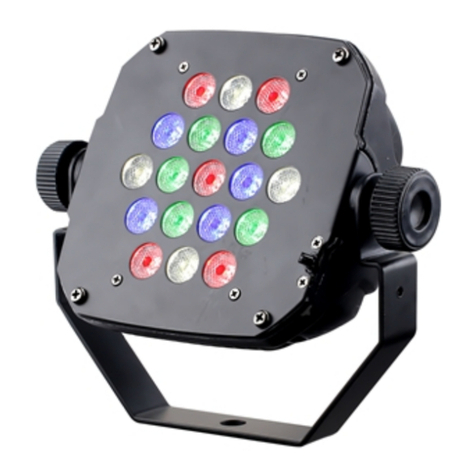
YELLOWRIVER YR-1190 User manual


YR-1190
-1-
V: 1.0

YR-1190
-2-
Warning
Please conserve this manual as operation guidance. If you sell this product to other user, please
make sure that they also have this user manual.
Before use this machine, please carefully check if there is any damage during transportation.
Before power on, please make sure that the input voltage is matched.
To avoid electric shock, this lighting machine should be earth,
This lighting is for dry indoor used only.
This lighting should be put in airiness place, at least 50cm away from other article, and make sure
airway is not blocked.
Cut off electric before move, repair and clean the machine.
Strictly forbid to put inflammable article near when this machine is running. Or it will easily build
fire.
The max environment temperature for this machine to run is 40℃, forbid to run it if temperature is
higher than this.
When machine is running, surface temperature of the shell can be up to 60℃, scald will be cause if
touch it.
Safe wire should be used to install machine. Bearing of safe wire should be 3times of the machine
weight.
Stop the machine if running abnormal. And contact the nearest authorized service center. Do not
repair by yourself, unprofessional repair can damage the machine or cause malfunction.
In case electric shock, do not touch electric wire when this unit is running,.
Do not power on and power off the machine in short time, or machine lifespan will be shorter.
When use DMX controller, please make sure that there is no interfering resource(e.g. wireless
intercom, high-frequency radiation source )
To avoid electric shock or fire, forbid to put the machine in rain or wet place.
If problem with shell or lamps, these should be changed before run this unit.
For you safe,Please read this user manual carefully before turn on this
lighting equipment. This machine should be operated by professional!

YR-1190
-3-
Not any part is allowed to be repaired by customer, do not open the machine by yourself, or it will
case damage, or make it out of insurance. Please contact manufacture or dealer when there is
problem.
Any damage that cased by violating this manual is out of insurance, our company will not take the
responsibility.
Installation
This machine should be mounted via the screw holes of the truss, make sure
that the truss is strong enough and will not let the machine slide or drop when
machine is running to cause shake. The bearing of truss should be 3 times of
machine weight. And make sure to use safe wire which bearing 3 time of machine
weight.
Specification of YR-1190
Voltage:AC110V-240V
Frequency:50/60HZ
Wattage:120W(1W) / 180(3W)
LED:54pcs RGBW/R12/G14/B14/W14
Beam Angle:30degree(standard)
Signal Control:DMX512
Channels:5/9ch(switchable)
Control Mode:DMX、sound active、auto
and master/slave
Specification of YR-1190-I
Voltage:AC110V-240V
Frequency:50/60HZ
Wattage : 180W(54pcs 3W)/120W(54pcs 1W/36pcs 3W)
LED.:54pcs RGB/R18/G18/B18
36pcs RGB/R12/G12/B12

YR-1190
-4-
Beam Angle:30degree(standard)
Signal Control:DMX512
Channel:4/8ch(switchable)
Control Mode:DMX、sound active、auto and master/slave
Specification of YR-1190-II
Voltage:AC110V-240V
Frequency:50/60HZ
Wattage:180W(54pcs 3W 3in1)/120W(36pcs 3W 3in1)
LED:54pcs 3W 3in1 /36pcs 3W 3in1
Beam Angle:25degree(Pearl surface)
Signal Control:DMX512
Channel:4/8ch(switchable)
Control Mode:DMX、sound active、auto and master/slave
Specification of YR-1190-III
Voltage:AC110V-240V
Frequency:50/60HZ
Wattage:150W
LED:12pcs 10W 4in1
Beam Angle:40degree
Signal Control:DMX512
Channel:5/9ch(switchable)
Control Mode:DMX、sound active、auto and master/slave
Operation Panel

YR-1190
-5-
1
2345 6
1. Display
Display menu and selected function.
2. Button
MENU
switch menu function
UP
On function: page up
On numerical value: increase value
DOWN
On function: page down
On numerical value: reduce value
ENTER
Settle selected function and value
3. DMX signal input
Control model by DMX signal,please use 3pin XLR signal cable.
4. DMX Signal output
Transfer DMX signal to next model, please use 3pin XLR signal cable.
5. Power output
Connect to obtain power (attention:please use connect to stated voltage.)
6.Power input
Connect to obtain power
LED displayed function reference table A:YR-1190 / YR-1190-III

YR-1190
-6-
No.
Menu
Function(press ENTER button)
1
r——
r000 to r255: R dimmer,from dark to light
2
g——
g000 to g255:G dimmer,from dark to
light
3
b——
b000 to b255:B dimmer,from dark to
light
4
n——
n000 to n255:W dimmer,from dark to
light
The 4
color’s
different
brightness
can mix out
all kinds of
color
5
C——
C000 to C255:7 color shade speed,from slow to fast
6
J——
J000 to J255:7 color skip speed,from slow to fast
7
FS——
FS00 to FS09:choose flashing color
8
F——
F000 to F255:flash speed,from slow to fast
9
LS——
LS00 to LS09:7 color selecting
10
L——
L000 to L255:7 color dimmer, from dark to light。
11
U——
U000 to U255:sound active speed, from slow to fast
12
A——
A000 to A255:auto speed, from slow to fast
13
d9CH
DMX9 channel mode, should link to DMX controller
14
d5CH
DMX5 channel mode, should link to DMX controller

YR-1190
-7-
LED displayed function reference table B: YR-1190-I/ YR-1190-II
No.
Menu
Function(press ENTER button)
1
r——
r000 to r255: R dimmer,from dark to light
2
g——
g000 to g255:G dimmer,from dark to
light
3
b——
b000 to b255:B dimmer,from dark to
light
The 4
color’s
different
brightness
can mix out
all kinds of
color
4
C——
C000 to C255:7 color shade speed,from slow to fast
5
J——
J000 to J255:7 color skip speed,from slow to fast
6
FS——
FS00 to FS09:choose flashing color
7
F——
F000 to F255:flash speed,from slow to fast
8
LS——
LS00 to LS09:7 color selecting
9
L——
L000 to L255:7 color dimmer, from dark to light。
10
U——
U000 to U255:sound active speed, from slow to fast
11
A——
A000 to A255:auto speed, from slow to fast
12
d9CH
DMX9 channel mode, should link to DMX controller
13
d5CH
DMX5 channel mode, should link to DMX controller
DMX512 channel chart:(4CH)

YR-1190
-8-
Channel
Function
specification
CH 1
Total
Dimmer
R G B total linear dimmer, from dark to light
CH 2
R dimmer
R linear dimmer, from dark to light
CH 3
G dimmer
G linear dimmer, from dark to light
CH 4
B dimmer
B linear dimmer, from dark to light
DMX512 channel chart:(5CH)
Channel
Function
specification
CH 1
Total
Dimmer
R G B total linear dimmer, from dark to light
CH 2
R dimmer
R linear dimmer, from dark to light
CH 3
G dimmer
G linear dimmer, from dark to light
CH 4
B dimmer
B linear dimmer, from dark to light
CH 5
W dimmer
W linear dimmer, from dark to light
DMX512 channel chart:(8CH)
Channel
Function
specification
CH 1
Total
Dimmer
R G B total linear dimmer, from dark to light
CH 2
R dimmer
R linear dimmer, from dark to light
CH 3
G dimmer
G linear dimmer, from dark to light
CH 4
B dimmer
B linear dimmer, from dark to light
CH 5
Strobe
7 color flash speed, from slow to fast
CH 6
Color mix
7 color mix
CH 7
Auto
0-60: shade;61-120: skip;121-180: shade, skip;

YR-1190
-9-
181-240: flash by sound;241-255: skip by sound
CH 8
Auto speed/
sound active
DMX 7 channel auto running speed, from slow to fast,
sound active sensitivity, from feebleness to strong
DMX512 channel chart:(9CH)
Channel
Function
specification
CH 1
Total
Dimmer
R G B total linear dimmer, from dark to light
CH 2
R dimmer
R linear dimmer, from dark to light
CH 3
G dimmer
G linear dimmer, from dark to light
CH 4
B dimmer
B linear dimmer, from dark to light
CH 5
W dimmer
W linear dimmer, from dark to light
CH 6
Strobe
7 color flash speed, from slow to fast
CH 7
Color mix
7 color mix
CH 8
Auto
0-60: shade;61-120: skip;121-180: shade, skip;
181-240: flash by sound;241-255: skip by sound
CH 9
Auto speed/
sound active
DMX 7 channel auto running speed, from slow to fast,
sound active sensitivity, from feebleness to strong
Connection

YR-1190
-10-
Attention
In address state, when connect multiple models, do not connect to controller, it
will run as master and slave. Operate one of the model, this model will auto act as
master, other models run the same as master. When connect to controller, all
models will be controlled by controller.
When a team of machines is connected to controller ,for the last machine, one
DMX signal output or input is vacant. This vacant output or input should be
connected a terminal organ. Find a DMX output or input connector, inside the
connector, weld a120ohm, 1/4 w resistance between pin2 and pin3, then inset this
connector to the vacant output or input.
Master and slave mode
Master and slave: select one machine as master, set it in menu state. Other
machine set to be DMX state as slaves, Connect all models by signal cable. Then,
For YR-1190,power connection can not be more than 8pcs. If more
than 8pcs, please connect to another power input.

YR-1190
-11-
slaves are controlled by master, running as master.
Controller control Multiple models:set all models to the same or different
address value(notice:before running, all the models should be set to the same
channel model, 9CH/8CH or 5CH/4CH, or they run differently. Address value
should be match with controller’s type and character)connect by signal cables,
then all slaves controlled by controller, running the same function as controller
setting.
Mark:This model is equipped with 1spm power cable. Bearable load is
no more than 8 model connection. If not follow such requirement and
cause damage or accident, our company will not be responsible for it.
Machine configuration graphic

YR-1190
-12-
Machine maintenance
Lens of the led face should be cleaned usually, this will make the light beam
penetrate normally. Clean frequency depends on environment. In humidity and
foggy or dirty environment, lens will easily accumulate dust.
* Use soft flax cloth or special depurative to clear lens
* Clean the components carefully.
* Clean the lens at least 1 time every 20days.

YR-1190
-13-

YR-1190
-14-

YR-1190
-15-
本公司有权对此份产品说明书进行修改,恕不另行通知。
Innovation | Efficiency | Dedication | Harmonious
Table of contents
Other YELLOWRIVER Dj Equipment manuals

YELLOWRIVER
YELLOWRIVER YR-IP350 User manual

YELLOWRIVER
YELLOWRIVER YR-W0372T User manual

YELLOWRIVER
YELLOWRIVER YR-IP1007H User manual

YELLOWRIVER
YELLOWRIVER YR-W0384T User manual

YELLOWRIVER
YELLOWRIVER YR-W1036Q User manual

YELLOWRIVER
YELLOWRIVER YR-W1004H User manual

YELLOWRIVER
YELLOWRIVER YR-COB5002 User manual

YELLOWRIVER
YELLOWRIVER YR-P0319SIR User manual

YELLOWRIVER
YELLOWRIVER YR-S4001 User manual