Safety Instruction
Please conserve this manual as operation guidance. If you sell this product to other user, please
make sure that they also receive this user manual.
Always make sure that you are connecting to the proper voltage and that the line voltage you are
connecting to is not higher than that stated on the decal or rear panel of the fixture.
The fixture is intended to indoor use only. To prevent risk of fire or shock, do not expose fixture to
rain or moisture. Make sure there are no flammable, explosive or corrosive materials surrounded
in 0.5 meter while operating.
The unit must be installed in a location with adequate ventilation, at least 50CM away from
adjacent surfaces. Be sure that no ventilation slots are blocked.
Do not operate at ambient temperatures higher than 104℉(40℃).
Safe wire should be used to install machine. Bearing of safe wire should be 3 times of the
machine weight. Complimentary signal cable transmits signals to 20 unit fixtures at most. Signal
amplifier is a must to connect more fixtures. Sectional area of complimentary power cable is 1㎡.
In daisy chain model, it allows to connect to 4 fixtures at most.
Always disconnect from the power source before servicing or replacing fuse/lamp and be sure to
replace with same fuse/lamp size and type. Cut off power before moving, repairing and cleaning
the machine.
Secure fixture using a safety chain and carrying handles. Never carry the fixture by its cord.
In case of failure or misfunction occurred, stop using the unit immediately.
Repairs carried out by unskilled people can lead to damage or malfunction. Buy the same spare
parts/components from manufacturer directly.
To avoid electric shock, all fixtures must be connected to circuits with a suitable ground. Make
sure the power cord is never crimped or damaged. Do not power on and power off the fixture in a
short time. For your safety, do not touch fixture when running.
When use DMX controller, please make sure that there is no interference sources(e.g. intercom,
high frequency radio waves and radiation source)
Caution! There are no user serviceable parts inside the unit. Do not open the housing or attempt
any repairs yourself. In the unlikely event your unit may require service, please contact your local
distribution or after-sale service center.
Section 2. Set Up
Installation
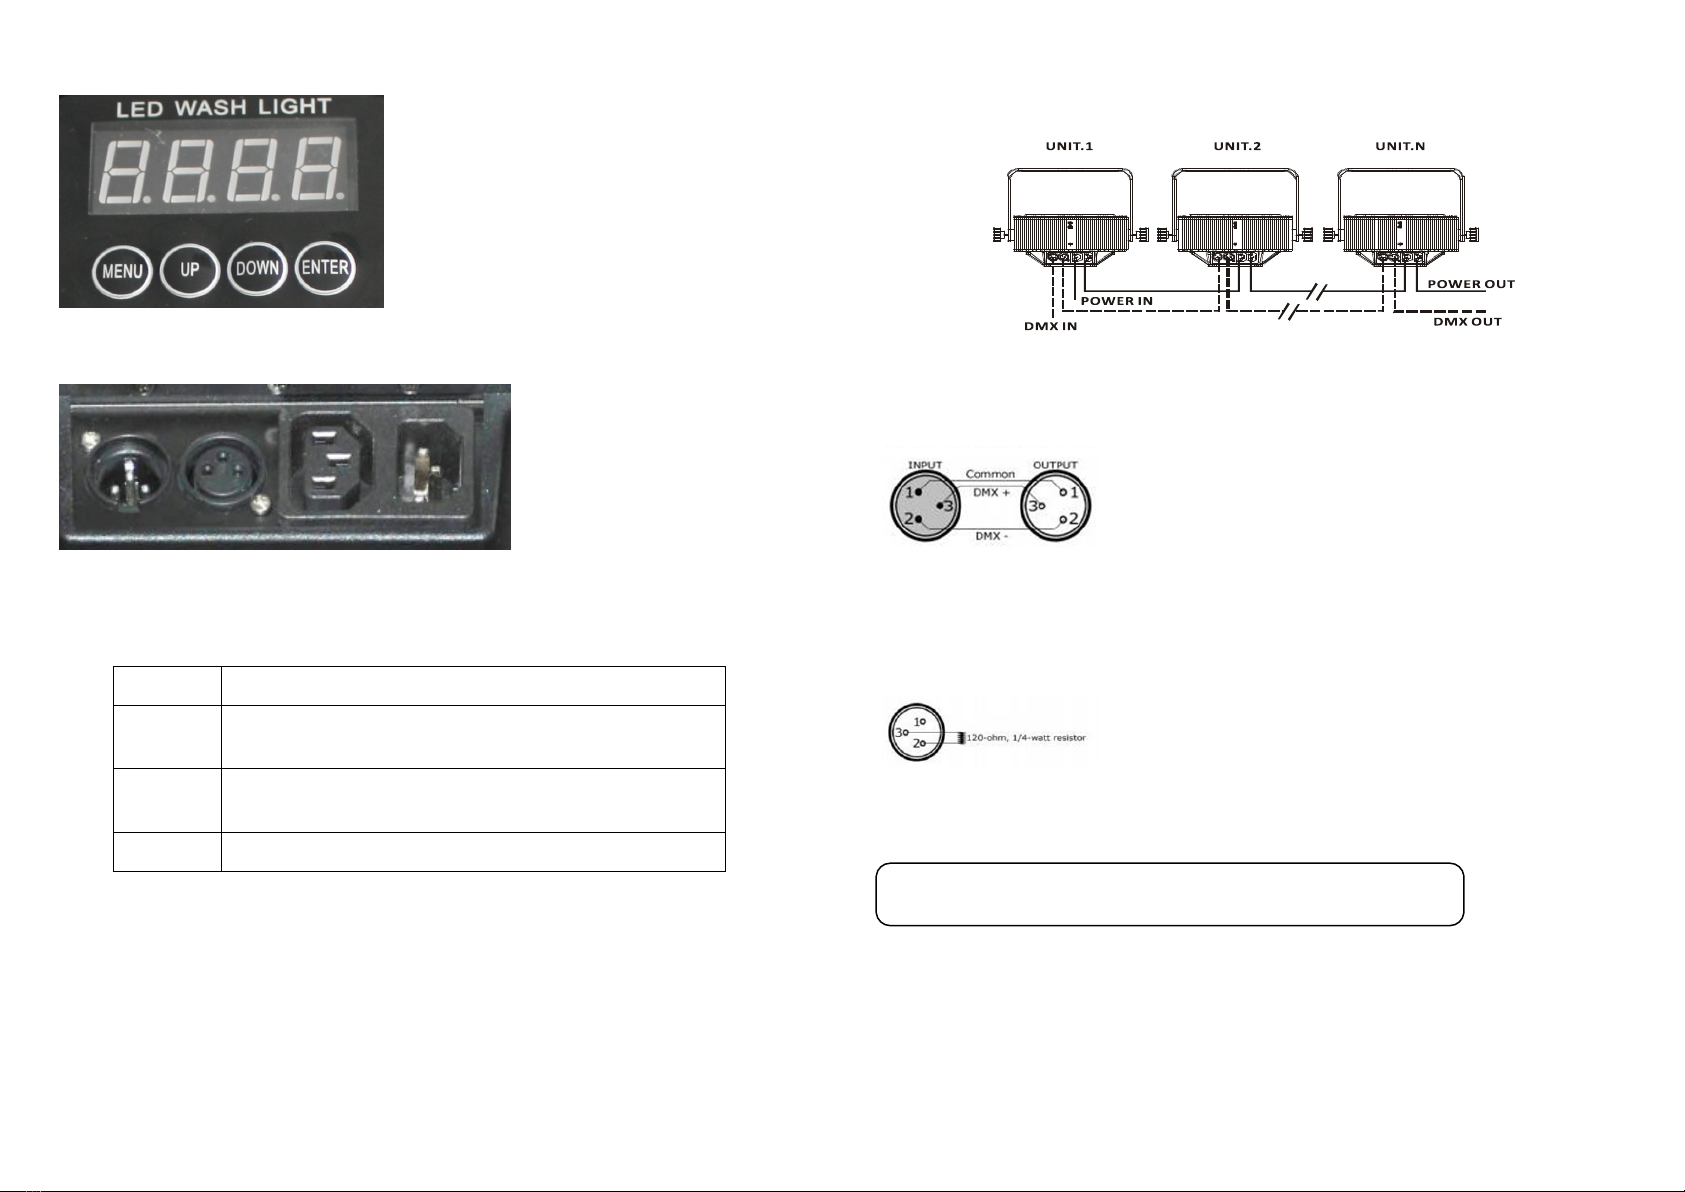
Controlling Board
Machine Connection
Installation
This machine should be mounted through the screw holes of truss. Safety wire is a must to
fix fixture well. Make sure truss and safety wire have strong load capacity to bear 3 times
weight than fixture at least. This machine should be installed by qualified technician.
For your safety,please read this user manual carefully before
operation. The machine should be operated by qualified engineer!