Yuel Beast Designs Motif Mobius User manual

1
Yuel Beast Designs
Motif Mobius
Thank you for your interest in the Motif Mobius.
This is the spiritual successor to the Monument,
with a focus on liquid cooling. The Mobius is the
approximate size and shape of a standard mid-
tower case, but features a unique open chassis
design that is unlike any other case on the market.
The chassis is a continuous strip of steel that is
contorted to accommodate components in an
eye-catching way. The motherboard and graphics
card are suspended on a pair of flanges that extend
from the outer edges of the chassis, all of which is
supported by the PSU flange.
The main chassis of the Mobius consists of 2 pieces
that are painstakingly cut, bent, welded and finished
to create a near seamless loop of steel. The chassis
features a 120mm and 240mm hole pattern for
AIO coolers, which can also be used for a custom
loop with a small pump/reservoir combo. The front
radiator cut outs, and the back of the motherboard
flange are shrouded by 2 pieces of either polished
stainless steel, or black powder coated steel.
This is a project kit designed for advanced PC
builders who have experience and familiarity with
the challenges of custom PC building. We hope this
product will be an important part of your next build
and that you will make something both useful and
captivating. Enjoy!
-Eric and Ken, Yuel Beast Designs

2
Weight of Chassis & Flanges: 18 lbs
Ships in a 20” x 18” x 12” box
14.5”
368mm
13.6”
345mm
8.2”
208mm

3
Each chassis begins as 4x5’ sheets of 11 gauge cold rolled steel. The front and back panels are 16 gauge
304 stainless steel with a type 4 polish, or CRS with a matte black powder coat. The parts are cut on a
3000 watt CNC fiber laser. The strip of steel that makes up most of the chassis is bent in five places using
a precision hydraulic press brake. The PSU flange is bent and welded to puzzle the strip together. These
welding points are carefully finished and the chassis part is powder coated.
Fabrication and Material Specifications

4
1. Main chassis
2. Front plate (Stainless Steel or Matte Black Powder coat)
3. Back plate (Stainless Steel or Matte Black Powder coat)
4. 1” motherboard standoffs (4)
Male-female threaded hex standoff, zinc-plated steel 1/4” wide, 1” long, 6-32 thread
5. 1/2” plate standoffs (8)
Male-female threaded hex standoff, zinc-plated steel 1/4” wide, 1/2” long, 6-32 thread
6. Motherboard fasteners (4)
7. Plate fasteners (8)
8. Radiator Mounting Fasteners (12)
9. PSU fasteners (4)
Black-oxide alloy steel socket head screw, 7/64 head, 6-32 thread, 3/8” long
10. GPU mounting thumb screw (1)
Black anodized aluminum thumb screw, 12mm head diameter, diamond pattern knurling, 6-32 thread
11. 1 1/4” fan mounting screws (12)
Black-oxide alloy steel socket head screw, 7/64 head, 6-32 thread, 1 1/4” long
12. 6-32 fan mounting hex nut (12)
Black-oxide 18-8 Stainless Steel Hex Nut, 5/16” wide, 6-32 thread
13. Thread caps (8)
14. Hex wrench for fasteners
15. Cable Clip (2)
16. 16mm power button with O-ring
17. Power button wire with ferrule ends
18. Adhesive-back rubber feet (4)
Included Parts and Hardware

5
Assembly Instructions
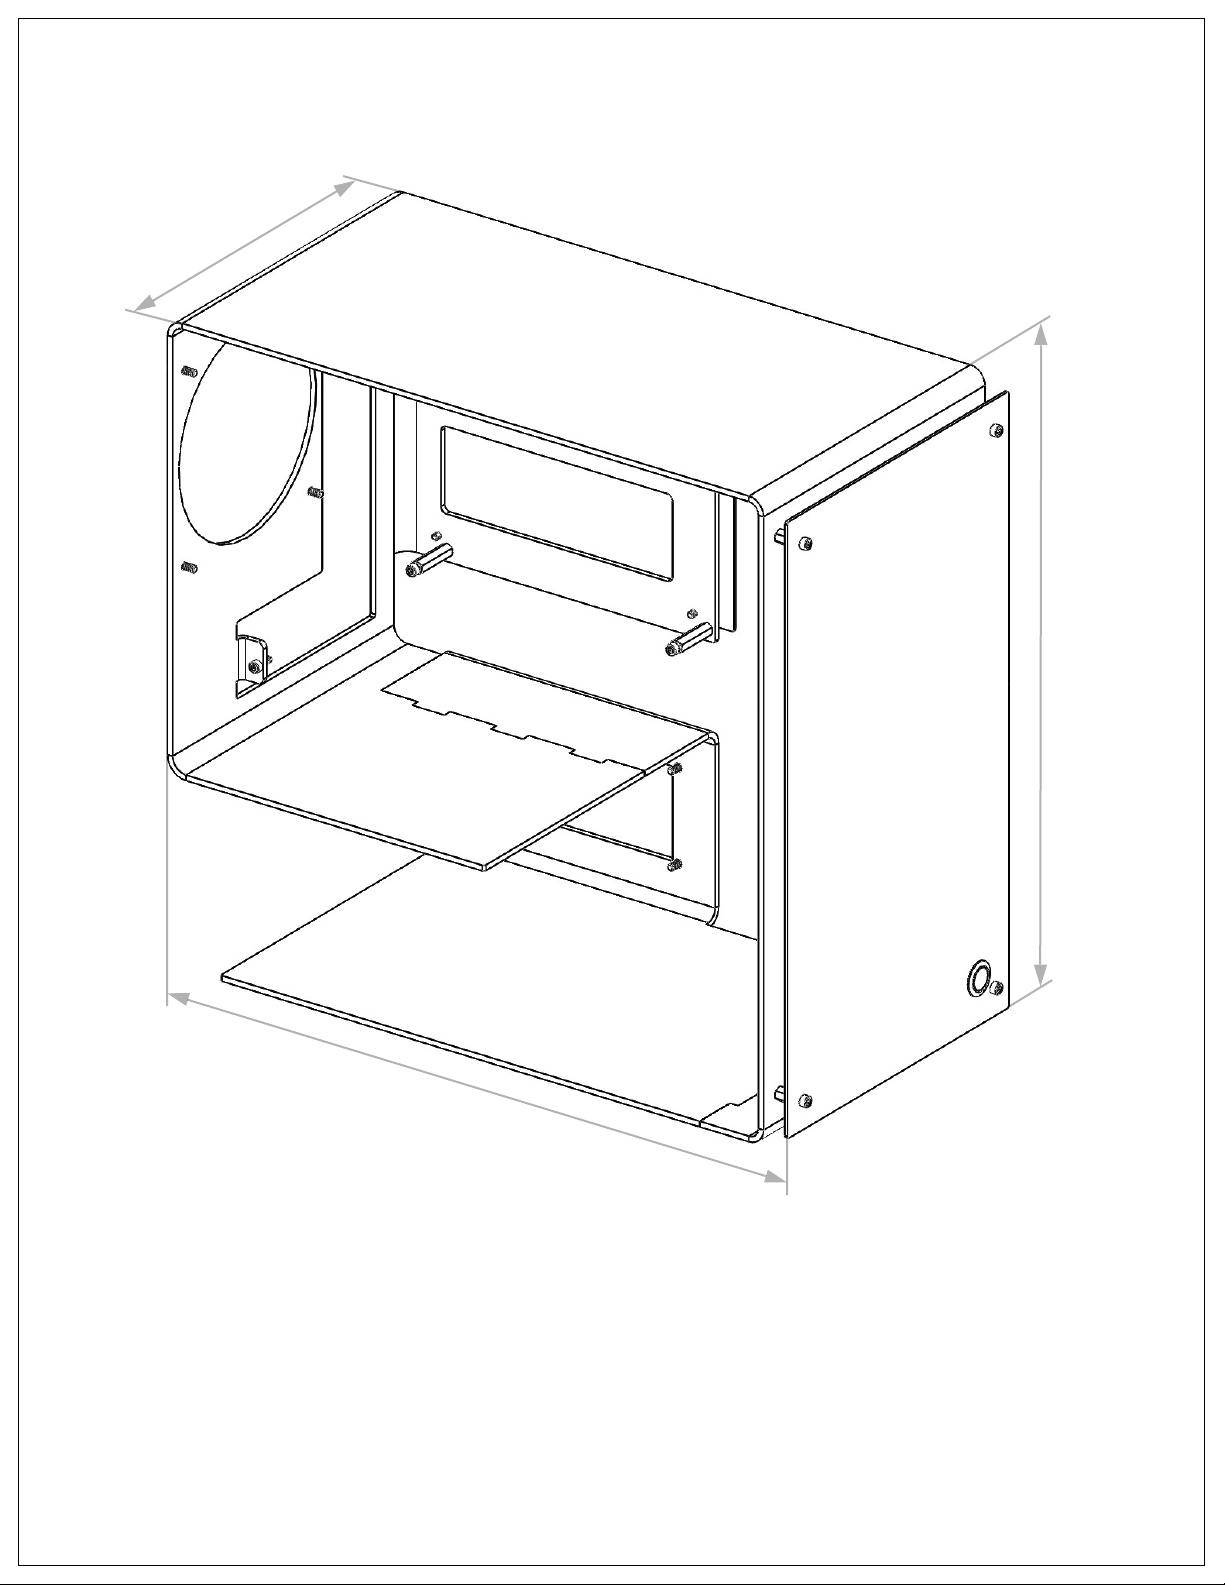
1. Before unpacking or assembling, please note that the
motherboard ange is somewhat susceptible to
bending, we do not recommend resting the weight of
the case directly on this flange, or holding the chassis
by this flange. For ease of assembly, you may lay the
chassis in the provided foam packaging insert when
you are installing the motherboard and graphics card.
2. Screw the four 1” standoffs into the motherboard
flange by hand (fig. 1). Pre-install the CPU cooler as
well as the RAM, then mount the motherboard to the
stand-offs using the provided 6-32 screws.
3. Install the GPU and use the thumb screw to secure the
card into the GPU flange. If there is mis-registration
between the GPU and the mounting flange, double
check that the correct 1” motherboard standoffs were
used.
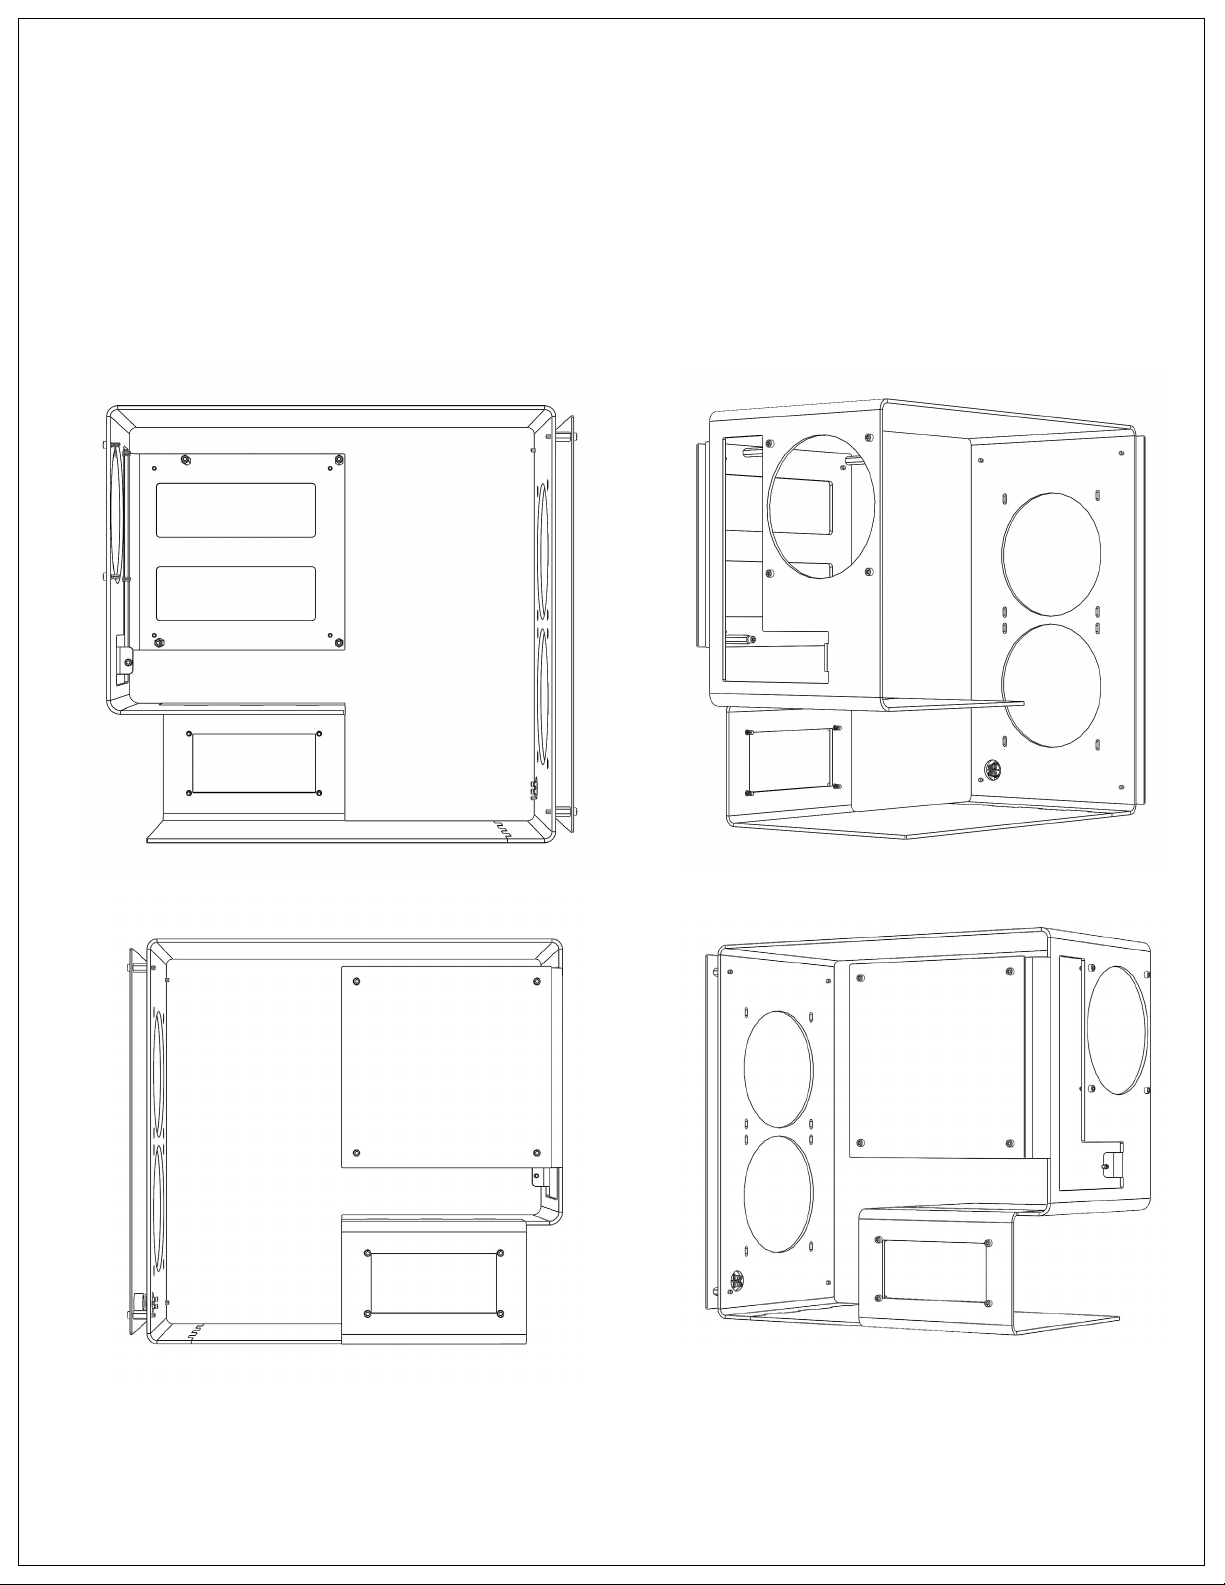
4. Remove the chassis from the foam insert and stand
it up normally. If you are using an AIO CPU or GPU
cooler, secure the radiators to the inside fan mounting
hole patterns.
5. Screw four of the 1/2” standoffs into the front of
the chassis, and the other four into the back of the
motherboard flange (fig. 2). Screw the thread caps
onto the exposed threads of the front panel and
motherboard standoffs.
6. Secure the PSU into the hole pattern on the lower area
of the chassis, we recommend adhering cable clips to
the horizontal band in the middle of the motherboard
flange.
7. Fasten the backplate into place behind the
motherboard. Mount the provided 16mm button onto
the hole in the front plate. Screw the ferrules of the
power wire into the button contacts and mount the
front plate so the button fits into the through hole on
the chassis (fig. 3).
fig. 1
fig. 2
fig. 3

6
Component Compatibility
Motherboard
The Mobius can accommodate all Mini-ITX or DTX motherboards. Any other formats cannot be mounted to this
chassis.
CPU Cooler
This chassis is intended to support all-in-one CPU coolers, or a fully custom loop, with 240mm radiators. That said,
you may also install an air cooler of any size, as long as it can fit on M-ITX motherboards.
RAM
There are no limitations on RAM size, but if you use a large air cooler, you may want to use a low-profile RAM.
PSU
Only SFX or SFX-L PSUs will fit in the hole pattern. Full size ATX PSUs cannot be mounted to this chassis.
We recommend only using fully modular PSUs, as custom cables are required to make a clean build on this chassis.
GPU
We recommend using 2-slot GPUs, but most 2.5 and 3 slot cards will fit on the chassis. The maximum GPU length
depends on what you have installed on the inside of the 240mm hole pattern on the right. Please see clearance
measurements below:
- No Fan/Radiator: 333mm / 13.1”
- 25mm fan: 308mm / 12.1”
- 29.5mm Radiator + 25mm fan: 278mm / 10.9”
Power Button Mounting Holes
The Mobius ships with an included 16mm button and power wire. There is a 16mm through-hole on the front plate
and a 3/4” hole on the main chassis. As of the first production iteration, if you do not want to use a front plate, you
will need a 3/4” button for the hole on the chassis.
Pumps & Reservoirs
Using a 120mm bracket, you can easily mount a small pump or reservoir over the rear 120mm hole pattern, or
on top of a fan mounted to the 240mm hole pattern. We found the EK Quantum Kinetic FLT120 to be an excellent
solution for a custom loop.
Power Cables
This case was designed to be used with custom sleeved PSU cables. In our production prototypes, we successfully
used the lengths listed below, though we highly recommended taking careful measurements with your own
components installed on the case. The backplate has plenty of room for cable management clips to properly arrange
the runs in an organized way. Feel free to cut, crimp, and sleeve your own cables or buy professionally made cables
and accessories from a company such as Mainframe Customs or CableMod.
- 24 Pin: 23”
- EPS: 28”
- PCI: 12”
- Sata/ Molex: 15”

7
Please visit our website for our current return policy, terms of service,
privacy policy, and other important information.
www.yuelbeast.com
© Yule Beast Designs, 2020
Table of contents
Popular Indoor Furnishing manuals by other brands

FMD Furniture
FMD Furniture VIBORG 3 Assembly instruction

Colombo
Colombo E4B6 Assembling instructions

Sauder
Sauder Edge Water 409047 Instruction booklet

Eaton
Eaton Linear TechBench partial shelf Installation sheet

Seasonal Living
Seasonal Living Zanzibar Fire Safety & user operation manual

Arjo
Arjo Evenda Instructions for use