Zadako DRAGON User manual

GSM Mini Alarm DRAGON
Manual
Version 1.3

2
CONTENT
I. INTRODUCTION ...... 3
II. SAFETY PRECAUTIONS ... 3
III. APPLICATIONS ................................................................................................................................... 3
IV. PREPARATION FOR USE ... 4
Device descri tion .. 4
How to start .......................................................................................................................................... 4
Switching on/off ................................................................................................................................... 5
Battery charging . 5
GSM network accessibility ................................................................................................................... 6
Setting u tele hone numbers ............................................................................................................. 6
Basic settings ...................................................................................................................................... 7
Setting u by text message ................................................................................................................. 8
V. MODES . 10
A. Alarm .. 10
B. PANIC mode (emergency call) ... 11
C. Ta ing of monitored room . .. 12
VI. EXTERNAL INPUT ... 12
VII. EXTERNAL OUTPUT ... 12
VIII. EXTERNAL SPEAKERS .... 13
IX. SIGNALLING ... 14
X. TECHNICAL DATA ............................................................................................................................. 15

3
* ZADAKO is a registered trade mark of Zadako s.r.o. com any. All rights reserved.
* ZADAKO has the right to modify the roduct described in this manual to im rove its erformance without
being com elled to give any revious information.
I. INTRODUCTION
Mini Alarm DRAGON is a com act wireless device designed for signalling of unauthorized entry into
rotected room. It is used indoor and you can ut it on any lace in the room where the PIR sensor can
reach the movement of eo le assing by (a x. 5 metres). Its usage is universal and unique, DRAGON
can be installed in horizontal or vertical osition (on the wall, on the ceiling, etc.).
WARNING!!!
Mini Alarm DRAGON can´t serve as a professional securit device, it onl informs about
unauthorized entr into the object.
II. SAFETY PRECAUTIONS
Mani ulation with the device in other ways that described in this manual could lead to its damage
or disfunctionality.
Mini Alarm requires a careful treatment, if ossible avoid a fall from a height on the ground.
Do not o en the device and do not try to re air it by yourself. Contact an authorized service centre
for re air.
To avoid the risk of fire and damage do not ex ose the device to moisture, rain nor direct sunlight.
Do not cover the device with metal objects.
Do not use the device near the etrol stations or chemicals.
Use only batteries, ada ter and accessories delivered by manufacturer. Otherwise you can
cause demage of Mini Alarm.
Performance of DRAGON can be reduced by interru tion of other devices.
Manufacturer doesn´t recommend to use DRAGON in rooms where ets are moving around
because motion detector could react on their movement.
Maintain motion detector clean. Im urities could cause its lower reliability.
All safety recautions regarding mobile hones are valid also for this device.
Do not trans ort DRAGON in other than original acking in order to avoid demage of motion
detector.
III. APPLICATIONS
monitoring of rotected room (flat, office, weekend house...) by integrated motion detector
tem orary survaillance of com any´s warehouse
re orting of intrusion into the rotected room by text message and voice call
ossibility of ta ing after the alarm activation or when disarmed
checking the children when they are alone at home
PANIC function - calling for hel in case of danger or health roblems (elder eo le)

4
IV. PREPARATION FOR USE
Device description
How to start
1. Check if there is PIN code rotection disabled on the SIM card that you want to insert into Mini Alarm.
You can check it by inserting the card to a usual mobile hone. If your mobile hone starts without asking
a PIN code, PIN code rotection is disabled. If you had to insert a PIN code, disable this function in your
mobile hone (Settings) as well as the voice mail service.
2. Check if there is CLIP service active on the SIM card. You can check it by calling on the SIM card – if
your hone shows you who is calling, CLIP service is active, if it doesn´t, contact your mobile o erator for
activation of the service. Also check if it is ossible to send text messages from the SIM card. If not,
lease contact your mobile o erator.
3. Turn the device u side down. Then gently turn the buttom cover to the left (against the arrows
direction) and take it out. Before inserting the SIM card, jum er can´t be ut on (see the ictures below)
and ower ada ter can´t be connected. If these conditions are fulfilled, o en the SIM card holder and
insert the SIM card (watch the inclined corner), close the holder. Put the jum er on.
button + motion
detector
micro hone
red LED light
green LED light
ower ada ter
con
n
ector
external sensor
in ut
s eaker
out ut
jum er
ut on
jum er
ut off

5
4. Put the buttom cover on and turn it gently to the right (following the arrows) till the cover suits its right
osition. Then connect the ower ada ter. If the battery is fully charged, red LED light flashes and goes
off, if it isn´t fully charged, red LED light shines ermanently (battery is being charged). After full charge of
the battery, red LED light goes off (more information about the battery charging - see age5).
WARNING!
If you insert a re aid SIM card into the device, you have to check credit on it and its validity because
if there is no credit on the SIM card or the SIM card goes invalid, Mini Alarm sto s working!!!
Device su orts roaming.
Switching on/off
Switching on: ress the button for 3 seconds, till you hear a double bee . When you release the button,
both red and green LED lights start flashing (DRAGON is getting registered to the GSM network). After
a x. 30 seconds red LED light sto s flashing, only green LED flashes once for 4 seconds. Mini Alarm is
ready to be used.
Note: If Mini Alarm is connected to the ower ada ter (battery is being charged), the red LED light shines
at start as well. When the battery is fully charged, red LED light goes off. It may ha en that battery is so
low that Mini Alarm doesn´t react on ressing the button and you hear a dee bee . In this situation,
lease wait for 5-10 minutes and switch the device on again. You can hear a dee bee after the start of
device as well if there is no SIM card or if the SIM card is inserted in a wrong way or if PIN code isn´t
disabled.
Switching off: ress the button for 5 seconds, till you hear a double bee . Both LED lights go off. If you are
charging the battery, red LED light shines also in switched off status. After full recharge of battery, red
LED light goes off.
Batter charging
Mini Alarm is feeded from a ower ada ter, but in case of need it can work also with an integrated battery.
Fully charged battery can last for u to 5 days. When battery is low, red LED light starts flashing once for
4 seconds, when it is fully discharged, the device switches off. You can charge the battery with su lied
ower ada ter. After connecting the ada ter, Mini Alarm bee s and red LED light starts shining, after
disconnecting the ada ter, Mini Alarm bee s again and red LED light goes off. When the charging
rocess is terminated, red LED light goes off. If you connect the ada er to Mini Alarm even when the
battery is fully charged, device bee s and red LED light flashes once. You can charge the battery only in
ositive tem erature. Manufacturer recommends to charge the battery before first use.
buttom
cover
SIM holder
battery
jum er

6
WARNING!!!
In case you won´t use the device for a long time, ut the jum er off. The battery is getting discharged also
when not used, therefore it´s necessary to charge it again before next usage.
GSM network accessibilit
GSM network has to be accessible in order to make Mini Alarm work correctly. Signalling of GSM network
accessibility is indicated in table on age 12. If GSM network is not accessible, the reasons could be the
following:
there is no SIM card in the device,
SIM card´s PIN code is not disabled (you can disable it on an usual mobile hone) or it´s
necessary to unblock the card with PUK code,
low signal,
GSM network not accessible because of some roblem of the o erator.
By installing the device, check the signal ower near the device by using a mobile hone (dis lay
indication). If signal ower is low, manufacturer recommends to re lace device on a lace with better
signal.
During electric ower failure (and when the battery is fully discharged) or during GSM network failure
DRAGON becomes functionless. After electric ower recovery (and charging the battery) and after GSM
network recovery device kee s the same mode as before failure.
Setting up telephone numbers
Mini Alarm needs to know where to send the messages and alarm/emergency calls, therefore it´s
necessary to set u the tele hone numbers on the SIM card of Mini Alarm. You can set u the numbers in
the following way:
1. Press the button twice (red and green LED lights start to flash alternately and device bee s once er
second).
2. Then call on tele hone number of Mini Alarm from the tele hone number which you want to add to
address book of device (it means on which tel. number you want the device to send the messages and
calls). CLIR service has to be disabled on the SIM card from which you are calling. Device ends the call
automatically and if the number was added successfully or already exists in the address book, you will
hear a double bee .
3. If you failed to add the number to the address book, you will hear a long dee tone. Reasons for failed
addition of tele hone number to Mini Alarm´s address book can be the following:
there isn´t CLIP service active on Mini Alarm´s SIM card,
there is CLIR service active on the SIM card from which you call,
Mini Alarm´s address book is already full.
For adding another tele hone number, you have to run this mode again (by ressing the button twice).
You can cancell this mode by ressing the button once or it will cancell automatically after 2 minutes.
You can add tele hone numbers also by sending a text meesage (see age 8). By alarm or emergency
call Mini Alarm calls in the order as the numbers are set u in the address book, it means T1 first, then T2
etc. If you want to check if you set u the numbers correctly, send a text message in form: assword, ga
and question mark (e.g. abcd ?) on Mini Alarm´s tel. number and you will receive an answer:
abcd T1=09xxxxxxxx T2=09xxxxxxxx T3=# T4=# O=15 L=5 P=OFF PWR=ON ARM OFF

7
There were 2 numbers set u in this exam le (T1and T2), # means that this osition is not accu ied. (For
more information about O, L, P see age 8.)
If you don´t want to change basic settings which are defined in the device from factory (see age 7), Mini
Alarm is now ready for use. If you want to use device as an alarm, lease continue on age 10 and if you
want to use it as a ta ing device or PANIC button, lease continue on age 11 or 12.
Basic settings
Basic settings are settings from factory. After first start of device, values are set in this way:
A Non - changeable arametres
length of call = 20 seconds
- how long Mini Alarm calls by alarm or emegency call on one tele hone number till the call is icked u
number of calls = 3 trials for each tele hone number
- how many times Mini Alarm calls by alarm or emergency call on one tele hone number till the call is
icked u
tapping time in disarmed status = unlimited
B Changeable arametres
password = abcd
- serves for control of device via text messages, it can contain letters and numbers, manufacturer
recommends to change the assword and to write it down (you can´t control Mini Alarm without a correct
assword)
leaving time = 30 seconds
- time during which the arming erson has to leave the room
tapping time b alarm or emergenc call = 5 minutes
text of information messages
- messages that inform about following events:
Name Event Predefined text of text messages
S0 Name of device Mini Alarm DRAGON
S1 Alarm ALARM
S2 Panic PANIC
S3
Low battery
BATTERY LOW
S4 Electric energy failure POWER OFF
S5 Electric energy recovery POWER ON
Mini Alarm sends text messages about alarm, emergency, low battery, electric energy failure and electric
energy recovery. All messages exce t PANIC are sent only in armed status (ARM ON). PANIC message
is sent in PANIC mode. Information text message is sent on your mobile hone always as S0 + S1 or S0 +
S2 and etc., e.g. Mini Alarm DRAGON ALARM alebo Mini Alarm DRAGON BATTERY LOW. Text
message about electric energy failure is sent after one hour, about its recovery immidiately. You can
change the changeable arameters by sending a text message (see age 8).
Return to basic settings
If you want to get the basic settings, disconnect the ada ter from Mini Alarm (in switched on status), hold
the button till you hear a double bee and connect the ada ter to Mini Alarm (to the left

8
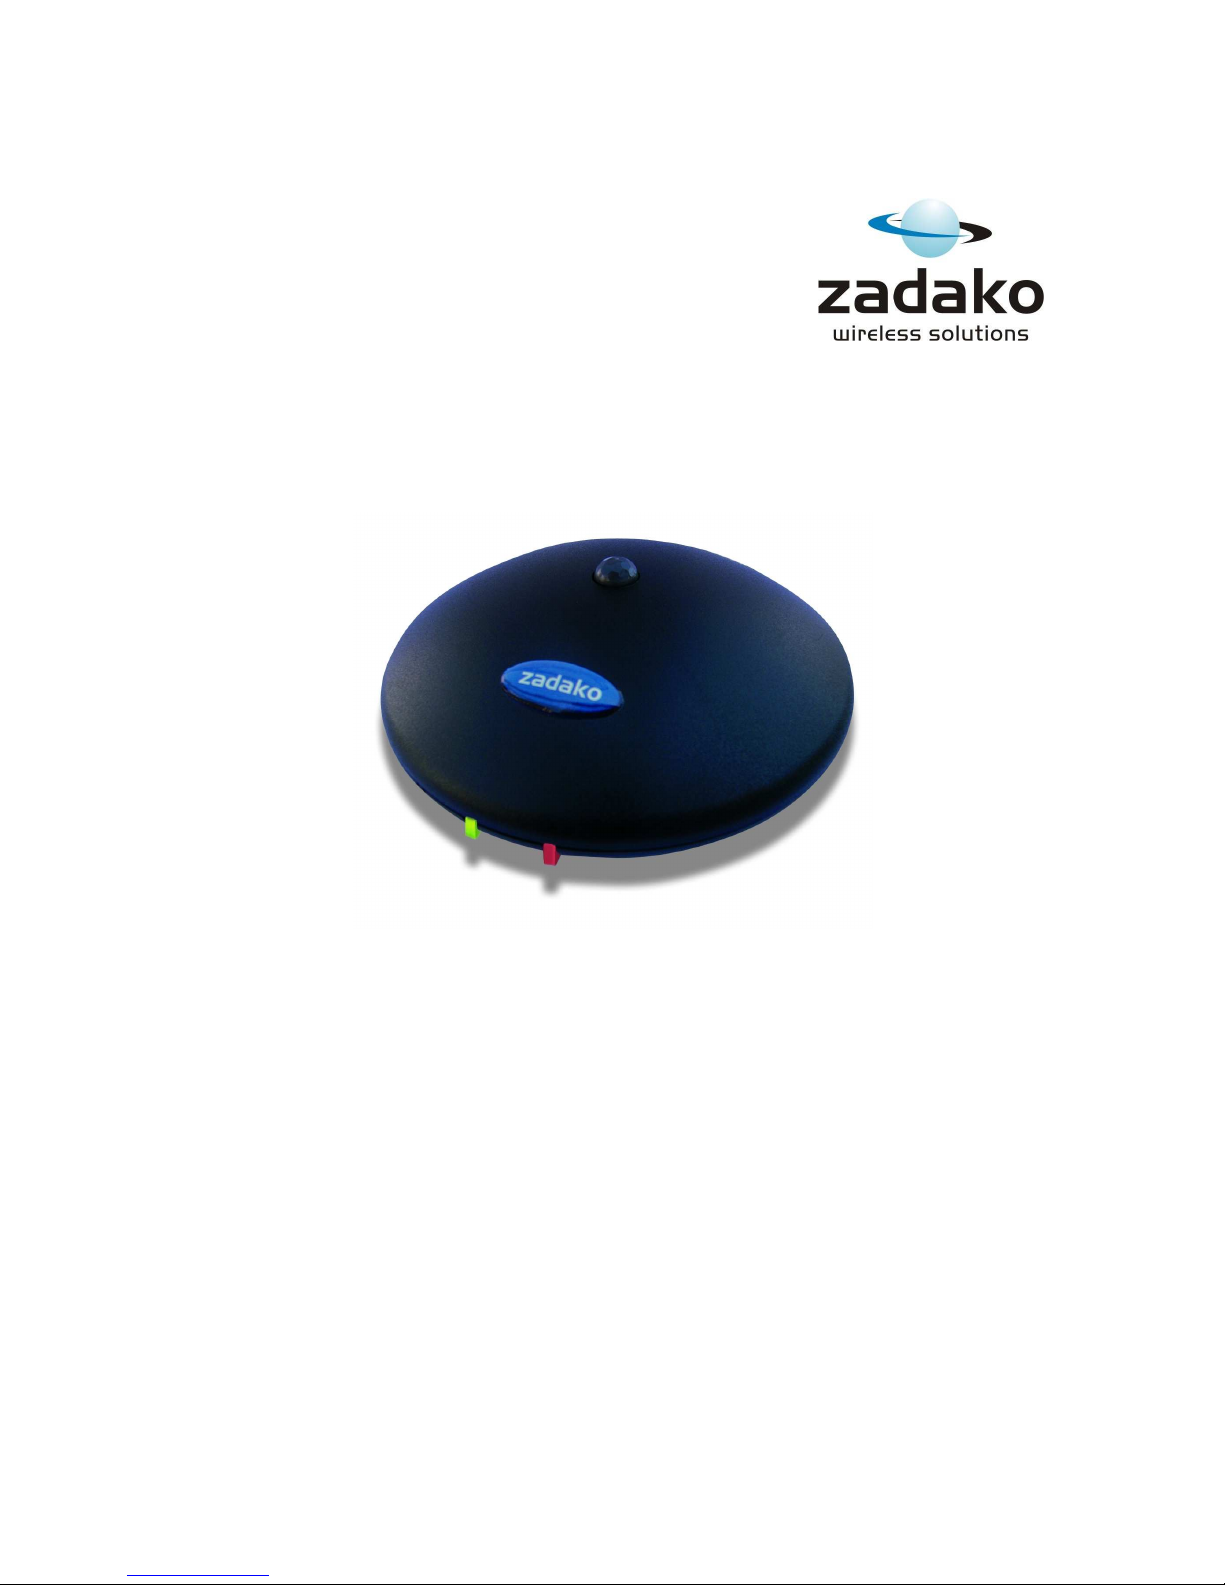
connector). Device starts to bee ermanently, what means that you can release the button because the
settings are already set u . You can disconnect the ada ter or leave it connected, u to your needs.
Setting up b text message
You can set u the device by sending a configuration text message (message in which you set u the
arametres) from your mobile hone on tele hone number of Mini Alarm. You can set u : tele hone
numbers (max. 4), assword, leaving time, ta ing time by alarm, ermission for PANIC mode and texts
of information messages. For a good functionality of device it´s not necessary to set u all these
arametres, the only necessary thing is to set u the tele hone numbers. The other arametres can be as
basic settings from factory (see age 7).
You can send a configuration text message also from a number that is not listed in the address book of
Mini Alarm, but you have to a ly a correct assword. Therefore it´s im ortant to change the assword
and give it only to ersons that will use the alarm. Text messages with a false assword or no assword
sent on tele hone number of Mini Alarm will be automatically deleted. Calls from unknown tele hone
numbers are ignored ( eo le with these numbers can´t ta or disarm)! Numbers listed in address book of
Mini Alarm can´t have CLIR service active when using the device (it can´t recognize the number of calling
erson)!
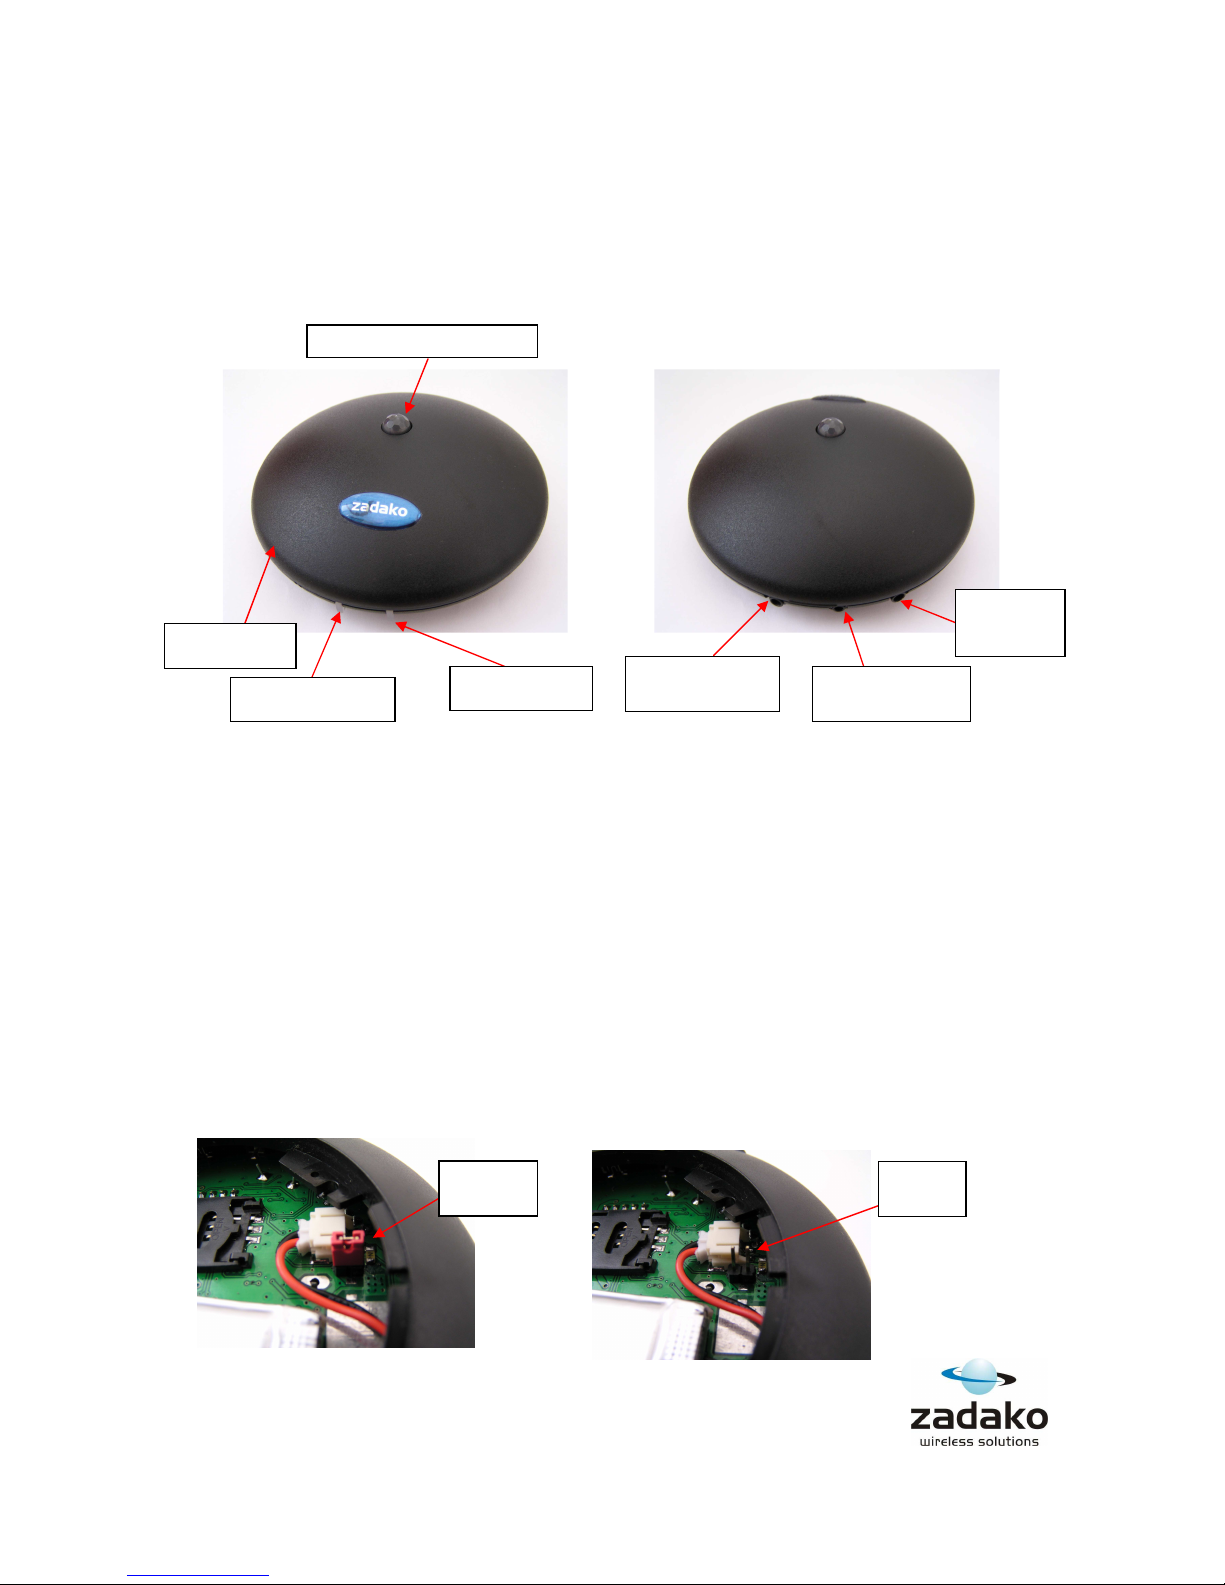
Device signalls the rece tion of text message (in disarmed status) in the following way:
if the assword is correct – green LED light shines (for 2 seconds) and you can hear a high tone,
if the assword is false – red LED light shines (for 2 seconds) and you can hear a dee tone /if the
battery is being charged and red LED light shines, rece tion of text message with a wrong
assword is signalled by 2-second extinction of red LED light/.
Rules for writing text messages
Password has to be on the first lace, if you want to use „?“ or „$“ as well, they have to be on the
last lace.
Watch the ga s (ga is re resented by _ ).
You don´t have to differentiate between small and ca ital letters.
Text of information messages S0- S5 has to be ended by #, tele hone numbers not! (See further.)
Exam les of configuration message in which you want to set u all arametres:
A/ abcd_H=adam_T1=09xxxxxxxx_T2=09xxxxxxxx_T3=#_T4=#_O=15_L=5_P=ON_?
B/ abcd_S0=dragon#_S1=alarm#_S2=panic#_S3=batt low#_S4=electr off#_S5=electr on#_$
Legend:
abcd - assword of device (4 characters)
_ - ga
H=adam - changing assword from “abcd” to “adam”
T1 T4 - tele hone numbers 1-4 (we set u only 2 tele hone numbers in our exam le)
T=# - tele hone number is not set u
O=15 - leaving time 15 seconds (10-120 s)
L=5 - ta ing time by alarm or emergency call 5 minutes (0-255 min)
P=ON/OFF - ermission / rohibition for PANIC mode
S0 - name of device / object
S1 S5 - information messages (max. 12 characters), see age 7
Attention! After the return to the factory defaults (reset), all tele hone numbers are deleted and it´s
necessary to add the numbers again for further use.

9
? / $ - question mark or dollar sign at the end of a text message means that you want Mini
Alarm to confirm you the execution of your command by a confirmation text message
sent on your mobile hone. Question mark is for tele hone numbers and status of device,
dollar for text messages.
Manufacturer recommends to send text messages with question mark at the end so that you can be sure
that you changed the settings or did a command correctly. After sending this message to Mini Alarm, you
will receive an information not only about the settings, but also about battery status and device´s mode (at
the end of the message), it means if it is armed or disarmed or if it is in PANIC mode, e.g.:
abcd T1= 09xxxxxxxx T2=# T3=# T4=# O=10 L=5 P=ON PWR=ON ARM OFF or
abcd T1= 09xxxxxxxx T2=# T3=# T4=# O=10 L=5 P=ON BAT=75% ARM ON
* PWR=ON - ada ter is connected
* BAT=25% - battery is charged on 25%
- ossible status: BAT=25%, BAT=50%, BAT=75%, BAT=100%
* ARM ON - armed
* ARM OFF - disarmed
* PANIC - in PANIC mode
If you don´t want Mini Alarm to send you text messages by alarm or emergency (you want to receive just
calls), send a configuration text message in this form: assword_S1=#_S2=#_S3=#_S4=#_S5=#. For
settings confirmation, a dollar sign $ at the end, e.g.: abcd_S1=#_S2=#_S3=#_S4=#_S5=#_$. If you want
to cancell sending just some of information messages, send a configuration message with number of that
message. E.g.: if you don´t want to receive information about low battery, send a message in this form:
abcd_S3=#.
Examples of configuration and command text messages:
Changing assword from “abcd” to “klmn”.
abcd_H=klmn
Setting u tele hone number 1 (valid for T2, T3, T4 as well).
abcd_T1=09xxxxxxxx
Deleting tele hone number 1 from adress book of Mini Alarm (valid
for T2, T3, T4 as well).
abcd_T1=#
Leaving time set on 15 seconds. abcd_O=15
Ta ing time by alarm or emergency call set on 5 minutes. abcd_L=5
Permission for PANIC mode. abcd_P=ON
Prohibition for PANIC mode. abcd_P=OFF
Changing the name of device/object. abcd_S0=FLAT#
Changing the text of information message from the original to
„warning
“ (
valid for
S2, S3, S4, S5
as well
)
abcd_S1=warning#
Cancellation of sending text messages.
abcd_
S1=#
_S2=
#_S3=#_S4=#_S5=#
Checking settings of hone numbers and arametres.
abcd_?
Checking settings of text messages. abcd_$
Arming. abcd_ARM=ON
Disarming. abcd_ARM=OFF
External arming in ut. abcd_EXT=ARM
External PANIC button. abcd_EXT=PANIK
External motion detector. abcd_EXT=PIR
External control button. abcd_EXT=BUTTON
No external in ut. abcd_EXT=OFF
You can combine the messages and set more arametres in one message.

10
V. MODES
Mini Alarm DRAGON works in 3 modes (not at the same time):
A. Alarm
B. Ta ing of monitored room
C. PANIC mode (emergency call)
A. Alarm
In this mode, Mini Alarm informs about the unauthorized entry into monitored room by sending a text
message and calling on defined tele hone numbers in the address book of Mini Alarm. The entry into the
room is registered by motion detector which is situated on the u er side of device. Therefore it is very
im ortant to lace the alarm on the right lace. The manufacturer recommends to lace Mini Alarm in
horizontal osition on the ground near the door or window and in inclinated osition (using a stand for
inclination) in higher level, e.g. on the table. You can´t screen the motion detector!!!
5 m 5m 5 m
360
o
110
o
5 m
Arming/disarming
Arming = motion detector activation
Disarming = motion detector disactivation
Motion detector is a sensor that reacts on motion of objects in its angle. It is situated on the to of Mini
Alarm (see age 4 Device descri tion) and serves as a control button as well. Before installing Mini Alarm,
it is strongly recommended to make a motion detector test in the chosen lace in order to find out if this
lace is suitable (if detector can register eo le assing by).
Motion detector test is related with arming and is erformed in disarmed status. You will start and end it by
a short ressing of the button. If motion detector is active, but it doesn´t register a movement, Mini Alarm
bee s in second intervals, when you are moving Mini Alarm signalls the registration of movement by
ermanent bee ing. While you are moving, sensor doesn´t allow to arm, but from the moment when you
sto moving (e.g. you leave the room), Mini Alarm starts to arm and bee s once er
second. The last 5 seconds of leaving time are signalled by quick bee ing. If you return
360
o
110
o

11
to the room during the leaving time, Mini Alarm starts to bee ermanently and a new arming starts in the
moment when sensor doesn´t register any movement. You can set u the length of leaving time by a text
message (see age 8). You can cancel arming during leaving time by short ressing of the button.
Problems by arming (motion detector test) can be caused by:
Mini Alarm is not registered to GSM network (1 long bee – dee tone),
there is no tele hone number defined in Mini Alarm´s address book (2 long bee s – dee tone).
How to arm:
by short ressing of button or
by sending a text message on tele hone number of Mini Alarm (if you are not in the rotected
room).
Arming text message has to be of this form: assword ARM=ON (e.g. abcd_ARM=ON). If you want Mini
Alarm to confirm you the arming on your mobile hone, add a question mark at the end of the message,
e.g.: abcd_ARM=ON ?. Arming through text message is erformed in silence, immediately after receiving
the message. It means that Mini Alarm doesn´t signal arming acusticly, only green LED light goes off.
How to disarm:
by calling on tele hone number of Mini Alarm (before entering the rotected room) – after Mini
Alarm refuses the call automatically you can enter the room or
by sending a text message on tele hone number of Mini Alarm in this form: assword ARM=OFF
(e.g. abcd_ARM=OFF).
WARNING! Before leaving the rotected room, close all windows and doors to avoid false alarms. False
alarm can be caused also by starting air condition, heating or by movement of animals in the room.
Intrusion into the protected room
If an unauthorized erson enters the rotected room, Mini Alarm sends a text message and calls on all
tele hone numbers defined in the address book. (If you ick u this call, you can hear what is going on in
the room.) Device doesn´t signal anything by LED lights or buzzer to avoid aying attention of the intruder.
After informing about the alarm, Mini Alarm kee s armed status and sends the next alarm text message
after 15 minutes (to avoid sending alarm messages about the same intrusion very often).
Authorized erson (e.g. flat owner) turns the device to disarmed status by calling on tele hone number of
Mini Alarm or by sending a text message before entering the rotected room. Mini Alarm gets disarmed
only if it receives a call from one of the numbers defined in Mini Alarm´s address book (Mini Alarm´s SIM
card has to have CLIP service active). Unknown calls are refused.
B. Tapping of protected room
1. in disarmed status
If you call on tele hone number of Mini Alarm, you can hear what is going on in the rotected room.
Ta ing time is unlimited. The ermission for ta ing has only the erson with tele hone number defined
in the address book of Mini Alarm.
2. by an event
You can ta also when Mini Alarm calls you in case of alarm or emergency call (PANIC mode) by icking
u the call from Mini Alarm. Ta ing by alarm is automatically ended after 5 minutes, but you can change
this arametre by sending a configuration text message (see age 8). If you want to end

12
this call earlier, just hang it u . By alarm or emergency call, only one erson can ta at one moment, the
next erson has to wait till the revious erson sto s ta ing (Mini Alarm calls on tele hone numbers in
the order in which they were added to the address book).
C. PANIC mode (emergenc call)
PANIC mode is a mode in which the user has the ossibility to call for hel by ressing the button in case
of danger or health roblems. Mini Alarm sends a text message and calls on all tele hone numbers
defined in the address book to inform your family or friends that you are in danger.
You have to allow the PANIC function by sending a text message in form: assword P=ON (e.g.
abcd_P=ON) on tele hone number of Mini Alarm. Then you can activate / disactivate the function by
ressing the button three times. When PANIC mode is active, green LED light shines ermanently. If you
want to rohibit this mode (so that you can´t activate it by ressing the button), send a text message in
form: assword P=OFF (e.g. abcd_P=OFF) on tele hone number of Mini Alarm.
If Mini Alarm is set on PANIC mode and user wants to call for hel , he/she has to ress the button once
(any other than 3-times- ressing causes an emergency call). Green LED light starts flashing quickly – it
means that Mini Alarm sends text messages with text Mini Alarm DRAGON PANIC and calls on all
tele hone numbers in the address book. You can change the text of this message (see age 8). You can´t
change Mini Alarm´s mode when it is sending text messages and emergency calls, you have to wait untill
the device ends all actions. After sending text messages and calls Mini Alarm stays in PANIC mode. You
can turn it from PANIC mode to Alarm mode on distance by sending a text message, e.g. abcd_ARM=ON
or abcd_ARM=OFF), but you can´t turn it from armed status to PANIC mode.
Advice: When you are not in the rotected room, you can use Mini Alarm as an alarm, when you are in the
room, you can use it as a PANIC button. Don´t forget to change the mode of device every time you leave.
VI. EXTERNAL INPUT
It is ossible to connect an external sensor to the in ut situated on the back side of the device (see age 4
Device descri tion). You can use the external in ut in several ways, but first you have to set it u :
Password_EXT=ARM
Arming in ut (leaving button), you can arm by ressing it.
Password _EXT=PANIC
PANIC button, after ressing it Mini Alarm sends text messages and
emergency calls immidiately, it is not necessary to turn to PANIC mode.
Password _EXT=PIR
Detector, for the case you need more sensors.
Password_EXT=BUTTON
Control button, you can manage the device from other lace in the room, not
necessary to ress the button on the to of DRAGON.
For disactivation, send a text message in form: Password_EXT=OFF (e.g. abcd_EXT=OFF).
VII. EXTERNAL OUTPUT
It is ossible to connect external siren to the in ut situated on the back side of the device (see age 4
Device descri tion). Connector for in ut and out ut is the same, but it is necessary to set it u before
connecting the connector of siren. You can set it u by sending text message in form:
Password_EXT=OUT (e.g. abcd_EXT=OUT)

13
After out ut activation you can connect external siren and in ut function (see age 12 External in ut) will
be automatically deactivated. In case of alarm the siren sound is activated for 30 seconds. There is no
ossibility to change this time.
VIII. EXTERNAL SPEAKERS
External s eakers function is always active, you have to just connect the s eakers to the connector (see
age 4 Device descri tion). Manufacturer recommends to use active s eakers (with integrated am lifier).

IX. SIGNALLING
Action / status
Number of button
pressings / length of
pressing LED lights signalling Acustic signalling
Start of device. 1 / 3 seconds Green and red LED lights flash at once. -
Device is switched on, registered
to GSM network. -
In disarmed status green LED light flashes
once for 4 seconds, in PANIC mode green
LED light shines ermanently. -
Device is not registered to GSM
network. -
In disarmed status, green LED light shines
once for 2 seconds, in armed status, no
LED light shines, in PANIC mode, green
LED light shines ermanently.
In disarmed status, buzzer bee s
once er second, in armed status
and in PANIC mode, buzzer doesn´t
bee .
Tele hone numbers settings. 2 / 1 second Green and red LED lights flash alternately. Buzzer bee s once er second.
Receiving a text message with a
correct assword. - Green LED light shines for 2 seconds.
Buzzer bee s once – a long high
tone.
Receiving a text message with a
false assword. - Red LED light shines for 2 seconds.
Buzzer bee s once – a long dee
tone.
There is no tele hone number in
Mini Alarm´s address book. - -
Buzzer bee s twice – a long dee
tone.
Motion detector test.
Arming. 1 / 3 seconds
Green LED light flashes + shines. Bee ing + long high tone.
Green LED light shines once for 2 seconds.
Buzzer bee s once er second + fast
bee ing during last 5 seconds.
Armed. - - -
Activation of PANIC mode. 3 / 1 second Green LED light shines. -
Device is sending text messages
and calls in PANIC mode. - Green LED light flashes fast. -
Disactivation of PANIC mode. 3 / 1 second
Green LED light flashes once for 4
seconds. -
Low battery. - Red LED light flashes once for 4 seconds. -
Charging thebattery. - Red LED light shines. -
Battery charged. - Red LED light sto s shining. -
Switching off the device. 1 / 5 seconds - -
Device switched off. - - -
Command acce ted. - - Double bee (high tone).
Command refused. - - One long dee tone.

X. TECHNICAL DATA
GSM module
Dual Band GSM/GPRS: 900/1800
PIR sensor (motion detector 360
o
, reach u to 5 m)
Signalling: 2 LEDs and buzzer
Integrated microphone
Power suppl : 12 V
Consumption: 4 mA
Max. consumption: 200 mA
Batter : 700 mAh
Stand-b time: 5 days
Dimensions:
∅
110 x 45 mm
Weight: 130g
Temperature range: - 10°C to + 55°C
Included accessories: ower ada ter, base for inclination
Optional accessories: wall-mounting set,
external PIR sensor, magnetic switch,
external PANIC button, battery
MANUFACTURER
ZADAKO
Segnáre 17
841 03 Bratislava
Slovakia
tel.: +421 (0)2 6453 1086
fax: +421 (0)2 6453 1084
e-mail: zadako@zadako.com
www.zadako.com
Table of contents
Popular Security System manuals by other brands

MobileHelp
MobileHelp MD5 Mobile DUO quick start guide

Wheelock
Wheelock NS-1215W installation instructions

Defender
Defender SN502-4CH instruction manual

Whelen Engineering Company
Whelen Engineering Company 2015 Series installation guide

Conrad
Conrad 75 15 94 quick start guide

SVAT
SVAT 2CV500 - 4CH instruction manual