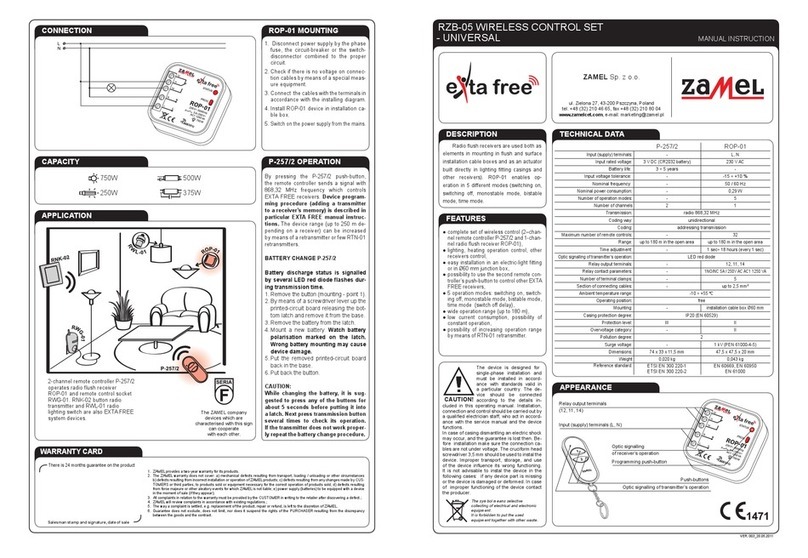
RZB-04 WIRELESS CONTROL SET
- LIGHTING, 2-CHANNEL MANUAL INSTRUCTION
VER. 003_20.05.2011
APPEARANCE
FEATURES
TECHNICAL DATADESCRIPTION
●completesetofwirelesscontrol(4–chan-
nel button radio transmitter RNK-04 and
2-channelradioflushreceiverROP-02).
●2outputrelays(drycontacts230VAC),
●lighting, heating operation control, other
receiverscontrol,
●easyushinstallationØ60mm,
●5operationmodes:switchingon,switch-
ing off, monostable mode, bistable mode,
timemode(switchoffdelay),
●wideoperationrange(upto200m),
●operationisopticallysignalled,
●low current consumption, possibility of
constant operation,
●possibility of increasing operation range
by means of RTN-01 retransmitter.
Radio ush receivers are used both as
elements in mounting in ush and surface
installation cable boxes and as an actuator
built directly in lighting tting casings and
other receivers). ROP-02 enables operation
in5 differentmodes(switchingon,switching
off, monostable mode, bistable mode, time
mode.
RNK-04 ROP-02
Input (supply) terminals: - L, N
Inputratedvoltage: 3 V DC (CR2032 battery) 230 V AC
Battery life: 3 ÷ 5 years -
Inputvoltagetolerance:
-
-15 ÷ +10 %
Nominal frequency:
-
50 / 60 Hz
Nominalpowerconsumption: - 0,39 W („stand-by” mode) / 0,69 W
operationmode1channel/1,09W
operationmode2channels
Number of operation modes: - 5
Numberofchannels: 4 2
Transmission: radio 868,32 MHz
Codingway: unidirectional
Coding:: addressing transmission
Maximum number of remote controls: - 32
Range: upto250mintheopenarea
Time adjustment: - 1sec÷18hours(every1sec)
Optic signalling of transmitter’s operation: LED red diode
Input terminals: - IN1, IN2
Transmitter’s input (supply) terminals: - OUT1,OUT2(voltagecontacts)
Relay contact parameters: - 2NO 5A / 250VAC AC1 1250 VA
Number of terminal clamps: - 6
Section of connecting cables: - up to 2,5 mm2
Ambient temperature range: -10 ÷ +55 oC
Operating position: free
Casing mounting:
wall plugs, double-sided adhesive tape
installationcableboxØ60mm
Casing protection degree: IP20 (EN 60529)
Protectionlevel: III II
Overvoltagecategory: - II
Pollution degree: - 2
Surgevoltage: - 1 kV (EN 61000-4-5)
Dimensions: 90 x 80 x 11,5 mm 47,5 x 47,5 x 20 mm
Weight: 0,038 kg 0,039 kg
Reference standard: ETSI EN 300 220-1,
ETSI EN 300 220-2
EN 60669, EN 60950,
EN 61000
Opticsignallingofreceiver’soperation
Programmingpush-button
Input terminals (IN1, IN2)
Output terminals (OUT1, OUT2)
Input (supply) terminals (L, N)
Optic signalling
of transmitter’s operation
Push-buttons
The device is designed for
single-phase installation and
must be installed in accord-
ance with standards valid in
a particular country. The de-
vice should be connected
according to the details in-
cluded in this operating manual. Installation,
connectionandcontrolshouldbecarriedoutby
aqualied electricianstaff, whoact inaccord-
ance with the ser vice manual and the device
functions.
Incaseofcasingdismantlinganelectricshock
mayoccur,andthe guaranteeislostthen.Be-
foreinstallationmakesuretheconnectionca-
blesarenotundervoltage.Thecruciformhead
sc rewdrive r3,5mmshouldbeusedtoinstalthe
device. Improper transport, storage, and use
of the device inuence its wrong functioning.
It is not advisable to instal the device in the
followingcases:ifanydevicepartismissingor
thedeviceisdamagedordeformed.Incaseof
improper functioningof the device contact the
producer.
CAUTION!
The symbol means selective
collecting of electrical and electronic
equipment.
It is forbidden to put the used
equipment together with other waste.
WARRANTY CARD
Thereis24monthsguaranteeontheproduct
1. ZAMELprovidesatwo-yearwarrantyforitsproducts.
2. TheZAMELwarrantydoesnot cover: a)mechanicaldefectsresulting from transport, loading/unloading or other circumstances
b)defectsresultingfromincorrectinstallationoroperationofZAMELproducts;c)defectsresultingfromanychangesmadebyCUS-
TOMERSorthird parties,toproductssoldorequipmentnecessary forthe correctoperationofproductssold; d)defects resulting
fromforcemajeureorotheraleatoryeventsforwhichZAMELisnotliable;e)powersupply(batteries)tobeequippedwithadevice
inthemomentofsale(iftheyappear);
3. AllcomplaintsinrelationtothewarrantymustbeprovidedbytheCUSTOMERinwritingtotheretailerafterdiscoveringadefect.;
4. ZAMELwillreviewcomplaintsinaccordancewithexistingregulations.;
5. Thewayacomplaintissettled,e.g.replacementoftheproduct,repairorrefund,islefttothediscretionofZAMEL.
6. Guaranteedoes not exclude, does not limit,nordoes it suspend the rights ofthe PURCHASER resulting from the discrepancy
betweenthegoodsandthecontract.
Salesman stamp and signature, date of sale
CONNECTION
APPLICATION
CAPACITY
750W
250W
500W
375W
ROP-02 MOUNTING
1.Disconnectpowersupply bythephase fuse,
thecircuit-breakerortheswitch-disconnector
combinedtothepropercircuit.
2. Check if there is no voltage on connec-
tion cables by means of a special measure
equipment.
3.Connectthecableswiththeterminalsinac-
cordancewiththeinstallingdiagram.
4.InstallROP-02deviceininstallation cablebox.
5.Switchonthepowersupplyfromthemains.
RNK-04 FUNCTIONING, MOUNTING
Bypressingthebutton,thetransmittersends
asignalwith868,32MHzfrequencywhichcon-
trolsEXTAFREEreceivers.Device program-
ming procedure (adding a transmitter to
a receiver’s memory) is described in par-
ticular EXTA FREE manual instructions.
Thedevicerange(upto250mdependingon
areceiver)canbeincreasedbymeansofare-
transmitterorfewRTN-01retransmitters.The
devicecanbemountedinanyplacebymeans
ofdouble-sidedadhesive tape or wall plugs
5 x (3 x 30) mm.
Mountingbymeansofwallplugs:
1.Remove thebutton -to doit pressthe but-
ton on one side, and on the other side put
ascrewdriverintoaslotandliftupthebutton.
2. Find a place on the wall to mount the
transmitter, make two holes corresponding
mountingholesfromthetransmitter’sbase.
3.Setwallplugsintheholes.
4.Fixthebasebymeansofscrewingscrews
intowallplugs.
5.Placethebuttonagain.
BATTERY CHANGE
Battery discharge status is signalled by
several LED red diode ashes during
transmission time.
1.Removethebutton(mounting-point1).
2. By means of a screwdriver lever up the
printed-circuit board releasing the bottom
latchandremoveitfromthebase.
3.Removethebatteryfromthelatch.
4.Mountanewbattery.Watchbatterypolari-
sationmarkedonthelatch.Wrongbattery
mountingmaycausedevicedamage.
5.Puttheremovedprinted-circuitboardback
inthebase.
6.Putbackthebutton.
CAUTION: While changing the battery,
it is suggested to press any of the buttons
for about 5 seconds before putting it into
a latch. Next press transmission button
several times to check its operation. If the
transmitter does not work properly repeat
the battery change procedure.
2-channelradioushreceiverROP-02
operatesasareceiverof8-channelremote
controllerP-256/8andof4-channelbutton
radiotransmitterRNK-04(lightsources
switchon/switchoffcontrol).Theabove
mentioned transmitters can also control
operationofradiolightingswitchRWL-01
and remote control socket RWG-01.
TheZAMELcompanydevices
whicharecharacterised
withthissigncancooperate
witheachother.


