manuals.online logo
Brands
  1. Home
  2. •
  3. Brands
  4. •
  5. Zanussi Electrolux
  6. •
  7. Oven
  8. •
  9. Zanussi Electrolux Built-in oven User manual

Zanussi Electrolux Built-in oven User manual

63
Englis
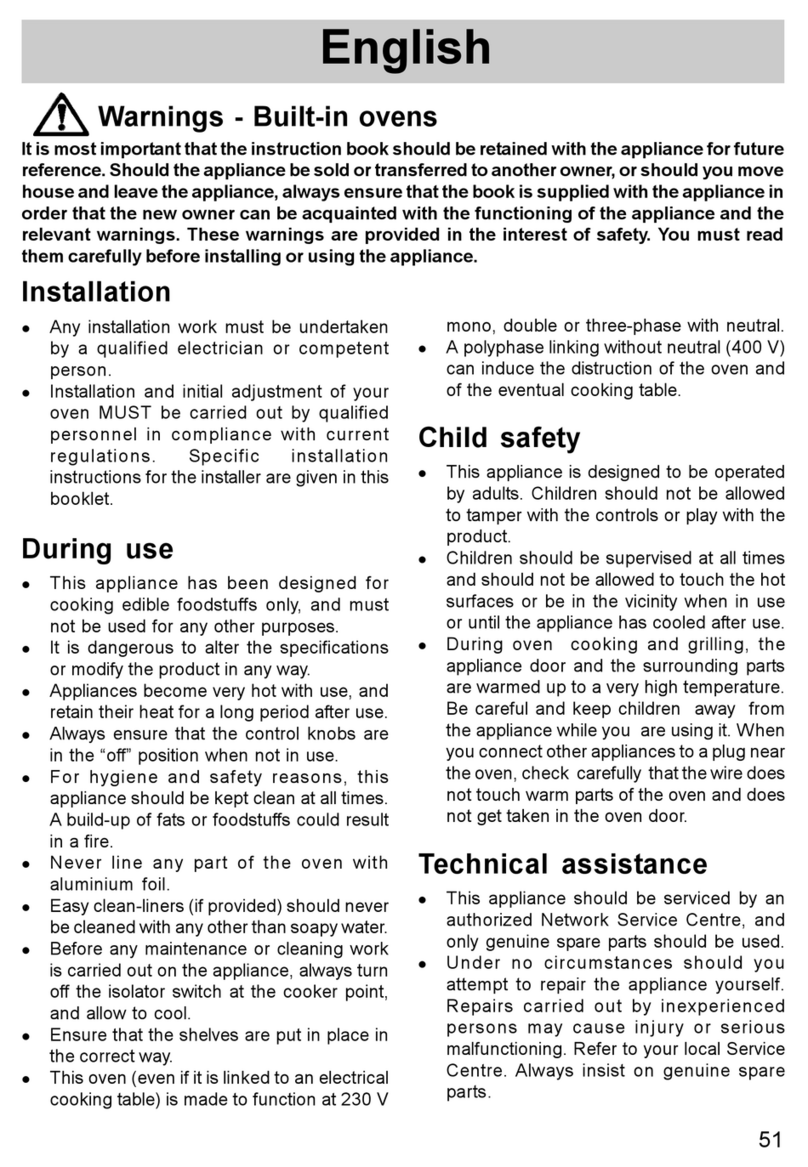
Warnings - Built-in ovens
It is most important that the instruction book should be retained with the appliance for future
reference. Should the appliance be sold or transferred to another owner, or should you move
house and leave the appliance, always ensure that the book is supplied with the appliance in
order that the new owner can be acquainted with the functioning of the appliance and the
relevant warnings. These warnings are provided in the interest of safety. You must read
them carefully before installing or using the appliance.
Installation
lAny installation work must be undertaken
by a qualified electrician or competent
person.
lInstallation and initial adjustment of your
oven MUST be carried out by qualified
personnel in compliance with current
re ulations. Specific installation
instructions for the installer are iven in this
booklet.
During use
lThis appliance has been desi ned for
cookin edible foodstuffs only, and must
not be used for any other purposes.
lIt is dan erous to alter the specifications
or modify the product in any way.
lAppliances become very hot with use, and
retain their heat for a lon period after use.
lAlways ensure that the control knobs are
in the off position when not in use.
lFor hy iene and safety reasons, this
appliance should be kept clean at all times.
A build-up of fats or foodstuffs could result
in a fire.
lNever line any part of the oven with
aluminium foil.
lEasy clean-liners (if provided) should never
be cleaned with any other than soapy water.
lBefore any maintenance or cleanin work
is carried out on the appliance, always turn
off the isolator switch at the cooker point,
and allow to cool.
lEnsure that the shelves are put in place in
the correct way.
lThis oven (even if it is linked to an electrical
cookin table) is made to function at 230 V
mono, double or three-phase with neutral.
lA polyphase linkin without neutral (400 V)
can induce the distruction of the oven and
of the eventual cookin table.
Child safety
lThis appliance is desi ned to be operated
by adults. Children should not be allowed
to tamper with the controls or play with the
product.
lChildren should be supervised at all times
and should not be allowed to touch the hot
surfaces or be in the vicinity when in use
or until the appliance has cooled after use.
lDurin oven cookin and rillin , the
appliance door and the surroundin parts
are warmed up to a very hi h temperature.
Be careful and keep children away from
the appliance while you are usin it. When
you connect other appliances to a plu near
the oven, check carefully that the wire does
not touch warm parts of the oven and does
not et taken in the oven door.
64
Safety Instructions
Step by step instructions for an
operation
Hints and Tips
F
MANUFACTURER:
ELECTROLUX ZANUSSI S.p.A.
iale Bologna, 298
47100 FORLÌ (Italy)
Guide to Use t e instructions
Technical assistance
lThis appliance should be serviced by an
authorized Network Service Centre, and
only enuine spare parts should be used.
lUnder no circumstances should you
attempt to repair the appliance yourself.
Repairs carried out by inexperienced
persons may cause injury or serious
malfunctionin . Refer to your local Service
Centre. Always insist on enuine spare
parts.
65
Control Panel
}
12
3456789
COOKING
FUNCTION
TIME DISPLAY
}
PROGRAMMING
CONTROLS
TEMPERATURE
DISPLAY
1. ON / OFF
2. Oven Function Control
3. Fast Heat Up Function / Defrosting
4. Current/setting temperature / Time of day
5. Decreasing Control (Time or Temperature)
6. Increasing Control (Time or Temperature)
7. Minute Minder
8. Cooking Time
9. End of Cooking Time
NOTE
In the event of a power failure, the
programmer will keep all the settings (time
of day, program setting or program in
operation) for about 3 minutes. If power
misses for a longer time, all the settings
will be cancelled. When the power is
restored, the numbers on the display will
flash, and the clock/timer has to be reset.
66
How to select a cooking
function
 Set the oven on by pressing button 1
 Press button 2 to select the required oven
function. Each time button 2 is
depressed, a pilot light will come on to
the left of the currently selected function
symbol. Here below is a list of the function
symbols and their meaning.
Fan cooking - This setting allows you
to roast or roast and bake
simoultaneously using any shelf,
without flavour transference.
Conven ional cooking - The heat
comes from both the top and bottom
element, ensuring even heating inside
the oven.
Double Grill - The full grill element
will be on. Recommended for large
meat dishes.
Pizza Oven - The bottom element
provides direct heat to the base of
pizzas, quiches or pies, while the fan
ensure air is circulated to cook the
pizza toppings or pie fillings.
Thermal Grilling - This function
offers an alternative method of cooking
food items, normally associated with
conventional grilling. The grill element
and the oven fan operate together,
circulating hot air around the food.
Selec a maximum empera ure of
200°C and do no exceed 1 hour
of opera ion.
Baking Func ion - The top and
bottom elements heat the oven cavity
and the fan circulates hot air around
your dishes. Best for baking cakes,
biscuits or bread.
Bo om hea ing elemen - The heat
comes from the bottom of the oven
only, to allow you finish your dishes.
Inner grill elemen only - can be
used for grilling small quantities.
67
How to select a
temperature
Every time you select a cooking function, a
pre-set temperature is displayed on the
control panel. You can adjust the temperature
value at any time of cooking.
 Press button 5 or 6 to adjust the tempe-
rature.
You can also get the current internal
temperature by pressing button 4.
How to switch off the oven
It is possible to switch off the oven at any
time.
 Press button 1 once. All pilot lights will
come off.
" ast Heat Up" function
After a cooking function has been selected
and the temperature has been adjusted, the
cavity will gradually heat up until the selected
temperature is reached. This will take from
10 to 15 minutes, depending on selected
function and temperature.
If it is necessary to reach the required
temperature in a shorter time, the "Fast Heat
Up" Function can be used.
 Switch the oven on by pressing button 1.
 Set the required cooking function and tem-
perature as explained in the previous
pages.
 Press button once. The tempera-
ture display will show "FHU".
 When the required temperature is
reached, an acoustic alarm will sound for
a short time, and the temperature display
will revert to the set temperature.
This function can be used with any cooking
function or temperature.
Defrosting unction
It is possible for the oven fan to operate without
heat and circulate the air, at low temperature,
inside the oven. This increases the speed of
defrosting.
 Switch the oven on by pressing button 1.
 Press button twice. The tempera-
ture display will show "32". This tempera-
ture setting cannot be changed.
 To switch the "defrost" function off, just
press button once again.
This function is particularly suitable for
defrosting delicate food which could be
damaged by heat, e.g. cream filled gateaux,
iced cakes, pastries, bread and other yeast
products.
68
Once he oven has been ins alled :
 the numbers on the display will flash and
indicate "12.00". If no button is pressed
in 10 seconds, the numbers will stop
flashing and the clock will start running
from 12.00.
To se he correc ime of day :
 if numbers are flashing, press button 5
or 6. When the correct time is displayed,
confirm the setting by pressing button
4. The clock will start running.
 if numbers are static, press button 8 and
9 at the same time and keep them
pressed until the numbers start flashing.
Then proceed as described above.
Then, selec he conven ional cooking
func ion ( ):
 press button 1 to switch on the oven.
 press button 2 twice. The pilot light to
the left of symbol will come on.
 Allow the oven to run emp y for
approximately 45 minutes.
 open a window for ventilation.
During this time, an unpleasant odour may
be emitted. This is absolutely normal, and
is caused by residues of manufacturing.
Once this operation is carried out, let the
oven cool down, then clean the oven cavity
with a soft cloth soaked in warm soapy
water.
Before cooking for the first time,
carefully wash the shelf and the
dripping pan.
To open he oven door, always
ca ch he handle in i s cen ral par
(Fig. 1).
W en t e oven is first installed
Fig. 1 FO 0799
69
Programming
How to set the minute
minder
 Press button 7 to select the Minute
Minder Function. The Minute Minder pilot
light will flash and the control panel will
display 0.00.
 Press button 5 or 6 to select the required
time. Maximum time is 19 hours 59
minutes.
 After the setting is carried out, the Minu-
te Minder will wait 3 seconds and then
start running.
 When time is over, an acoustic alarm will
be heard: to switch off the acoustic
alarm, press any button. between 4 and
9.The oven will NOT be switched off.
To cancel he Minu e Minder:
 press button 7 and, while keeping it
pressed, press button 5 too.
How to make the oven
switch off automatically
 Press button 1 once.
 Place food in the oven, select a cooking
function and adjust the cooking tempe-
rature if required.
 Press button 8 to select the Cooking
Duration function. The Cooking Duration
pilot light will flash and the control panel
will display 0.00.
 Press button 5 or 6 to select the required
time. Maximum time is 19 hours 59
minutes.
 After the setting is carried out, the
programmer will wait 3 seconds and then
start running.
 When time is over, the oven will be
switched off automatically and an
acoustic alarm will be heard: to switch
off the acoustic alarm, press any button
between 4 and 9.
To cancel he Dura ion Time:
 press button 8 and, while keeping it
pressed, press button 5 too. If this
operation is carried out while a program
is running on, the oven will NOT be
switched off.
70
How to make the oven switch
on and off automatically
 Carry out the cooking duration setting as
described in the relevant chapter.
 Press button 9. The "End of Cooking"
function will be selected, and the relevant
pilot lamp will flash. The control panel
will display the end of cooking time (that
is, the actual time + cooking duration).
 Press button 5 or 6 to adjust the required
end of cooking time.
 The oven will then switch on automatically
at the required time. When time is over, it
will switch off, while an acoustic alarm is
heard. To switch the alarm off press any
button between 4 and 9.
EXTRA EATURES
Safety cut-off function
The oven will switch off automatically if any
change of setting is made, according to the
table beside.
Child safety
To avoid little children to switch on the oven
while playing, it is possible to lock the oven
commands.
 Turn off the oven by pressing button 1
 Press buttons 4 and 5 at the same time
and keep them pressed for about 3
seconds. The control panel will display
one flashing dot after the numbers.
 The oven is now locked. Neither oven
functions nor temperatures can be
selected.
To unlock he oven:
 Press buttons 4 and 5 at the same time
and keep them pressed for about 3
seconds. The flashing dot after the
numbers will come off. The oven can now
be operated.
If temperature the oven will
setting is: switch off:
250°C or more after 1,5 hours
from 120 up to 250°C after 5 hours
less than 120°C after 12 hours
Residual heat function
When a Cooking Duration time is set, the
oven will automatically switch off some
minutes before, and the residual heat inside
the oven cavity will finish your dishes without
energy consumption. Anyway, the oven pilot
light will stay on until the Cooking Duration
time is up.
This function is off when the Cooking
Duration time is less than 15 minutes.
71
The Safety Thermostat
This oven is provided with a safety
thermostat. In case of malfunctioning of the
main thermostat, and consequent over-
heating, the safety device will stop the power
supply to the appliance. If this happens, call
your local Service Centre. Under no
circumstances should you attempt to repair
the appliance yourself.
The Cooling an for the
Controls
This oven is provided with a cooling fan,
meant to keep the front panel, the knobs
and the oven door handle cool. This fan may
run on after the oven or grill is switched off,
until a normal temperature is reached.
The oven has four shelf levels. The shelf
positions are counted from the bottom of the
oven as shown in figure 2.
Shelf levels 1, 2 and 4 are fitted with
telescopic shelf supports, to allow en easier
operation when inserting or removing the
shelves.
Pull the right and left hand telescopic shelf
supports completely out, as shown in figure
3.
Place the shelf or the grill pan on the
telescopic shelf supports, then gently push
them all inside the oven (Fig. 3).
Do no a emp o close he oven door if
he elescopic shelf suppor s are no
comple ely inside he oven. This could
damage he door enamel and glass.
Fig. 2
4
3
2
FO 2296
FO 2297
Fig. 3
S elf supports
72
Hints and tips for using t e oven
Always cook wi h he oven door
closed.
Conventional cooking
Heat comes from the top and from the
bottom, therefore it is preferable to use the
central runners.
If cooking requires more heat from the top
or from the bottom use the top or the bottom
runners.
an cooking
The food is cooked by means of preheated
air force blown evenly round the inside of
the oven by a fan set on the rear wall of the
oven itself.
Heat thus reaches all parts of the oven evenly
and fast and this means that you can
simultaneously cook different types of foods
positioned on the various oven shelves (fig.
4). Fan cooking ensures rapid elimination
of moisture and the dryer oven environment
stops the different aromas and flavours from
being transmitted from one food to another.
The possibility of cooking on several shelf
heights means that you can cook several
different dishes at the same time and up to
three tins of biscuits and mini pizzas to be
eaten immediately or subsequently deep
frozen.
Naturally the oven can also be used for
cooking on just one shelf. In this case you
should use the lowest set of runners so that
you can keep an eye on progress more
easily.
In addition, the oven is particularly
recommended for sterilizing preserves,
cooking home-made fruit in syrup, and for
drying mushrooms or fruit.
Fan cooking
Grilling
When grilling meat or fish, spread a little oil
on them and always place them on the oven
grid. The shelf level depends on the
thinckness of the food.
Always place the dripping pan at the lowest
level, with some water in it, to avoid smoke
and unpleasant smells.
Thermal grilling
When using his cooking func ion, selec
a maximum empera ure of 200°C and
do no exceed 1 hour of opera ion.
The full grill element and the oven fan operate
alternately, circulating hot air around the
food. The need to check and turn food is
reduced. With the exception of toast and
rare steaks, you can thermal grill all the
foods you would normally cook under a
conventional grill.
Defrosting
The oven fan operates without heat and
circulates the air, at room temperature, inside
the oven.
Fig. 4 FO 0351
73
Some hints
For baking cakes
Cakes require a moderate temperature
(normally between 150 and 200°C). In
addition, the oven must be heated up
beforehand - for about 10 minutes.
The oven door should not be opened before
at least 3/4 of the set cooking time is up.
Normal short pastry dough should be cooked
in a mould or tin for 2/3 of total cooking time
required and then garnished as desired
before being cooked completely.
Clearly, the remaining cooking time depends
on the type of garnish used (jam, fruit, etc.).
Care should be taken to ensure that any
dough and cake mixes are of the right
consistency since an unduly moist mix
lengthens cooking time unnecessarily. The
raw dough or mix should therefore be fairly
difficult to detach from the spoon or beater.
If three shelves are filled with cakes and tarts
simultaneously, it is advisable to slot in an
extra shelf between the two lower shelves
(Fig. 4).
For cooking mea and fish
Meat cooked in the oven should weigh at
least 1 kg to prevent it from becoming too
dry during cooking. ery tender red meat to
be cooked rare, i.e. well cooked on the
outside but extremely juicy inside, requires
high-temperature cooking (200-250°C).
White meat, poultry and fish instead require
low-temperature cooking (150-175°C).
The ingredients for the accompanying sauce
or gravy should be put in the baking pan at
the very beginning only when cooking times
are short.
Otherwise they should be added during the
last half hour. A simple way of checking
whether meat is done or not is to press it
with a spoon; if the meat does not yield
under this pressure it means that it is done
to a turn. In the case of roast beef and fillet
steaks, the inside of which should remain
fairly pink in color, cooking times must be
short.
The meat can be cooked in a baking pan or
else directly on the shelf - in this case a
dripping pan must obviously be placed
underneath the shelf to collect the juice.
Should you cook very fat food, place the
meat directly on the grill and the grill over
the dripping pan in order not to dirty the oven.
Once the meat is cooked, it is advisable to
let it rest for at least 15 minutes before
carving so that the juice does not seep out.
To prevent the formation of too much smoke
in the oven during roasting, it is a good idea
to pour a little water into the dripping pan
andto prevent steamto add a little bit
more during cooking if the original amount
dries up too much.
Before serving, the various courses can be
kept hot in the oven which should be turned
down to the minimum temperature.
A en ion! - Do not place pans,
dripping pans, biscuit pans or
aluminium foil on the oven bottom.
This could cause a heat build-up
which would affect the baking results
and damage the oven enamel.
Cooking times
Cooking times vary according to the type of
food to be cooked, its consistency, and
volume.We suggest that you take particular
note of your first cooking experiments with
the oven, since operating in the same
conditions for the same dishes you will of
course obtain similar results.
Only experience will enable you to make
the appropriate changes to values given on
charts.
74
Cooking Tables
4
3
2
1
4
3
2
1
M AT
1000 Beef 2 200 2 175 50 ~ 70 On rid
1200 Pork 2 200 2 175 100 ~ 130 On rid
1000 Veal 2 200 2 175 90 ~ 120 On rid
1500
En lish roast beef
2 220 2 200 50 ~ 70 On rid
1200 Lamb 2 200 2 175 110 ~ 130 Le
1000 Chicken 2 200 2 175 60 ~ 80 Whole
4000 Turkey 2 200 2 175 210 ~ 240 Whole
1500 Duck 2 175 2 160 120 ~ 150 Whole
3000 Goose 2 175 2 160 150 ~ 200 Whole
1200 Hare 2 200 2 175 60 ~ 80 Cut in pieces
FISH
1000 Whole 2 200 2 (1 and 3)* 175 40 ~ 60 2 fishes
800 Fillets 2 200 2 (1 and 3)* 175 30 ~ 40 4 fillets
FLANS
Pasta flan 2 200 2 (1 and 3)* 175 40 ~ 50
Ve etable flan 2 200 2 (1 and 3)* 175 45 ~ 60
Quiches 2 200 2 (1 and 3)* 175 35 ~ 45
Lasa ne 2 200 2 175 45 ~ 60
Traditional
Cookin
Weight (gr.)
TYPE OF DISH Level
Fan Oven
NOTES
Cookin
time
minutes
temp.
°C
Level temp.
°C
Traditional cooking and fan ducted cooking
4
3
2
1
BREAD AND PIZZA
1000 White bread 2 175 45 ~ 60 1 piece
500 Rye bread 2 175 30 ~ 45 In bread pan
500 Bread rolls 2 (1 and 3)* 175 20 ~ 35 8 rolls
250 Pizza 2 (1 and 3)* 200 20 ~ 35 In baking pan
Weight (gr.)
TYPE OF DISH
Level temp. °C
Cookin
time
minutes
NOTES
"Pizza" function
Pizza function
75
4
3
2
1
Baking function
temp.
Baking function Cooking
time
minutes
TYPE OF DISH
Level
°C
CAK S
Whipped up kneadin 2 (1 and 3)* 160 45 ~ 60
Leavened kneadin 2 (1 and 3)* 160 20 ~ 35
Shortbread dou h 2 (1 and 3)* 160 20 ~ 30
Butter-milk cheese cake 2 150 60 ~ 80
Apple cake 2 (1 and 3)* 160 40 ~ 60
Strudel 2 (1 and 3)* 150 60 ~ 80
Jam-tart 2 (1 and 3)* 160 45 ~ 60
Small cakes 2 (1 and 3)* 160 15 ~ 25
Biscuits 2 (1 and 3)* 160 10 ~ 20
Merin ues 2 (1 and 3)* 100 90 ~ 120
Steaks 4 800 4 max 10 8
Chops 4 600 4 max 12 8
Sausa es 8 500 4 max 10 6
Chicken (cut in pieces) 6 800 3 max 30 20
Kebabs 4 700 4 max 12 10
Chicken (breast) 4 400 4 max 13 10
Tomatoes 8 500 4 max 12 
Fish (fillets) 4 400 4 max 8 6
Sandwiches 4  4 max 8 
Toast 4  4 max 2~3 1
Grilling
Upper
side
°C
temp.
Pieces Weight
Quantity Cooking time
(minutes)
Lower
side
Grilling
TYPE OF DISH
Level
4
3
2
1
Thermal grilling
TYP OF DISH Quantity Shelf Temp. Time in minutes
(gr.) level °C lower upper
side side
Pork 1500 2 or 3 170 45 30
Roastbeef 1500 3 200 30 20
Chicken 1200 2 or 3 190 40 30
Kebabs 800 3 200 15 10
Fish (whole) 800 3 200 12 8
76
Before any cleaning swi ch he
oven off and le i cool down. This
appliance cannot be cleaned with
steam or with a steam cleaning
machine.
Impor an ! Before carrying ou
main enance and cleaning
opera ions, make sure ha your
oven is disconnec ed from he
mains power supply.
Cleaning must be carried out after the oven
has cooled down. Wash the enamelled parts
with lukewarm water and detergent. Do not
use abrasive products, such as steel wool
pads, acids etc. since these could damage
the various surfaces. Rinse stainless steel
parts with water after use, and dry them with
a soft cloth or chamois leather.
In the case of persistent stains, you can
use normal non-abrasive detergents or
products specific for stainless steel readily
available on the market. Another alternative
is a drop of hot vinegar.
When cleaning the oven door with the glass
top cover use just hot water, taking care to
avoid using coarse cloths or abrasive
products.
The hot acids of fruit (e.g. Iemons, stewed
prunes, etc.) leave difficult-to-remove stains
Cleaning and Maintenance
FO 0452
Fig. 6
on the enamelled surfaces; this inconvenient
may remove enamel gloss, but, it does not
impair oven operation.
Clean the oven thoroughly after use; in this
way it will be possible to remove cooking
residuals more easily, thus avoiding these
from burning the next time the oven is used.
Oven door cleaning
For a better cleansing of the oven door, you
are suggested to remove it from the
appliance with the following procedure:
- open tho door completely; lift the small
levers placed on the two hinges and turn
the levers towarde the inside (Fig. 6).
- Slowly close the oven door, until it
touches the two levers,
- then push it towards the oven and remove
Grease ilter
When cooking meat, the grease filter must
be fitted over the oven fan by clipping it over
the vents in the back panel. This will prevent
a built-up of fat on the fan impellor. Do not
use abrasive materials to clean the seal.
The grease filter is dishwasher proof.When
cooking is completed and the oven has
cooled down, remove the filter by pushing
the protruding tongue on the filter upward
(Fig. 5) Wash the filter after use using warm
soapy water. Fi he grease fil er only
when roas ing.
Fig. 5 FO 0018
77
it by pulling it towards the outeide.
- Place the door on a horizontal level.
After cleaning, assemble the door again by
carrying out the procedure described above
backwards. When the two small levers are
placed again on the hinges, the door will
have been accurately fit.
Replacing the oven light
Disconnect the appliance from its power
supply point. Push in and unscrew the glass
cap (Fig. 7). Unscrew the light bulb and
replace it with a new heat-proof bulb (300°C)
having the following features: - Operative
tension: 230 (50 Hz); - Power: 25 W; -
Fitting: E 14. Reconnect the appliance.
The Hinged Grill
Some models are fitted with a hinged grill
element, to enable you to clean the roof of
the oven easily.
Before proceeding ensure he
oven is cool and is isola ed from
he elec rici y supply.
lUndo the screws which hold the grill in
place (see Fig. 8). When doing this
operation for the first time, we
recommend using a screwdriver.
lThen gently pull the grill downward to
allow access to the oven roof.
lClean the oven roof with a suitable
cleaner and wipe dry before replacing the
hinged grill element.
lGently push up the grill element into
place and firmly screw into place the
holding nuts.
Ensure he grill holding nu s are
firmly in place o avoid he grill
falling down when in use.
FO 0030
Fig. 7
Fig. 8
78
Tec nical Data
This appliance complies with the
following E.E.C. Directives:
- 73/23 - 90/683 (Low oltage Directive);
- 89/336 (Electromagnetical Compatibility
Directive);
- 93/68 (General Directives)
and subsequent modifications.
Dimension of the oven
recess
Height 59,5 cm
Width 56,0 cm
Depth 55,0 cm
Dimensions of the oven
cavity
Height 32,5 cm
Width 42,0 cm
Depth 39,0 cm
Capacity 53 dm3
Oven thermostat regulation: from 50 up to
250 °C
Heating elements ratings
Bottom heating element 1000 W
Top heating element 800 W
Full Oven (Top+Bottom) 1800 W
Grill heating elements simple 1750 W
double 2550 W
Fan Oven heating element 2000 W
Pizza function 3000 W
Oven lamp 25 W
Convection fan 30 W
Cooling fan 25 W
Maximum power rating 3080 W
oltage tension (50 Hz) 230
Fig. 9
Telescopic shelf supports
The telescopic shelf supports can be
removed for easy cleaning. Undo the fixing
nut then remove the shelf supports from both
the oven sides (Fig. 9). To clean the
telescopic shelf supports, soak in warm
soapy water and remove stubborn marks
with a well wetted soap impregnated pad.
Rinse well and dry with a soft cloth. Please,
ensure the retaining nuts are secure when
refitting the shelf support.
When cleaning he shelf suppor s, ake
care no o remove he lubrica ing
grease behind he elescopic runners.
This is mean o ensure heir good
opera ion.
79
Instructions for t e installer
The ins ruc ions given below are
designed specifically for a
qualified ins aller and should aid
him or her o perform all
ins alla ion, adjus men , and
main enance opera ions wi h
absolu e precision and in
compliance wi h all curren
legisla ion and regula ions. We
s rongly recommend ha all
opera ions for he ins alla ion of
your cooker be carryed ou by
Qualified Personnel in
accordance wi h exis ing rules
and regula ions.
Electrical connection
Prior to making the electrical connection,
make sure that:
 the protection fuse and the domestic
wiring system are suitable to carry the
total electric load of the oven (see rating
plate);
 your domestic wiring system has an
efficient earth connection in compliance
with rules and laws in force;
 the wall socket or the omnipole switch
used for the electrical connection can
easily be reached after the oven is built
in.
This appliance is delivered without an electric
supply cable, therefore, you will have to fit
to it a supply cable with standard plug,
suitable for the total electric load shown on
the rating plate. The plug is to be inserted
into a suitable wall socket. If you require a
direct connection to the electric network
(mains), it will be necessary to fit between
the appliance and the mains an omnipole
switch, with a minimum gap between
contacts of 3 mm, suitable for the required
load and in compliance with rules in force.
The green & yellow ground wire must not be
interrupted by the switch. The supply cable
must in all cases be laid out in such a way
as to ensure that it does not reach at any
given point a temperature 50°C higher than
the ambient temperature.
Suitable power supply cables are the
following types, considering the respective
necessary section of cable: H07 RN-F, H05
RN-F, H05 RR-F, H05 -F, H05 2 2-F
(T90), H05 BB-F.
Terminal block
The oven has an easily accessible terminal
block, which is meant to work with an
electric single-phase rate of 230 (Fig. 10).
The Manufac urer disclaims any liabili y
in case hese acciden -preven ing rules
are no observed.
FO 2159
Fig. 10
80
To ensure correct operation of the built-in
assembly, the kitchen cabinet and the
recess for the built-in appliance must have
suitable dimensions.
When the appliance is fitted-in, there must
be no open spaces left and it must be closed
on all sides by the kitchen furniture to prevent
the possibility of inadvertently touching live
(current carrying) parts of the oven.
All parts ensuring such a protection,
including any covering panel (for instance, if
the appliance is installed at the end or at
the beginning of a kitchen counter) must be
fastened in such a way as to prevent removal
of the same without the aid of some tool.
This appliance belongs to the Y class
relevant to protection against ambient
over-heating.
This means that the appliance can be placed
with its back and with one side close to ap-
pliances or walls of higher height. The other
side, instead, must be placed close to furni-
ture or appliances, having the same height.
Overall oven dimensions (Fig. )
In-Column recess dimensions
The recess must have the dimensions
shown in Fig. 12.
Undertop recess dimensions
The recess must have the dimensions shown
in Fig. 13.
Securing the oven to the
cabinet
- Fit the appliance into the cabinet recess.
- Open teh oven door and secure the oven
to the kitchen cabinet with four wood
screws, which fit the holes provided in
the oven frame (Fig. 14).
Building-in
FO 0207Fig. 11
Fig. 12
FO 0039
Fig. 14
FO 0290
FO 2562
550 MIN
595
560 - 570
80÷100
Fig. 13
81
When callin for repairs durin the period of uarantee ofthe appliance, the ori inal invoice
or receipt must be shown or sent to ether with the appliance to be repaired.
General condi ions of guaran ee
1The manufacturer uarantees the appliance indicated on the relative invoice for a period
of one year from the date of purchase. In case of a fault durin this period if caused bya
defect in materials and/or construction, the client is entitled to repair free of char e.
1a Concernin vacuum cleaners for domestic use, the total periodof uarantee is two
years. Accessories are subject to a direct usa e, consequently these articles are
excluded from the uarantee.
2The manufacturer uarantees technical assistance and repairsfor one year. Spare
parts fitted durin repair are also covered by a one year uarantee from the date of repair.
In case of fault durin this period, as a direct result of the repair work carried out or
caused by the new parts fitted on such occasion, the client is entitled to repair free of
char e. The execution of repairs does not prolon the total period of uarantee coverin
the appliance.
3Technical Assistance at domicile will be provided only for lar e apparatus which are
difficult to transport such as: washin machines, spin-driers, dishwashers,refri erators,
freezers (vertical or horizontal), ovens, cookers and built-in appliances.
3a The above-mentioned conditions are also valid for refri erators for caravens on condition
that they are situated within the national boundaries and are accessible by roads open
to traffic. Furthermore, at the time of the intervention the appliance and its owner, or the
person so authorized, must be present at the place a reed upon for the intervention.
4If, in the opinion of the manufacturer, the appliance as described in point 3 must be
transported to a Technical Assistance laboratory, the transportation will be carried out
as established by the manufacturer, at his expense and under his responsibility.
5All appliances not mentioned under points 3 and 3a, includin appliances havin the
same functional characteristics but whose transport is easy, must be sent to the
Technical Assistance or taken to them. Throu hout the period of uarantee the cost of
return transportation will be taken care by the manufacturer.
6If durin the period of uarantee a disfunction occurs due to a defect which cannot be
repaired, the appliance will be replaced free of char e.
Ex ension of he guaran ee
7For motorcompressors of refri erators/ freezers (excludin the startin device and
thermal interrupter) a decreasin uarantee of 20% per year for a period of five years
from the date of purchase of the appliance indicated on the relative invoice with repairs
free of char e throu hout the entire period under uarantee. On completion of the total
period of uarantee the cost of travel, workmanship and eventual spare parts will be at
the expense of the client.
GUARANTEE - SPARE PARTS (only for BENELUX)
82
Exclusion from guaran ee
8The free execution of work for the repair and/ or substitution as set out above will not
apply if:
- The purchase invoice or receipt indicatin the date of purchase and the identification of
the appliance cannot be presented or was not sent with the appliance to be repaired;
- The appliance is used for purposes other than those of the domestic nature for which
it was made;
- The appliance was not installed, handled or used in conformity with the indications in
the instruction manual or in the modalities for use;
- The appliance has been repaired or modified incorrectly by unqualified personnel.
8a If the appliance has been built-in, underinserted, suspendedor installed in such a way
that the time required to move it and put it back in position exceeds thirty minutes in total,
the extra expenditures occurred will be billed to the owner of the appliance.
8b ln case of deterioration due to an irre ular installation carried out in a reement with the
owner of the appliance, the manufacturer and the technical assistance decline all
responsibility.
8c Dama e such as scratches, knocks or breaka e of movable or dismountable units
which were not notified to the manufacturer at the time of delivery are not covered by the
uarantee.
Impor an no ice
This appliance has been made to be safe. Inadequate repairs can nonetheless compromi-
se this safety. To avoid such problems and to prevent any eventual dama e we advise you
to have repairs carried out exclusively by qualified
personnel.We advise you to have repairs or
maintenance carried out by the retailer or the Electrolux
Service and to request only ori inal spare parts.
Belgium
Bergensesteenweg 719 / B - 1520 Halle (Lembeek)
Repairing to customer's house:
Tel.: 02-3630444
Fax.: 02-3630400
Spare parts:
Tel.: 02-3630555
Fax.: 02-3630500
Luxembourg
7, Rue de Bitbourg / L-1273 Luxembourg-Hamm
Customer care:
Tel.: 42 43 11
Fax: 42 43 13 60

Other manuals for Built-in oven

6

Other Zanussi Electrolux Oven manuals

Zanussi Electrolux ZCM 8021 User manual

Zanussi Electrolux

Zanussi Electrolux ZCM 8021 User manual

Zanussi Electrolux ZCM 8021 User manual

Zanussi Electrolux

Zanussi Electrolux ZCM 8021 User manual

Zanussi Electrolux BMX316 User manual

Zanussi Electrolux

Zanussi Electrolux BMX316 User manual

Zanussi Electrolux ZCM 1030 X User manual

Zanussi Electrolux

Zanussi Electrolux ZCM 1030 X User manual

Zanussi Electrolux ZCM 7902 User manual

Zanussi Electrolux

Zanussi Electrolux ZCM 7902 User manual

Zanussi Electrolux ZCGHL50 User manual

Zanussi Electrolux

Zanussi Electrolux ZCGHL50 User manual

Zanussi Electrolux ZCM1031X User manual

Zanussi Electrolux

Zanussi Electrolux ZCM1031X User manual

Zanussi Electrolux ZCG7540 User manual

Zanussi Electrolux

Zanussi Electrolux ZCG7540 User manual

Zanussi Electrolux BST 6 W User manual

Zanussi Electrolux

Zanussi Electrolux BST 6 W User manual

Zanussi Electrolux ZCE 7702 User manual

Zanussi Electrolux

Zanussi Electrolux ZCE 7702 User manual

Zanussi Electrolux Built-in oven User manual

Zanussi Electrolux

Zanussi Electrolux Built-in oven User manual

Zanussi Electrolux ZOU580 User manual

Zanussi Electrolux

Zanussi Electrolux ZOU580 User manual

Zanussi Electrolux ZCM 1030 X User manual

Zanussi Electrolux

Zanussi Electrolux ZCM 1030 X User manual

Zanussi Electrolux Built-in oven User manual

Zanussi Electrolux

Zanussi Electrolux Built-in oven User manual

Zanussi Electrolux Built-in oven User manual

Zanussi Electrolux

Zanussi Electrolux Built-in oven User manual

Zanussi Electrolux MULTI BUILT-IN OVENS User manual

Zanussi Electrolux

Zanussi Electrolux MULTI BUILT-IN OVENS User manual

Zanussi Electrolux Built-in oven User manual

Zanussi Electrolux

Zanussi Electrolux Built-in oven User manual

Zanussi Electrolux ZCE 5000 User manual

Zanussi Electrolux

Zanussi Electrolux ZCE 5000 User manual

Zanussi Electrolux Built-in oven User manual

Zanussi Electrolux

Zanussi Electrolux Built-in oven User manual

Zanussi Electrolux ZOU270 User manual

Zanussi Electrolux

Zanussi Electrolux ZOU270 User manual

Zanussi Electrolux Electric oven User manual

Zanussi Electrolux

Zanussi Electrolux Electric oven User manual

Zanussi Electrolux ZCE 8021 User manual

Zanussi Electrolux

Zanussi Electrolux ZCE 8021 User manual

Zanussi Electrolux ZCE 5200 User manual

Zanussi Electrolux

Zanussi Electrolux ZCE 5200 User manual

Zanussi Electrolux ZCM 1030 X User manual

Zanussi Electrolux

Zanussi Electrolux ZCM 1030 X User manual

Popular Oven manuals by other brands

Wood Stone FIRE DECK 9690 Installation and operation manual

Wood Stone

Wood Stone FIRE DECK 9690 Installation and operation manual

Omega 60 Series instruction manual

Omega

Omega 60 Series instruction manual

KitchenAid KCO263SZ owner's manual

KitchenAid

KitchenAid KCO263SZ owner's manual

Hoover HO7DC3B308IN User instruction

Hoover

Hoover HO7DC3B308IN User instruction

Franke TL 62 M Installation and user manual

Franke

Franke TL 62 M Installation and user manual

Melchioni DEVIL 11 user manual

Melchioni

Melchioni DEVIL 11 user manual

Hotpoint Ariston OT 857 CO RFH operating instructions

Hotpoint Ariston

Hotpoint Ariston OT 857 CO RFH operating instructions

Bosch HRA 14B Series User manual and installation instructions

Bosch

Bosch HRA 14B Series User manual and installation instructions

Ignis AKL 900 Product description sheet

Ignis

Ignis AKL 900 Product description sheet

IKEA GRÄNSLÖS Installation and user guide

IKEA

IKEA GRÄNSLÖS Installation and user guide

Siemens HB655GB 1 Series instruction manual

Siemens

Siemens HB655GB 1 Series instruction manual

GE JTP31SRSS Dimensions and installation information

GE

GE JTP31SRSS Dimensions and installation information

NEFF U1661A2GB How to connect

NEFF

NEFF U1661A2GB How to connect

Baumatic B900BL instruction manual

Baumatic

Baumatic B900BL instruction manual

Zanussi FM 11 B Use and care instructions

Zanussi

Zanussi FM 11 B Use and care instructions

Thermador ME301JS installation instructions

Thermador

Thermador ME301JS installation instructions

Bosch VGD011BR0M instruction manual

Bosch

Bosch VGD011BR0M instruction manual

LG SolarDOM MP-9485SS owner's manual

LG

LG SolarDOM MP-9485SS owner's manual

manuals.online logo
manuals.online logoBrands
  • About & Mission
  • Contact us
  • Privacy Policy
  • Terms and Conditions

Copyright 2025 Manuals.Online. All Rights Reserved.