Zehntner ZGM1130 User manual

ZGM1130
Glossmeter
Technical Manual

18. May 2021 © Copyright 2021, PROCEQ SA
Document Information
Document Revision: 2.0
Revision Date: -
Document State: Released
Company: Proceq SA
Ringstrasse 2
CH-8603 Schwerzenbach
Switzerland
Classification: Technical Manual
Revision History
Rev
Date
Author, Comments
0.9
May 17, 2021
PEGG
- Initial document copied from ZGM1130 v1.8_en
2.0
May 18. 2021
PEGG, Initial release

18. May 2021 © Copyright 2021, PROCEQ SA
Content
1Safety notes ............................................................................................................1
1.1 Symbols used.......................................................................................................... 1
1.2 Safety notes and hints.............................................................................................. 1
2Introduction ............................................................................................................2
2.1 Scope of this document............................................................................................ 2
3Scope of Delivery ...................................................................................................3
3.1 Standard delivery..................................................................................................... 3
3.2 Software .................................................................................................................. 3
4Device overview......................................................................................................5
4.1 Display .................................................................................................................... 6
4.2 Measuring Button..................................................................................................... 6
4.3 Power Supply .......................................................................................................... 6
4.4 Automatic System Check ......................................................................................... 6
4.5 Connectivity............................................................................................................. 6
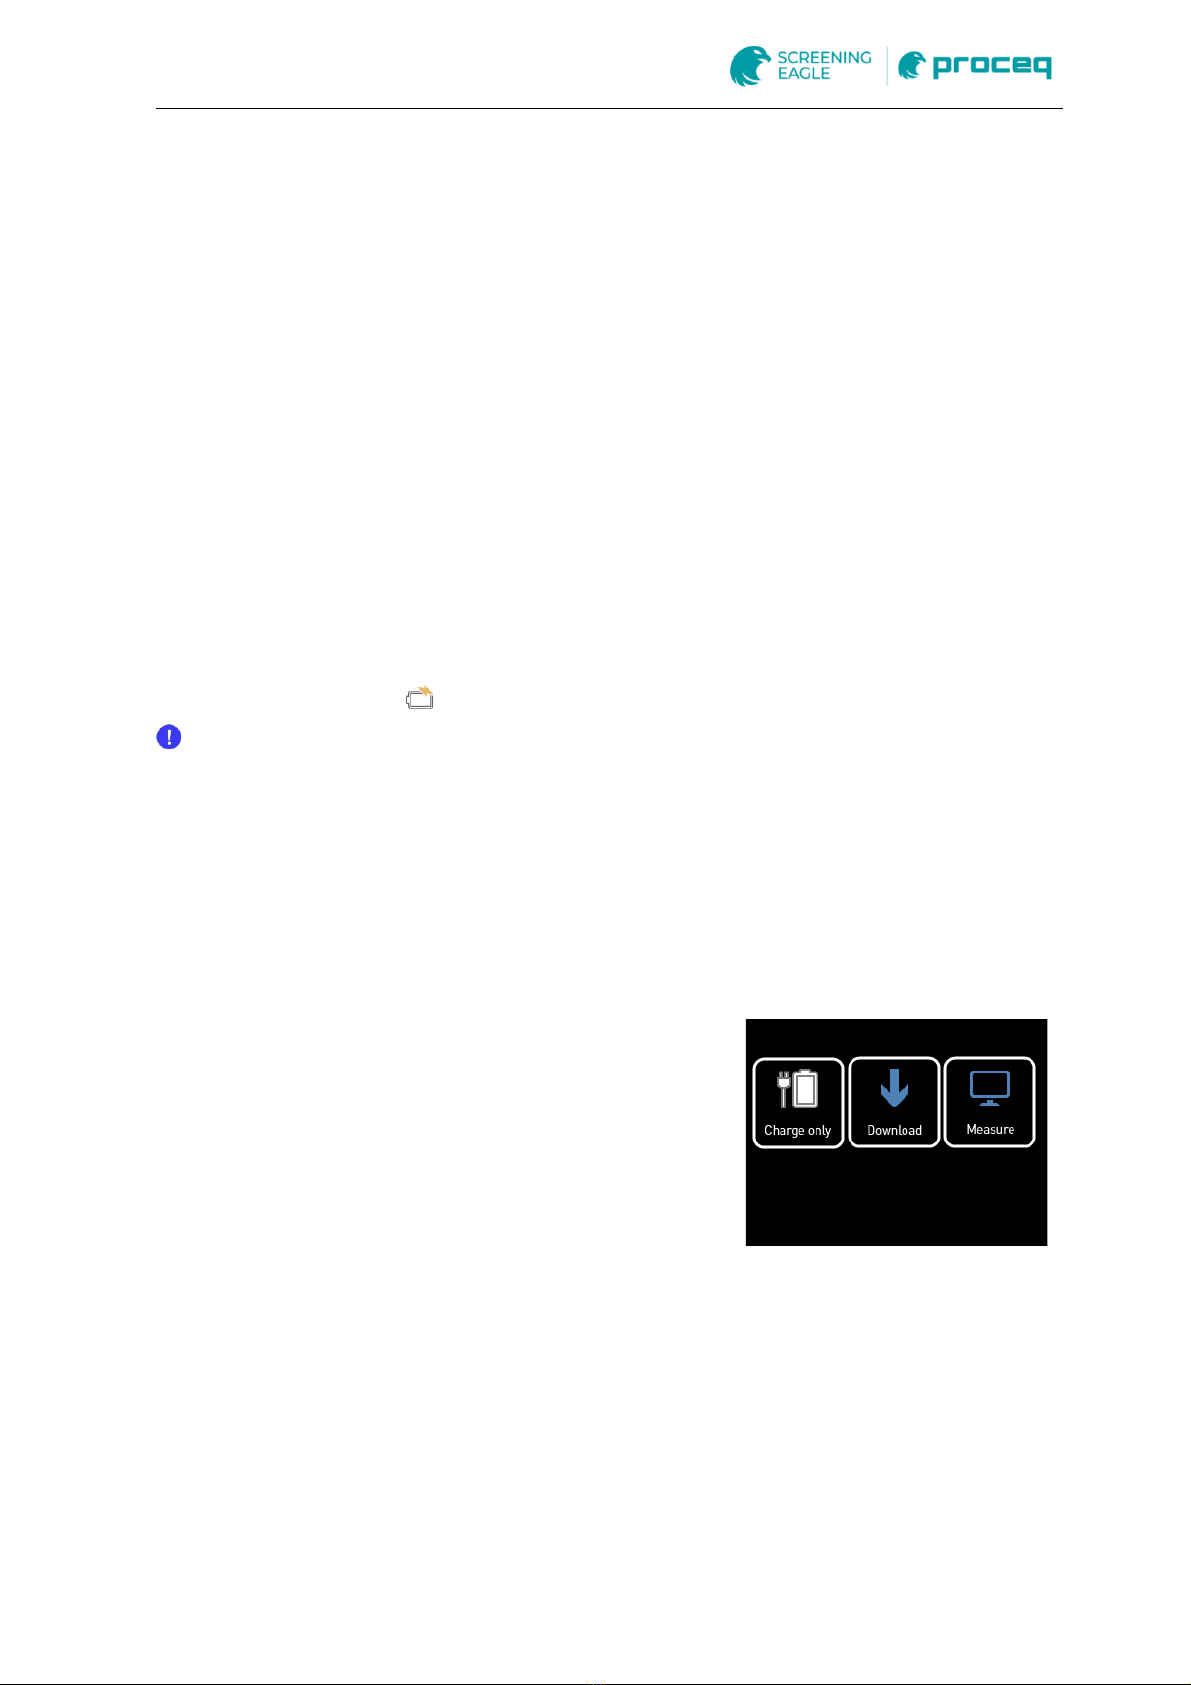
4.5.1 Charging only .......................................................................................................... 6
4.5.2 Download ................................................................................................................ 7
4.5.3 Measure .................................................................................................................. 7
4.6 Measuring Display ................................................................................................... 7
4.7 Quick Menu ............................................................................................................. 7
4.8 Menu Structure ........................................................................................................ 8
4.8.1 Archive .................................................................................................................... 9
4.8.2 Calibrate ................................................................................................................ 10
4.8.3 Menu ..................................................................................................................... 10
4.8.4 Modes ................................................................................................................... 13
4.8.5 Reset..................................................................................................................... 14
5Operation and handling ZGM 1120......................................................................15
5.1 Calibration ............................................................................................................. 15
5.2 Measuring procedure ............................................................................................. 15
5.2.1 Using the ZGM 1130 standalone............................................................................ 15
5.2.2 Using the ZGM 1130 with “GlossTools”.................................................................. 16
6Measurement File .................................................................................................17
7How to choose the correct measuring geometry in the area of paint industry 18
8Maintenance and Cleaning...................................................................................19
8.1 Maintenance carried out by the user ...................................................................... 19
8.2 Cleaning of the aluminium housing......................................................................... 19
8.3 Cleaning of the standard ........................................................................................ 19
9Technical Specification........................................................................................20

18. May 2021 © Copyright 2021, PROCEQ SA
Legal Notices
This document can be changed at every time and without any prenotification or announcement.
The content of this document is intellectual property of Proceq SA and prohibited to be copied
neither in a photomechanical or electronic way, nor in excerpts, saved and/or be passed on to
other persons and institutions.
The features described in this instruction manual represent the complete technology of this
instrument. These features are either included in the standard delivery or available as options
at additional costs.
Illustrations, descriptions as well as the technical specifications conform to the instruction
manual at hand at the time of publishing or printing. However, Proceq SA policy is one of
continuous product development. All changes resulting from technical progress, modified
construction or similar are reserved without obligation for Proceq to update.
Some of the images shown in this instruction manual are of a pre-production model and/or are
computer generated; therefore the design/features on the final version of this instrument may
differ in various aspects.
The instruction manual has been drafted with the utmost care. Nevertheless, errors cannot be
entirely excluded. The manufacturer will not be liable for errors in this instruction manual or for
damages resulting from any errors.
The manufacturer will be grateful at any time for suggestions, proposals for improvement and
references to errors.
Damages during carriage
On receipt of the goods, check for any visible damages on the packaging. If it is undamaged
you may sign the receipt of the goods. If you do suspect by visual inspection that damage has
occurred, make a note of the visible damage on the delivery receipt and request the courier to
countersign it. Moreover, the courier service must be held responsible for the damage in writing.
If a hidden damage is discovered while unpacking, you have to inform and hold the courier liable
immediately in the following way: “When opening the parcel we had to notice that … etc.“ This
superficial checking of the goods has to be done within the time limit set by the carrier, which is
normally 7 days. However, the period could vary depending on the courier. Hence, it is
recommended to check the exact time limit when receiving the goods.
If there are any damages also inform your authorised Proceq agent or Proceq SA immediately.
Shipment
Should the device be transported again, it must be packaged properly. Preferably use the
original packaging for later shipments. Additionally, use filling material in the package to protect
the device from any shock during carriage.

18. May 2021 © Copyright 2021, PROCEQ SA 1
1 Safety notes
1.1 Symbols used
This note comprises instructions needed to follow directions, specifications, proper
working procedure and to avoid data loss, damage or destruction of the instrument.
This note signifies a warning about dangers to life and limb if the apparatus is handled
improperly. Observe these notes and be particularly careful in these cases. Also inform
other users on all safety notes. Besides the notes in this instruction manual the
generally applicable safety instructions and regulations for prevention of accidents
must be observed.
1.2 Safety notes and hints
It is strictly forbidden to open the housing of the product! If not observed, all the
guarantee and liability claims to Proceq SA will be void.
The glossmeter is exclusively intended for the determination of gloss ranges of
surfaces. Any other use is considered as not being in accordance with the intentions of
the manufacturer. The manufacturer is not liable for damage resulting from
inappropriate application. The user bears the full responsibility.
Unauthorized modifications and changes of the product are not permitted.
Reproduction without permission is not allowed.
All maintenance and repair work which is not explicitly permitted and described in the
present instruction manual shall only be carried out by Proceq SA or your authorized
Zehntner agent, failure to comply voids warranty. Always disconnect the glossmeter
from the USB port of the computer before the permitted maintenance.
Proceq SA refuses all warranty and liability claims for damages caused by usage of
the product in combination with non-original accessories, or accessories from 3rd
party suppliers.
Never unplug the USB-cable during a measurement or while the green data transfer
indication light LED (2) is on.
Never immerse the device in water or other liquids: Danger of short circuit!
Never leave the product under direct sun exposure. Always store the product in its
carrying case.
For the operation of the product all local safety regulations apply.

18. May 2021 © Copyright 2021, PROCEQ SA 2
2 Introduction
The ZGM 1130 glossmeters are for measurement of all gloss ranges on all surfaces from
matt to high gloss (up to 2000 GU).
The ZGM 1130 has an intuitive 2.4”LCD colour touchscreen for intuitive operation and easy
use.
This instrument has the following features:
Sturdy 20°, 60° and 85° measuring geometry in one device
Graphical 2.4“ LCD colour touchscreen display, switchable for right and left handed
users
A precision milled monoblock optic ensures stable and reliable gloss measurements
Ergonomic, sturdy housing with first-class quality, slip-proof through eudermic, sweat-
resistant rubber coating
Precise results within milliseconds
Powerful stray light compensation allows exact measurements of transparent objects
User friendly, multilingual user interface
Stand-alone operation or live mode with “GlossTools”
Simultaneous display of up to 3 geometries as well as up to 3 statistical values
Definition of reference and limit values for gloss measurements with colour coded
indication of „pass/fail“ information
Automatic calculation of the geometry “reflection haze H” in accordance with ASTM
D4039 at dual and triple angle versions
Automatic, adjustable prompt for calibration
Automatic calibration standard recognition
Calibration unit ensures correct positioning during calibration and protects the
calibration standard as well as the optics
Easy management of the measuring data in the instrument‘s archive
Connect to a PC/Mac using the supplied USB cable to access and print stored readings
in csv-format. No software or internet connection required
Easy evaluation of the measuring data e.g. with Microsoft Excel as well as easy transfer
of the measuring data to in-house databases
Versatile measuring and data analysis software “GlossTools” with additional features,
free of charge
Long-lasting LED illumination system
Powerful battery and universal battery charger
2.1 Scope of this document
This document is an instruction manual for the ZGM1130 Glossmeter family, which describes
the correct use of the instrument. This manual covers all models of the ZGM 1130 series
which includes 1-, 2- or also 3-angle models. Therefore, it is possible that some pictures or
functional descriptions (e.g. selection of measuring geometry) may differ from your model.

18. May 2021 © Copyright 2021, PROCEQ SA 3
3 Scope of Delivery
3.1 Standard delivery
The following parts are included in the delivery:
ZGM 1130
Content
1
ZGM 1130 glossmeter
1
calibration standard
1
microfiber cleaning cloth
1
Wrist loop
1
certificate of manufacturer
1
certificate of calibration
1
carrying case
3.2 Software
A software for windows PCs is available to connect to the device. This software allows to
read data from the device.
The GlossTools software is available for download on the Proceq website.

18. May 2021 © Copyright 2021, PROCEQ SA 4
Part of this package are also two APIs, which allow automized measurement:
Labview programming interface
„GlossTools“ programming interface (.NET API)
Proceq refuses all warranty and liability claims for damages caused by usage of the
ZGM 1130 in combination with non-original accessories, or accessories from 3rd
party suppliers.

18. May 2021 © Copyright 2021, PROCEQ SA 5
4 Device Overview
1. Touch Display
2. USB Interface
3. Calibration standard
4. Measuring button
5. Measuring opening
(1)
(2)
(3)
(4)
(5)

18. May 2021 © Copyright 2021, PROCEQ SA 6
4.1 Display
The ZGM 1130 is equipped with a touchscreen (1) in order to receive inputs from the user.
4.2 Measuring Button
The measuring button (4) is used to start, stop measurements or to switch the device off if
configured. It is also used to exit the menu from any point and return back to the measuring
window. Beside this it has the following functions:
Trigger a single measurement
Start / stop a scan measurement
Start / stop interval measurements
4.3 Power Supply
The ZGM 1130 is powered by an internal rechargeable battery which can be charged over
the USB port. Either a standard PC USB port or a high power USB charger like included in
the delivery of the ZGM 1130 can be used.
However, special attention should be payed to the USB cable since fast charging can only
be reached when the supplied cable is used.
If the device is charging, will be displayed in the upper right corner of the display.
Only a Zehntner Service Center is allowed to replace the battery.
4.4 Automatic System Check
The ZGM 1130 provides an automatic system check functionality. The device is turned on
when placed on the calibration standard a system check will be performed during the startup
phase. Whenever needed, the system will inform you about possible issues and instruct you
to carry out the necessary steps to eliminate the problem.
4.5 Connectivity
The ZGM 1130 is equipped with a USB interface (2) which
allows to download measurement files and to control the
device. In order to use the ZGM 1130 together with the
“GlossTools” software, the software needs to be installed
first. To connect the ZGM 1130 with a PC no additional
drivers are necessary. If the device is connected the first
time to a PC, the necessary driver will be installed
automatically. When the ZGM 1130 is recognized by the PC
the shown pop up window appears on the touchscreen
where three different connection modes are available.
4.5.1 Charging only
In charging mode the device will be charged from the PC over USB but no data connection
will be established. This mode is used when further measurements should be taken with the
device but the battery is critically low.

18. May 2021 © Copyright 2021, PROCEQ SA 7
A battery charging symbol will be displayed in the upper right corner of the display when
charging.
The ZGM 1130 can be charged either via a USB PC connection or with a USB wall charger.
The latter will charge the ZGM 1130 faster than the USB PC connection.
4.5.2 Download
This mode connects the ZGM 1130 as a flash drive to the PC, and enables the user to
download measuring files directly from the device to the PC without installing any other
software. Additionally, the device will also be charged in this mode.
4.5.3 Measure
The measure mode should be chosen when the device is used in conjunction with
“GlossTools” or any other software. Additionally the device will also be charged in this mode.
4.6 Measuring Display
The measuring display is the main display and is shown when the device has been started.
It has two different views which can be set-up in the menu. Detailed view shows more statistic
information, while Simple view shows less but gives a better readability.
Simple View Detailed View
The status bar in the upper part of the display provides information about the battery
condition, the measurement mode, name of the current measurement file and number of
measurements.
4.7 Quick Menu
The quick menu gives short access to all vital functions. It is
accessible through a single touch on the touchscreen when
the measurement window is shown.

18. May 2021 © Copyright 2021, PROCEQ SA 8
4.8 Menu Structure
The table below shows the menu structure of the ZGM 1130.
Pass / Fail
20°
60°
Archive
New File
Open File
View Data
20°
60°
85°
Calibrate
Off
Calibrate
Calib. value
Basic
Simple
Menu
20°
60°
85°
Language
Standard
Sequence
Delete last
measurement
Mode
Delete
Right Hand
Orientation
Upper Limit
Lower Limit
View
Pass / Fail
Angles
Setup
Interval
off switch
Interval time
%
G
Info
Date / Time
Units
Interval
Date
Time
Auto off time
Last calibration
Next fact. calib.
Calibration code
Firmware
S/N
Setup
Off
System

18. May 2021 © Copyright 2021, PROCEQ SA 9
4.8.1 Archive
Every measurement is stored in a measurement file.
These measurement files can be created, reopened,
viewed or deleted in the archive menu. All measurement
files are also accessible through USB.
New File
Creates a new measurement file with an individual name.
The filename must not be longer than 8 characters. If the
previous filename contains a number at the end of the
filename, the number is selected automatically when
creating a new file
Use and to select a character and or to select, add or delete a character. Please
consider that only capital ASCII characters and numbers are available. Confirm the new
filename with or discard it with .
Open File
This menu item allows to select an existing measuring file in order to add new measurements.
Choose the measurement file to proceed with from the list. Then the selected measuring file
will be loaded and the ZGM 1130 returns to the measuring window.
View Data
Measurements can also be viewed in a simple file
viewer. Open any indicated measurement file from the
list to navigate through the file. Use and to step
through the file in single steps. and jumps to the
end resp. to the beginning of the file.
Delete File
This function allows to delete whole measurement files from the ZGM 1130. Choose the
measurement file to delete from the list and confirm or decline. If the current measurement
file will be deleted, a new one named DEFAULT will be created automatically.

18. May 2021 © Copyright 2021, PROCEQ SA 10
4.8.2 Calibrate
It is necessary to calibrate the device from time to time. This is may be required particularly
if ambient conditions have been changed since the last calibration. It is recommended to
calibrate the device at least every 2 days.
This function will automatically calibrate all available
geometries against a calibration standard. The current
calibration values are shown on the entry window of a
calibration. These can be changed within the setup menu
(e.g. for calibration on a second standard). When pressing
the Calibration button the ZGM 1130 moves on with the
calibration. If the device is not placed on the calibration
standard a message is shown on the display.
After the device has performed a calibration, a summary will
be shown indicating which angles exceeding a certain tolerance.
Confirm the calibration with or discard it with .
This angle has been calibrated successfully without any error.
This angle has been calibrated successfully without any error but the device
has not been placed on its calibration standard.
An error occurred during calibration. Please consider the message shown.
4.8.3 Menu
The menu items gives the user access to all settings of the device.

18. May 2021 © Copyright 2021, PROCEQ SA 11
Off - Switches the ZGM 1130 off.
View
The view of the display can be set-up to either a Simple View which improves readability of
the measuring display, but shows less detailed statistic information or to a Detailed View
which shows more detailed statistic information but in a smaller font.
Simple View
Detailed View
x: Shows the average value of all measurements taken within a sequence
“n” stands for number of measurements
Hi: Shows the highest measured value
Lo: Shows the lowest measured value
All statistic values refer to the current sequence of measurements and will be reset when a
new sequence has been started.
Orientation
Turns the display for right or left hand use.

18. May 2021 © Copyright 2021, PROCEQ SA 12
Pass / Fail
Switches the Pass / Fail functionality for all supported
angles on or off.
20 ° 60 ° 85° & H
Lower and higher limits can be defined for each
supported angle individually. If the measured value is
below or above of these values the measured value will
be marked with a or .
Angles
Each supported angle can be turned on or off separately,
but only up to three angles at one time can be measured.
Please be aware that reflection haze is only
available on devices supporting 20° and 60°
measuring angles.
H = 60° value –20° value
Setup
Language
Choose one of the shown languages. The selected
language will be applied immediately.
Interval
Set-up the second function of the measure button. When
“Interval” is chosen, the device conducts measurements
in the given interval as long as the measuring button is
pressed. If the option “Off Switch” is chosen, the device
will turn off after holding the measuring button pressed for
3 seconds. The interval time can be set in the
corresponding menu.

18. May 2021 © Copyright 2021, PROCEQ SA 13
Units
The measured values (except Haze) can be displayed
either in Gloss Unit (GU) or as a percentage relative to the
selected measuring angle.
100% @20° ≡ 2037 GU
100% @60° ≡1000 GU
100% @85° ≡ 161 GU
Date / Time
Set up date, local time and the time in minutes after the
device will turn off when not used. If Auto Off Time is set
to “0” the device will not switch off automatically.
Info - General information about the device will be shown
here e.g. when the factory calibration expires and a
recalibration from the manufacturer is recommended.
4.8.4 Modes
The ZGM 1130 supports three different measure modes.
Standard and Sequence mode are used to trigger one
measurement at a time. Whereas Scan mode measures
continuously with high speed as long as the measure button
is pressed. This enables to measure an average value over
a much larger area than just the measuring area itself.
In Standard mode, only single measurements are taken
and the statistic values are reset when the mode has been changed or the same mode has
been chosen again.
In Sequence mode, the number of single measurements which should be made and lead to
an average value can be predetermined. The statistic values are reset after this predefined
number of single measurements, when the mode has been changed or the same mode has
been chosen again.
In Scan mode, the ZGM 1130 measures with high speed as long as the measuring button is
pressed. All single measurements completed during that time lead to one single average
value which will be added to the statistic display. Treated as one measurement. The statistic
values are reset when the mode has been changed or the same mode has been chosen
again.

18. May 2021 © Copyright 2021, PROCEQ SA 14
4.8.5 Reset
To reset the device press the reset button through the hole at the bottom of
the device with a paper clip or something similar.

18. May 2021 © Copyright 2021, PROCEQ SA 15
5 Operation and handling ZGM 1120
The following paragraph guides through how gloss should be measured with a ZGM 1130.
Beside this the following notes shall be considered:
Proper measurements are only possible on even, clean and unscratched surfaces.
Always indicate the used measuring geometry for all measurements.
Measurements of different geometries can neither be compared nor converted into
another.
All the models of the ZGM 1130 series are equipped with an automatic adaptation of the
measuring range, which makes them capable of measuring even specimen in the extended
measuring range with values between 200 and 2000 gloss units. This enables you to
measure even specimens with high reflectance like mirrors or metallic specimens.
5.1 Calibration
Before a series of measurements is being started the device should be calibrated. In order to
do a calibration follow the steps below:
Clean the calibration standard with a microfiber cleaning cloth.
Place the ZGM 1130 on the calibration standard and start the device.
Open the quick menu with a single tip on the touch screen and select “Calibrate”.
Double check the stated calibration values with the values on the bottom side of the
calibration standard. If they match proceed by pressing “Calibrate” or set-up the correct
values by pressing the “Setup” button.
Now, the ZGM 1130 performs a calibration on every angle and shows a calibration
summary when finished.
Accept or cancel the calibration.
Beside the provided calibration standard any other standard with a known value and
appropriate size can be used for calibration.
5.2 Measuring procedure
The ZGM 1130 can be used as a standalone device or in conjunction with the “GlossTools”
software and a PC.
No matter if the ZGM 1130 is used standalone or with “GlossTools” the specimen should be
larger than the measuring area of the device (see section 9).
The center of the device’s measuring area is marked in longitudinal direction with
on its housing.
5.2.1 Using the ZGM 1130 standalone
If the ZGM 1130 is used without connection to a PC measurements are stored by default in
a measurement file. Please follow the steps below:
Create or select a measurement file in the archive menu (see section 4.8.1)
Chose a measurement mode in the quick menu (see section 4.8.4)
Chose the appropriate measuring geometry in the setup menu (see section 7)
Trigger measurements with the measurement button.

18. May 2021 © Copyright 2021, PROCEQ SA 16
5.2.2 Using the ZGM 1130 with “GlossTools”
In order to use the ZGM 1130 connect the device via USB to a PC. When the device is
connected chose “Measure” from the pop-up menu on the device to establish a
connection with “GlossTools”. While connected measurements can be triggered
with the measurement button of the device or by software. For a detailed
explanation of the “GlossTools” software refer to the software instruction manual.
Table of contents
Other Zehntner Measuring Instrument manuals
Popular Measuring Instrument manuals by other brands

SMA
SMA SUNNY HOME MANAGER 2.0 Quick reference guide

Sperry instruments
Sperry instruments SPR-300 PLUS A operating instructions

Sper scientific
Sper scientific 850013 instruction manual

CODEL
CODEL DCEM2000 Technical manual

yellow jacket
yellow jacket 68940 Operation manual

Compressed Air Alliance
Compressed Air Alliance POM400 user manual