TIP: For ease of use, we highly recommend using a
keyboard/trackpad with your NeurOptimal®tablet if you plan
to use an external monitor with it. You can gain access to your
monitor by moving the mouse pointer all the way to the right
(and off) of your tablet screen. The mouse pointer will then
appear on the Client monitor. To bring the mouse pointer
back to the tablet screen, move the mouse all the way to the
left of the Client monitor.
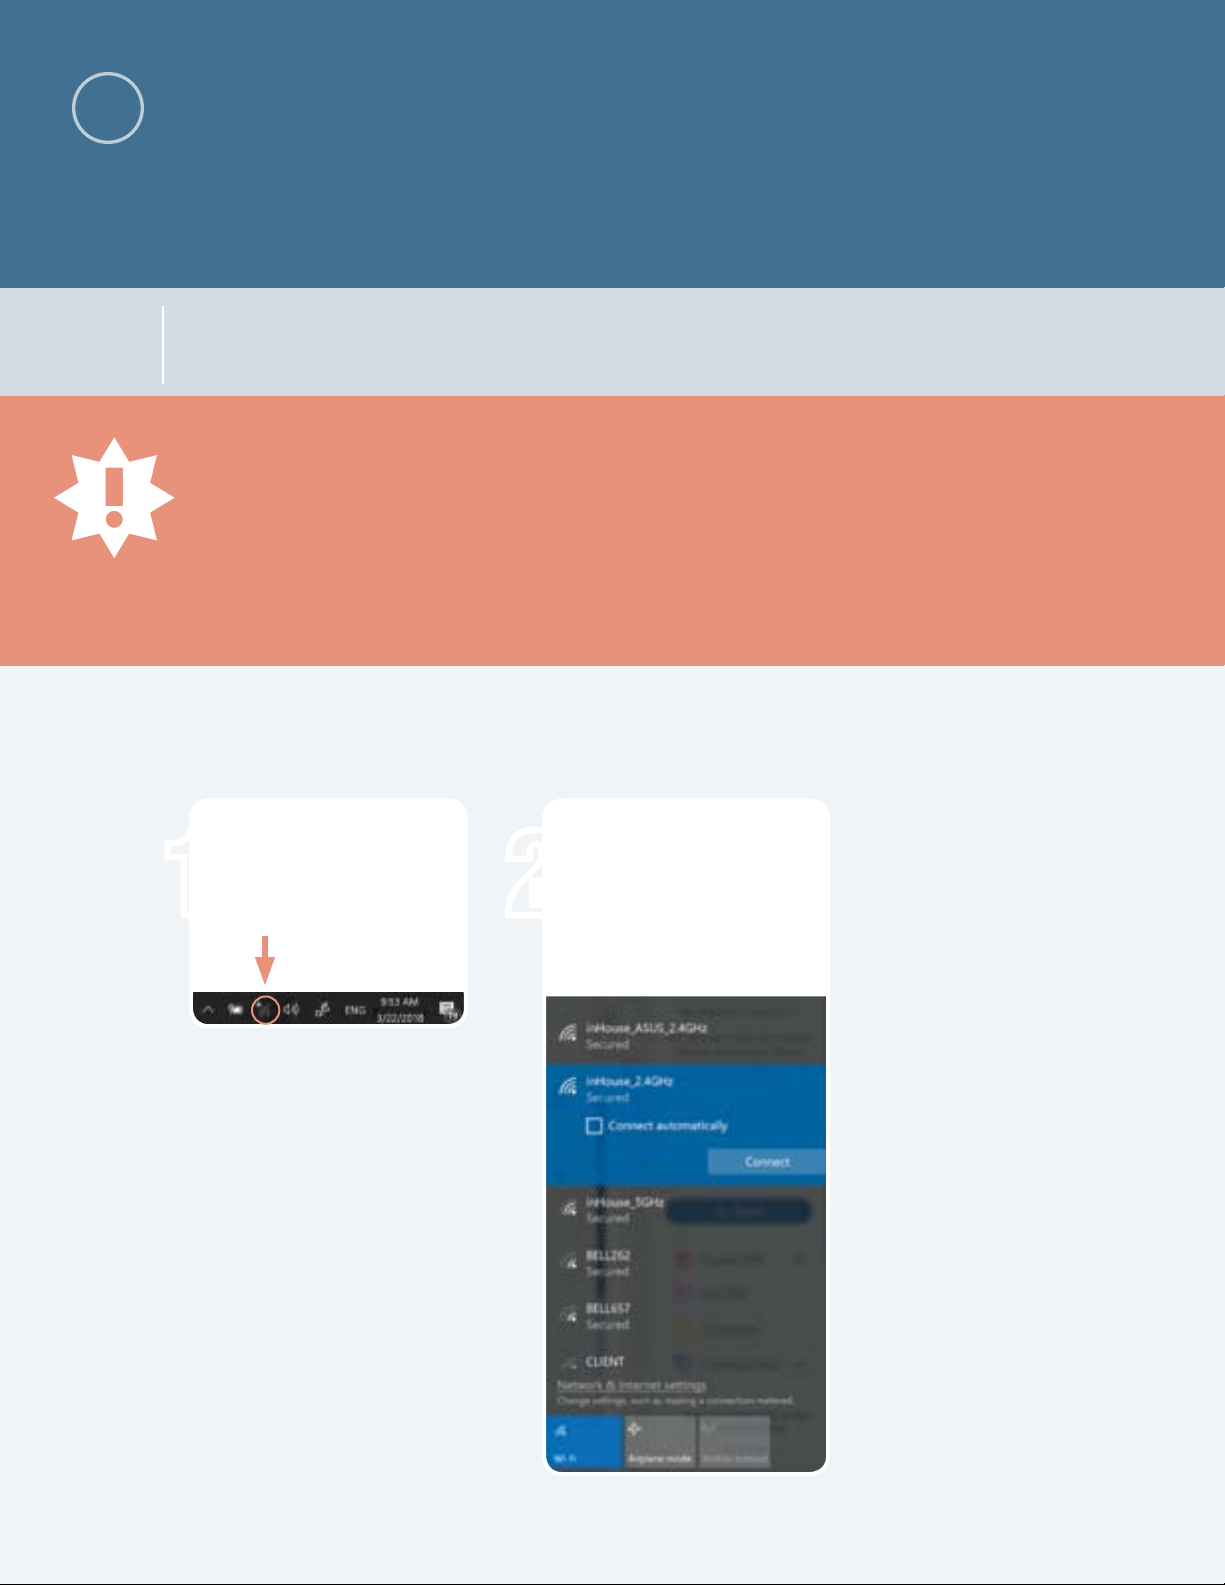
NOTE: Your system has been configured to
boot into dual monitor (“extended desktop”) mode
so your Client can see their own screen. These
instructions are included only in case you have to
reset it.
Tap “Project”
Select
“Extend”
Power up your NeurOptimal®system. If
you see the NeurOptimal®wallpaper on
the Client monitor you can continue to
the next section. If not, tap the “Action
Center” icon at the bottom right of your
screen and continue with Step 2
Repeatedly press the “input select”
button (to the left of the power
button) until HDMI is selected
Setting Up the Client Monitor B
Connecting your Equipment
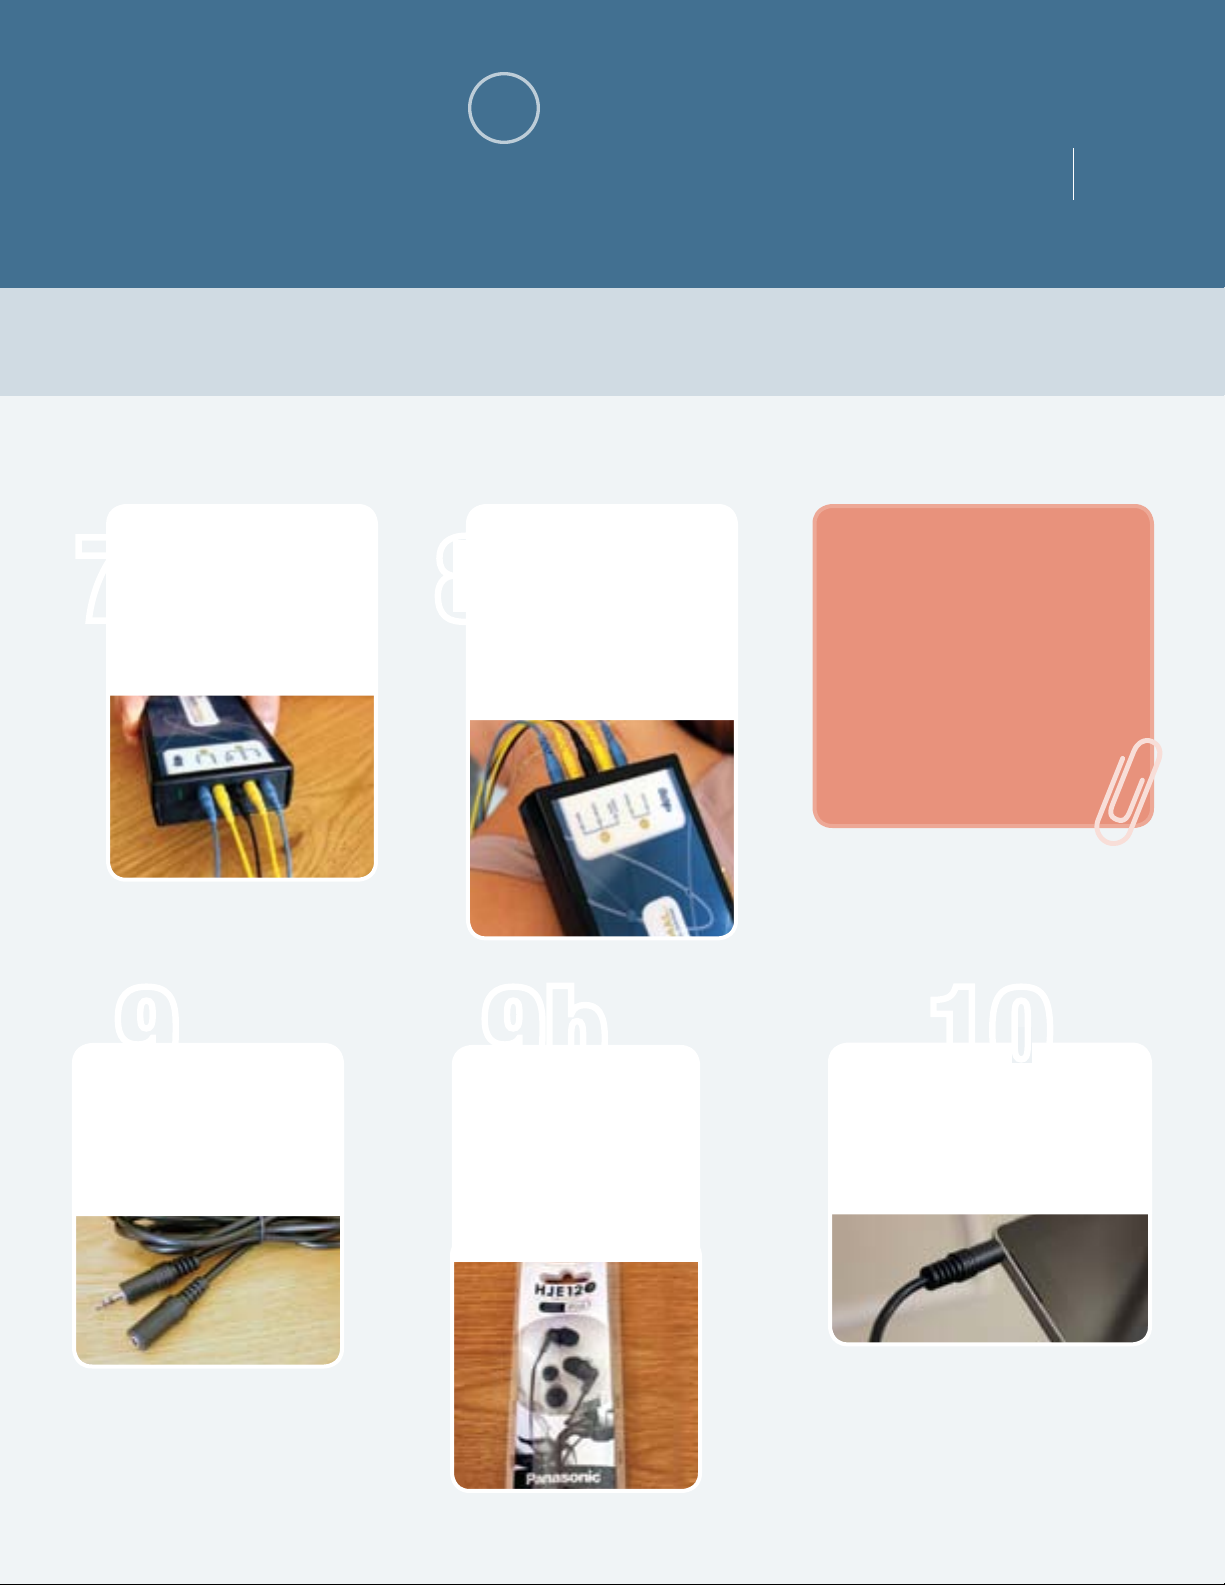
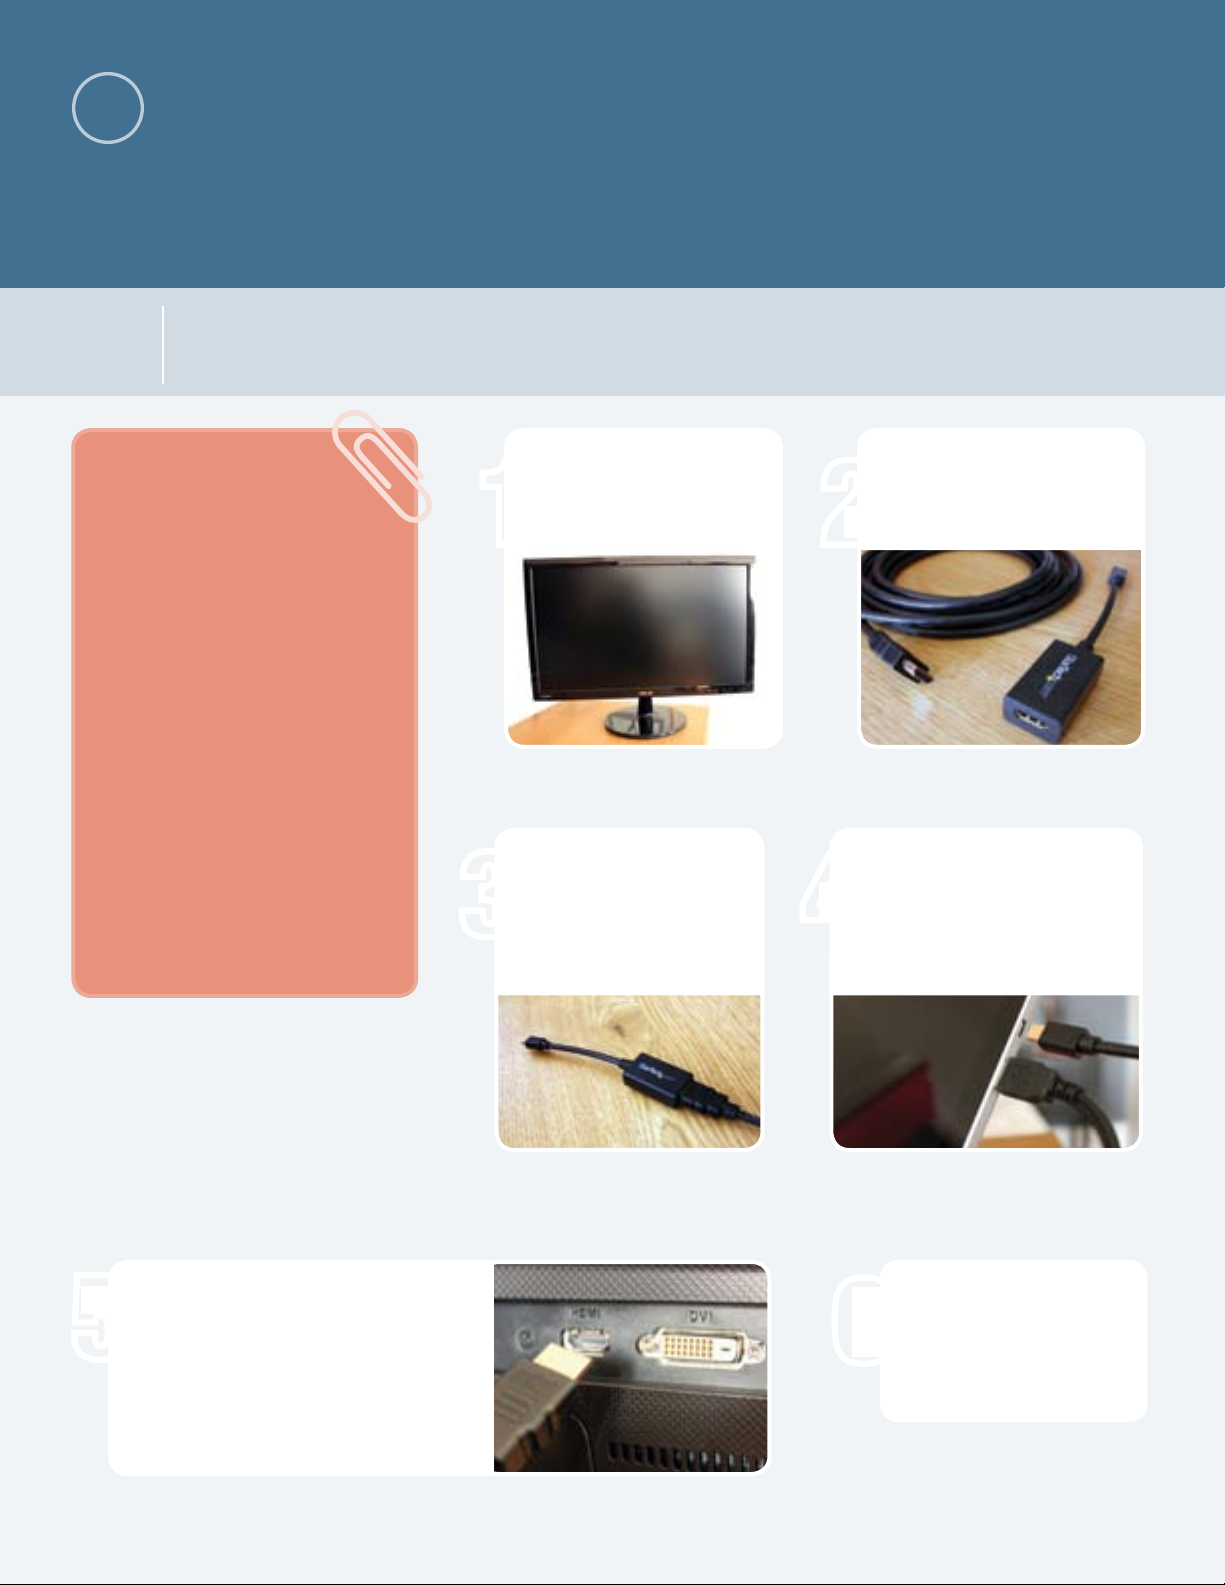
1
9
10
8
7
9