Zenith HydroTap G5 UltraCare BCU 40 User manual

807041NZ v1.00 03.21 HydroTap G5 UltraCare User guide 1
User Guide
HydroTap G5
UltraCare BCU 40
®
Visit our website to download the manuals

807041NZ v1.00 03.21 HydroTap G5 UltraCare User guide
2

807041NZ v1.00 03.21 HydroTap G5 UltraCare User guide 3
Contents
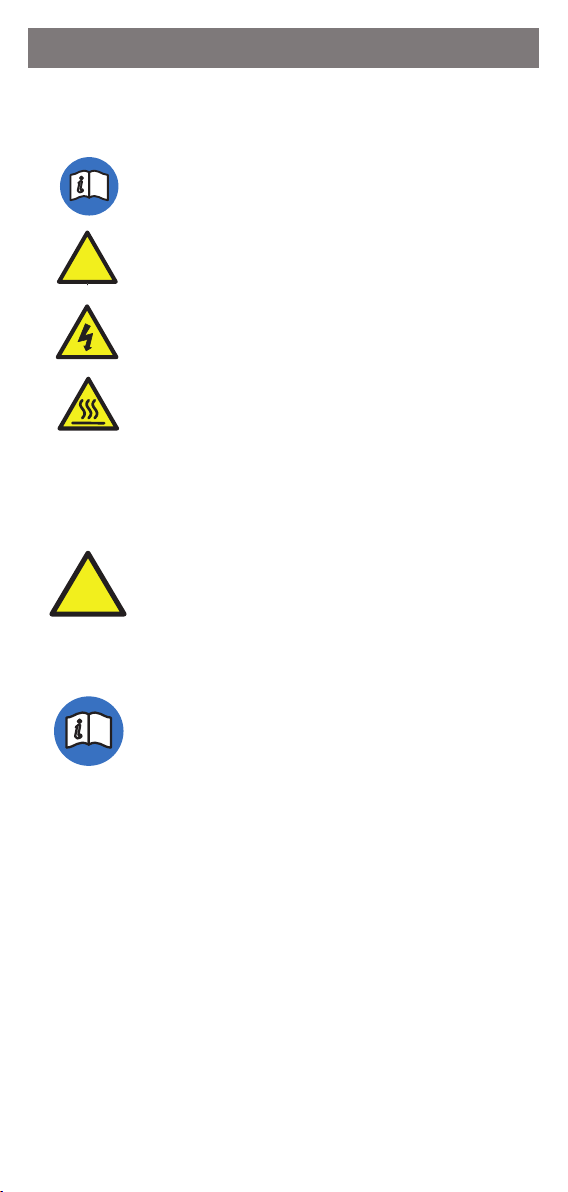
SECTION 1: SAFETY ....................................5
1.1 Explanation of symbols .......................................... 5
1.2 Before you start ..................................................... 5
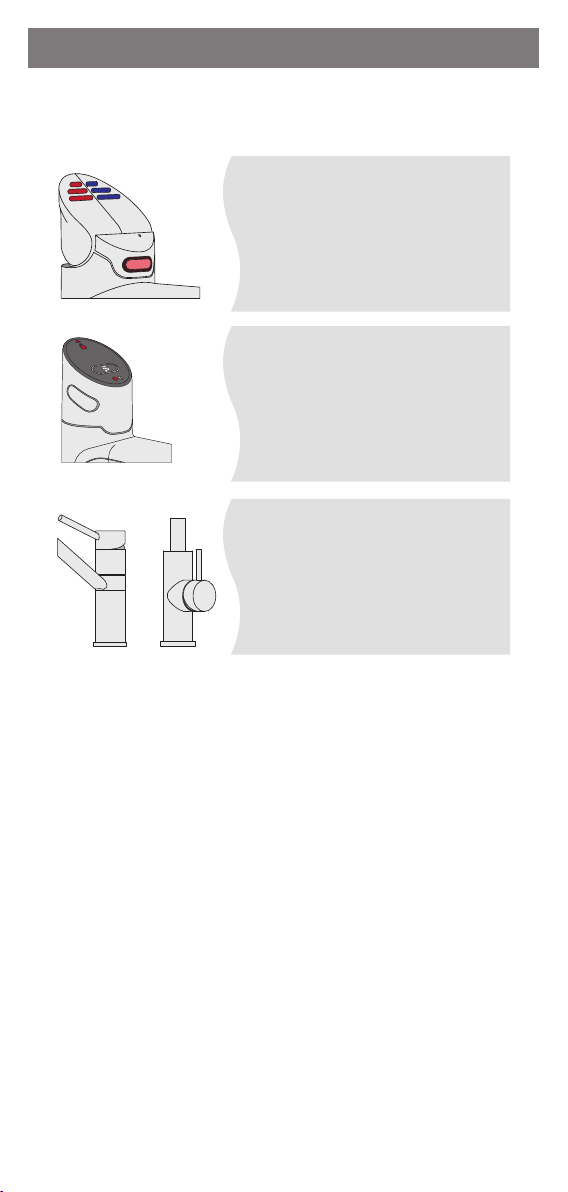
SECTION 2: Tap operation ..........................6
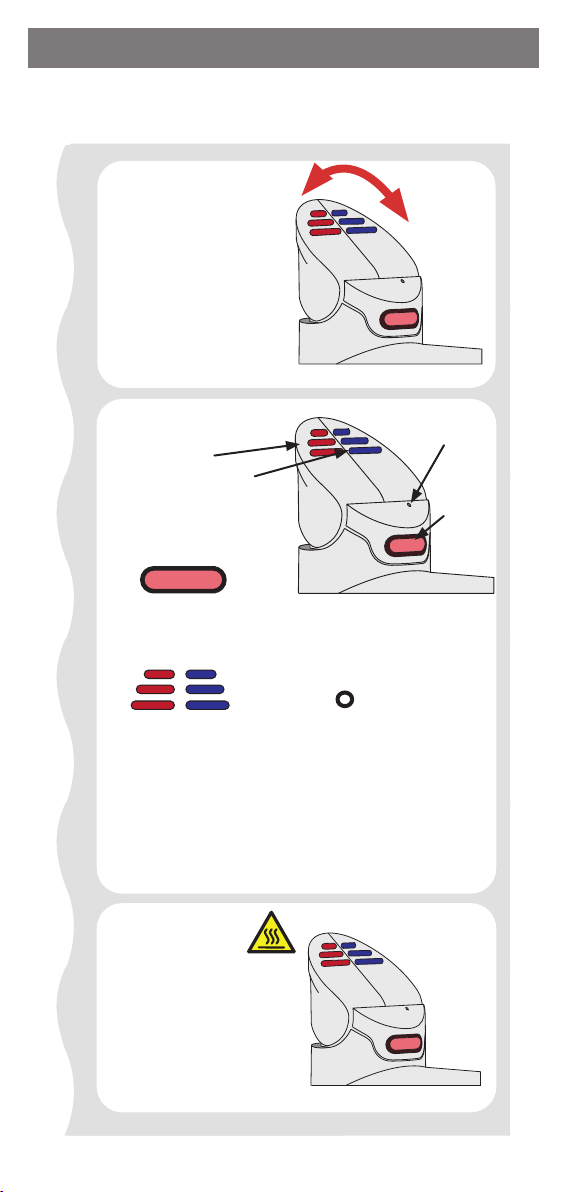
2.1 Classic .................................................................... 7
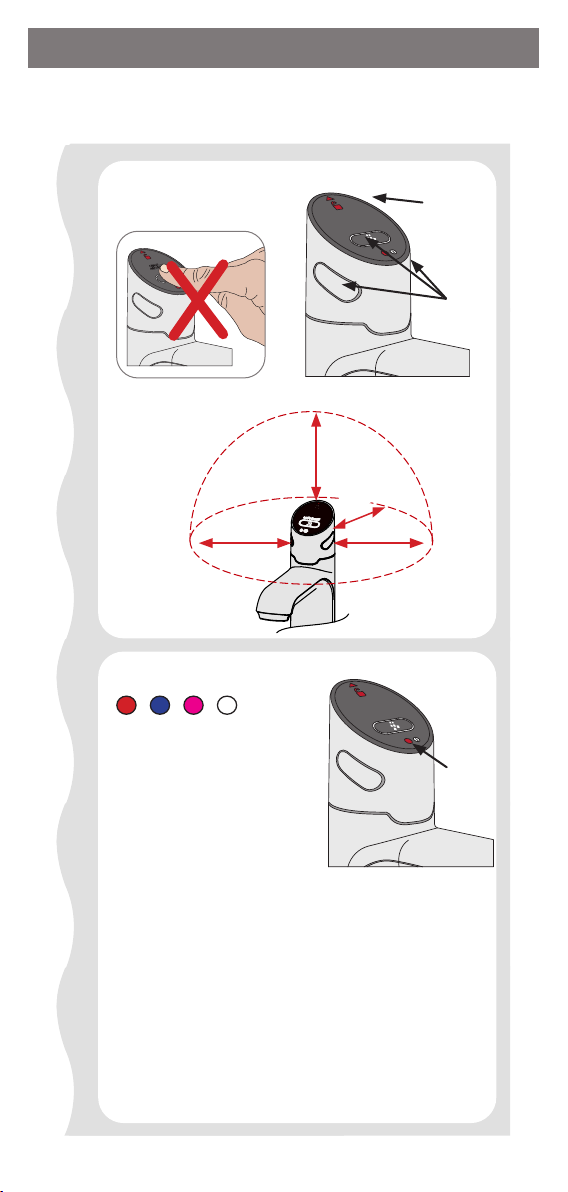
2.2 Touch-Free Wave ................................................. 8
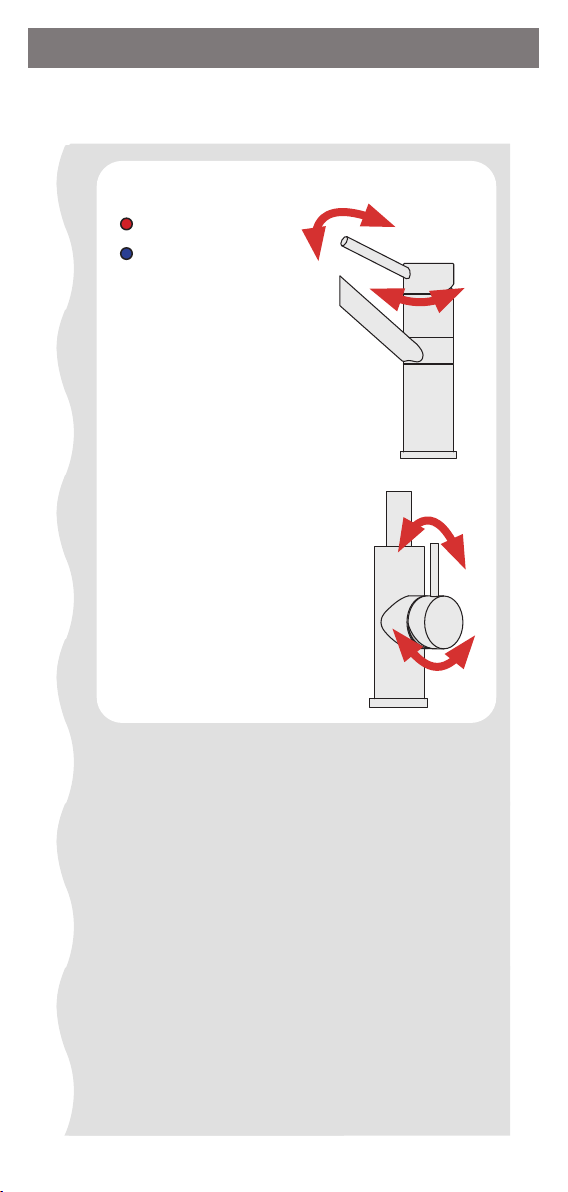
2.3 HydroTap Mixer taps............................................. 10
SECTION 3: Command Centre Screen..........11
3.1 How to use the Command Centre screen ............. 11
3.2 Home screen......................................................... 13
3.3 Main menu ............................................................ 14
3.4 General settings ................................................... 14
3.5 System settings ..................................................... 16
3.5.1 Filter settings....................................................... 17
3.5.2 Temperature settings ......................................... 20
3.5.3 Dispense times.................................................... 22
3.5.4 Light sensor........................................................ 22
3.5.5 Quiet mode......................................................... 23
3.5.6 Advanced settings 1............................................ 23
3.5.7 Advanced settings 2 (Wave Tap only)................. 24
3.5.8 System restart..................................................... 24
3.6 Safety & security.................................................... 25
3.6.1 Boiling safety....................................................... 25
3.6.2 Passcode protect ............................................... 26
3.7 Energy saving ........................................................ 27
3.7.1 Sleep mode ......................................................... 27
3.7.2 On/Off Timer...................................................... 28
3.7.3 Energy Use.......................................................... 29
3.8 Info & logs ............................................................. 30
SECTION 4: User maintenance....................31
4.1 Changing the internal filter ................................... 31
4.2 Air inlet filter maintenance .................................. 33
4.3 Cleaning ................................................................ 34
4.4 UV-C module........................................................ 35
4.5 Safety solenoid...................................................... 36
4.6 Chilled hose and tap tube..................................... 37
4.7 In-field sanitisation................................................ 38
Sanitisation procedure ............................................... 39
Maintenance log.........................................41

807041NZ v1.00 03.21 HydroTap G5 UltraCare User guide
4
• Navigate to the register product menu.
• Scan the QR code and follow the on screen steps to
register your product.
MAIN MENU 12:12 PM
General
Settings System
Settings Safety &
Security Energy
Saving
Info &
Logs Product
Serial No. Register
Product Service
Technician
[ ]
[ ]
Register product
REGISTER PRODUCT 12:12 PM
Congratulations on
purchasing a HydroTap
system.
Scan the QR code on your
phone to register your
product.

807041NZ v1.00 03.21 HydroTap G5 UltraCare User guide 5
!
!
1.1 Explanation of symbols
Read the instructions
WARNING
!
!
Danger of electric shock
!
!
Hot surface
SECTION 1: SAFETY
1.2 Before you start
Read the WARNINGS and PRECAUTIONS.
Download & read the complete Command
Centre installation instruction manual and
user guide.
!
Read and use the instructions supplied
with individual kit components for a
safe use and installation of replacement
consumables.

807041NZ v1.00 03.21 HydroTap G5 UltraCare User guide
6
SECTION 2: Tap operation
Touch-free
Touch-Free Wave
page 8
BOILING
CHILLED
CHANGE FILTER
SAFETY
Classic
page 7
HydroTap Mixer Taps
page 10

807041NZ v1.00 03.21 HydroTap G5 UltraCare User guide 7
BOILING
CHILLED
CHANGE FILTER
SAFETY
SECTION 2: Tap operation
2.1 Classic
BOILING
CHILLED
CHANGE FILTER
SAFETY
Controls
Push for manual
dispense
Pull for bottle fill
(timed dispense)
Lights
BOILING
CHILLED
CHANGE FILTER
SAFETY
Dispense options
Boiling ready
Chilled / sparkling
ready
Filter
Use boiling, chilled,
sparkling, or ambient
lever to dispense your
water choice.
BOILING
CHILLED
CHANGE FILTER
SAFETY
SAFETY
BOILING
CHILLED
CHANGE FILTER
SAFETY
SAFETY
ON
Ready to dispense.
FLASHING SLOWLY
Water temperature is not
at set point
FLASHING QUICKLY
System fault
BOILING
CHILLED
CHANGE FILTER
SAFETY
SAFETY
FILTER
Safety
lock
OFF
Filter within lifespan.
FLASHING SLOWLY
Change filter.
ON active
OFF inactive
!
!

807041NZv1.0003.21HydroTapG5UltraCareUserguide
8
SECTION 2: Tap operation
2.2 Touch-Free Wave
Touch-free
Controls Touch-free
sensors on the tap top,
back and sides.
Touch-free
Lights
Dispense
sensors
Safety
sensor
(at back)
Light
Touch-free
Touch-free
Clearance requirements
100mm 100mm
100mm
100mm
RED Boiling & safety
sensors activated, water
dispensed.
BLUE Chilled sensor
activated, water dispensed.
WHITE Sparkling sensor
activated, water dispensed.
PURPLE Lock mode on (when tap is idle).
Flashing RED Sensor activated incorrectly; hand
may be too close to sensor, sensor has been
touched or covered.
WHITE / BLUE / RED Cycling 5 to 10 seconds
Filter needs replacing, CO warning (G5), unit
is in an error mode (refer to Command Centre
screen).
WHITE Flashing rapidly Sensors calibrating when
power is first applied to the tap. Allow 10 seconds.

807041NZ v1.00 03.21 HydroTap G5 UltraCare User guide 9
SECTION 2: Tap operation
2.2 Touch-Free Wave continued
Dispense options
Sensor range 1 - 4cm.
To dispense, hold hand within range of the
sensors.
Tap will not operate and light will flash if the
sensors are touched or if your hand is too close.
+
Boiling Water
!
!
Chilled
Ambient
Sparkling
!
!
1 – 4cm
Boiling
Side + Rear sensor:
Bottle fill
(timed dispense)
Top + Rear sensor:
Bottle fill
(timed dispense)

807041NZv1.0003.21HydroTapG5UltraCareUserguide
10
SECTION 2: Tap operation
2.3 HydroTap Mixer taps
Controls mixed water
Hot
Cold
Lift and rotate the lever
to dispense mixed
warm water.

807041NZ v1.00 03.21 HydroTap G5 UltraCare User guide 11
SECTION 3: Command Centre Screen
3.1 How to use the Command Centre screen
The Command Centre has a colour touch screen liquid
crystal display.
The screen turns OFF after 5 minutes of non-use. Touch
the screen to reactivate.
Navigate to the required screen. Here's an example :
Set the language - from the home screen
Touch the ‘top left’ icon to navigate to the main menu.
Then touch the general settings icon to navigate to the
general settings menu.
MAIN MENU 12:12 PM
General
Settings System
Settings Safety &
Security Energy
Saving
Info &
Logs Product
Serial No. Register
Product Service
Technician
[ ] [ ]
Touch the language icon to navigate to the language
screen.
Touch the relevant icon to choose the language.
[ ] [ ]
(To go back)
(To return to the home screen)
[ ]
[ ]

807041NZ v1.00 03.21 HydroTap G5 UltraCare User guide
12
OFF screen
Touch the power button to turn the Command Centre ON
or OFF. The LCD screen visually shows OFF when it is non-
operational.
You will hear the sound of an internal “click” as the
HydroTap Command Centre turns ON or OFF.
When OFF, all functions are disabled including heating,
chilling, filling and dispensing.
Turning the power back ON will reset the system of any
faults.
SECTION 3: Command Centre Screen

807041NZ v1.00 03.21 HydroTap G5 UltraCare User guide 13
3.2 Home screen
Status screens shown here are representative and may vary.
Use the home screen to monitor the HydroTap status.
Touch each icon to view the system status.
Boiling temperature set
point
Chilled temperature set
point (Chilled models)
CO2 gas remaining (Sparkling models)
12:12 PM
0
%
CO2 GAS REMAINING
REPLACE
CO2 GAS
!
!
When the CO2 cylinder has approximately 20% remaining,
a warning appears to encourage you to prepare a
replacement cylinder.
SECTION 3: Command Centre Screen
Filter life remaining
A warning icon is shown when the filter needs to be
replaced. See page 27.
12:12 PMFILTER LIFE REMAINING
External %
EXT FILTER
DISABLED
!
!
UV %
REPLACE
FILTER
Internal %
100
Energy saving settings
View or modify the current active timers and sleep mode
actions. See page 27.

807041NZ v1.00 03.21 HydroTap G5 UltraCare User guide
14
SECTION 3: Command Centre Screen
3.3 Main menu
Use the Main menu to configure your HydroTap and
access features and settings. Touch each icon to access
further options.
MAIN MENU 12:12 PM
General
Settings System
Settings Safety &
Security Energy
Saving
Info &
Logs Product
Serial No. Register
Product Service
Technician
3.4 General settings
Language
[ ]

807041NZ v1.00 03.21 HydroTap G5 UltraCare User guide 15
SECTION 3: Command Centre Screen
Date and time
Touch the text boxes on the screen and then press + and -
to set the current date and time. Press the tick to confirm
and save.
Network
Connect to Wi Fi (available as an option with selected
products).

807041NZ v1.00 03.21 HydroTap G5 UltraCare User guide
16
3.5 System settings
SYSTEM SETTINGS 12:12 PM
Filter
Settings Temp
Settings Dispense
Times
Light
Sensor Quiet
Mode Advanced
Settings System
Restart
MAIN MENU 12:12 PM
General
Settings System
Settings Safety &
Security Energy
Saving
Info &
Logs Product
Serial No. Register
Product Service
Technician
Configure your HydroTap to suit your needs.
Navigate to system settings screen for all system settings.
SECTION 3: Command Centre Screen
[ ]

807041NZ v1.00 03.21 HydroTap G5 UltraCare User guide 17
SECTION 3: Command Centre Screen
Filter flush
Use Filter flush during commissioning of a new installation,
and after every filter change.
See page 31 for filter change instructions.
3.5.1 Filter settings
FILTER SETTINGS 12:12 PM
Filter
Reset Filter
Life
Filter
Flush Tank
Flush
Open filter door, uncoil flush line.
Direct flush line into bucket.
Open flush line tap.
Flush line tap
Flush line tap open

807041NZ v1.00 03.21 HydroTap G5 UltraCare User guide
18
SECTION 3: Command Centre Screen
Start flush.
12:12 PM
| |
FILTER FLUSH
RUNNING.....
Water is now being flushed through the filter.
This process is automatic and will take 2 minutes.
Press pause to pause filter flush.
Approximately 10L of water will
flow, for 2 minutes.
The screen will show the filter has
been flushed.
Close the flush line tap, return the
flush line to the filter compartment
and close door.
Reset the filter counter (see page 19).
Flush line tap closed

807041NZ v1.00 03.21 HydroTap G5 UltraCare User guide 19
Filter reset
FILTER RESET 12:12 PM
This will reset the usage counters for the chosen item.
Select an item and press reset to confirm.
Internal
filter External
filter UV
disinfector
Filter life
Edit the filter life and actual usage for the internal water
filter, external water filter (if fitted) or UV disinfector.
When usage exceeds the filter life, the tap lights and
screen will indicate to change the filter.
Default life settings are as follows:
• Internal water filter: 6 months or 6000L
• UV-C module unit life: 24 months
• UV-C module activated LED life: 2500 hours
Reset the filter counters after filter replacement and flush.
Life (months)
Life (litres)
12 000
Usage (days)
Usage (litres)
04000 000
INTERNAL FILTER LIFE 12:12 PM
SECTION 3: Command Centre Screen
UV Unit Life (months)
Activated LED Life (Hrs)
24 000
UV Unit Life (days)
Activated LED Usage (Hrs)
2500 000
INTERNAL FILTER LIFE 12:12 PM

807041NZ v1.00 03.21 HydroTap G5 UltraCare User guide
20
Boiling models
Default set point: 98ºC Set point range: 68-100ºC.
Operation: Within 1-2ºC of set point.
Note: Boiling water delivery rate will be affected with a
higher temperature setting. Up to 6% less energy in standby
is consumed with a 98ºC set point, rather than 100ºC.
A warning icon will appear when setting boiling set point
temperatures that are subject to pump cavitation.
COLD/HOT SETPOINT 12:12 PM
Boiling Set Point
Chill Set Point
5-9
°C
98
°C
Boiling / Chilled set point
Adjust as required.
3.5.2 Temperature settings
SECTION 3: Command Centre Screen
Chilled models
Default chill set point: 5-9ºC (Commercial).
Scroll to select alternatives.
Table of contents
Other Zenith Plumbing Product manuals

Zenith
Zenith FlushMaster Solo 42214 User manual

Zenith
Zenith HydroTap G4 User manual

Zenith
Zenith ChillTap Residential Manual

Zenith
Zenith FlushMaster 40090NZ Manual

Zenith
Zenith HydroTap G4 Celsius Series User manual

Zenith
Zenith HydroTap Classic User manual

Zenith
Zenith Surgeon 42226NZ User manual

Zenith
Zenith HydroTap G5 Instruction Manual

Zenith
Zenith HydroTap G5 User manual

Zenith
Zenith Miniboil Manual