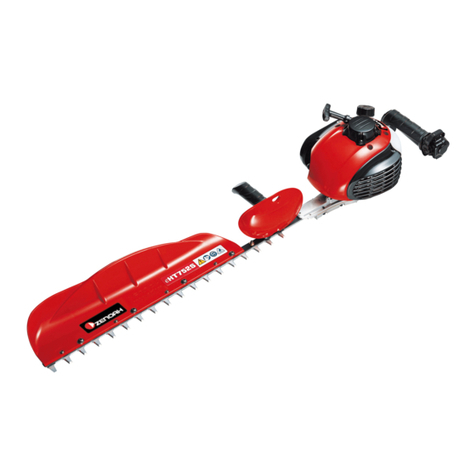
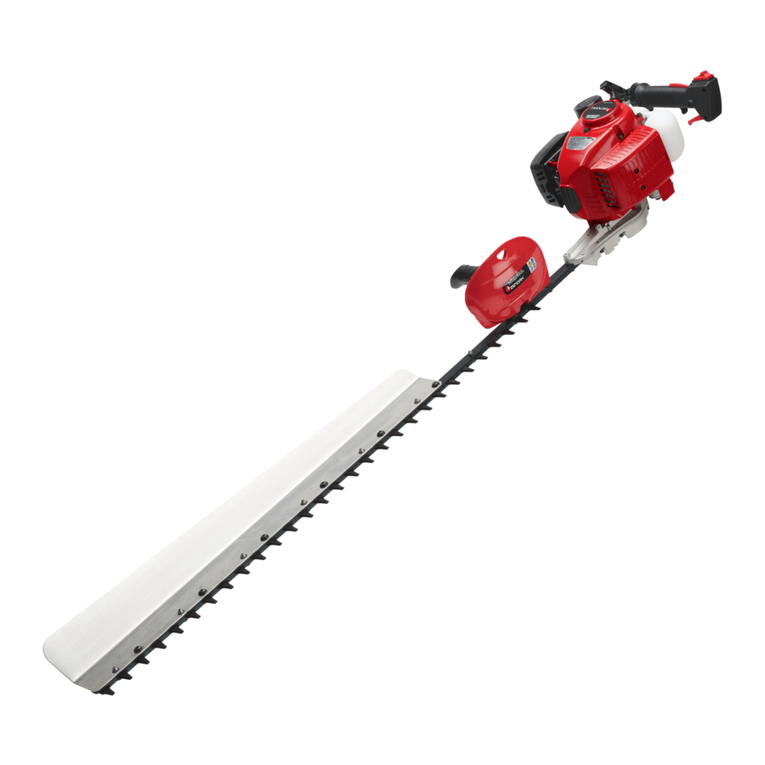
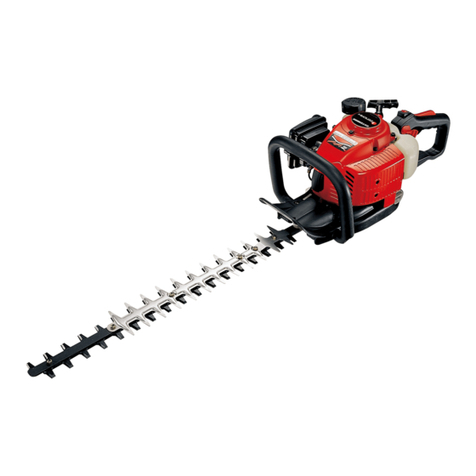
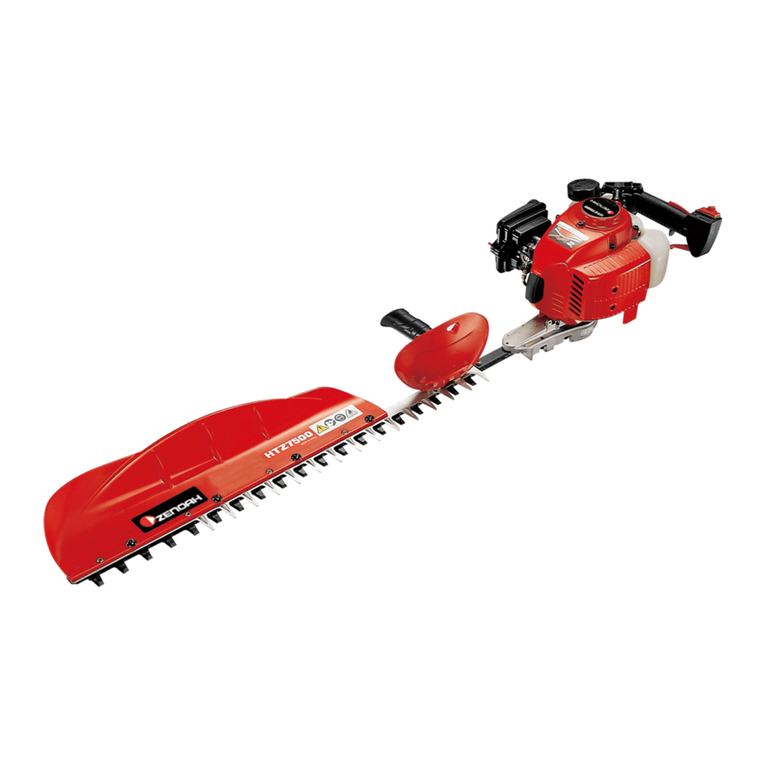
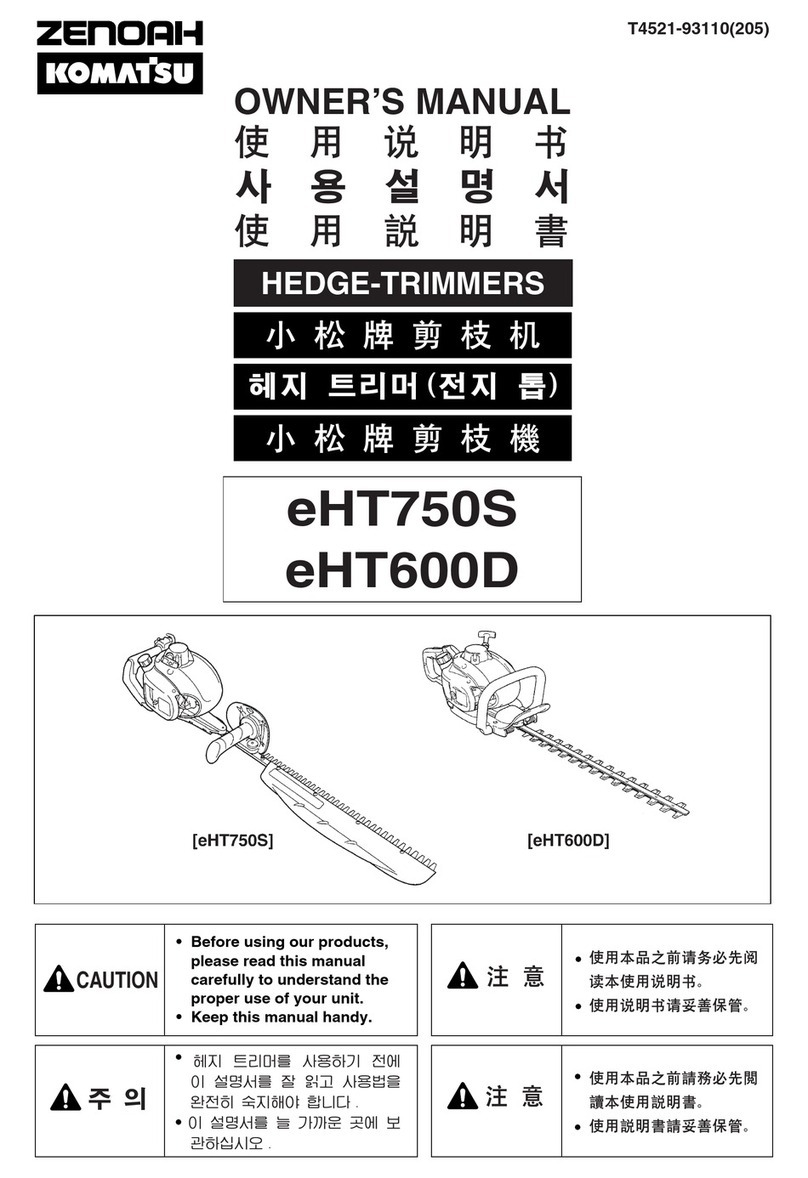
Zenoah HT220-75 User manual

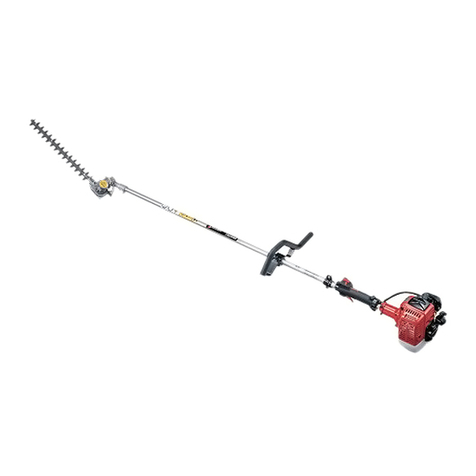
HT220-75
CHT220-60
EN Operator's manual 2-23
KO 사용자 설명서 24-45
ZH-T
W
操作手冊 46-67

2 1045 - 001 - 01.06.2020
Contents
Introduction .................................................................... 2 Troubleshooting .......................................................... 20
Safety ............................................................................ 5 Transportation, storage and disposal. ......................... 21
Operation ..................................................................... 11 Technical data ............................................................. 22
Maintenance ................................................................ 15 Warranty ..................................................................... 23
Introduction
To customers
Thank you for purchasing a Husqvarna Zenoah product.
This operator’s manual describes the correct handling of
the product, simple inspection, and maintenance.
Please read this manual carefully before and during
using this product to demonstrate superior performance
and to make sure that you can perform work
comfortably.
After reading, be sure to keep it in a safe place where
you can easily accessible for reference. Please note that
the product you purchased may not match the contents
of this manual due to improvement in the product
specifications, etc.
Service and warranty
Inquiries
For inquiries regarding this product, purchase of
consumables, and service orders, please contact your
local dealers. When inquiring, please provide the Model
name and Serial number (see the figure below).
Please feel free to contact a Zenoah dealer if you have
any notices or opinions regarding product technology
and others.
HT220-75
CHT220-60
Warranty
A warranty card is separately attached to this product.
Be sure to check the seal of the dealer name, date of
purchase, model name, and the serial number and
receive it from the dealer, read the contents carefully,
and keep it in a safe place.
Supply term of spare parts
The spare parts supply period for this product is eight
years after the discontinuation of production.
However, we may consult with you about delivery dates,
etc. regarding special parts, even within the supply
period.
The spare parts supply will terminate at the above-
mentioned supply period in principle. However, even
after the supply period has expired, if you request for
parts supply, we will discuss the delivery date and price.
WARNING: Modification of the machine is
dangerous. Do not modify this machine.
Please note that if the machine was
modified or used for a purpose different from
the intended use described in the operator’s
manual, the manufacturer's warranty will not
cover the failure of the machine.
Product description
We are continuously developing products. Therefore,
design and appearance may be changed without notice.
Note: This product is a hedge trimmer driven with a two-
cycle engine.
Purposes
This product is designed for pruning planted shrubs,
such as hedges, and tea trees.
Do not use it for any purposes other than the intended
use. Doing so may cause unexpected accidents.
Note: The use of this product may be subject to the
National regulations.
Model Name
Serial Number
Model Name
Serial Number

1045 - 001 - 01.06.2020 3
Product overview - HT220-75
1. Operator's manual
2. Fuel tank cap
3. Fuel tank
4. Choke lever
5. Spark plug cap and spark plug
6. Front handle
7. Blade
8. Rear handle
9. Engine switch
10. Throttle lever
11. Primary pump
12. Gear housing
13. Air cleaner
14. Grease nipple
15. Starter knob (recoil starter)
16. Engine cover
17. Hand guard
18. Blade cover
19. Leaf catcher
20. Tool (Combination wrench)
21. Caution label

4 1045 - 001 - 01.06.2020
Product overview - CHT220-60
1. Operator's manual
2. Fuel tank cap
3. Fuel tank
4. Choke lever
5. Spark plug cap and spark plug
6. Front handle
7. Blade
8. Rear handle
9. Throttle trigger
10. Safety lock lever
11. Engine switch
12. Primary pump
13. Frame
14. Air cleaner
15. Gear housing
16. Grease nipple
17. Starter knob (recoil starter)
18. Engine cover
19. Hand guard
20. Blade cover
21. Tool (Combination wrench)
22. Caution label

1045 - 001 - 01.06.2020 5
Symbols on the product
WARNING! This product can be
dangerous. Injury or death can occur to
the operator or bystanders if the product is
not used carefully and correctly. To
prevent injury to the operator or
bystanders, read and follow all safety
instructions in the operator's manual.
Read the operator's manual carefully and
make sure that you understand the
instructions before use.
Always wear the following:
● Earplugs (earmuffs)
● Protective glasses (goggles)
● If there is a risk of dust, wear a dust
mask.
● Wear a protective helmet where objects
can fall overhead.
WARNING! There is a risk of cutting
fingers or hands due to the sliding blades.
Keep your hands away from the blades.
Handle adjustment lock: CHT220-60
You can change the angle of the rear
handle to make it easier to work.
Wear approved protective gloves.
This symbol indicates that the type of fuel
is mixed gasoline.
This symbol indicates that pressing the
primary pump fills the carburetor with fuel.
Choke lever: open position
Choke lever: closed position
The serial number is indicated on the ID
plate.
yyyy is the year of production, ww is the
week of production, and xxxxx is the serial
number.
Product liability
Under the Product Liability Law, we are not liable for
damage arising from this product in the following cases:
● The product was repaired incorrectly.
● The product was repaired using parts not
manufactured by the Manufacturer or parts not
approved by the Manufacturer.
● The product used accessories not supplied by the
Manufacturer or accessories not approved by the
Manufacturer.
● The product was not repaired by an authorized
Service Center or an authorized Agency.
Safety
Safety definitions
Warnings, cautions and notes are used to point out
specially important parts of the manual.
WARNING: Failure to follow the instructions
described in this manual may cause a risk of
injury or death of workers or injury to people
nearby.
CAUTION: Failure to follow the instructions
described in the manual may cause a risk of
damage to the products, attachments, other
items, or adjacent areas.
Note: Indicates to provide the details needed in certain
situations.
yyyywwxxxxx

6 1045 - 001 - 01.06.2020
General safety instructions
WARNING: Please read the warning
instructions described below before working
with the hedge trimmer.
● Do not make any modifications to the machine
without the Manufacturer's approval for any reason.
Always use genuine parts. Unauthorized
modifications and accessories can cause severe or
fatal injuries to users and others.
● Never use a machine that has undergone any
modification and differs from the specifications at the
time of shipment.
● Never use the machine if it is defective. Perform the
safety inspections, maintenances, and services
according to the contents described in this operator’s
manual. Some maintenance and service contents can
only be done by experts. For the procedure, refer to
Maintenance schedule on page 15
.
● All services, repairs, especially handling of safety
devices for this machine require specific training. If
any problems are found in the machine based on the
inspection procedures described in this manual,
please contact your local dealer. Never use a product
with a defective safety device. The safety devices of
this machine must be maintained as described in this
manual. When you buy one of our products, you are
guaranteed to receive professional repair and
services.
● Always be aware that you are responsible for keeping
people, animals, and objects from being exposed to
various accidents and dangers.
Safety instructions for operation
WARNING: Please read the warning
instructions described below before working
with the hedge trimmer.
●This machine is equipped with reciprocally sliding
blades at high speed. An incorrect operation can
be very dangerous.
●Careless or incorrect handling can make the
machine dangerous and may cause serious or
even fatal injuries. You must read this manual
carefully and understand it thoroughly.
● Prolonged exposure to the noises may cause
permanent hearing damage. Always wear
approved earplugs (earmuffs) when using this
machine.
●Before using the machine, perform an inspection
of the entire machine. For the inspection time,
refer to
Maintenance schedule on page 15
.
● Do not work with this machine if you are fatigued,
after drinking, or taking any medication that may
affect your vision, judgment, or performance.
● Overtime fatigue will reduce attention and cause an
accident. Be generous in your work plan, with a
maximum of 30 to 40 minutes of continuous work and
a 10 to 20 minutes break. Also, the working time per
day should be less than 2 hours.
● Wear personal protective equipment. For more
information, refer to
Personal protective equipment on
page 7
.
● To avoid the risk of electric shock, make sure that the
plug cap and the ignition lead are not damaged.
● Workers must ensure that any persons or animals are
not within 15 m. If multiple workers work in the same
work area, always keep a safe distance of at least 15
m from each other.
● Do not let children operate this machine.
● Never allow anyone who does not understand the
contents of this operator’s Manual to operate the
machine.
● Consult your local government to ensure compliance
with the law.
● Keep all parts of your body away from the hot
surfaces of the machine.
● Do not start the machine indoors. It is dangerous to
inhale exhaust gas.
● Look around closely. Make sure that no people or
animals approach the machine. If a person
approaches the work area, close the throttle lever to
the idling position until a safe distance is secured
between the person and the work area.
● If a person with a circulatory system receives
vibration for a long period, it may cause
cardiovascular or neurological disorders. If symptoms
occur due to continued vibration, consult a physician.
Symptoms include numbness, sensory paralysis,
tingling, stabbing pain, pain, weakness, and changes
in skin color and condition. These symptoms usually
appear on the fingers, hands, and wrists. This
symptom is common in cold environments. It is
strongly recommended that the following precautions
be taken to reduce the risk of developing white finger
disease.
・ Wear thick anti-vibration gloves.
・ Take frequent breaks of 5 minutes or longer in a
warm place.
・ Always hold the handle firmly. However, avoid
grasping with excessive pressure.
・ If you have any discomfort, redness, or swelling on
your fingers or other parts of your body, seek
medical attention before they get worse.
● Engine emissions contain carbon monoxide, which
causes poisoning. For this reason, do not start or
operate the machine indoors or in places with poor
ventilation. The exhaust gas from the engine is hot
and may contain sparks, which may cause a fire.
Never start the machine indoors or near
combustible materials.
● Wait for the engine to cool before refueling.

1045 - 001 - 01.06.2020 7
● Do not operate this machine in bad weather
conditions such as intense heat, heavy fog, heavy
rain, strong winds, and severe cold. Working in bad
weather is dangerous, as it is easy to get tired and
your feet can be slippery.
● Make sure you can move freely and have a good
footing. Make sure that there are no obstacles (roots,
rocks, branches, gutters, etc.) around you if you must
dodge quickly. Be especially careful when working on
slopes.
● If you place the hedge trimmer on the ground with the
engine running, keep an eye on it.
● Do not use a chipped, cracked, or bent blades.
Neglecting this caution increases the risk of accidents.
● Use a well-sharpened blades.
● Keep all parts of the body away from the blades when
the engine is running.
● If the blades are caught with something during
operation, stop the engine and wait for the blades to
stop completely before removing blocked things.
● When the engine is stopped, keep all parts of the
body away from the blades until they stop completely.
● Check the work area in advance to make sure that
there are no metal bars, metal wires, electric wires,
etc. in the work area.
● Always operate the machine on a safe and stable
footing.
● Do not work on a ladder, step ladder, or other
unstable platforms.
● Do not operate the machine if you cannot seek help
in case of an accident.
● Be careful of flying objects while working. Always
wear protective glasses (goggles). If not, stones or
debris may get into your eyes and cause blindness or
serious injury.
● Do not operate the machine if the exhaust gas outlet
of the engine cover is blocked by a wall or other
obstruction. This machine may be damaged. During
operation, make sure that the machine is at least 50
cm away from obstacles.
● Always shut off the engine before beginning cleaning.
● When starting the machine, be sure to move from the
refueling area and start on a flat place.
● This machine can only be started when it is
assembled correctly.
● Always hold the machine with both hands. Hold the
machine in front of your body.
● Applying a strong impact to the machine or dropping
it during work or transport may cause damage. Also,
if the blades are caught with foreign objects during
work, the blades will be damaged and will cause
abnormal vibration. Inspect the machine for damage
while the engine stops. If damaged, stop work and
repair the machine.
● Confirm that all nuts, screws, and bolts are tightened
securely.
● Replenish grease according to
Grease replenishing
procedure into the gear housing on page 19
so that
the gear housing is well lubricated.
● The gear housing becomes hot during operation. To
prevent burns, do not touch the gear housing.
● When not using the hedge trimmer, always attach the
blade cover to the blades.
● This machine generates an electromagnetic field
during operation. This field can affect active and
passive medical devices in some cases. It is
recommended for anyone using medical equipment to
consult their physician and the manufacturer of the
medical equipment before beginning work with this
machine to avoid the risk of serious or fatal injury.
Personal protective equipment
WARNING: Please read the warning
instructions described below before working
with the hedge trimmer.
● Always wear approved personal protective equipment
when operating the machine. Although personal
protective equipment does not prevent injuries
completely, it can reduce the degree of injury in the
event of an accident. Consult your dealer for the
appropriate choice of protective equipment.
● Always wear approved earmuffs that reduce the noise
sufficiently. Prolonged exposure to noise can cause
permanent hearing damage.
● Wear approved protective glasses (goggles). If not,
blown branches, etc. may scatter and damage the
eyes.
● Wear protective gloves when installing, inspecting,
and cleaning the blades.

8 1045 - 001 - 01.06.2020
● Wear sturdy, non-slip boots.
● Always wear thick long pants, boots, gloves, and a
long-sleeved shirt. Do not wear loose clothing, scarves,
jewelry, etc. that can catch twigs, branches, and leaves.
Bind and keep your hair above your shoulders.
● If there is a risk of dust, wear a dust mask.
● Be sure to prepare first aid equipment nearby.
Safety systems
WARNING: Please read the warning
instructions described below before working
with the hedge trimmer.
This section describes the safety functions and their
purposes of the hedge trimmer, as well as inspection
and maintenance procedures to ensure the proper
operation. For the location of the parts of this machine,
refer to
Product overview - HT220-75 on page 3
and
Product overview - CHT220-60 on page 4
.
If the machine is not properly maintained or is not
serviced or repaired by a professional engineer, the
machine life will be shortened and the risk of accidents
will increase. For more information, contact your local
dealer.
WARNING: Never use the machine with a
defective safety device. Inspect and
maintain the safety devices of the machine
according to the description in this section. If
your product does not meet any of these
requirements, contact your local dealer for
repair.
CAUTION: Special training is required for all
services and repairs on this machine,
especially the safety equipment. If any
problems are found in the machine based on
the inspections in this operator’s manual,
contact your local dealer. When you buy one
of our products, you are guaranteed
professional repair and services.
Inspection of safety lock lever CHT220-60
1. Confirm that safety lock lever (A) and throttle trigger
(B) move smoothly and that the return spring
functions properly.
2. Push down the safety lock lever. Make sure that it
returns to its original position when released.

1045 - 001 - 01.06.2020 9
3. Make sure that the throttle lock is locked and does
not move when you try to operate the throttle trigger
with the safety lock lever released.
4. Start the machine and set full throttle.
5. Release the throttle trigger and verify that the blades
stop and the machine remains stationary.
WARNING: If the blades are moving even
when the throttle trigger is in the idling
position, be sure to adjust the idling speed of
the carburetor. Refer to
Idling speed
adjustment procedure on page 16
.
Inspection of the engine switch
1. Start the engine.
2. Press the engine switch to confirm that the engine
stops.
Handguard inspection procedure
The handguard prevents blade injuries to the body.
1. Make sure the handguard is installed correctly while
the engine stops.
2. Inspect the handguard for damage.
Inspection of the vibration damper CHT220-60
The anti-vibration spring between the gear housing and
the frame reduces vibration to the handle.
1. Inspect the anti-vibration spring for deformation or
damage visually.
2. Confirm that the anti-vibration spring is installed
correctly.
Muffler inspection procedure
WARNING: Do not work with the machine
having defective muffler.
WARNING: The muffler gets very hot when
working and idling. Wear protective gloves
to prevent burns.
1. With the engine stopped, inspect the muffler visually
for damage or deformation.
Note: Some chemicals inside the muffler are
carcinogenic. If the muffler is damaged, do not touch
these materials.
2. Confirm that the muffler is suitably installed on the
machine.
Torque: (A) 7 ~ 10 N・m (70 ~ 100 kg・cm)

10 1045 - 001 - 01.06.2020
Blade inspection
1. Check the blades while the engine stops.
2. Wear protective gloves.
3. Check the blades for damage or distortion.
Always replace a damaged or distorted blade.
4. Make sure the blade screw is tight.
Fuel safety
WARNING: Please read the warning
instructions described below before working
with the hedge trimmer.
● Do not mix fuel indoors or near heat sources.
● Do not start the machine if fuel or engine oil is on the
machine. Wipe off any fuel or oil completely and let it
dry.
● If you spill gasoline on your clothes, change clothes
immediately.
● Do not allow fuel to adhere to your body. You may be
injured. If the fuel gets on your body, wash it off with
soap and water.
● Do not start the engine if oil or fuel has been spilled on
the machine or your body.
● Do not start the engine if fuel is leaking from the
machine. Check regularly for fuel leaks.
● Beware of fuel. Vaporized fuel is explosive and can
cause injury or even death.
● Do not breathe vaporized fuel. It may cause injury.
Ensure enough airflow.
● Do not smoke near fuel or engines.
● Do not place warm objects near the fuel tank or the
engine.
● Do not refuel while the engine is running.
● Do not refuel until the engine has cooled down.
● Before opening the fuel tank cap, place the product
and replenishment tank on the ground to remove any
static electricity.
● Do not use a metal funnel when refueling. Static
electricity may discharge into the fuel and cause a fire.
● Before refueling, open the fuel tank cap and carefully
release the residual pressure in the tank.
● Do not refuel the engine indoors. Without enough
airflow, suffocation and carbon monoxide poisoning
can result in injury or even death.
● Before starting, move the machine at least three metes
away from the fueled area.
● Do not overfill the fuel tank.
● Confirm that there are no leaks when moving the
machine or the fuel container.
● Do not place machine or fuel container in open flames,
sparks, or pilot flames. Make sure that there is no open
flame in the storage area.
● Keep the refueling container in the shade without fire.
● Use only approved containers when transferring fuel or
storing fuel in storage.
● For long-term storage, empty the fuel tank. Dispose of
the remaining fuel properly by consulting with your
local dealer or gas station.
● When storing the machine for a long time, clean the
machine.
● Remove the plug cap before storing the machine to
prevent accidental starting of the engine.
Safety precautions for maintenance
WARNING: Please read the warning
instructions described below before working
with the hedge trimmer.
● Stop the engine. Make sure the blades are
completely stopped. Perform maintenance after the
machine has cooled down.
● Damage using not quality-guaranteed accessories or
replacement parts may not be guaranteed for
damage or product liability.
● Do not touch the hot parts such as the muffler, muffler
cover, cylinder, and spark plug while the engine is
running and until the engine cools down after the
engine has stopped. Neglecting this caution may
cause burns due to high temperatures.
● Some chemicals inside the muffler are carcinogenic.
If the muffler is damaged, do not touch these
materials.

1045 - 001 - 01.06.2020 11
Operation
Introduction
WARNING: Please read the Safety Chapter
before working with the hedge trimmer.
Fuel
This machine is equipped with a two-stroke engine.
CAUTION: Refueling with the improper type
of fuel can damage the engine. Always use
a mixture of gasoline and two-stroke engine
oil.
WARNING: Always provide adequate
ventilation when handling fuel.
Fuel mixing
Gasoline
● It is recommended to use gasoline with a high octane
number for continuous high-speed operation.
― Zenoah Genuine Big Bang Gasoline ―
Zenoah's genuine blended gasoline "Big Bang Gasoline"
is a blended fuel exclusively for two-stroke engines
developed for engine equipment with long periods of
downtime.
⦿ Eliminates cab clogging by adopting special gasoline
that is difficult to deteriorate
⦿ Various additives that protect the engine from wear
and dirt and clean exhaust
⦿ No need for mixing
⦿ Supplied in a metal container that is convenient for
refueling, carrying, and storing
With the above excellent features, it can be used just
before the suspension of operation to prevent engine
trouble when restarting operation. For more information,
contact your local dealer.
Two-cycle engine oil
● For best results and performance, use genuine
Zenoah Two-stroke Engine Oil (FD Grade). This oil is
specially prepared for the air-cooled two-stroke
engine used in this machine.
(Mixing ratio 50 : 1)
● If genuine Zenoah Two-stroke Engine Oil is not
available, high-quality two-stroke oil for air-cooled
engines can be used (JASO Performance FD Class
oil, mixing ratio 50 : 1). To choose an oil, contact your
dealer.
CAUTION: Never use water-cooled
outboard two-stroke engine oil (known as
outboard oil). Never use four-stroke engine
oil.
Mixing ratio of gasoline and two-stroke engine oil
Gasoline, L (liter) Two-stroke engine oil, L (liter)
Mixing ratio 50 : 1 (2 %)
1 0.02
5 0.10
10 0.20
15 0.30
20 0.40
CAUTION: It is important to measure the
amount of oil accurately to ensure the
correct mixing ratio. When mixing small
amounts of fuel, even small differences can
have a significant effect on blending.
1. First, put the half amount of gasoline and the full
amount of oil into the fuel container, and shake the
container to mix them.
Note:
A
lways use clean fuel containers when mixing
gasoline and oil.
2. Add the remaining gasoline and shake to mix.
CAUTION: Do not make more than one
month's worth of mixed fuel at one time.

12 1045 - 001 - 01.06.2020
Refueling
1. Place the machine to be refueled on a flat surface
outdoors and settle it.
2. Clean the area around the fuel tank cap.
3. Loosen the fuel tank cap slightly to remove the
pressure difference between the inside and outside
of the fuel tank.
4. Shake the fuel container well to mix perfectly.
5. Remove the fuel tank cap and refill little by little to
80 % of the fuel tank.
6. After refueling, tighten the tank cap securely and
check that there is no fuel leakage.
7. Start the engine at least 3 m away from the refueling
location. Refer to
Starting procedure on page 12
.
Note: To find the location of the fuel tank, refer to
Product overview - HT220-75 on page 3
or
Product overview - CHT220-60 on page 4
.
Handle adjustment CHT220-60
The rear handle can be adjusted to three different
angles.
● Release the handle lock and turn the handle.
Starting procedure
WARNING: Always start the machine at
least 3 m from the refueling area.
WARNING: Keep people out of the work
area without permission. There is a risk of
serious injury. The safety distance is 15 m.
WARNING:
A
lways keep the throttle lever in
the idling position when starting, stopping
the engine, or moving the machine. It is
extremely dangerous if the throttle lever is
set to any position other than the idling
position, as the blades will start moving
when the engine starts.
1. Move the choke lever to the closed position.
Note: If restarting the machine immediately after
stopping the engine, the choke can be left in the
open position.
2. Repeat pressing and releasing the primary pump
with the operator's finger until fuel begins to return to
the tank through the clear pipe.
Note: No pump operation is required when restarting
immediately after the engine is stopped while fuel
remains in the tank.

1045 - 001 - 01.06.2020 13
3. Confirm that the throttle lever / the throttle trigger are
set to the idle position.
a) HT220-75
Idling position
b) CHT220-60
Idling position
4. Secure the machine to the ground with your left
hand. Do not step on the machine.
5. Pull the starter knob with your right hand. Pull the
starter knob lightly at the beginning. When the lever
becomes heavy, pull it quickly with a large force.
WARNING: Do not wrap the starter rope
around your hand.
Note: Do not pull out the rope all at once or release
your hand from the knob suddenly, as this may
cause a starter failure.
6. Pull the starter knob until the engine starts, then
slowly move the choke lever to the open position.
7. Increase the engine speed gradually by operating
the throttle lever / throttle trigger.
8. Make sure that the engine is running smoothly, and
warm up at a low speed for 2 to 3 minutes.
Note: If you continue to pull the rope with the choke
lever in the closed position, the spark plug may get wet
and the engine will not start. In such a case, set the
choke lever to the “open” position and then pull the
starter rope repeatedly, or remove the spark plug and
dry the electrode, and then repeat the operation.
Stopping procedure
CAUTION: Do not stop with the throttle lever
in the full-throttle position.
1. Set the throttle lever to the idling position and
perform the cooling operation for 1 to 2 minutes.
2. Press the engine switch.

14 1045 - 001 - 01.06.2020
Operating techniques
● When cutting the side of a hedge, start cutting from
near the ground and move the hedge trimmer up
along the hedge. Pay attention that the blades do not
touch the ground.
a) HT220-75
b) CHT220-60
WARNING: Always work with the blades
away from your body. Pay attention that the
blades do not touch the ground.
● Hold the hedge trimmer near your body with both
hands to stabilize the working position.
● Adjust the engine speed with the throttle lever
according to the planting density and branch
thickness.
● Operate the engine at an appropriate speed so that
the branches can be pruned. Avoid excessive speed
other than necessary.

1045 - 001 - 01.06.2020 15
Maintenance
Introduction
WARNING: Read and understand the Safet
y
Chapter before performing maintenance on
the machine.
Maintenance schedule
The following list describes the maintenance procedures to be performed on the machine. Most items are described
in the maintenance section. The user should only carry out the maintenance and service described in this operator’s
manual. For maintenance other than the ones described in this manual, always contact your local dealer.
Maintenance Daily
maintenance
Weekly
maintenance
Monthly
maintenance
Clean the outside of the machine. ●
Remove leaves, dirt, etc. from mufflers, exhaust pipes, blades, and
engines. ●
From a safety standpoint, make sure that the blade does not work
when the throttle lever is in the idling position. ●
Confirm that the engine switch works properly.
(Refer to
Inspection of engine switch on page 9
.) ●
Inspect the blade and blade cover for damage or cracks. Replace if
damaged. ●
Inspect the handguard for damage or cracks. Replace if damaged. ●
Check for leaks from the engine, fuel tank, and fuel system. ●
Check that nuts, screws, and bolts are tightened securely. ●
Inspect the fuel filter for contamination and check the fuel hose for
cracks or other abnormalities. Replace if necessary. ●
Inject grease into the gear housing after every 20 hours of use. ●
Inspect the starter and starter rope for damage. ●
Clean the air filter. Replace if necessary. ●
Clean the outside of the spark plug. Remove the spark plug and
check the electrode gap. Adjust the gap properly or replace the
spark plug.
(Refer to
Inspection of the spark plug on page 16
.)
●
Clean the cooling air intake and cylinder fins of the machine. ●
Clean the outside and surroundings of the carburetor. ●
Clean the fuel tank. ●
Additional tightening of the cylinder mounting bolts ●
Additional tightening of the engine parts ●
Muffler carbon removal
(Refer to
Muffler maintenance procedure on page 17
.) ●
Check all cords and connections. ●

16 1045 - 001 - 01.06.2020
Idling speed adjustment procedure
The engine is adjusted at factory shipment. If the engine
stops or the engine speed is too high due to the change
of the operating conditions (running in the engine, high
altitude operation, etc.), or if the engine stops when the
throttle lever is set to the idling position, adjust the idle
adjustment screw following the procedure below.
If the problem persists even after adjustment, consult
your dealer for possible causes.
1. Clean the air filter and attach the air filter cover.
2. Start the machine. Refer to
Starting procedure on
page 12
.
3. Turn the idle adjustment screw (T) clockwise until
the blades start moving.
4. Turn the idle adjustment screw counterclockwise
until the blades stop.
WARNING: If the blades do not stop
when adjusting the idling speed, contact
your dealer. Do not use the machine
until the adjustment or repair is
completed.
5. Adjust the idling speed to 3000 rpm.
Note: If the idling speed is appropriate, the engine will
run smoothly in any position. For recommended idling
speeds, refer to
Technical data on page 22
.
Inspection of the spark plug
CAUTION: Be sure to use the specified
spark plug.
(Refer to
Technical data on page 22
.)
Using an unspecified product may damage
the cylinder or piston.
The spark plug will be deteriorated by the following
causes.
● Improper carburetor settings
● Incorrect fuel mix
(Excessive or inappropriate type of oil)
● Air filter contamination
If carbon adheres to the spark plug electrode due to the
above reasons, it may cause problems during operation
or difficult starting. Check the spark plug if the engine
does not have enough power, does not start smoothly,
or if idling is unstable. If the spark plug electrode is dirty,
clean it. Confirm that the electrode gap is 0.6 to 0.7 mm.
Replace the spark plug when it has been used for a
month. If necessary, replace the spark plug.
Engine cooling parts cleaning
procedure
CAUTION: If the cooling air intake and
cylinder fins are dirty or clogged, the
machine will become hot and may be
damaged.
● The machine is equipped with cooling air intakes and
cylinder fins to keep the operating temperature as
low as possible.
● Confirm that the cooling air intake and cylinder fins
are free from dirt and clogging.
● Clean the cooling air intake and cylinder fins once a
week with a brush, more frequently in harsh
operating environments. If the cooling air intake and
cylinder fins are dirty or clogged, the machine will
overheat, causing damage to the piston and cylinder.

1045 - 001 - 01.06.2020 17
1. Remove the screws and remove the engine cover
and the muffler cover.
WARNING: Do not insert your fingers or
objects into the cooling air intake during
operation. Doing so may contact the rotating
parts and dangerous.
2. Inspect the cooling air intake and cylinder fins after
every 20 hours of operation. Remove and clean any
dirt or clogs.
a) HT220-75
b) CHT220-60
3. Attach the engine cover and muffler cover, and
securely tighten the screws.
Muffler maintenance procedure
WARNING: Do not use a defective muffler.
WARNING: The muffler gets very hot when
working and idling. Wear protective gloves
to prevent burns.
Inspect the muffler regularly for bolts for looseness,
damage, and rust. If an exhaust gas leak is found, stop
using the machine and request repair immediately.
1. Stop the engine and cool the muffler.
2. Remove the screws and remove the muffler cover.
3. Remove the bolt and remove the muffler.
Note: Some chemicals inside the muffler are
carcinogenic. If the muffler is damaged, do not touch
these materials.
4. Insert a screwdriver through the exhaust port of the
muffler to remove the carbon inside the muffler.
At the same time, remove the carbon at the muffler
exit.

18 1045 - 001 - 01.06.2020
Air filter cleaning procedure
Clean the air filter regularly to remove dirt and dust. This
prevents carburetor failure, difficult starting, decreased
engine output, and wear of engine parts. Air filter
cleaning provides a proper fuel economy. Clean the air
filter every 20 hours or less.
Also, clean the air filter when operating the machine
under severe operating conditions.
1. Remove the two clips (A) on the air filter cover.
2. Remove the air filter cover (B).
3. Remove the air filter (D) from the air filter holder (C).
4. Clean the air filter with soapy water.
Note: The contamination of the air filter used for a
long time cannot be thoroughly eliminated. Replace
the air filter regularly. If the air filter is deformed or
damaged, replace it with a new one.
5. Dry the air filter.
6. Clean the inside of the air filter cover. Use
compressed air or a brush.
7. Install the air filter.
8. Attach the air filter cover and fasten the two clips.
Fuel filter inspection procedure
● Remove the fuel filter (A) from the fuel tank after
every 20 hours of operation to remove dust. If the
clogging is severe, replace the filter with a new one.
● If the fuel filter is clogged, the engine speed will not
increase or the speed will fluctuate.

1045 - 001 - 01.06.2020 19
Grease replenishing procedure into the
gear housing
● Use Zenoah Genuine Grease. Or contact your dealer
for recommended grease.
● Inject grease from the grease nipple after every 20
hours of operation. Inject grease until the grease
starts to come out from the tip of the gear housing
(from the blade base).
● Designated grease:
Zenoah Genuine Grease No. 318096251 (100 g)
Or lithium-based heat-resistant grease (#2)
Note: When using genuine Zenoah Grease, remove
the grease nipple and screw the tip of the container
into the grease nipple.
Cleaning and lubrication of the blades
1. Before and after using the machine, remove and
clean the sap and dirt adhered to the blades.
Designated blade cleaner:
Zenoah Genuine Blade Cleaner
Part No. 369992061A (420 ml)
2. For long-term storage, lubricate the blades.
Note: Contact your dealer for recommended lubricants.
Blade inspection procedure
1. Remove the gear housing cap.
2. Make sure the blade moves freely. Set the socket
wrench on the gear housing bolt and turn it
clockwise and counterclockwise.
3. Inspect the blade edges for damage or deformation.
4. File the blade burrs with a file.
5. Attach the gear housing cap.
Note:
● Use well-sharp blades.
● Make sure that the blades are not chipped, cracked
or bent before using them. Never use faulty blades.
● When sharpening the blades, be sure to round the
base of the edges to prevent cracking.
● The edge of the blade is very sharp. There is a risk of
injury if carelessly touched. Always wear durable
leather gloves when doing maintenance and
sharpening the blades.

20 1045 - 001 - 01.06.2020
Troubleshooting
Engine does not start.
Problem Possible cause Recommended procedure
Fuel tank Improper fuel type. Dispose of the wrong fuel and use the correct fuel.
Carburetor Inappropriate idling speed. Adjust the idling speed.
Refer to
Idling speed adjustment procedure on page 16
.
Contact your dealer if necessary.
Does not ignite
The spark plug is dirty or wet. If carbon or dirt adheres to the electrode of the spark
plug, clean it with a wire brush. If the electrode is wet, dry
it.
Incorrect electrode gap.
Adjust the electrode gap of the spark plug correctly.
For the correct electrode gap, refer to
Technical data on
page 22
.
Spark plug The spark plug is loose. Tighten the spark plug.
Fuel filter The fuel filter is clogged. Clean the fuel filter.
The engine starts but stops.
Problem Possible cause Recommended procedure
Fuel tank Improper fuel type. Dispose of the wrong fuel and use the correct fuel.
Carburetor Inappropriate idling speed. Adjust the idling speed.
Refer to
Idling speed adjustment procedure on page 16
.
Contact your dealer if necessary.
Air filter The air filter is clogged. Clean the air filter.
Fuel filter The fuel filter is clogged. Clean the fuel filter.
Engine cooling parts Branches and leaves are
clogged.
Clean the cooling air intake and cylinder fins. Refer to
Engine cooling parts cleaning procedure on page 16
.
Blades
Problem Possible cause Recommended procedure
The blades move
slowly or do not
move.
The blades are clogged or
damaged.
Remove any jams between the blades.
Deburr the blades.
Refer to
Blade inspection procedure on page 19
.
If the blades are damaged, replace them.
The blades do not
cut well.
The blades are not sharp or
damaged.
Dress the blades.
Refer to
Blade inspection procedure on page 19
.
If they are damaged, replace the blades.
The blades get hot. There is friction on the blades. Deburr the blades and lubricate the blades.
Refer to
Blade inspection procedure on page 19
.
This manual suits for next models
1
Table of contents
Languages:
Other Zenoah Trimmer manuals

Zenoah
Zenoah EX2600 User manual

Zenoah
Zenoah HTZ2460 User manual

Zenoah
Zenoah CHT2310 User manual

Zenoah
Zenoah EHT603D User manual

Zenoah
Zenoah LRT2300 User manual

Zenoah
Zenoah BT250 User manual

Zenoah
Zenoah HT2200 Manual

Zenoah
Zenoah eHT600D User manual

Zenoah
Zenoah BT251 Owner's manual

Zenoah
Zenoah CHTZ2400 Owner's manual

Zenoah
Zenoah EHT602D User manual

Zenoah
Zenoah CHTZ2401-CA Manual

Zenoah
Zenoah SRTZ2500 Owner's manual

Zenoah
Zenoah LRTZ2401 Owner's manual

Zenoah
Zenoah BHT250PD60 Instruction manual

Zenoah
Zenoah CHT2200 Manual

Zenoah
Zenoah CHTZ6010 User manual

Zenoah
Zenoah EHT601D User manual

Zenoah
Zenoah SRTZ2401F-CA User manual

Zenoah
Zenoah CHTZ2401 Owner's manual