manuals.online logo
Brands
  1. Home
  2. •
  3. Brands
  4. •
  5. Canon
  6. •
  7. Camera Accessories
  8. •
  9. Canon HG-100TBR Assembly instructions

Canon HG-100TBR Assembly instructions

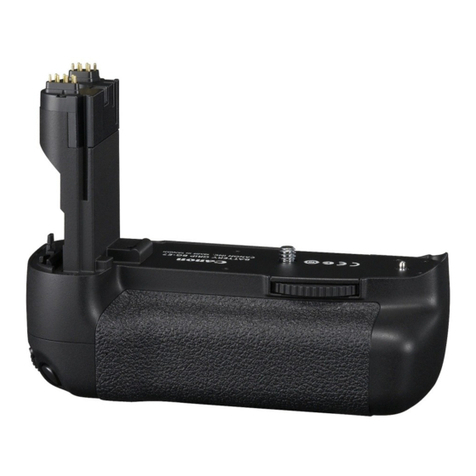
CANON TRIPOD GRIP
HG-100TBR
Advanced User Guide
E
2
Introduction
The Tripod Grip HG-100TBR is a handgrip that allows you to shoot
while operating the camera with the attached Wireless Remote Control
BR-E1. Legs can also be extended from the grip portion for use as
a tripod. The included microphone brackets allow you to attach an
external microphone such as a stereo microphone (sold separately)
to a camera without a hot shoe. The microphone brackets can also be
used with cameras capable of vertical movie shooting.
Before Use, Be Sure to Read the Following
To avoid accidents, rst read the “Safety Instructions” (p.3). Also,
read this manual carefully to ensure that you use the tripod grip
correctly.
Also, read the instructions for the Wireless Remote Control BR-E1.
Included accessories
zWireless Remote Control BR-E1
zWrist strap
zMicrophone bracket L
zMicrophone bracket S
* Be careful not to misplace included accessories.
Cameras the tripod grip can be used with
The tripod grip can be used with these cameras (as of October 2019).
zPowerShot G5 X Mark II
zPowerShot G7 X Mark III
zEOS M200
zEOS M50
zEOS M6 Mark II
* See your camera’s instructions for details on compatibility of cameras released
in and after October 2019 with the HG-100TBR.
oThis product can withstand up to 1 kg/35.3 oz. of weight. Ensure that
the weight of the mounted camera, lens, etc. does not exceed 1 kg/35.3
oz. Using the product with this weight exceeded may result in product
breakage.
3
Conventions Used in this Manual
Icons in this Manual
(p. **) : Reference page numbers for more information.
: Warnings to prevent potential problems during operation.
: Supplemental information.
Safety Instructions
Be sure to read these instructions in order to operate the product
safely.
Follow these instructions to prevent injury or harm to the operator of
the product or others.
WARNING Denotes the risk of serious injury or death.
oKeep the product out of the reach of young children.
A strap wrapped around a person’s neck may result in strangulation.
The parts are dangerous if swallowed. If swallowed, seek immediate medical
assistance.
oDo not disassemble or modify the product.
oDo not expose the product to strong shocks or vibration.
oDo not use organic solvents such as alcohol, benzine or paint thinner to clean
the product.
CAUTION Denotes the risk of injury.
oDo not leave the product in places exposed to extremely high or low
temperatures.
The product may become extremely hot/cold and cause burns or injury when
touched.
oStrap is intended for use on the body only. Hanging the strap with any product
attached on a hook or other object may damage the product. Also, do not
shake the product or expose the product to strong impacts.
oDo not touch any parts inside the product. Do not allow your ngers to get
caught when opening/closing the tripod legs.
This may cause injury.
4
Included accessories
(11)
(12)
(1) Camera mount
(2) Wireless Remote Control BR-E1
(3) Strap mount
(4) Tripod screw
(5) Attach/detach dial
(6) Body
(7) Left/right lock release button
(8) Leg R
(9) Front/back lock release button
(10) Leg L
Nomenclature
(2)
(1)
(3)
(7)
(8)
(4)
(5)
(9)
(10)
(6)
(11) Microphone bracket L
(12) Microphone bracket S
5
Preparation
Attaching the wrist strap
zAttach the included wrist strap to the strap mount on the body of the
tripod grip.
Pairing the camera and BR-E1
zSee the instructions for your camera and the BR-E1.
Attaching the BR-E1
zWith the BR-E1 at an angle, press it upward into the body of the
tripod grip (rubber portion) (①).
zWith the BR-E1 pressed upward into the body, swing its bottom into
the body of the tripod grip (②).
6
Preparation
Removing the BR-E1
zWith a nger where shown in the BR-E1 (strap hole) (①), pull
outward to remove (②).
oDo not place your nger in the strap hole after removing the BR-E1.
7
Adjusting the Angle of the Camera Mount
Adjusting the tilt of the camera mount
zHold the front/back lock release button pressed.
zThe camera mount can be locked every 15°.
zAfter adjusting the angle, release the button.
0°
90°
45°
Camera mount turning
zHold the left/right lock release button pressed.
zThe camera mount can be locked every 90°.
zAfter adjusting the angle, release the button.
90°
90°
90°
90°
oIf the camera is attached on the camera mount, hold the camera before
adjusting the tilt of the camera mount or turning it to avoid pinching your
nger or dropping the camera.
oBefore changing the front/back or left/right rotation angle, make sure
your ngers are not obstructing movement to avoid pinching them.
8
Attaching a Camera
Horizontal shooting
zSet the camera monitor and the BR-E1 button panel in the same
orientation, and then insert the tripod screw in the tripod socket on
the camera (①).
zTurn the attach/detach dial to lock the camera (②).
zTo remove the camera, reverse the order.
Vertical shooting
1
Attach the camera with its monitor in
the same direction as leg R (p.4).
zTurn the attach/detach dial to lock the
camera.
9
Attaching a Camera
2
Turn the camera mount so that
the camera monitor and the BR-
E1 button panel are in the same
orientation.
3
Tilt the camera mount 90°.
BR
-E1
zTo remove the external microphone, reverse the order.
oAttach a camera when the camera is turned o󰀨.
oMake sure to attach the camera to the camera mount securely so that it
does not detach from it.
oInstall any batteries or memory cards in the camera before attaching it to
the camera mount.
10
Holding the Tripod Grip to Shoot
zPut the wrist strap around your wrist as shown before holding the
tripod grip.
zPress the buttons on the BR-E1 to start/end shooting.
s
oAttach the included wrist strap to the strap mount on the tripod grip
correctly.
oAvoid holding and carrying the tripod grip only by the wrist strap.
oIf the front/back lock release button or left/right lock release button have
not fully returned, the camera mount is not locked in place.
Check that the front/back lock release button or left/right lock release
button have fully returned.
If the lock release button have not fully returned, move the camera
mount until the button returns.
oDepending on the camera, changing the angle may unbalance the
camera.
Adjust to angles where the camera is stably balanced (p.7).
11
Tripodding a Camera to Shoot
zBend legs R/L outward as shown.
zOpen legs R/L all the way.
zBe careful not to pinch your ngers.
zUse the tripod legs R/L open as far as they will go.
zBe sure the tripod is on a level surface and does not wobble to
prevent it from falling over.
12
Tripodding a Camera to Shoot
zFor vertical shooting, set the camera mount as shown below.
oDo not place as a tripod to shoot if the tripod might fall over, such as in
windy conditions or where there is vibration.
oIt is recommended that you remove the BR-E1 and shoot by remote
control (p.6).
13
Attaching an External Microphone
If your camera does not have a hot shoe for an external microphone,
you can use the microphone brackets to attach one. Even if your
camera has a hot shoe, you should use the microphone brackets when
you want to avoid camera or lens operation sound.
When shooting horizontally
1
Attach the camera as shown (p.8).
2
Insert microphone bracket L in the
camera mount.
3
Attach the external microphone to
microphone bracket L.
zRefer to the external microphone’s
instructions on how to attach.
14
Attaching an External Microphone
4
Attach the connector from the
external microphone to the external
microphone IN terminal on the
camera.
zTo remove the external microphone, reverse the order.
oAvoid mounting an item other than an external microphone on
microphone bracket L.
oTo remove the external microphone from microphone bracket L, rst
disconnect the external microphone connector.
oWhen removing microphone bracket L from the camera mount, check
that you are not pulling the bracket in the direction of nearby persons or
a wall.
15
Attaching an External Microphone
When shooting vertically
BR
-E1
1
Attach the camera as shown (p.8).
2
Insert microphone bracket S into
microphone bracket L.
zDo not insert microphone bracket S
backwards.
3
Insert microphone bracket L in the
camera mount.
4
Attach the external microphone to
microphone bracket S.
zRefer to the external microphone’s
instructions on how to attach.
16
Attaching an External Microphone
5
Attach the connector from the
external microphone to the external
microphone IN terminal on the
camera.
zTo remove the external microphone, reverse the order.
oAvoid mounting an item other than an external microphone on
microphone bracket S.
oTo remove the external microphone from microphone bracket S, rst
disconnect the external microphone connector.
oWhen removing microphone bracket L from the camera mount, check
that you are not pulling the bracket in the direction of nearby persons or
a wall.
17
Specications
Stowing the microphone brackets
When not using the microphone brackets, store microphone bracket L
and microphone bracket S stowed as shown.
Specifications
Size/Weight
Size........ As a grip: Approx. 38.6 (W) × 190.0 (H) × 43.4 (D) mm/
Approx. 1.53 (W) x 7.49 (H) x 1.71 (D) in.
As a tripod: Approx. 172.4 (W) × 148.5 (H) × 174.1 (D) mm/
Approx. 6.79 (W) × 5.85 (H) × 6.86 (D) in.
Weight ... Approx. 179 g/6.33 oz. (body and BR-E1) /
Approx. 163 g/5.76 oz. (body only)
zAll the data above is based on Canon’s testing standards.
zProduct specications and the exterior are subject to change without
notice.
CT2-D052-A © CANON INC. 2019
The descriptions in this Instruction Manual are current as of August 2019. For
the latest version Instruction Manual, refer to the Canon Web site.

Other Canon Camera Accessories manuals

Canon FOCUSING RAIL Instruction Manual

Canon

Canon FOCUSING RAIL Instruction Manual

Canon EF 20mm f/2.8 USM User manual

Canon

Canon EF 20mm f/2.8 USM User manual

Canon Camera Accessory Kit 5 User manual

Canon

Canon Camera Accessory Kit 5 User manual

Canon LM-V1 User manual

Canon

Canon LM-V1 User manual

Canon POWER WINDER A2 User manual

Canon

Canon POWER WINDER A2 User manual

Canon XF705 User manual

Canon

Canon XF705 User manual

Canon EF 25 User manual

Canon

Canon EF 25 User manual

Canon Powershot S2 IS - Powershot S2 IS 5MP Digital... Mounting instructions

Canon

Canon Powershot S2 IS - Powershot S2 IS 5MP Digital... Mounting instructions

Canon RECEIVER LC-4R Instruction Manual

Canon

Canon RECEIVER LC-4R Instruction Manual

Canon EOS C300 User manual

Canon

Canon EOS C300 User manual

Canon HJ15ex8.5B KRSE-V User manual

Canon

Canon HJ15ex8.5B KRSE-V User manual

Canon MR-14EX II User manual

Canon

Canon MR-14EX II User manual

Canon REBEL 350D User manual

Canon

Canon REBEL 350D User manual

Canon BP-110 Datasheet

Canon

Canon BP-110 Datasheet

Canon BU-47H 1AM User manual

Canon

Canon BU-47H 1AM User manual

Canon BG-R10 User manual

Canon

Canon BG-R10 User manual

Canon MACRO SPEEDLITE MR-14EX User manual

Canon

Canon MACRO SPEEDLITE MR-14EX User manual

Canon ANGLE FINDER C Instruction Manual

Canon

Canon ANGLE FINDER C Instruction Manual

Canon TIMER REMOTE CONTROLLER TC-80N3 Instruction Manual

Canon

Canon TIMER REMOTE CONTROLLER TC-80N3 Instruction Manual

Canon Puncher Unit-BS1 User manual

Canon

Canon Puncher Unit-BS1 User manual

Canon LIFE SIZE CONVERTER EF Instruction Manual
Canon

Canon LIFE SIZE CONVERTER EF Instruction Manual

Canon Speedlite Transmitter ST-E2 User manual

Canon

Canon Speedlite Transmitter ST-E2 User manual

Canon EF-S55-250mm f/4-5.6 IS II User manual

Canon

Canon EF-S55-250mm f/4-5.6 IS II User manual

Canon Macro Twin Light MT-26EX-RT Assembly instructions

Canon

Canon Macro Twin Light MT-26EX-RT Assembly instructions

Popular Camera Accessories manuals by other brands

PROAIM P-L2-SL Assembly manual

PROAIM

PROAIM P-L2-SL Assembly manual

Sony ADP-AMA operating instructions

Sony

Sony ADP-AMA operating instructions

Arax KIEV-88 Instructions for use

Arax

Arax KIEV-88 Instructions for use

Energizer 3-335NNCI Product data sheet

Energizer

Energizer 3-335NNCI Product data sheet

Bioenno Power BLF-12150AS user manual

Bioenno Power

Bioenno Power BLF-12150AS user manual

COHU 7140 Installation and operation manual

COHU

COHU 7140 Installation and operation manual

pellenc OLIVION + operating instructions

pellenc

pellenc OLIVION + operating instructions

Viewpro Z18F user manual

Viewpro

Viewpro Z18F user manual

Growatt GBLI Series manual

Growatt

Growatt GBLI Series manual

Ikelite Olympus E-500 instruction manual

Ikelite

Ikelite Olympus E-500 instruction manual

Vicon ACTIVE WAND user guide

Vicon

Vicon ACTIVE WAND user guide

Spyder Checkr 24 quick start guide

Spyder

Spyder Checkr 24 quick start guide

Kingston Technology Digital Media Guide manual

Kingston Technology

Kingston Technology Digital Media Guide manual

Fulbat FLTX20HL Product Instruction Sheet

Fulbat

Fulbat FLTX20HL Product Instruction Sheet

PROAIM CG-014-00 instruction manual

PROAIM

PROAIM CG-014-00 instruction manual

AMPHIBICO Phenom FX21 instruction manual

AMPHIBICO

AMPHIBICO Phenom FX21 instruction manual

Sony MPK-THK Specifications

Sony

Sony MPK-THK Specifications

Panasonic Lumix DMW-MCTZ5 operating instructions

Panasonic

Panasonic Lumix DMW-MCTZ5 operating instructions

manuals.online logo
manuals.online logoBrands
  • About & Mission
  • Contact us
  • Privacy Policy
  • Terms and Conditions

Copyright 2025 Manuals.Online. All Rights Reserved.