manuals.online logo
Brands
  1. Home
  2. •
  3. Brands
  4. •
  5. Zero88
  6. •
  7. Dimmer
  8. •
  9. Zero88 BETAPACK3 User manual

Zero88 BETAPACK3 User manual

BETAPACK3 USER GUIDE
Zero88 Lighting Ltd, Usk House, Llantarnam Park, Cwmbran, Gwent NP44 3HD, U.K www.zero88.com
Tel: +44 (0) 1633 838088 (24hr Answer Phone) Fax: +44 (0) 1633 867880 Email: [email protected]
73-682-00 IM8025Betapack3ManualIssue1_0.doc Page 4 of 7
Specification Overview
The Betapack3 is a well specified versatile dimmer,
offering six channels each capable of driving up to
10Amp loads.
The Betapack3 features breakers as standard, preheat,
topset and 3 laws per channel, 12 memories, 3 99-step
sequences, local control and DMX patch per channel.
An isolated DMX512-A input and loop-through allow for
remote operation. When the loop-through plug is not
inserted, the DMX line is automatically terminated.
Control Interface
The main display consists of four seven-segment
displays; the data displayed is dependent on the set-up
mode of the Betapack3. Around the outside of these
displays are eight red LEDs which indicate the current
set-up mode of the Betapack3. An additional green LED
is used for DMX indication.
The Betapack3 has a default mode, for operation. In
this mode non of the set-up mode LEDs will be lit, and
the main display will show the DMX address(es).
Mode Button
The Mode button is used to cycle through the different
set-up modes. They are;
- Manual control
- DMX address
- DMX fail
- Memory
- Sequence
- Preheat
- Topset
- Law
Enter Button
The Enter button is used to confirm actions.
Up & Down Buttons
These are used to adjust the values shown in the main
display. Pressing both buttons together will reset the
display to the default values.
Default Mode
If a block patch has been set (see ‘DMX Address’
below), then the display will show the DMX start
address of the block.
If individual DMX addresses have been set for each
channel, then the ‘Up & Down’ Arrows can be used to
select which DMX address to display, or alternatively if
‘Auto’ is selected, then the display will cycle through all
six DMX addresses. In either case, the DMX address is
prefixed by the channel number.
Holding down the ‘Enter’ button in default mode will
change the display to ‘Out’, and the top 6 setup LEDs
(numbered) will change to displaying an indication of
the current output levels. Each LED will be lit if the
current output level for that channel is greater than
20%.
Set-up Modes
Manual Control
The Manual Control Mode allows the user to set-up a
look on the Betapack3 without the need of an external
controller.
Select ‘Manual’ mode using the ‘Mode’ button. The
display will show C.LLL, where C is the channel number
and LLL is the level. Select the channel you require or
‘A’ for all channels, using the ‘Up & Down’ Arrows and
press ‘Enter’. Now set the level you require using the
‘Up & Down’ Arrows and press ‘Enter’ again to confirm
and move back to the channel selection.
The Manual Control levels are reset to zero if power to
the Betapack3 is lost.
DMX Address
There are 2 ways that the Betapack3 can be patched –
a single DMX start address can be set for the block of 6
channels (block patch), or each channel can be given a
different DMX start address.
For block patch, the range of DMX start addresses is
001 – 507. For individual patch, the range of DMX start
addresses is 001 – 512
BETAPACK3 USER GUIDE
Zero88 Lighting Ltd, Usk House, Llantarnam Park, Cwmbran, Gwent NP44 3HD, U.K www.zero88.com
Tel: +44 (0) 1633 838088 (24hr Answer Phone) Fax: +44 (0) 1633 867880 Email: [email protected]
73-682-00 IM8025Betapack3ManualIssue1_0.doc Page 5 of 7
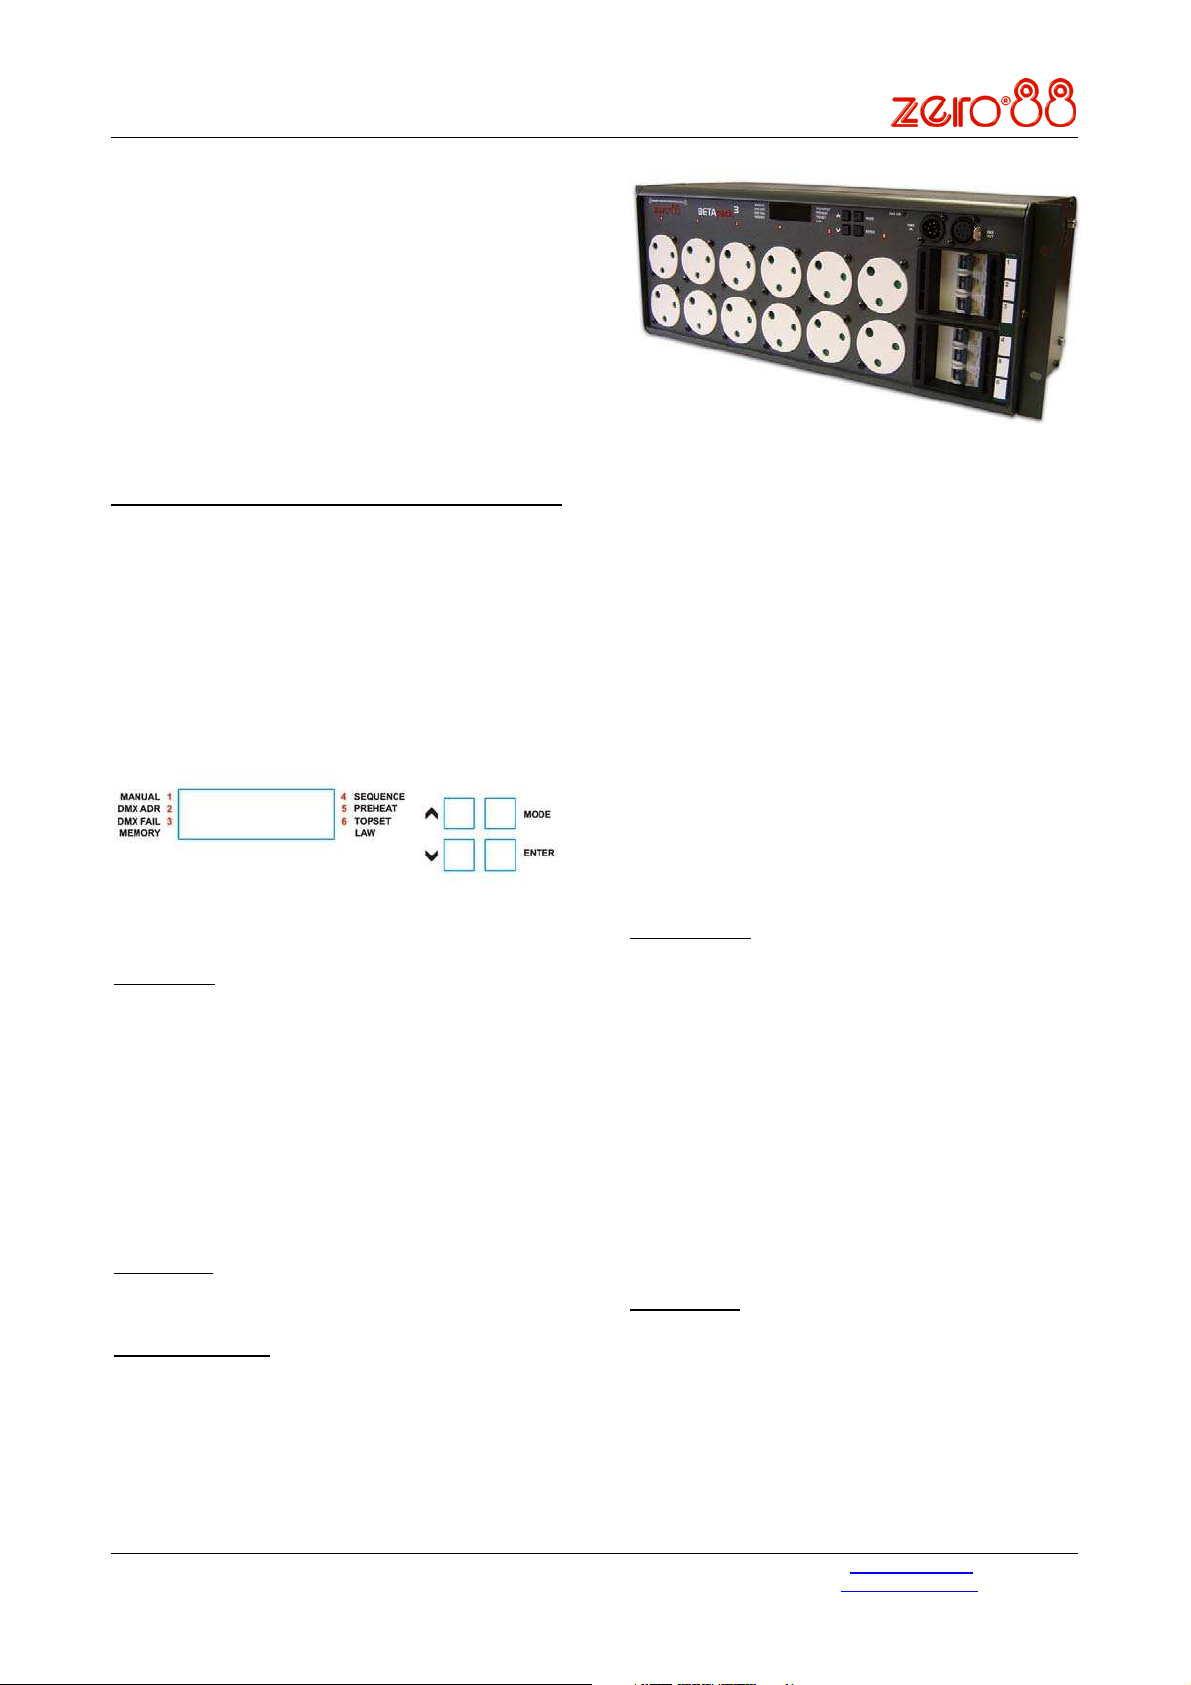
Select ‘DMX ADR’ using the ‘Mode’ button, the display
will show C.AAA, where C is the channel number and
AAA is the current DMX address for that channel.
Select the channel you require (1-6), or ‘A’ for all
channels (block patch), using the ‘Up & Down’ Arrows
and press ‘Enter’. Now set the address you require
using the ‘Up & Down’ Arrows and press ‘Enter’ again
to confirm and move back to the channel selection.
DMX Fail
There are four DMX fail modes available – ‘hold DMX’,
‘fade to black’, ‘fade to memory’ and ‘fade to sequence’.
Select ‘DMX Fail’ using the ‘Mode’ button. Using the
‘Up & Down’ Arrows select your preferred choice from
the list below;
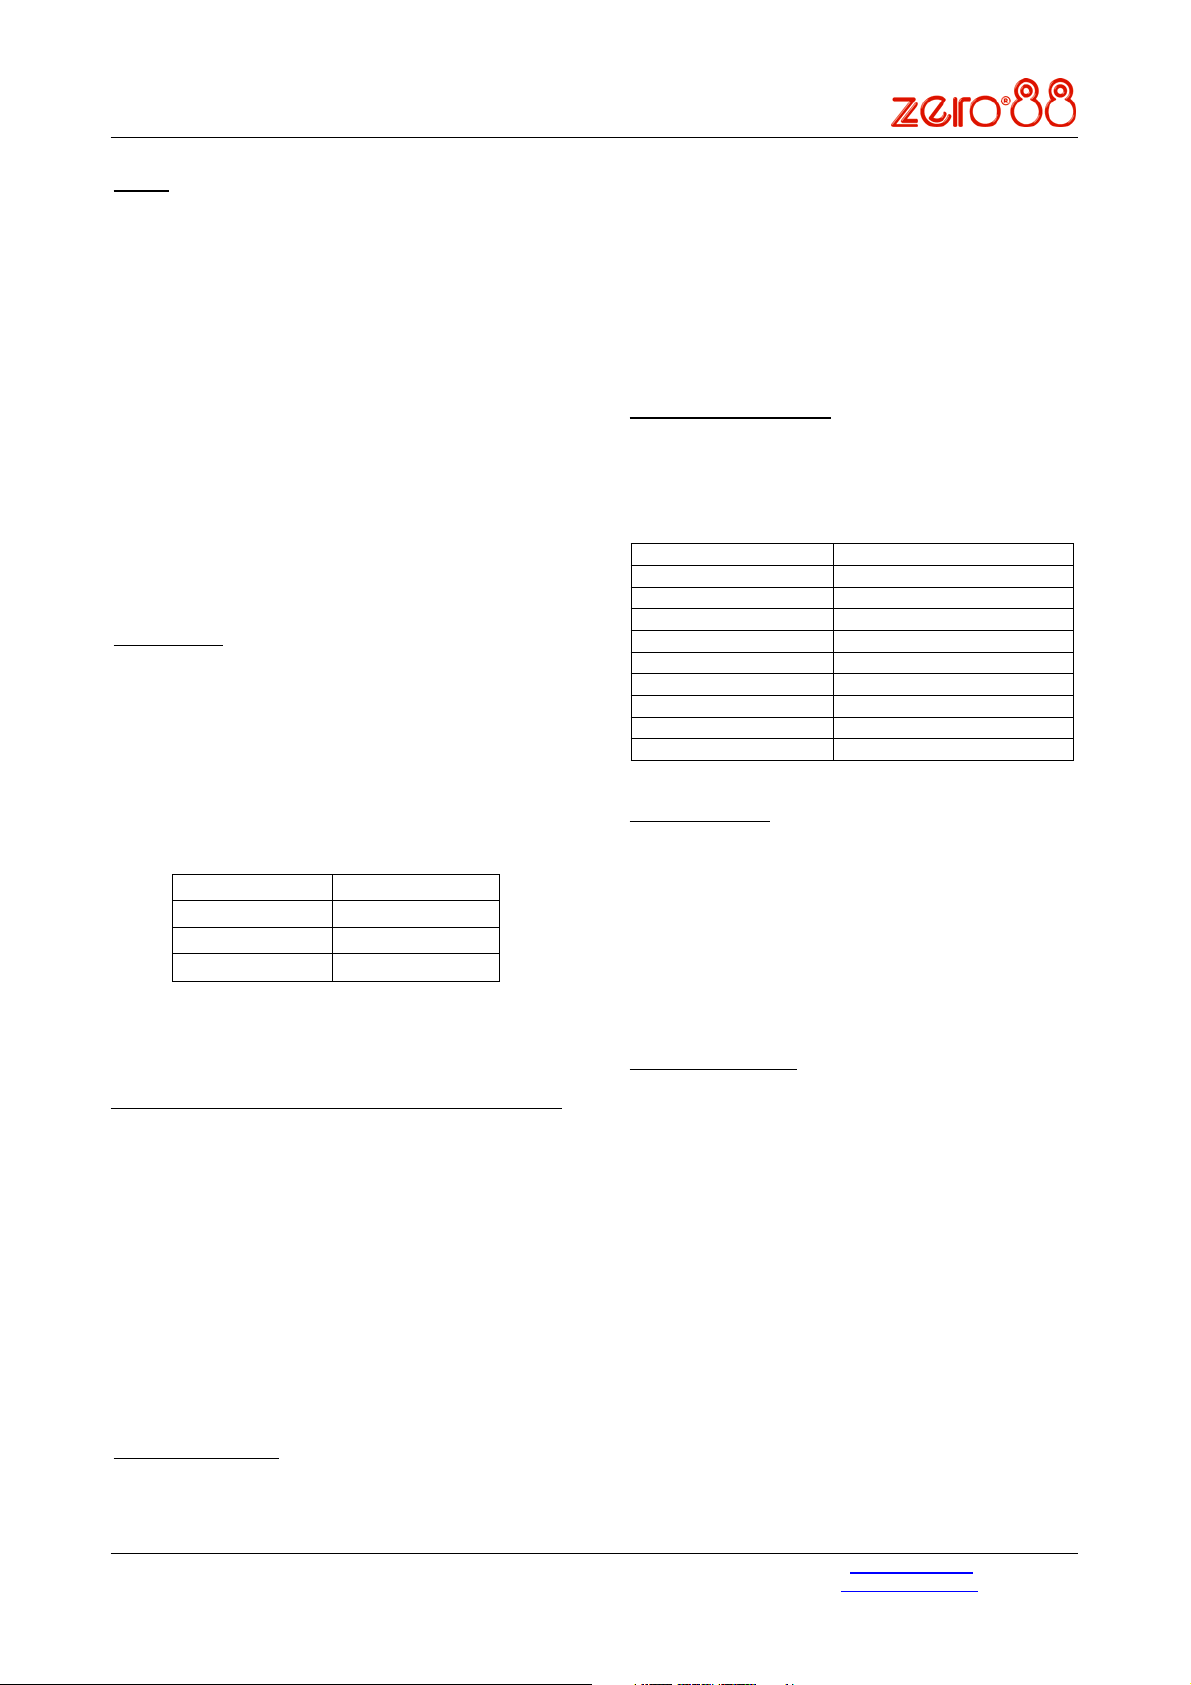
Fail Mode Main Display
Hold Last State Hold
Fade to Zero F 00
Fade to Memory 1 - 12 F 01 – F 12
Fade to Sequence 1 - 3 S 01 – S 03
If there is no DMX present, the selected
memory/sequence will be re-called immediately.
Memories
The Betapack3 will store 12 memories for stand alone
operation, these can only be re-called if there is no
DMX present.
1. Set-up the scene using the ‘Manual’ control
function or a DMX controller.
2. Select ‘Memory’ using the ‘Mode’ button.
Using the ‘Up & Down’ Arrows select the required
memory number and press the ‘Enter’ button to confirm.
A ‘p’ should appear next to the memory to signify that it
has been programmed.
Holding both the ‘Up & Down’ Arrows for 1 second will
clear the selected memory. If these buttons are held for
5 seconds, ALL memories will be cleared.
If memories are cleared which are used in sequences,
they will be removed automatically from those
sequences.
Sequences
The Betapack3 will store 3 sequences of up to 99-steps
each. Each step is a link to one of the 12 programmed
memories. Sequences can only be replayed if there is
no DMX present.
Each sequence can have a fade time (0-60s) and dwell
time (1-60s) programmed. It is only possible to add
steps to or remove steps from the end of a sequence.
1. Program the required looks using the ‘Memories’
function (see above).
2. Select ‘Sequence’ using the ‘Mode’ button.
3. Use the ‘Up & Down’ Arrows to select the required
sequence (the number of steps already
programmed in each sequence is shown after the
sequence number on the display), and press the
‘Enter’ button to confirm.
4. The display will now change to show the current
step number, followed by the memory currently
programmed in that step. Use the ‘Up & Down’
Arrows to select the required step number (or Fade
time ‘F’ or dwell time ‘d’), and press the ‘Enter’
button to confirm.
5.
For steps:
If there is no DMX present, the selected memory
will be immediately re-called. Use the ‘Up & Down’
Arrows to select the memory for that step, and
press the ‘Enter’ button to confirm. Only
programmed memories may be selected. If the
step is at the end of the sequence, then the step
number will automatically increment and further
steps may now be programmed in the same way.
Otherwise the display will return to step number
selection mode.
For fade and dwell times:
If there is no DMX present, the sequence will now
run. Use the ‘Up & Down’ Arrows to change the
time, and press the ‘Enter’ button to confirm.
When done, or to return to sequence selection mode
(step 3 above) at any point, press and hold the ‘Enter’
button for 1s.
At step 3 above, holding both the ‘Up & Down’ Arrows
for 1 second will clear the selected sequence. If these
buttons are held for 5 seconds, ALL sequences will be
cleared.
At step 5 above, if the selected step is at the end of the
sequence, holding both the ‘Up & Down’ Arrows will
clear the selected step.
Preheat
Preheat can be selected on a per channel or all channel
basis. The preheat level is 5% and cannot be adjusted.
Select ‘Preheat’ by cycling through the modes using
the ‘Mode’ button.
Select required channel or ‘A’ for all channels, using the
‘Up & Down’ Arrows and press ‘Enter’, to confirm.
Now select on/off using the ‘Up & Down’ Arrows. Press
‘Enter’ to confirm and return to the channel selection.
Note that Preheat is only applied if there is a DMX input
present, and the law is not set to ‘Switch’.
BETAPACK3 USER GUIDE
Zero88 Lighting Ltd, Usk House, Llantarnam Park, Cwmbran, Gwent NP44 3HD, U.K www.zero88.com
Tel: +44 (0) 1633 838088 (24hr Answer Phone) Fax: +44 (0) 1633 867880 Email: [email protected]
73-682-00 IM8025Betapack3ManualIssue1_0.doc Page 6 of 7
Topset
Topset can be selected on a per channel or all channel
basis. On the Betapack3, Topset is applied as a limiting
(not scaling) value.
Select ‘Topset’ by cycling through the modes using the
‘Mode’ button.
Select required channel or ‘A’ for all channels, using the
‘Up & Down’ Arrows and press ‘Enter’, to confirm.
Now select the topset level you require, again using the
‘Up & Down’ Arrows and press ‘Enter’ to confirm and
return to the channel selection.
Note that if the law is set to ‘Switch’, the setting in
Topset will instead be used to determine the
switchpoint. The ‘Topset’ LED will flash in this case, to
indicate the setting being made.
Dimmer Laws
Three dimmer laws are available, which can be
selected per channel.
Select ‘Law’ mode using the ‘Mode’ button. Using the
‘Up & Down’ Arrows select the channel required, or ‘A’
for all channels. Press ‘Enter’ to confirm. Now select
the law you require, again using the ‘Up & Down’
Arrows and press ‘Enter’ to confirm and return to the
channel selection.
Output Law Main Display
Normal n
Switch S
Linear L
Note that if the law is set to Switch, the switchpoint can
be set in the ‘Topset’ menu.
Super User
The Betapack3 has a number of hidden functions,
located in the Super User Menu. The super user
menus can only be accessed from the Default mode
(no LEDs lit). To enter Super User press and hold the
‘Up & Down’ Arrows together and press and hold the
‘Mode’ button for 5 seconds. All the mode LEDs will
flash to indicate the Betapack3 is in super user mode.
The ‘Up & Down’ Arrows are used to cycle through the
various super user functions. Pressing the ‘Mode’
button at any point will revert to normal operation. If no
buttons are pressed after 20 seconds the unit will
automatically revert to normal operation.
Dimmer Lock/Unlock
Press the ‘Up & Down’ Arrows until the display shows
“LOC”. Press ‘Enter’ to confirm this action. The
Betapack3 will revert to the Default mode. Pressing the
‘Mode’ button now will only cycle between Manual
Control and Default Mode.
If Super User is entered when the Betapack3 is locked,
only the unlock function will be available. The display
will show “UNL”. To unlock the Betapack3, press and
hold the ‘Enter’ button for 5 seconds. The Betapack3
will unlock and exit super user returning to the Default
mode.
Resetting The Betapack3
Press the ‘Up & Down’ Arrows until the display shows
“rset”. Press ‘Enter’ to confirm. The display will flash
briefly to confirm this action. The Betapack3 will be
reset to its default settings, shown in the table below:
Set Up Parameter State
Manual Control Levels All Off
DMX Addresses Block patch at 001
DMX Fail Mode Hold Last State
Memory All Memories Cleared
Sequence All Sequences Cleared
Preheat Off (0%) for all channels
Topset 100% for all channels
Law Normal law for all channels
Switch law switchpoint 50% for all channels
Firmware Version
To identify which version of firmware is loaded in the
Betapack3, press the ‘Up & Down’ Arrows until the
firmware version is shown in the display (e.g. 01.00)
Press and hold the ‘Enter’ button for 1s, and the
Betapack3’s CPU serial number will be displayed.
Press the ‘Enter’ button again to return to the version
display. Note that the firmware version will also be
shown briefly on start up.
Internal Temperature
Press the ‘Up & Down’ Arrows until the temperature is
shown in the display, shown as xxxC, where xxx is the
temperature in Centigrade. The ‘Enter’ button has no
function in this mode.

Other Zero88 Dimmer manuals

Zero88 Spice 1210i User manual

Zero88

Zero88 Spice 1210i User manual

Zero88 Betapack 2 Technical manual

Zero88

Zero88 Betapack 2 Technical manual

Zero88 Betapack 4 User manual

Zero88

Zero88 Betapack 4 User manual

Popular Dimmer manuals by other brands

AMX RDM-DC installation guide

AMX

AMX RDM-DC installation guide

LEGRAND 573866 manual

LEGRAND

LEGRAND 573866 manual

Acclaim Lighting X-Dimmer-3 PRO User instructions

Acclaim Lighting

Acclaim Lighting X-Dimmer-3 PRO User instructions

Leviton Decora Smart DN6HD quick start guide

Leviton

Leviton Decora Smart DN6HD quick start guide

Zennio DIMinBOX DX1 Technical documentation

Zennio

Zennio DIMinBOX DX1 Technical documentation

PROLED L513170 user manual

PROLED

PROLED L513170 user manual

ETC Unison Echo Forward-Phase Dimmer-Gen 2 installation guide

ETC

ETC Unison Echo Forward-Phase Dimmer-Gen 2 installation guide

Jung UDS 4 REG HE operating instructions

Jung

Jung UDS 4 REG HE operating instructions

ChiliTec MILOS 22781 Operation manual

ChiliTec

ChiliTec MILOS 22781 Operation manual

Quick HDIM300 Manual of use and maintenance

Quick

Quick HDIM300 Manual of use and maintenance

Xero88 CHILLI DIMMER operating manual

Xero88

Xero88 CHILLI DIMMER operating manual

Targetti LMS 1T5351 manual

Targetti

Targetti LMS 1T5351 manual

ETC SMARTRACK user manual

ETC

ETC SMARTRACK user manual

Leviton MRIDC owner's manual

Leviton

Leviton MRIDC owner's manual

Sinope DM2550ZB installation guide

Sinope

Sinope DM2550ZB installation guide

Gewiss CHORUSMART GW10673 quick start guide

Gewiss

Gewiss CHORUSMART GW10673 quick start guide

Tronico KUJU IMZ121H Product data sheet

Tronico

Tronico KUJU IMZ121H Product data sheet

Leviton DDS3600R Installation and operation guide

Leviton

Leviton DDS3600R Installation and operation guide

manuals.online logo
manuals.online logoBrands
  • About & Mission
  • Contact us
  • Privacy Policy
  • Terms and Conditions

Copyright 2025 Manuals.Online. All Rights Reserved.