manuals.online logo
Brands
  1. Home
  2. •
  3. Brands
  4. •
  5. Leviton
  6. •
  7. Dimmer
  8. •
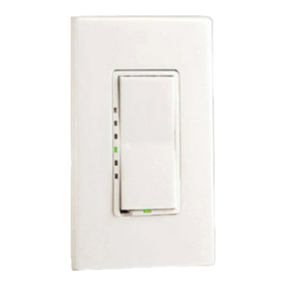
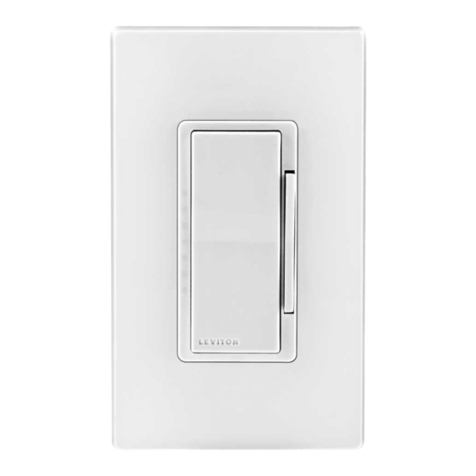
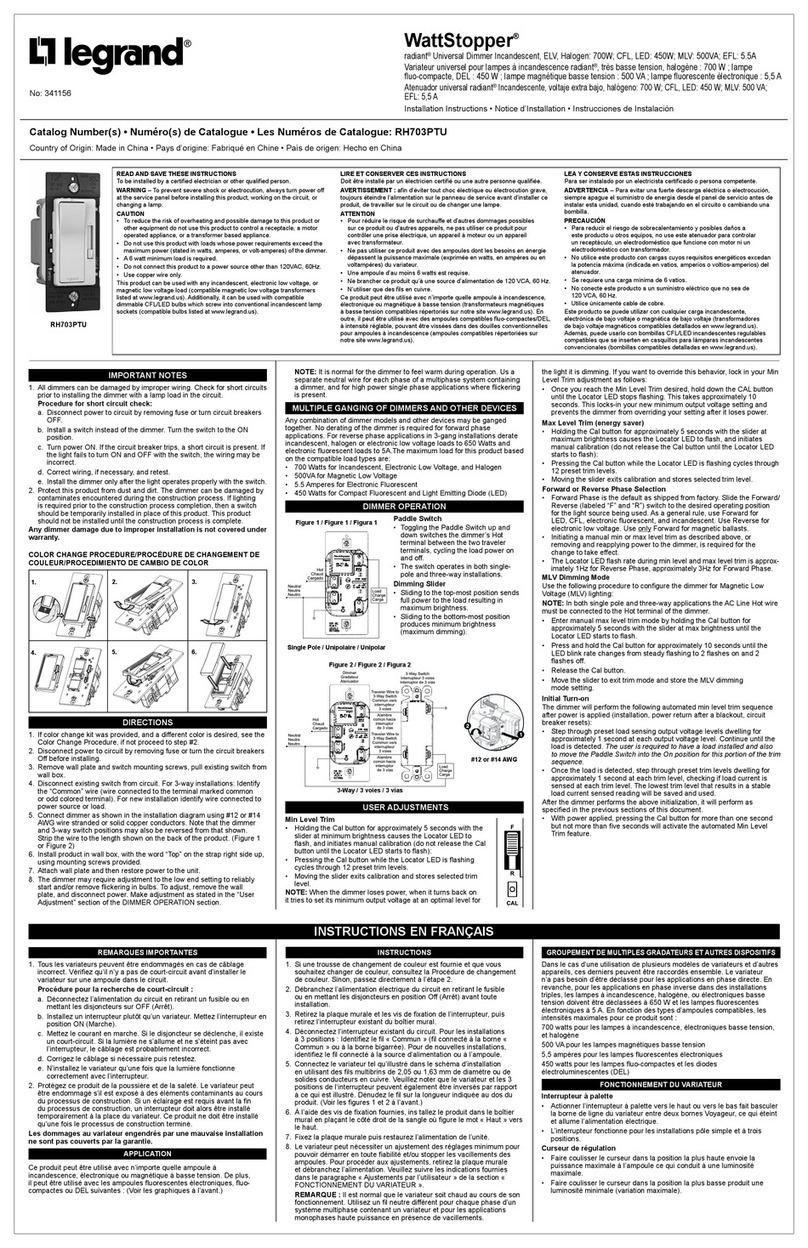
  9. Leviton Decora Mural MCM06-1 User manual

Leviton Decora Mural MCM06-1 User manual

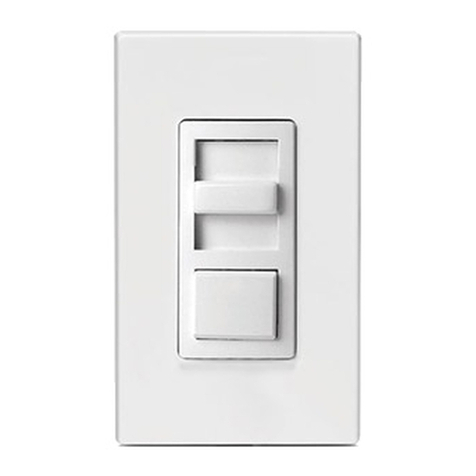
FEATURES
•Leviton's Decora® Style design • Scene Capabilities
•Soft fade ON/OFF • Power interruption - load returns to existing state
•Minimum Brightness Adjustment • ON/OFF LED indicates status of load
•Brightness Level Display • Color conversion available
•Double Tap functions
FCC COMPLIANCE STATEMENT
This device complies with part 15 of the FCC Rules. Operation is subject to the following two conditions: (1) This device must not cause harmful interference, and (2) This device
must accept any interference received, including interference that may cause undesired operation.
INSTALLATION INSTRUCTIONS
WARNING: TO BE INSTALLEDAND/OR USED IN ACCORDANCE WITHAPPROPRIATE ELECTRICAL CODESAND REGULATIONS.
WARNING: IFYOU ARE NOT SUREABOUTANY PART OF THESE INSTRUCTIONS, CONSULTA QUALIFIED ELECTRICIAN.
WARNING: TO AVOID OVERHEATING AND POSSIBLE DAMAGETO THIS DEVICE AND OTHER EQUIPMENT, DO NOT INSTALL TO CONTROL A RECEPTACLE,
FLUORESCENT LIGHTING, ORA MOTOR - ORTRANSFORMER - OPERATEDAPPLIANCE OTHER THAN APPROPRIATE LOW-VOLTAGE LIGHTING.
WARNING: A 17100 REPEATER MUST BE USED IF THERE IS MORE THAN ONE CIRCUIT.
CAUTION (For Incandescent Only): USE WITH INCANDESCENT OR 120V HALOGEN FIXTURES ONLY.
CAUTION (For Magnetic Low-Voltage Only):
1. USE WITH MAGNETIC LOW-VOLTAGE TRANSFORMERS, INCANDESCENT, OR 120V HALOGEN FIXTURES ONLY. USE A LEVITON ELECTRONIC LOW-VOLTAGE
DIMMER TO CONTROLELECTRONIC (SOLID STATE) LOW-VOLTAGE TRANSFORMERS.
2. WHEN AMAGNETIC LOW-VOLTAGE CIRCUIT IS OPERATED AT ADIM LEVEL, WITH ALL LAMPS INOPERATIVE, EXCESS CURRENT MAY FLOW THROUGH THE
TRANSFORMER. TOAVOID POSSIBLE TRANSFORMER FAILURE DUE TO
OVERCURRENT, USE A TRANSFORMER THAT INCORPORATES THERMAL
PROTECTION OR AFUSE AT THE PRIMARY WINDINGS.
OTHER CAUTIONS:
1. DISCONNECT POWER WHEN SERVICING OR CHANGING BULBS.
2. USE THIS DEVICE ONLY WITH COPPER OR COPPER CLAD WIRE. WITHALUMINUM
WIRE USE ONLY DEVICES MARKED CO/ALR OR CU/AL.
MULTI-GANG INSTALLATION:
When ganging dimmers, the side sections of the mounting strap must be removed. Use pliers
to carefully bend side sections back and forth until they break off (refer to Figure 1). The side sections dissipate heat,
so removing them requires a derating of the dimmer's capacity (refer to chart).
MAXIMUM BULB WATTAGE (For Magnetic Low-Voltage Only):
Low-voltage dimmers are rated in Volt-Amps (VA). The maximum bulb wattage is determined by the efficiency of the
transformer in the low-voltage lighting system. Transformer efficiencies will vary from different manufacturers;
consider 75% efficient as average. Use the chart to determine maximum bulb wattage for typical transformer
efficiency ratings.
TO INSTALL:
1. WARNING: TO AVOID FIRE, SHOCK, OR DEATH; TURN OFF POWERAT CIRCUIT BREAKER OR FUSEAND
TEST THAT POWER IS OFF BEFORE WIRING!
2. Remove existing wallplate and switch or dimmer, if applicable.
3. Remove 3/4" (1.9 cm) of insulation from each circuit conductor. Make sure that ends of conductors are straight.
4. Connect lead wires per appropriate WIRING DIAGRAM as follows: WARNING: CONNECT A MAGNETIC LOW-
VOLTAGE DIMMER ONLY TO THE PRIMARY (HIGH-VOLTAGE) SIDE OF AMAGNETIC LOW-VOLTAGE
TRANSFORMER. Twist strands of each lead tightly and, with circuit conductors, push firmly into appropriate wire
connector (see chart for allowable wire connector and number of conductor combinations). Screw
connectors on clockwise making sure that no bare conductor shows below the wire connectors. Secure each
connector with electrical tape.
5. Carefully position all wires to provide room in outlet box for dimmer. Mount dimmer into box with mounting screws
supplied.
6. Restore power at circuit breaker or fuse. Turn the dimmer ON by pressing the upper half of the rocker. The
GREEN LED will turn OFF to indicate power to the dimmer (when the dimmer is OFF, the LED is ON).
NOTE: This model incorporates a trim adjustment which will allow the installer to precisely set the low end of the
dimming range to suit each installation. This adjustment is preset at the factory and should require no further
adjustments for most installations. If adjustment is required proceed as follows, otherwise continue with step 9:
7. The brightness adjustment is located on the side of the dimmer (refer to Figure 1). Using a small, insulated
screwdriver, depress the brightness adjustment switch.To increase the minimum brightness, press the upper half
of the rocker.To decrease the minimum brightness, press the lower half of the rocker.
8. Release the rocker. Release adjustment switch and minimum brightness is set. Check for proper operation by
tapping the lower half of the rocker so the lights turn OFF, then tapping the upper half of the rocker so the lights
turn ON. The lights will turn ON to the new minimum brightness set. If operation is not satisfactory, repeat step 7.
9. Attach Decora®wallplate (not included). INSTALLATION IS COMPLETE.
NOTE: On the lower left corner of the switch frame, there is an air-gap switch. When servicing a controlled fixture,
pull lever out (OFF position). This will cut the power to the fixture.After servicing is complete, push the lever in (ON
position) to restore power. The lever must be pushed in all the way (ON position) for normal operation.
PK-93080-10-00-0A
For Technical Assistance Call:
1-800-824-3005 (U.S.A. Only)
1 800 405-5320 (Canada Only)
www.leviton.com
LIMITED 2 YEAR WARRANTYAND EXCLUSIONS
Leviton warrants to the original consumer purchaser and not
for the benefit of anyone else that this product at the time of its
saleby Levitonisfree ofdefectsin materialsandworkmanship
under normal and proper use for two years from the purchase
date. Leviton’s only obligation is to correct such defects by
repairor replacement,at itsoption,if withinsuch twoyear period
the product is returned prepaid, with proof of purchase date,
and a description of the problem to Leviton Manufacturing
Co., Inc., Att: Quality Assurance Department, 59-25 Little
NeckParkway,LittleNeck, NewYork11362-2591(In Canada
send to Leviton Mfg. of Canada Ltd., 165 Hymus Blvd.,
Point Claire, (Quebec), Canada H9R 1E9). This warranty
excludes and there is disclaimed liability for labor for removal
of this product or reinstallation. This warranty is void if this
product is installed improperly or in an improper environment,
overloaded, misused, opened, abused, or altered in any
manner, or is not used under normal operating conditions or
notinaccordancewith any labels or instructions.Thereareno
otheror impliedwarranties ofanykind,includingmerchantability
andfitnessfora particular purpose, but if any impliedwarranty
is required by the applicable jurisdiction, the duration of any
such implied warranty, including merchantability and fitness
for a particular purpose, is limited to two years. Leviton is not
liablefor incidental,indirect, special,orconsequential damages,
including without limitation, damage to, or loss of use of, any
equipment, lost sales or profits or delay or failure to perform
thiswarrantyobligation. The remediesprovidedherein are the
exclusive remedies under this warranty, whether based on
contract, tort or otherwise.
Scene Capable Dimmer
120VAC, 60Hz
Incandescent and Magnetic Low-Voltage
Cat. No. MCM
Ø
6-1, 600 W/VA
(w/brightness level display)
Cat. No. MCM1
Ø
-1, 1000 W/VA
(w/brightness level display)
Total minimum wattage must
exceed 60W or 60VA
INSTALLATION INSTRUCTIONS
PK-93080-10-00-0A
C O L L E C T I O N B Y L E V I T O N
Two More than
Rating Single Gang 2 Gang
600VA 450W 375W 300W
1000VA 750W 600W 525W
MAXIMUM BULB WATTAGE AT 75% EFFICIENCY
Figure 1 – Dimmer Functions
Upper
Rocker
Air Gap
Switch ON/OFF
LED
Lower
Rocker
Minimum Brightness
Adjustment Switch
Brightness Level
Display
Mounting Strap
Side Sections
Two More than
Cat. No. Single Gang 2 Gang
MCM
Ø
6-1 600W/VA 500W/VA 400W/VA
MCM1
Ø
-1 1000W/VA 800W/VA 700W/VA
MAXIMUM LOAD PER DIMMER FOR MULTI-GANG
WIRE CONNECTOR / # OF COND. COMBINATION CHART
1- #12 w/ 1 to 3 #14, #16 or #18
2- #12 w/ 1 #14 w/ 1 #16 or #18
2- #12 w/ 1 #16 w/ 1 or 2 #18
2- #14 w/ 1 to 3 #16, #18 or #20
4- #16 w/ 1 or 2 #18, #20 or #22
1- #14 w/ 1 to 4 #16, #18 or #20
2- #14 w/ 1 to 3 #16, #18 or #20
2- #14 w/ 1 #16 w/ 1 or 2 #18 or #20
3- #14 w/ 1 or 2 #18 or #20
4- #14 w/ 1 #16 or #18
2- #16 w/ 1 #18 w/ 1 or 2 #20 or #22
1- #14 w/ 1 #18 w/ 1 to 3 #20
3- #14 w/ 1 #16 w/ 1 #18, #20, #22
3- #14 w/ 1 #18 w/ 1 #20 or #22
PK-93080-10-00-0A 9/24/02, 1:52 PM1
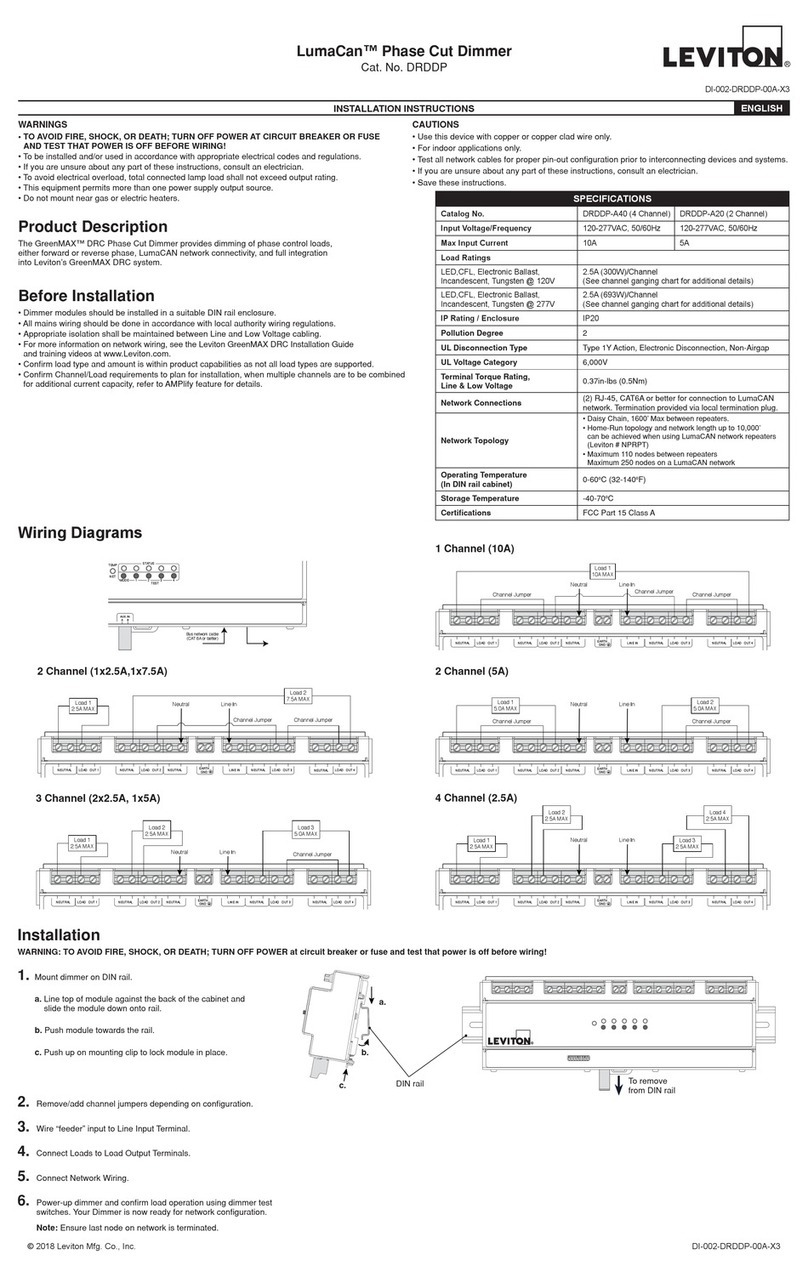
COLOR CONVERSION PROCEDURE
The color of this device can be changed to suit your interior design requirements. Simply obtain a color conversion
kit of the appropriate color from your Leviton distributor and proceed as follows (please note that wallplate must be
removed).
1. Select the color of the face you desire.
2. The frame has snaps on its sides. Using a small screwdriver, gently remove the frame from the strap (refer to
Figure 2).
3. Take the new frame and position it properly to the strap. Notice that the frame has a cut-out for the air-gap
switch lever. Line up the plastic snaps with the square holes in the strap. Insert the snaps on one side of the
frame into the strap.
4. Firmly press sideways and down to slip the other snaps into place. The frame snaps in with a audible click.
Ensure that all four snaps are secure. Replace Decora®wallplate. The color conversion is complete.
TO PROGRAM
Programming scenes occurs at the Scene Controller for this dimmer. If programming is required, refer to Scene
Controller’s instruction sheet.
OPERATION
ON: Tap the upper half of the rocker. The lights will brighten to the last set light level.
OFF: Tap the lower half of the rocker.The lights will dim to OFF.
BRIGHTEN: Press and hold the upper half of the rocker to the desired light level.
FULL BRIGHT: If the lights are OFF, double tap the upper half of the rocker.The lights will turn ON FULL
BRIGHT.
If the lights are ON, tap the upper half of the rocker once. The lights will turn ON FULL
BRIGHT.
The previous light level will remain in memory upon next ON operation (see above).
FAST OFF: Double tap the bottom half of the rocker.The lights will immediately turn OFF.
DIM: Press and hold the lower half of the rocker to the desired level.
BRIGHTNESS LEVEL DISPLAY:
Indicates the level of brightness when the lights are ON. Indicates the previous level of brightness when the lights are
OFF (refer to Figure 1).
NOTE: To alert you that there is power to the dimmer when the load is OFF, the ON/OFF LED remains ON. To alert
you that the load is ON, the ON/OFF LED remains OFF.
NOTE: If lights are OFF, regardless if you tap or press and hold the upper half of the rocker, the lights will go to
last set light level.
NOTE: If a power interruption should occur while the device is ON, the light load will return to its previous light level
when power is restored within 10 seconds.
TROUBLESHOOTING
•Light does not turn ON and ON/OFF LED does not turn ON
- Circuit breaker or fuse has tripped.
- Lamp switch is OFF, if applicable.
- Lamp is burned out.
- Lamp is not connected to line Neutral.
- Air gap switch is open.
•Dimmer does not operate
- Dimmer BLACK wire miswired to lamp and Dimmer BLUE wire miswired to LINE Hot.
•Light turns ON and Dimmer works, but Controller does not work
- There are no connections from Controller to Dimmer (YELLOW wire).
- Controller is miswired.
•Lights Flickering
- Lamp has a bad connection.
- Lamp load is less than 60W or 60VA.
Hot (Black)
Neutral (White)
Load
Scene Capable
Dimmer
Blue
White White
Black
Yellow Yellow Black
White
Black
Line
120VAC, 60Hz
Scene Controller
Green
Ground
(OR PRIMARY SIDE OF
MAGNETIC LOW-VOLTAGE
TRANSFORMER)
}
Hot (Black)
Neutral (White)
Load
Scene Capable Dimmer
(Incandescent)
Scene Capable Dimmer
(Low-Voltage)
Blue
Blue
White
Black
Black Black
Yellow
Yellow
Yellow
Black
White
Black
White White
Line
120VAC, 60Hz
Scene
Controller Scene
Controller
Green
Ground
Green
Ground
LOAD
Wiring Diagram 1 – Two Location Control Application
Wiring Diagram 2 – Scene Dimming: Low-Voltage and Line Voltage with
Multiple Scene Controllers and Scene Dimmers
Wiring Diagram 3 – Scene Dimming: Line Voltage with
Multiple Scene Controllers and Dimmer on Two Circuits
Scene
Dimmer
(Incandescent)
Scene
Dimmer
(Incandescent)
Scene
Controller
17100-2WY
REPEATER
2-Way Scene
Controller
Black
120VAC, 60Hz
Black Red
Neutral B
Neutral A
Yellow
Yellow
Black Yellow
Blue Blue
White Gray
Yellow/Red
Line B
Line A
Load Load
White White
Yellow
Black
Black Yellow
Circuit A Circuit B
Green
Ground Green
Ground
Scene
Dimmer
(Incandescent) Scene
Controller
17100-2WY
REPEATER
2-Way Scene Dimmer
(Low-Voltage) Scene
Controller
Black
120VAC, 60Hz
Black Red
Neutral B
Neutral A
Yellow
Yellow
Black Yellow
Blue Blue
White Gray White
Yellow/Red
Line B
Line A
Load
White White
Yellow
Black
Black Yellow
Circuit A Circuit B
LOAD
Green
Ground Green
Ground
Wiring Diagram 4 – Scene Dimming: Low-Voltage and Line Voltage with
Multiple Scene Controllers and Dimmer on Two Circuits
PK-93080-10-00-0A
Frame
Strap
Air-Gap
Switch
Snaps
Push in 2 Locations ON/OFF
LED
Brightness Level Display
Figure 2 – Color Conversion
PK-93080-10-00-0A 9/24/02, 1:52 PM2

This manual suits for next models

1

Other Leviton Dimmer manuals

Leviton DMX-512 Installation guide

Leviton

Leviton DMX-512 Installation guide

Leviton Acenti ACE04-1L User manual

Leviton

Leviton Acenti ACE04-1L User manual

Leviton i 48e Manual

Leviton

Leviton i 48e Manual

Leviton 600 Series Owner's manual

Leviton

Leviton 600 Series Owner's manual

Leviton VZH08-1L User manual

Leviton

Leviton VZH08-1L User manual

Leviton Toggle Touch TGI06-1L User manual

Leviton

Leviton Toggle Touch TGI06-1L User manual

Leviton Decora Mural MCX10-1 User manual

Leviton

Leviton Decora Mural MCX10-1 User manual

Leviton HCM06-1D User manual

Leviton

Leviton HCM06-1D User manual

Leviton Decora Illumatech IPX06-1 User manual

Leviton

Leviton Decora Illumatech IPX06-1 User manual

Leviton VZM06-1L User manual

Leviton

Leviton VZM06-1L User manual

Leviton VZE04-1L User manual

Leviton

Leviton VZE04-1L User manual

Leviton Decora Smart DN6HD User manual

Leviton

Leviton Decora Smart DN6HD User manual

Leviton Decora Illumatech IPI06-1L User manual

Leviton

Leviton Decora Illumatech IPI06-1L User manual

Leviton Vizia RF RZM10-1L User manual

Leviton

Leviton Vizia RF RZM10-1L User manual

Leviton 6631-L User manual

Leviton

Leviton 6631-L User manual

Leviton Decora Mural MDE03-1 User manual

Leviton

Leviton Decora Mural MDE03-1 User manual

Leviton Decora HCM10-1DW Installation instructions

Leviton

Leviton Decora HCM10-1DW Installation instructions

Leviton LumaCan DRDDP User manual

Leviton

Leviton LumaCan DRDDP User manual

Leviton VZI06-1L User manual

Leviton

Leviton VZI06-1L User manual

Leviton 6613-PL User manual

Leviton

Leviton 6613-PL User manual

Leviton lumina 0-10VDC User manual

Leviton

Leviton lumina 0-10VDC User manual

Leviton UNIV User manual

Leviton

Leviton UNIV User manual

Leviton Decora Mural MLI06-1 User manual

Leviton

Leviton Decora Mural MLI06-1 User manual

Leviton VZH06-7L User manual

Leviton

Leviton VZH06-7L User manual

Popular Dimmer manuals by other brands

Westcott 7580 user manual

Westcott

Westcott 7580 user manual

AMX RDM-MDM Wiring diagrams

AMX

AMX RDM-MDM Wiring diagrams

SMG Powerlight 612 user manual

SMG

SMG Powerlight 612 user manual

DALCNET SLIM 2CV CASAMBI Device manual

DALCNET

DALCNET SLIM 2CV CASAMBI Device manual

Velleman WRS Series quick start guide

Velleman

Velleman WRS Series quick start guide

Lightronics RD-122 owner's manual

Lightronics

Lightronics RD-122 owner's manual

preussen DimME KNX product manual

preussen

preussen DimME KNX product manual

Behringer EUROLIGHT LD6230 user manual

Behringer

Behringer EUROLIGHT LD6230 user manual

SRS Light Design DDP 610 PG instruction manual

SRS Light Design

SRS Light Design DDP 610 PG instruction manual

Jung FUSD 1253 quick start guide

Jung

Jung FUSD 1253 quick start guide

Lapetek SMART 300 Assembling instructions

Lapetek

Lapetek SMART 300 Assembling instructions

GE Z-Wave 45606 manual

GE

GE Z-Wave 45606 manual

NSI ND 4600 Operation manual

NSI

NSI ND 4600 Operation manual

ETC SMARTRACK user manual

ETC

ETC SMARTRACK user manual

ATX AL-WS-DR1-PIR manual

ATX

ATX AL-WS-DR1-PIR manual

hager WBMDUPB quick start guide

hager

hager WBMDUPB quick start guide

Green image GC-2830CDMX-US quick start guide

Green image

Green image GC-2830CDMX-US quick start guide

Crestron CLX-1DELV4 Specification sheet

Crestron

Crestron CLX-1DELV4 Specification sheet

manuals.online logo
manuals.online logoBrands
  • About & Mission
  • Contact us
  • Privacy Policy
  • Terms and Conditions

Copyright 2025 Manuals.Online. All Rights Reserved.