Zhongshan Hongmao SM-800D User manual

TWO-WAY LCD
VEHICLE SECURITY SYSTEM
OPERATION & INSTALLATION INSTRUCTIONS

1. Main Control Module
Working Voltage : 9V-15VDC
Stand by Current Consumption: 20 mA
Active Current Consumption: 500 mA- 2A
Working Temperature Range: -40 ~ +70
Frequency Range: 433.92MHz + 75KHz
TX Range: 600-800m
Working Mode: ASK
TECHNICAL SPECIFICATION
2. 2-Way LCD Remote Control
Working Voltage Range: 1.0V-1.7VDC
Frequency Range: 433.92MHz + 75KHz
Working Mode: ASK
TX Range: 300-500m (in open area)
-1-

1. Button
1.1 Alarmdisarmed: Press button once, the central door lock will lock, the ignition and the trunk will
arm in 3 seconds, and the doors will arm automatically after the dome light is turned off, the sensor will be
activated in 25 seconds to ensure the lifting operation of the power window is completed.
1.2 While driving: Press button once, the doors will lock/unlock.
1.3 Alarm triggered: Press button once,the system willdisarm.
1.4 Alarmarmed: Press button once,the system willdisarm.
2. Button
2.1 Alarmdisarmed: Press button once,the system will enter silent armed mode in 3 seconds and the
doors will lock.
2.2 Alarmarmed: Press button onceto locate thevehicle.
2.3 While driving: Press button twice,the system willenter anti-hijack mode.
2.4 Alarmsounding: Press button once,the siren willstop sounding instantly.
3. Button
3.1 Alarmdisarmed: Press button once, the trunk will open.
3.2 Alarmarmed: Press button & once, thesensor and the driver paging function will be turned off
temporarily.(For system without remote engine start press button twice to turn off the sensor and
the driver paging function.)
3.3 Alarmsounding: Press button once,the siren willstop sounding instantly.
3.4 Alarmarmed: Press button twice,the engine willstart.(For system with remote engine start)
QUICK REFERENCE ON USE OF REMOTECONTROL
-2-

4. Button
4.1 Press &release button , the LED of the Remote Control will illuminate for 1 second (Press button
once when the alarm is triggered , the LED will illuminate for 4 seconds.)
4.2 While the alarm is disarmed, open a vehicle door, turn the ignition to ON position, press & hold
button for 3seconds, theAUTO functionwill be turnedON/OFF.
4.3 While the alarm is armed or disarmed, press button & once, the vibrator in the Remote Control
will be turned ON/OFF. (Only Remote Control with vibrator has this function.)
NOTE:
The duration of each press of a button should be over 0.5 second. If a second press of a button
is needed, it is recommended to press the button after the icon disappeared fromthe LCDscreen
due to two-way communication.
QUICK REFERENCE ON USE OF REMOTECONTROL
-3-

1.Main Control Module (forvehicle of negative polarity ground 12V constant power)
It isa mainpart of the Vehicle SecuritySystem andit is usually installed in ahidden location under
the bottom of the dashboard in the vehicle. Use the wiring diagram as a reference, connect the module
wires tothe vehicle's ignition, turn signal lights, constant power, etc respectively. Make sure to connect
each wirefirmly andprotect theconnected partof thewire properlywith quality electrical tapeto
make it perfectlyinsulated. After the connectionof each wire,insert the plugsinto the moduleconnectors.
Testthe system withthe remote controlto see whethereach button functionscorrectly.
After you confirmnothing iswrong, bundle the wiresorderly andput theexisting vehicle wiring
harnesses back the original locations.
2.Communication Module(with Paging Sensorinside)
It transmits and receives RF signal with the Remote Control. It is a key component of the system so the
selection of the mounting location is very important. Normally it is mounted to the top or bottom right
corner of the windshield. It shall not be close to the silver-gilt film on the windshield or the transmission
and receiving of the module will be affected. The distance between the module and the metal frame of
the vehicle's bodyshall not beless than 5cm.
3.Shock Sensor(Optional)
It is an intelligent dual stage shock sensor that can distinguish whether the vehicle is impacted lightly
orheavily. When an impact is appliedto thebody of the vehicle,it sendssignal to the Main Control
Module toset offsiren alarm sound and to make Remote Control emit audio and visual warning signals.
The Shock Sensor should be firmly mounted on the frame of the vehicle's body so that it can respond to
the externalimpact as correctly as possible. After installation, adjust the sensitivity to the desired level
according to the actual need and the size of the vehicle. (The sensitivity has been set to an optimum level
in the factory. Please do not adjust it again if it is not necessary.)
BRIEF LOOKAT EACH DEVICE
-4-

4.Siren
If installed, alarm sound of higher than 110 dB is set off from the siren when the vehicle is attacked. It
should be mountedin a placeto protect itfrom heat andwater damage.
5.Remote Control
The Remote Control mainly consists ofASK electroniccircuits, LCD screen, melody buzzer and a vibrator
(vibrator is optional). Each graphic icon displayed on the LCD screen and each different melody/beep
sound tone emitted from the Remote Control gives you both visual & audio information on the vehicle's
status, every operation status/process of the System or System's present status.
-5-
BRIEF LOOKAT EACH DEVICE

1.About Two-Way Transmission
As the system is of two-way signal transmission, sometimes the time required for communication takes
longer than usual when communicating remotely either to operate the system or to check the operation
result sincea large amountof information is tobe exchanged between the TX part and RX part of the
system with one press of button.
The uniquetransmission logic that hasboth wake-upmode and sleep modeduring communication
may alsoresult insuch delay of signal transmission. For instance, if a signalfrom TX partis sentto
RX part of the Main Control Module while it is in sleep mode, the RX part may not recognize the signal
sent by TX partfor a few seconds until when the RX part of the Main Control Module gets in wake-up
mode and visa versa. Due to the same reason, when you shut down any of the system's operation and if
there are no response with your first press of a button, we recommend you to press the button again after
waiting 3 seconds.
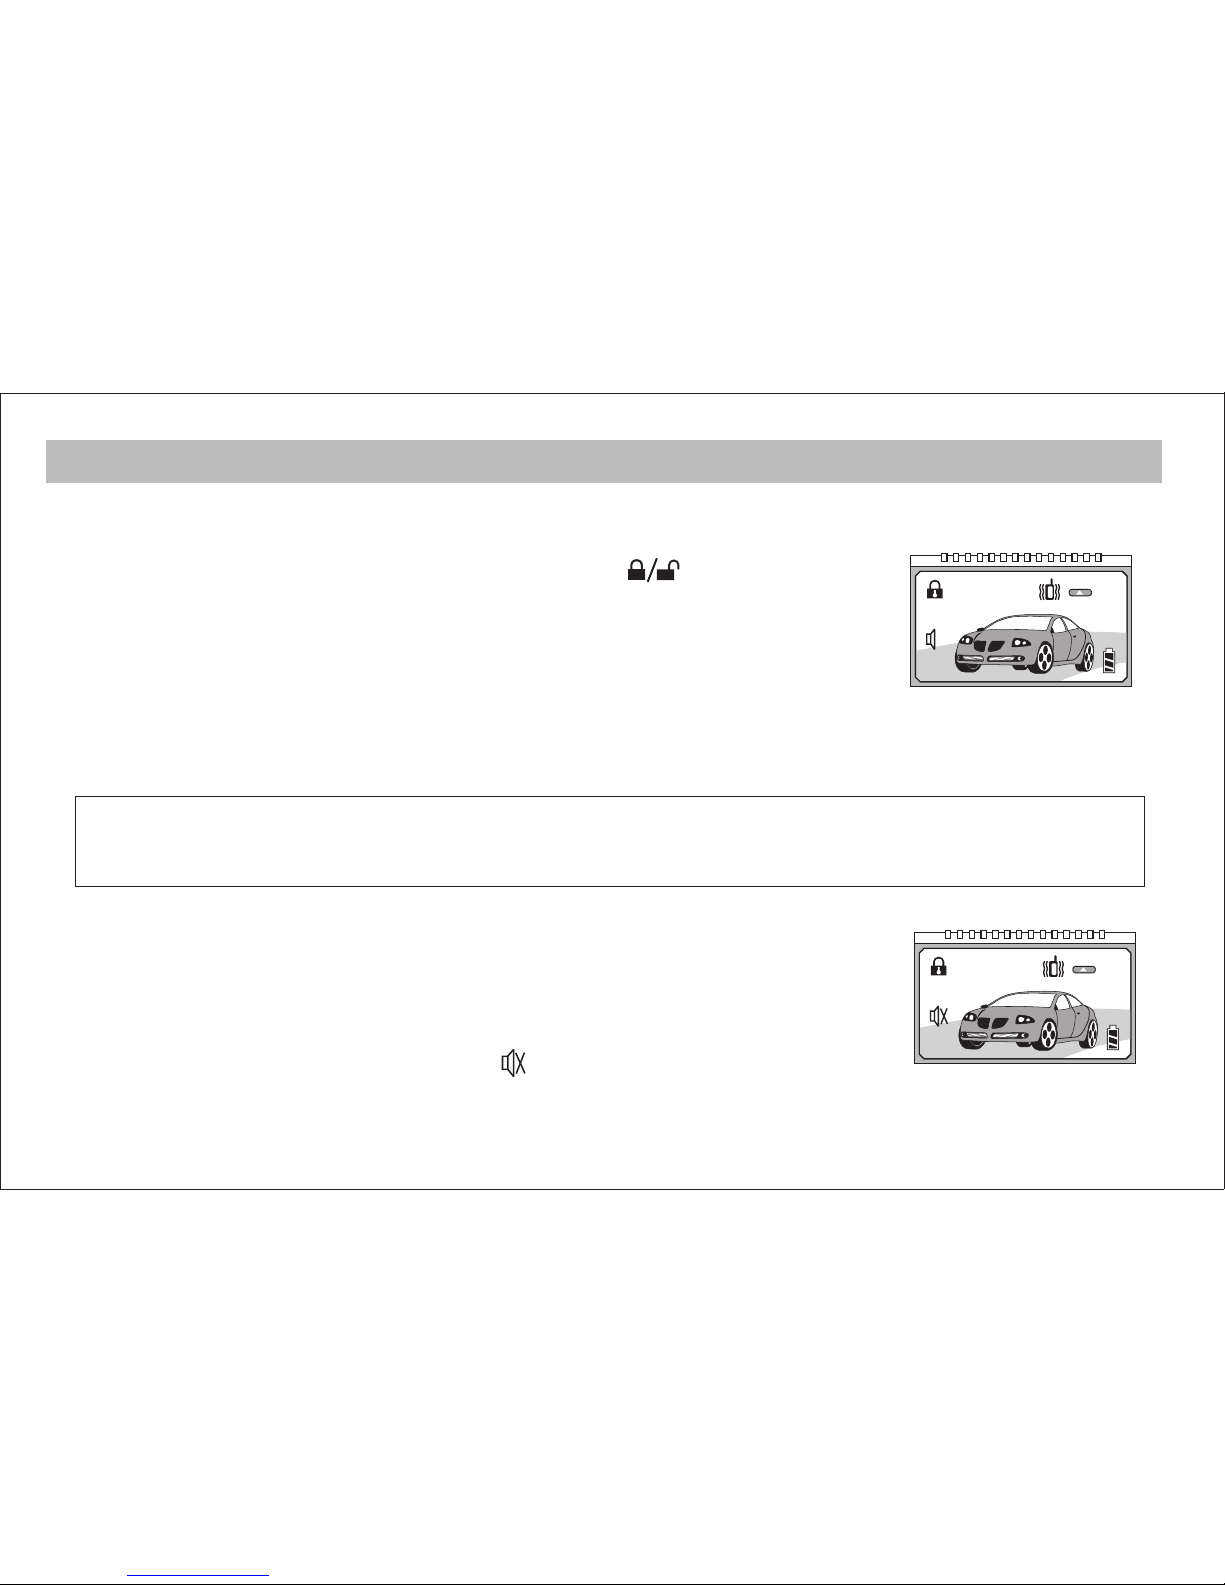
Press button once while the alarm is armed, the Remote Control will beep 3 timesand indicate the
system iswithin communication range. If the system is interfered by strong radio frequency around,
sources of high voltage electric power or such obstacles like tall buildings and so on, the transmission
range may getshorter as thesystem uses lowoutput powered frequency.
2.Battery Replacement
The Remote Control is powered by a 1.5Vtype alkaline battery. When the battery is new, the icon will
display on the LCD screen. When the power of the battery is exhausted, the icon on the LCD will flash
and anew battery should be replaced. If the timeduration for replacement of the battery is within 10
seconds, the icons on the LCD screen of the Remote Control will remain unchanged.
3.Asthe TX powerof the Communication Moduleis prettystrong, so the distance between it and the
Remote Control shallbe over 2.5mwhen operating theRemote Control.
POINTS TO BE NOTED FOR YOUR BETTER USE
-6-

1. Arm The Vehicle & Door Lock
Exit the vehicle and close all of the doors. Press button , the siren willchirp
once, the turn signal lights will flash once, the doors will lock, the power window
output will beactivated, the RemoteControl will emita short chirp, the ignition
and the trunk will arm in 3 seconds, the doors will arm automatically after the
domelight is turned off, the sensor will be activated in 25 seconds and the LED
status indicator will begin flashing slowly. The LCD screen on the Remote
Control displays aspicture (1).
FEATURES ILLUSTRATION
Please close allthe windows completely before arming thevehicle or makesure there
is not anyobstacle that will affect the lifting operation ofthe windows. Otherwise
the power windowwill not work properly or bedamaged.
IMPORTANT!
Picture (1): Arming with
sound and light
2. Silent Arming
It is to mute a short siren alarm sound from the vehicle when you operate any
functions by pressing button of Remote Control. You'd better turn off the chirp
sound not todisturb your neighbors, for instance, ifyou operate thesystem late
at night in a residential area. Press button once while the alarm is disarmed,
the alarm will enter silent arming mode. The LCD screen on the Remote
Control displays as picture (2).
Picture (2): Silent arming
-7-

FEATURES ILLUSTRATION
Picture (3): Alarm disarmed
3. Disarm The Vehicle & DoorUnlock
A.Press button while the alarm is armed with sound and light, the siren will emit 2 chirps,
the turn signal lights will flash twice, the central door lock will unlock,the
LED will stopflashing, the system will disarm andthe Remote Controlwill
beep twice. The LCD screen on the Remote Control displays as picture (3).
B.Press button while the alarm is in silent armed mode, the turn signal
lights willflash twice, the central door lock will unlock, the LED will
stop flashing, the system will disarm and the Remote Control will beep
twice. The LCD screen on the Remote Control displays as picture (3).
C.If you do not open any vehicle door after disarming the system within25 seconds, the system will
rearmautomatically, the doors will lock and the Remote Control will beep once.
D.The alarm has an intrusion memory. If the alarm is triggered while it is armed, the siren will emit 4
short chirps and the turn signal lights will flash 4 times upon disarming the alarm.
4. Remote TrunkRelease
Press button whilethe alarm is disarmed or the ignition is ON, the trunk shall be opened but
there is no indication on the LCD screen.
5. Vehicle Finding
Press button while thealarm is armed with sound and light, the siren will emit 3 short chirps and
the turn signal lights will flash 3 times for locating the vehicle.
Press button while thealarm is in silent armed mode, only the turn signal lights will flash 3 times
for locating the vehicle.
-8-

FEATURES ILLUSTRATION
Picture (4): Shock sensor
temporarily turned off
Picture (5): Remote engine start
6. System's StatusCheck
By pressing button , you can check whether your Remote Control is within the range of transmission or
not. If within the range, the Remote Control will beep 3 times. If you are out of range, the Remote Control
will not emit any sound.
7. Remote Sensor Bypass
Remote sensor bypassis designed forsituation in which it is notconvenient for thesensor to be active due
to environmental conditionsthat may causeannoying false alarms (i.e.: the vehicleis parked atthe airport
or in thunderstorm day). In such occasions you may turn off the sensortemporarily.Whilethe alarm is armed,
for system with remote engine start, press button & once(for system
without remote engine start, press button twice), the turn signal lights will
flash once, the Remote Control willbeep once, the sensorof the alarm system
and the driver paging functionare temporarily turned off.After pressing button
to disarm the alarm, the system will return to the shock-sensing mode
again the nexttime when youarm the alarm.The LCD screen on theRemote
Control displays as picture (4).
8. Remote EngineStart (Optional)
-9-
A. While the alarm is armed, press button twice, the siren will chirp
once, the turnsignal lights willflash once, the Remote Control will beep
3 timesand the engine will start. After the engine is started the Remote
Control will beep 3 times again, the turn signal lights will flash once every
two seconds. The LCDscreen on the Remote Control displays as picture (5).
B. Once the vehicle has started, it will run for the pre-programmed period

FEATURES ILLUSTRATION
of time (either 8, 16, 24 or 60 minutes) then shut down and the system will enter armed state again. While
the remote started engine is running, you may press button to shut it down, the Remote Control will
beep twice and the system will enter armed state again.
C. If the hand brake is released while trying to start the engine with Remote Control, the siren will emit 3
short chirps andthe engine willnot start.
D. If you want to drive the vehicle while the remote started engine is running, press button to disarm
the alarm and unlock the doors, turn the ignition key to ON position within 30 seconds or the engine will
shut down.
NOTE:
1.If you start your car with the remote, the vehicle will try to start the engine 3 times. If it is failed to start
please check thewire connection ofthe remote enginestart circuit.
2.After the engine is started successfully then it cranks again, please check whether the purple detecting
wire from the main control module is correctly connected to the correct alternator wire or the engine oil
pressure indicator wire. (These two wires are with negative polarity beforeengine startand with
+12V after engine started.)
E. Remote start crank time: 0.7, 0.9, 1.1, 1.3, 1.5, 1.7, 1.9, 2.1, 2.3, 2.5 sec.
There are 10 options of crank time. Connect power to the unit then it will enter the default setting 0.7
second. In default setting the engine will crank 3 times in total. The first time 0.7 second, the second time
0.9 second and the third time 1.1 seconds.
Please be surethat you usethe remote enginestart function onlywhile the gear
selector is inneutral position andthe hand brakeis ON.
WARNING:
Crank time programming
While the alarm system is disarmed, turn the ignition ON then stay ON, then press & hold the Override/
-10-

FEATURES ILLUSTRATION
Valet Switch for5 seconds, thesiren will chirp once to indicatethe system isnow in programming mode.
While the system is inprogramming mode:
a.Press theOverride/Valet Switch once,the siren will chirp twice and indicate the 0.9-second crank time is
selected. Inthis setting the engine will crank 3 times in total. The first time 0.9 second, the second time
1.1 seconds and the third time 1.3 seconds.
b.Press theOverride/Valet Switch onceagain, the sirenwill chirp 3times and indicatethe 1.1-second crank
time is selected. Inthis setting the engine will crank 3 times in total. The first time 1.1 seconds, the second
time 1.3 seconds and the third time 1.5 seconds.
c.Follow the above method till the 2.5-second crank time is selected, the siren will chirp 10 times. In this
setting the engine will crank 3 times in total. The first time 2.5 seconds, the second time 2.7 seconds and
the third time 2.9 seconds.
Afterthe 2.5-second crank time is selected, if you press the Override/Valet Switch again, the siren will
chirponce and return the crank time setting to 0.7 second. (After programming is complete, turn the
ignition OFF to exit the programming mode.)
Note: Every time when the power supply of the unit is disconnected then connected again, it will return the
crank time to the default setting 0.7 second.
9. Short run/turbo
Short run turbo mode keeps the engine running for a programmable period of 1, 2, 3, 4, 5, 6, 7 or 8 minutes
after you turnoff the ignition key and lock the doors. This will protect the engineof the vehiclesequipped
with Turbo engine. (Only system with remote engine start has this function.)
In default setting,the system willkeep the enginerunning for 2 minutes after turning off the ignition key.
If the brake pedal is pressed within 2 minutes then the engine will shut down instantly. If the brake pedal
is being pressed whenturning off the ignition key, the enginewill shut down instantly. This will be helpful
when parking amanual-transmission vehicle ona slope.
-11-

FEATURES ILLUSTRATION
10. System features programming
To enter the systemfeatures programming mode:
While the system is disarmed, press & hold the brake pedal, press & hold the Override/Valet Switch for 3
seconds, the sirenwill chirp onceto indicate the system has enteredprogramming mode.
A. Engine running time selection: 8,16, 24, 60 minutes
While the system is in programming mode, press button once, the siren will chirp twice to indicate
the 16-minute engine running time is selected. Press button once again,the siren will chirp 3 times
to indicate the 24-minute engine running time is selected. Press button once again,the siren will
chirp 4 times to indicate the 60-minute engine running time is selected. Press button once again, the
siren will chirp once to indicate the 8-minute engine running time is selected. Thedefault setting is 8
minutes. Every time when the power supply of the unit is disconnected then connected again, it will return
theengine running time to the default setting 8 minutes. (Only system with remote engine start has this
function.)
B. Short run/turboON/OFF
While the system is in programming mode, press button once, the siren will chirp once to indicate the
short run turbo mode is ON. Press button once again,the siren will chirp twice to indicate the short run
turbomode is OFF. The default setting is short run turbo mode OFF. Every time when the power supply
of the unit is disconnected then connected again, it will return the short run turbo mode to the default
setting. (Only system with remote engine start has this function.)
C.Short run/turbo timeselection: 1, 2,3, 4, 5, 6, 7, 8minutes
While the system is in programming mode, press button once, thesiren will chirp once to indicate
the 1-minute short run turbo time is selected. Press button once again, the siren will chirp twice to
indicate the 2-minute short run turbo time is selected. Press button once again, the siren will chirp
3 times to indicate the 3-minute short run turbo time is selected. Follow the above method till the 8-minute
short run turbo time is selected. The default setting is 2 minutes. Every time when the power supply of the
-12-

unit isdisconnected then connected again, it will return the engine running time to the default setting 8
minutes. (Only system with remote engine start has this function.)
After programming is complete,remove your footfrom the brakepedal to exitprogramming mode.
11. Remote Control Learning Process
A.The system is designed to memorize codes of 2 two-way LCD Remote Controls and 4 one-way Remote
Controls. The sequence should be to learn the two-way Remote Control first then learn the one-way Remo
te Control.
B.To Erase Remote Controls From Memory
Please erase the codes memorized in the Main Control Module each time before learning new Remote
Control. The process is as following:
While thealarm is disarmed, turn the ignition key to "NO" &"OFF" position 3 times then stay "ON", the
siren will emit a short chirp, then press & hold the Override/Valet Switch for 5 seconds, the siren will emit
a short chirp again, the LED status indicator will light solid, the system is now in learning mode. Then
press the Override/Valet Switch 6 times (for a duration of 0.5-1 second each time), the siren will emit a
short chirp, the LED will flash 5 times then turn off and indicate the codes memorized have been erased.
C.New Remote Control Learning (Leaning All Remote Controls Again)
Follow the above operation to let the system enter learning mode. While the system is in learning mode,
press button once, the siren will emit a short chirp and the LED will turn off indicating the learning
of the numberone Remote Control is completed. Repeat the above operation to learn more Remote
Controls.
Note:
Please be noted that there should not be strong radio frequency around and the distance between the
Communication Module and the Remote Control shall be over 2.5m during the learning process or the
learning will beaffected or fail.
FEATURES ILLUSTRATION
-13-

Picture (6): Driver paging
Z
Z
Z
FEATURES ILLUSTRATION
-14-
IMPORTANT!
In case aRemote Control islost you maygo to thedealer near yourlocation to buya new
one then memorize the codes of the Remote Control into the system. For security of your
vehicle please erase the code of the lost Remote Control from memory thenlearn all the
Remote Controls againand this willprevent the illegaluser who obtainedthelost Remote
Control from usingit to operatethe alarm system.
12. Driver Paging
While the alarm is armed, you may page the driver by tapping the Communication Module mounted on the
vehicle 3 times within 5 seconds, the turn signal lights will flash for 15 seconds, the paging melody sound
will sound 6 times (and the vibrator will vibrate 5 times Note: Only Remote Control with vibrator has this
function.) after the Remote Control receives the signals. The LCD screen on the Remote Control displays
as picture (6).
To disable this function,while the alarmis armed, forsystem with remote
engine start, press button & once (for system without remote engine
start, press button twice), the turn signal lights will flash once,the
Remote Control will beep once to confirm the Remote Control will not receive
the driver pagingsignals temporarily. (Note: The shock sensoris also turned
off at the same time.) This function will be enabled after disarming the alarm
by pressing button.
13. Hands-Free Operation (AUTO Function)
This system features hands-free operation.
While thesystem is in AUTO mode, as you walk toward your vehicle, the alarm system will automatically
disarm and unlock the doors as you get within approximately 3 to 20 meters of the vehicle. 10 seconds
after you turn off the ignition and close all the doors and leave the vehicle, the system will arm
automatically and the doors will lock. If you do not leave the vehicle within 10 seconds after closing the
doors then the system will not arm and the doors will not lock.

Picture (7): AUTO function ON
FEATURES ILLUSTRATION
-15-
To enable this function: Open the vehicle door while the alarm is disarmed, turn the ignition to ON
position, press andhold button on the Remote Controlfor 3 secondswith a distanceto the vehicle for
2 to 3 meters, the siren will emit a short chirp, the Remote Control will beep once, the icon will
display on the LCD screen and the system is now in AUTO mode
To disable this function:Open the vehicledoor, turn the ignition to ON
position, press and hold button on the Remote Control for 3 seconds,the
siren will emit 2 short chirps, the Remote Control will beep twice,the icon
will disappear from the LCD screen.
Note: Every time after battery replacement, the AUTO function should be
reset. The power consumption ofAUTO function is prettyhigh so it
is recommended not to use this function frequently..
AUTO function temporarily OFF
While the system is in AUTO mode, anytime when arming the system by pressing button or ,the
Remote Control will beep once to indicate the AUTO modeis temporarily turned off. When disarming
the system by pressing button , the Remote Control will beep twice to indicate the AUTO mode
function is turned on.
14. Automatic Door Lock/Unlock
Central door lock will automatically lock while stepping on brake pedal
15 seconds after turning ignition key to "ON" position and doors closed.
Central lock will automatically unlock when the ignition key is removed.
You can alsolock/unlock the doors by pressingbutton on the Remote
Control while driving.
15.Alarm by Shock Sensing
The dual-stage shock-sensingfeature may reduce the "false" alarmas few as possible.
When anylight impact is applied to the vehicle, the siren will emit 12 short chirps, the turn signal lights
Picture (8): Shock sensing alert
Z
Z
Z

FEATURES ILLUSTRATION
willflash 6 times and the LED will light solid to warn away potential intruders. The Remote Control will
sound for 15 seconds and vibrate 5 times (Only Remote Control with vibrator has this function.). The LCD
screen displays as picture (8).
Ifany light impact is applied to the vehicle again within 15 seconds or the vehicle is impacted heavily for
thefirst time, the siren will sound and the turn signal lights will flash for 25 seconds, the starter interrupt
will engage, the LED will light solid, the Remote Control will sound for 15 seconds and vibrate 5 times
(Only Remote Control with vibrator has this function.). (The siren will not sound while the alarm is in
silent armed mode.)
16. Doors/Trunk/Brake Pedal/Ignition Zone Protection
If any of the protected zones is triggered while the alarm is armed, the siren will sound and the turn signal
lights will flash for 25 seconds, the Remote Control will sound for 15 seconds and vibrate 5 times (Only
Remote Control with vibrator has this function.). If the trigger is not removed after 25 seconds, the alarm
cycle will repeat until the trigger is removed. The LCD screen will display as pictures (9) (11).
17. Closing DoorReminder
In the event that you arm the alarm with Remote Control while any of the doors are not closed completely,
then after 20 seconds, the siren will sound, the turn signal lights will flash and the Remote Control will
also sound until the door is closed.
Picture (9): Door opened
Picture (10): Trunk/Hood triggered Picture (11): Brake pedal/Ignition triggered
Z
Z
Z
Z
Z
Z
Z
Z
Z
-16-

18. Vibration Mode OfThe Remote Control (Optional)
It is difficult to hear the beep sound of the Remote Control after the alarm is triggered while you are in a
noisy place. Inthis occasion thevibration mode is helpful. And you maydisable this function if you think
it is notnecessary or forpower saving purpose.
Press button & once while thealarm is armed or disarmed, theRemote Control will beep twice,and
the vibrator inthe Remote Controlwill be temporarily turned off. Repeat the aboveoperation to returnto
the vibration mode again, the Remote Control will beep once. (Note: Only Remote Control with vibrator
has this function.)
19. Anti-Hijack
If you feel threatened while driving, you may press button twice within thetransmission range, the turn
signal lights will flash once. After 30 seconds, the siren will sound and the turn signal lights will flash
continuously, the Remote Control will also beep continuously and the vibrator will vibrate 5 times
(Remote Control with vibrator), the LCD screen displays as picture (11). Whetherthe engine will be
disabled or enabled will depend on the programmable options selected. (Refer to Jumper Table, the factory
setting is engine enabled). To exit anti-hijack mode only by pressing button .
20. Power Interrupted Memory
Whether the alarm system is armed or not before the vehicle battery is disconnected, the system will remain
in the samestate after thebattery is reconnected,this will increasethe security of your vehicle.
21. Override/Valet Switch
A. Emergency Override
In the case that the alarm's Remote Control is lost or its batteries become exhausted, you can perform an
emergency override to disarmthe alarm. Open the door with the key (the siren will sound), turn the ignition
to "ON" position within 10 seconds, then press the Override/Valet Switch twice, the system will disarm
and you candrive the vehicleas usual. But please be noted that the alarm system will not provide security
service with yourvehicle before thesystem is resumed to use.
FEATURES ILLUSTRATION
-17-

FEATURES ILLUSTRATION
The Override/Valet Switch should be installed in a hidden location
where it is convenient to operate.
IMPORTANT!
-18-
Picture (12): Auto arming
B. Valet Mode
This is for situation in which it is not convenient for the alarm to be armed, such as car wash. In the valet
mode all of the alarm's security features have been turned OFF and only the convenience features
such as keyless entry can be operated.
While thealarm is disarmed or the vehicle's ignition is OFF, press the Override/Valet Switch 5 times with
all doors closed, the siren will chirp once to confirm the alarm is in valet mode. Repeat the above operation
to exit valetmode, the siren will chirp twice.
22. Door Open Alert (Selectable)
If the user or the passenger opens the door while driving, the turn signal lights will flash to warn the others
driving behind. This feature canbe disabled. While the alarm is disarmed, openthe vehicle door,then press
the Override/Valet Switch 5 times, the siren will chirp twice, and this feature will be disabled after closing
the door. Repeat the above operation to enable this feature, the siren will chirp
once.
23. Auto Arming(Selectable)
Turn offthe ignition and exit the vehicle, after one minute the alarm will arm
automatically and enter the silent armed mode, the siren will chirp once to
confirm but thecentral door lockwill not lock.The LCD screen displays as
picture (12). Please refer to the Jumper Table to disable or enable this function.

FEATURES ILLUSTRATION
Door Trigger (+)
Power Central Door Lock Vacuum Pump Type Central Lock
Engine Disable Engine Enable (Anti-Hijack Mode)
Auto Arming ON Auto Arming OFF
Door Trigger (-)
Jumper Table (Factory setting: )
24. Features Selectable By Jumper
-19-
Table of contents