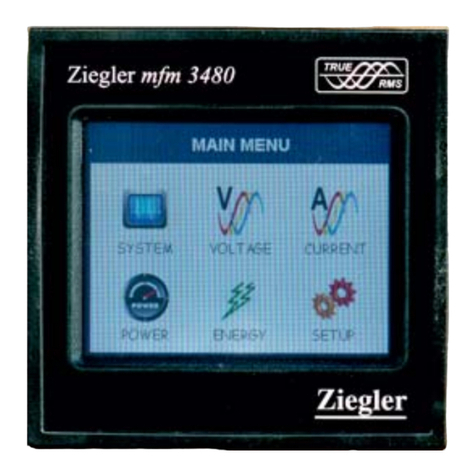
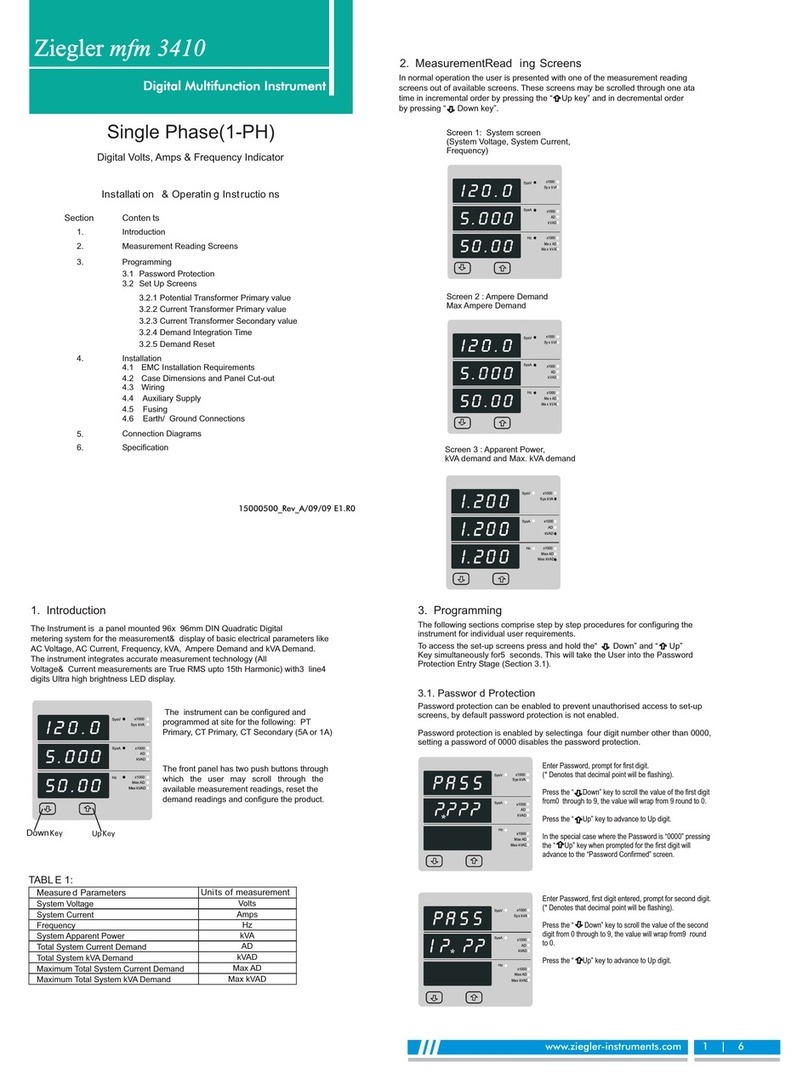
Ziegler mfm 3420 Manual

Enter Password, first digit entered, prompt for second
digit.
(* Denotes that decimal point will be flashing).
Use the “ Down” key to scroll the value of the second
digit from 0 through to 9, the value will wrap from9
round to 0.
Press the “ Up” key to advance to Up digit.
SysV
SysA
Hz
x1000
kWh
x1000
x1000
2. Measurement Reading Screens
In normal operation the user is presented with one of the measurement reading
screens out of several screens. These screens may be scrolled through one ata
time in incremental order by pressing the “ Up key” and in decremental order
by pressing “ Down key”.
3. Programming
The following sections comprise step by step procedures for configuring the
Ziegler mfm 3420 for individual user requirements.
To access the set-up screens press and hold the“
Key simultaneously for 5 seconds. This will take the User into the Password
Protection Entry Stage (Section 3.1).
3.1. Password Protection
Password protection can be enabled to prevent unauthorised access to set-up
screens, by default password protection is not enabled.
Password protection is enabled by selecting a four digit number other than 0000,
setting a password of 0000 disables the password protection.
Down” and “ Up”
Enter Password, prompt for first digit.
(* Denotes that decimal point will be flashing).
Press the “ Down” key to scroll the value of the first digit
from 0 through to 9, the value will wrap from 9 round to 0.
Press the “ Up” key to advance to Up digit.
In the special case where the Password is “0000” pressing
the “ Up” key when prompted for the first digit will
advance to the “Password Confirmed” screen.
Screen 2 : Import EnergyScreen 1 : System screen
(System Voltage, System Current,
Frequency)
SysV
SysA
Hz
x1000
kWh
x1000
x1000
Screen 3 : Export Energy
Screen 4 : Max. System voltage andcurrent
SysV
SysA
Hz
x1000
kWh
x1000
x1000
SysV
SysA
Hz
x1000
kWh
x1000
x1000
Screen 5 : Min Sys Voltage & Current
SysV
SysA
Hz
x1000
kWh
x1000
x1000
SysV
SysA
Hz
x1000
kWh
x1000
x1000
SysV
SysA
Hz
x1000
kWh
x1000
x1000
1. Introduction
The is a panel mounted 96 x 96mm DIN Quadratic DigitalZiegler mfm 3420
metering system for the measurement & display of basic electrical parameters like
AC Voltage, AC Current, Frequency, Import energy and Export energy.
The instrument integrates accurate measurement technology (All
Voltage & Current measurements are True RMS upto 15th Harmonic) with 3 line4
digits Ultra high brightness LED display.
Ziegler mfm 3420 can be configured and
programmed at site for the following : PT
Primary, CT Primary, CT Secondary (5A or
1A)
The front panel has two push buttons through
which the user may scroll through the
available measurement readings, reset the
energy (Import/Export) Min/Max (System Voltage
and System Current) and configure the product.
SysV
SysA
Hz
x1000
kWh
x1000
x1000
Measure d Parameters
System Voltage
System Current
Frequency
Import Energy (8 Digit resolution)
Export Energy (8 Digit resolution)
Units of measu rement
Volts
Amps
Hz
kWh
TABLE 1
kWh
Ziegler -mfm 3420 Single Phase
Single Phase Digital Volts, Amps, Frequency & Energy Indicator
Installation & Operating Instructions
Section Contents
1. Introduction
2. Measurement Reading Screens
3. Programming
3.1 Password Protection
3.2 Set Up Screens
5.
7. Specification
Installation
5.1 EMC Installation Requirements
5.2 Case Dimensions and Panel Cut-out
5.3 Wiring
5.4 Auxiliary Supply
5.5 Fusing
5.6 Earth / Ground Connections
6. Connection Diagrams
Down Up
3.2.1 Potential Transformer Primary value
3.2.2 Current Transformer Primary value
3.2.3 Current Transformer Secondary value
3.2.4 Pulse Rate
3.2.5 Reset
3.2.6 Pulse Duration
3.2.7 Auto Scrolling
3.2.8 Display update Rate
3.2.9 Low Current noise cutoff
3.2.10 Assignment of Pulsed output to
Import or Export Energy
4. Pulse output option
8. Connection for Optional Pulse output
Ziegler mfm 3420Ziegler mfm 3420
Digital Multifunction Instrument
www.ziegler-instruments.com 1|7
30986_Rev B 05/2007-E1R0

New / Change Password, third digit entered, prompting
for fourth digit. (* denotes that decimal point will be
flashing).
Pressing the “ Down” key will scroll the value of the
fourth digit from 0 through to 9, the value will wrap from
9 round to 0.
Pressing the “ Up” key advances the operation to
the “New Password Confirmed” and sets the fourth digit,
in this case to “3”.
New Password confirmed
Pressing the “ Down” key will return to the
“New/Change Password”.
Pressing the “ Up” key will advances to the Set up
screen.(see section 3.2).
3.2 Set Up Screens
Enter Password, second digit entered, prompt for third
digit.
(* Denotes that decimal point will be flashing).
Use the “ Down” key to scroll the value of the third
digit from 0 through to 9, the value will wrap from9
round to 0.
Press the “ Up” key to advance to Up digit.
SysV
SysA
Hz
x1000
kWh
x1000
x1000
Enter Password, third digit entered, prompt for fourth
digit.
(* Denotes that decimal point will be flashing).
Use the “ Down” key to scroll the value of the fourth
digit from 0 through to 9, the value will wrap from9
round to 0.
Press the “ Up” key to advance to verification of the
password.
SysV
SysA
Hz
x1000
kWh
x1000
x1000
Enter Password, fourth digit entered, awaiting
verification of the password.
SysV
SysA
Hz
x1000
kWh
x1000
x1000
Password confirmed.
Pressing “ Down” key will advance to the “New/
change Password” entry stage.
Pressing the “ Up” key will advance to the Set up
screen. (See section 3.2).
SysV
SysA
Hz
x1000
kWh
x1000
x1000
Password Incorrect.
The unit has not accepted the
Password entered.
Pressing the" Down" key will return to
the Enter Password stage.
Pressing the “ Up” key exits the
Password menu and returns operation
to the measurement reading mode.
SysV
SysA
Hz
x1000
kWh
x1000
x1000
New / Change Password
(*Decimal point indicates that this will be flashing).
Pressing the “ Down” key will scroll the value of the
first digit from 0 through to 9, the value will wrap from9
round to 0.
Pressing the “ Up” key to advances the operation to
the Up digit and sets the first digit, in this case to “2”
SysV
SysA
Hz
x1000
kWh
x1000
x1000
New / Change Password, second digit entered,
prompting for third digit. (*decimal point indicates that
this will be flashing).
Pressing the “ Down” key will scroll the value of the
third digit from 0 through to 9, the value will wrap from9
round to 0.
Pressing the “ Up” key advances the operation to
the Up digit and sets the third digit, in this case to “5”
New / Change Password, first digit entered, prompting for
second digit. (*Decimal point indicates that this will be
flashing).
Pressing the “ Down” key will scroll the value of the
second digit from 0 through to 9, the value will wrap from
9 round to 0.
Pressing the “ Up” key advances the operation to the
Up digit and sets the second digit, in this case to “1”
SysV
SysA
Hz
x1000
kWh
x1000
x1000
SysV
SysA
Hz
x1000
kWh
x1000
x1000
SysV
SysA
Hz
x1000
kWh
x1000
x1000
SysV
SysA
Hz
x1000
kWh
x1000
x1000
Potential Transformer Digit Edit
Pressing the “ Down” key will scroll the value of
the most significant digit from 0 through to 9 unless
the presently displayed Potential Transformer Primary
Value together with the Current Transformer Primary
Value, previously set, would result in a maximum power
of greater than 120 MVA in which case the digit range
will be restricted.
Pressing the “ Up” key accepts the present value
at the cursor position and advances the cursor to the
Up less significant digit.
(* Denotes that decimal point will be flashing).
Note: the flashing decimal point indicates the cursor position,a steady decimal point will be present
to identify the scaling of the number until the cursor position coincides with the steady decimal point
position. At this stage the decimal point will flash.
When the least significant digit has been set pressing the “ Up” key will advance to the
“Potential Transformer Primary Value Confirmation” stage.
Screen showing display of 0.120 kV i.e. 120 Volts indicating steady decimal point and cursor
flashing at the “hundreds of volts” position.
3.2.1. Potential Transformer Primary Value
The nominal full scale voltage will be displayed, inclusive of any transformer ratios.
The values displayed represent the voltage in kilovolts (note the x1000 enunciator).
Pressing the “ Up” key accepts the present value
and advances to the “Current Transformer Primary
Value edit” menu. (See Section 3.2.2)
Pressing the “ Down” key will enter the “Potential
Transformer Primary Value Edit” mode.
Initially the “multiplier must be selected, pressing the“
Down” key will move the decimal point position to the
right until it reaches # # # .# after which it will return to
#. # # #.
Pressing the “ Up” key accepts the present
multiplier (decimal point position) and advances to the
“Potential Transformer Digit Edit” mode.
SysV
SysA
Hz
x1000
kWh
x1000
x1000
SysV
SysA
Hz
x1000
kWh
x1000
x1000
www.ziegler-instruments.com 2|7

Potential Transformer Primary Value Confirmation
This screen will only appear following an edit of the
Potential Transformer Primary Value.
If the scaling is not correct, pressing the “ Down”
key will return to the “Potential Transformer Primary
Value Edit” stage with the digits flashing indicating
that the multiplier (decimal point position) should be
selected.
Pressing the “ Up” key sets the displayed value
and will advance to the Current Transformer Primary
Value (See section 3.2.2.)
SysV
SysA
Hz
x1000
kWh
x1000
x1000
3.2.2. Current Primary ValueTransformer
The nominal Full Scale Current that will be displayed as the Line currents. This screen enables the
user to display the Line currents inclusive of any transformer ratios, the values displayed represent
the Current in Amps.
Pressing the “ Up” key accepts the present value and advances to the Current Transformer
Secondary Value (See section 3.2.3)
Pressing the “ Down” key will enter the “Current
Transformer Primary Value Edit” mode. This will scroll the
value of the most significant digit from 0 through to 9,
unless the presently displayed Current Transformer
Primary Value together with the Potential Transformer
Primary Value results in a maximum power of greater
than 120 MVA in which case the digit range will be
restricted, the value will wrap. Example: If primary value
of PT is set as 400kV (max value) then primary value of
Current is restricted to 0208A.
Pressing the “ Up” key will advance to the Up less
significant digit. (* Denotes that decimal point will be
flashing).
SysV
SysA
Hz
x1000
kWh
x1000
x1000
3.2.3. Current Transformer Secondary Value
CT Secondary value confirmation
This screen will only appears following an edit of CT
secondary value.
If secondary value shown is not correct, pressing the
Down key will return to CT secondary edit stage by
blanking the bottom line of the display.
Pressing “ Up” key sets the displayed value and
will advance to Pulse Rate Edit menu.
(See section 3.2.4)
This screen is used to set the secondary value for
Current Transformer. Secondary value “5” for 5A or
“1” for 1A can be selected. Pressing “ Up” key
accepts the present value and advances to the
Pulse Rate edit menu (See section3.2.4).
Pressing the “ Down” key will enter the CT
Secondary value edit mode and scroll the value
through the values available.
Pressing the “ Up” key will advance to the CT
Secondary value confirmation.
The “Maximum Power” restriction fo 120 MVA refers to 120% of nominal current and 120% of
nominal voltage, i.e, 83.333 MVA nominal system power.
When the least significant digit had been set, pressing the “ Up” key will advance to the
“Current Transformer Primary Value Confirmation” stage.
The minimum value allowed is 1, the value will be forced to 1 if the display contains zero when the
“ Up” key is pressed.
Current Transformer Primary Value Confirmation.
This screen will only appear following an edit of the
.
If the scaling is not correct, Pressing the “ Down” key
will return to the“ Edit
stage with the most significant digit highlighted (associated
decimal point flashing) and the bottom line of the display
will be blanked.
Pressing the “ Up” key sets the displayed value and
will advance to the “Current Transformer Secondary Value
Edit” menu. (See section 3.2.3).
Current
Transformer Primary Value
Current Transformer Primary Value ”
SysV
SysA
Hz
x1000
kWh
x1000
x1000
SysV
SysA
Hz
x1000
kWh
x1000
x1000
SysV
SysA
Hz
x1000
kWh
x1000
x1000
SysV
SysA
Hz
x1000
kWh
x1000
x1000
3.2.4. Pulse Rate
This screen applies to the Relay Output option only. The screen allows user to set the kWh
pulse rate divisor. Divisor values can be selected through 1,10,100,1000.
Pressing “ Up” key accepts the presents value
and advances to the “Reset”menu (See section 3.2.5).
Pressing the “ Down” key will enter the “Pulse rate divisor
Edit” mode and scroll the value through the values 1,10,100,
1000 wrapping back to 1.
Pressing the “ Up” key advances to the “Pulse rate
DivisorCo nfirmation” menu.
Pulse Rate Divisor Confirmation.
This screen will only appear following an edit of the
Pulse rate divisor.
If the Pulse rate shown is not correct, pressing the“
Down” key will return to the “Pulse rate divisor
Edit” stage by blanking the bottom line of the
display.
Pressing “ Up” key sets the displayed value and
will advance to the “Reset” menu.
(See section 3.2.5)
SysV
SysA
Hz
x1000
kWh
x1000
x1000
3.2.5. Resets
The following screens allow the users to reset the Energy(Import/Export), Lo(Min), hI(Max) and all readings.
SysV
SysA
Hz
x1000
kWh
x1000
x1000
Reset (None)
Pressing “ Up” key will not reset and will advance
to Pulse Duration menu.(See sec.3.2.6)
Pressing the “ Down” key will enter the “Reset
Parameter select” mode and scroll the value”
through the parameters and wrapping back
to None.
Pressing “ Up” key advances to Pulse Duration menu.
(see section 3.2.6).
SysV
SysA
Hz
x1000
kWh
x1000
x1000
Reset parameters select, (Reset Energy)
The user has scrolled through to the “E” Energy
value.
Pressing “ Up” key will select the value and
advance to the “Reset Energy Confirmation” Mode.
SysV
SysA
Hz
x1000
kWh
x1000
x1000
Reset Energy Confirmation.
Pressing “ Up” key resets the Energy(Import/Export)
and advances to the Pulse Duration
(see section 3.2.6.)
Pressing the “ Down” key will re-enter the “Reset
Parameter select” mode.
SysV
SysA
Hz
x1000
kWh
x1000
x1000
Reset parameters select, (Reset Lo)
The user has scrolled through to the “Lo” (Min)
Pressing “ Up” key will select the value and
advance to the “Reset Lo Confirmation” Mode.
www.ziegler-instruments.com 3|7

SysV
SysA
Hz
x1000
kWh
x1000
x1000
Reset hI (Max) Confirmation.
Pressing the “ Down” key will re-enter the
“Reset Parameter Select mode.
Pressing “ Up” key resets the hI (Max)
readings and advances to the Pulse Duration
(see section 3.2.6).
SysV
SysA
Hz
x1000
kWh
x1000
x1000
Reset parameters select, (Reset ALL)
The user has scrolled through to the “ALL”.
Pressing “ Up” key will select the value and
advance to the “Reset ALL Confirmation” Mode.
SysV
SysA
Hz
x1000
kWh
x1000
x1000
Reset ALL Confirmation.
Pressing the “ Down” key will re-enter the
“Reset Parameter Select mode.
Pressing “ Up” key resets ALL the readings
and advances to the Pulse Duration
(see section 3.2.6).
SysV
SysA
Hz
x1000
kWh
x1000
x1000
Reset parameters select, (Reset Hi)
The user has scrolled through to the “Hi” (Max)
Pressing “ Up” key will select the value and
advance to the “Reset Hi Confirmation” Mode.
SysV
SysA
Hz
x1000
kWh
x1000
x1000
Reset Lo Confirmation
Pressing the “ Down” key will re-enter the
“Reset Parameter Select mode.
Pressing “ Up” key resets the Lo (Min)
readings and advances to the Pulse Duration
(see section 3.2.6).
3.2.6. Pulse Duration
This screen applies to the Relay Pulsed output only.
This screen allows the user to set Relay energisation time in milliseconds.
Pressing “ Up” key accepts the present value and
advance to the Auto scroll menu (see section 3.2.6).
Pressing the “ Up” key will select the value and advances
to “Pulse Duration Confirmation”.
Pressing the “ Down” key will enter the “Pulse Duration
Edit” mode and scroll the value through 60, 100, 200 and
wrapping back to 60.
Pulse Duration Edit.
SysV
SysA
Hz
x1000
kWh
x1000
x1000
SysV
SysA
Hz
x1000
kWh
x1000
x1000
Pulse Duration Confirmation.
This screen will only appear following an edit of the
Pulse duration.
Pressing “ Up” key set displayed value and
will advance to Auto scroll menu (see section 3.2.7)
pressing the “ Down” key will re-enter the “Pulse
Duration Edit” mode.
3.2.7. Auto Scrolling
This screen allows user to enable screen scrolling.
Pressing “ Up” key accepts the present status and
advance to the Display update rate menu (see section 3.2.8).
Pressing the “ Up” key will select the status displayed and
advances to “Display update rate” screen (see section 3.2.8)
Pressing the “ Down” key will enter the “Auto Screen
Scrolling Edit” and toggle the status ‘Yes’ and ‘No’.
Auto scrolling Edit.
SysV
Hz
x1000
kWh
x1000
x1000
Auto scrolling Confirmation.
Pressing “ Up” key set displayed value and
will advance to Display update rate menu
(See section 3.2.8)
pressing the “ Down” key will re-enter the “Auto
scroll Edit” mode.
SysV
SysA
Hz
x1000
kWh
x1000
x1000
3.2.8. Display update rate
This screen allows the user to set display update time in seconds. Default time is1 second.
Pressing “ Up” key accepts the present value and
advance to Low current noise cutoff menu.
(see section 3.2.9).
Pressing the “ Down” key will enter the “Display update
rate Edit” mode and scroll the value through 1, 2, 3, 4,5
and wrapping back to 1.
Display update rate Edit.
SysV
SysA
Hz
x1000
kWh
x1000
x1000
Display update rate Confirmation.
Pressing “ Up” key set displayed value and
will advance to Low current noise cutoff menu.
(See section 3.2.9)
pressing the “ Down” key will re-enter the “Display
Update rate Edit” mode.
SysV
SysA
Hz
x1000
kWh
x1000
x1000
3.2.9. Low Current noise cutoff.
This screen allows the user to set Low noise current cutoff in mA.
Pressing “ Up” key accepts the present value and
advance to Assignment of Pulsed output to Import or
Export energy (see section 3.2.10)
Pressing the “ Down” key will enter the “Low current
noise cutoff Edit” mode and scroll the “Value” through 0 & 30
and wrapping back to 0. This setting will display currents as
0 below 30 mA.
Low current cutoff Edit.
SysV
SysA
Hz
x1000
kWh
x1000
x1000
www.ziegler-instruments.com 4|7

Low current noise cutoff Confirmation.
Pressing “ Up” key set displayed value and
will advance to Assignment of Pulsed output to Import or
Export Energy menu. (See section 3.2.10)
pressing the “ Down” key will re-enter the “Low current
Noise cutoff Edit” mode.
SysV
SysA
Hz
x1000
kWh
x1000
x1000
3.2.10. Assignment of pulsed output to Import or Export Energy
This screen allows the user to assign pulse output1 and pulse output2 to Import or Export energy and vice versa.
Pressing “ Up” key accepts the present Pulsed output
and advance to measurement screens.
(see section 2).
Pressing the “ Down” key will enter the “Assignment of
pulsed output” mode and will toggle Rl1 and Rl2. Assigning
RL1 for Import energy will automatically assign RL 2 for
Export energy and vice-versa.
Assignment of Pulsed output
SysV
SysA
Hz
x1000
kWh
x1000
x1000
Assignment of pulsed output confirmation.
Pressing “ Up” key set the pulsed output2 to
Import energy and pulsed output1 to Export Energy and will
advance to measurement screens. (See section 2)
pressing the “ Down” key will re-enter the “Assignment
of Pulsed output” mode.
SysV
SysA
Hz
x1000
kWh
x1000
x1000
Caution
1.
In th e int eres t o f s afe t y an d fu n cti o n ality th is pr odu c t mu st b e ins tal le d by
a qua li fie d eng in eer, ab id in g b y an y loca l reg u la t io ns.
2.
Vo lta ge s dan ge r o u s to h um an l ife are p r ese n t at so m e o f th e te r m in al
co n n ec t io n s o f th is u n it . E ns u r e tha t al l su p p l ie s a re d e-en e rg ise d b ef ore
att emp ti n g an y c o n n ec t io n o r di sc onn ec t io n.
3.
T hes e pr odu ct s d o n ot hav e int ern al fus es th ere f or e ex ter n al fus es mu st
b e us ed t o ens ur e sa f et y u n d er f au l t co n d it io ns.
5.1 EMC Installation Requirements
This product has been designed to meet the certification of the EU directives
when installed to a good code of practice for EMC in industrial environments,
e.g.
1. Screened output and low signal input leads or have provision for fitting
RF suppression components, such as ferrite absorbers, line filters etc., in
the event that RF fields cause problems.
Note: It is good practice to install sensitive electronic instruments that are
performing critical functions, in EMC enclosures that protect against electrical
interference which could cause a disturbance in function.
2. Avoid routing leads alongside cables and products that are, or could be,a
source of interference.
3. To protect the product against permanent damage, surge transients must
be limited to 2kV pk. It is good EMC practice to suppress differential
surges to 2kV at the source. The unit has been designed to automatically
recover in the event of a high level of transients. In extreme
circumstances it may be necessary to temporarily disconnect the
auxiliary supply for a period of greater than 5 seconds to restore correct
operation.
4. ESD precautions must be taken at all times when handling this product.
The Current inputs of these products are designed for connection in to
systems via Current Transformers only, where one side is grounded.
5.2 Case Dimension and Panel Cut Out
3.78”
96mm
FRONT DISPLAY
AREA
3.78”
96mm
3.15”
80mm
3.62”
92mm
PA N E L C U TO U T
3.62”
92mm
MAX PANEL THICKNESS 0.18”,5mm
5. Installation
Mounting is by four side clamps, slide the side clamps through side slot till side clamp
gets fir mly locked in a groove (Refer fig.) Consideratio n should be given to the space
required behind the instrument to allow for bends in the connection cables.
As the front of the enclosure conforms to IP54 it is protected from water spray
from all directions, additional protection to the panel may be obtained by the
use of an optional panel gasket. The terminals at the rear of the product
should be protected from liquids.
The should be mounted in a reasonably stable ambientZiegler mfm 3420
temperature and where the operating temperature is within the range
0
-10 to 55 C . Vibration should be kept to a minimum and the product should
not be mounted where it will be subjected to excessive direct sunlight.
SLIDE IN THIS DIRECTION AND LOCK
PANEL
Ziegler mfm 3420
4. Pulse output option
The pulse output gives pulses at the rate proportional to the measured active energy kWh.
There are two options available,
1) One Pulse Output: Relay 1 can be configured either to Import Active energy or
Export Active energy.
2
The pulse divisor and pulse width (duration) can be configured. When two pulse outputs
are fitted,they share a common divisor value and pulse width
) Two Pulse Output: Here it is possible to assign Import Active energy either to Relay1
or Relay 2. Then accordingly Export Active energy is configured
automatically to the corresponding relay.
.
NOTE:
If system power is selected in W then default pulse rate is 1 pulse per Wh (upto 3600W).
If the system power is scaled in kW then default pulse rate is 1 pulse per kWh
(upto 3600 kW). If the system power is over 3600 kWh then pulse rate is 1 pulse per MWh.
www.ziegler-instruments.com 5|7

6 Connection Diagrams
SINGLE PHASE
DIGITAL METERING SYSTEM
P1 S1
LN
AUX
SUPPLY
L1
L2
L3
N
L
O
A
D
258 34679
5.4 Auxiliary Supply
Ziegler mfm 3420 should ideally be powered from a dedicated supply, however
it may be powered from the signal source, provided the source remains within
the limits of the chosen auxiliary voltage.
5.5 Fusing
It is recommended that all voltage lines are fitted with1 amp HRC fuses.
5.6 Earth/Ground Connections
For safety reasons, CT secondary connections should be grounded in
accordance with local regulations.
5.3 Wiring
Input connections are made directly to screw-type terminals with indirect
wire pressure. Numbering is clearly marked in the plastic moulding. Choice of
cable should meet local regulations. Terminal for both Current and Voltage
inputs will accept upto 3mm x 2 diameter cables.
2
Note : It is recommended to use wire with lug for
connection with meter.
Operating Measuring Ranges
Voltage 5 .. 120 % of Rated Value
Current 5 .. 120% of Rated Value
Frequency 40 .. 70 Hz
Accuracy
Voltage
Current
+ 0.5 % of range( 50 ... 100% of Rated Value)
+ 0.5 % of range ( 10 ... 100% of Rated Value)
Frequency 0.15% of mid frequency
Active Energy (Import/Export) + 1% as per IEC 62053-21
Active P.F. (0.866 ... 1 ... 0.866) (Import/Export)
Power Factor 0.5 Lag ... 1 ... 0.8 Lead
System CT primary values Std. Values upto 4kA (1 or 5 Amp secondaries)
7.Specification
System Single Phase
Inputs
Nominal inputvoltage
Max continuous input
voltage
Max short duration input
voltage
Nominal input voltage burden
57.7V to 277V
L-N L-N
120% of Rated Value
2x Rated Value
(1sappli cation repeated 10 times
at 10s intervals)
0.2VA approx.
Nominal inputcurrent 1A / 5A AC rms programmable at site
Max continuous inputcurrent 120%of Rated Value
Nominal input current burden 0.6VAappro x.
Max short duration current input 20 x (1s application repeatedRated Value
5 times at 5 min. intervals)
Auxiliary
Standard nominal a.c. supply 110V , 230V ,380V AC,
voltages
a.c. supply voltage tolerance +20 % / -15 % of Rated Value
a.c. supply frequency range 45 to 66 Hz
a.c. supply burden 4.0 VA
100 - 250V AC or DC
d.c. supply burden 3W
Reference conditions for Accuracy:
0
23C +2C
50 or 60Hz 2%+
Sinusoidal (distortion factor 0.005)
Rated Value 1%+
Reference temperature
Input frequency
Input waveform
Auxiliary supply voltage
Auxiliary supply frequency
Display
3 line 4 digits. Digit height 11mm
Approx. 1 seconds minimum.
LED
Update
Controls
TwopushbuttonsUser Interface
Standards
IEC 61326
10V/m min-Level 3 industrial low level
electromagnetic radiation environment
IEC 61000-4-3.
IEC 61010-1 , Year 2001
EMC Immunity
Safety
Isolation
2.2 kV RMS 50 Hz for 1 minute
between all electrical circuits
Dielectric voltage withstand
test between circuits and
accessible surfaces
Can be programmed up to 5 sec.
Rated Value 1%+
0
Nominal range of use of influence quantities for measurands
50 .. 120% of Rated Value
10 .. 120% of Rated Value
Rated Value 10%+
0
0to 50C
Voltage
Current
Input frequency
Temperature
Auxiliary supply voltage
Auxiliary supply frequency
Temperature Coefficient
0
(For Rated value range of use
Error change due to variation of an
influence quantity
2 * Error allowed for the reference
condition applied in the test.
Rated Value 10%+
Rated Value 10%+
0.05% /C for Current ( 10..120% of Rated Value)
0
0... 50 C)
IEC 60529
IP for water & dust
0.025% / C for Voltage ( 50..120% of Rated Value ) and
0
www.ziegler-instruments.com 6|7

The Information contained in these installation instructions is for use only by installers trained to make electric al power installations and
is intended to describe the correct method of installation for this product. However, ‘Ziegler Instruments’ has noc ontrol over the field
conditions which influence product installation.
It is the user's responsibility to determine the suitability of the installation method in the user's field conditio ns. ‘Ziegler Instruments’ only
obligations are those in ‘Ziegler Instruments’ standard Conditions of Sale for this product and in no case will ‘Ziegler Instruments’ be liable for
any other incidental, indirect or consequential damages arising from the use or misuse of the products.
Environmental
0
-10 to 55 C
0
-20 to +65C
0..90%RH
3 minute (minimum)
15g in 3 planes
10 .. 55 Hz, 0.15mm amplitude
IP 54 as per IEC 60529
Operating temperature
Storage temperature
Relative humidity
Warm up time
Shock
Vibration
Enclosure( front only)
Enclosure
96mmx 96mm DIN Quadratic
Polycarbonate Housing,
Screw-type terminals
<80mm
0.620 kg Approx.
Style
Material
Terminals
Depth
Weight
Self extinguish & non dripping as per UL 94 V-0
Relay1
CNC
NO
Relay2
CNC
NO
8. Connection for Optional Pulse Output
Pulse output Option (1 or 2 Relay)
1NO + 1NCRelay
240VDC, 5Amp.
Switching Voltage & Current
1 per Wh (up to 3600W),
1 per kWh (up to 3600kW),
1 per MWh (above 3600 kW)
Default Pulse rate Divisor
Pulse rate Divisors Programmable on site
1 per 10Wh (up to 3600W),
1 per 10kWh (up to 3600kW),
1 per 10MWh (above 3600 kW)
10
1 per 100Wh (up to 3600W),
1 per 100kWh (up to 3600kW),
1 per 100MWh (above 3600 kW)
100
1 per 1000Wh (up to 3600W),
1 per 1000kWh (up to 3600kW),
1 per 1000MWh (above 3600 kW)
1000
60ms, 100ms or 200msPulse Duration
www.ziegler-instruments.com 7|7
ZIEGLER INSTRUMENTS
Schnepfenreuther Weg 6, D-90425 Nürnberg, Germany.
(+49)(911) 38 492 45
TEL.
(+49)(911) 32 26 212
FAX.
www.ziegler-instruments.com
E-MAIL
WEBSITE in
Germany
made
Table of contents
Other Ziegler Measuring Instrument manuals