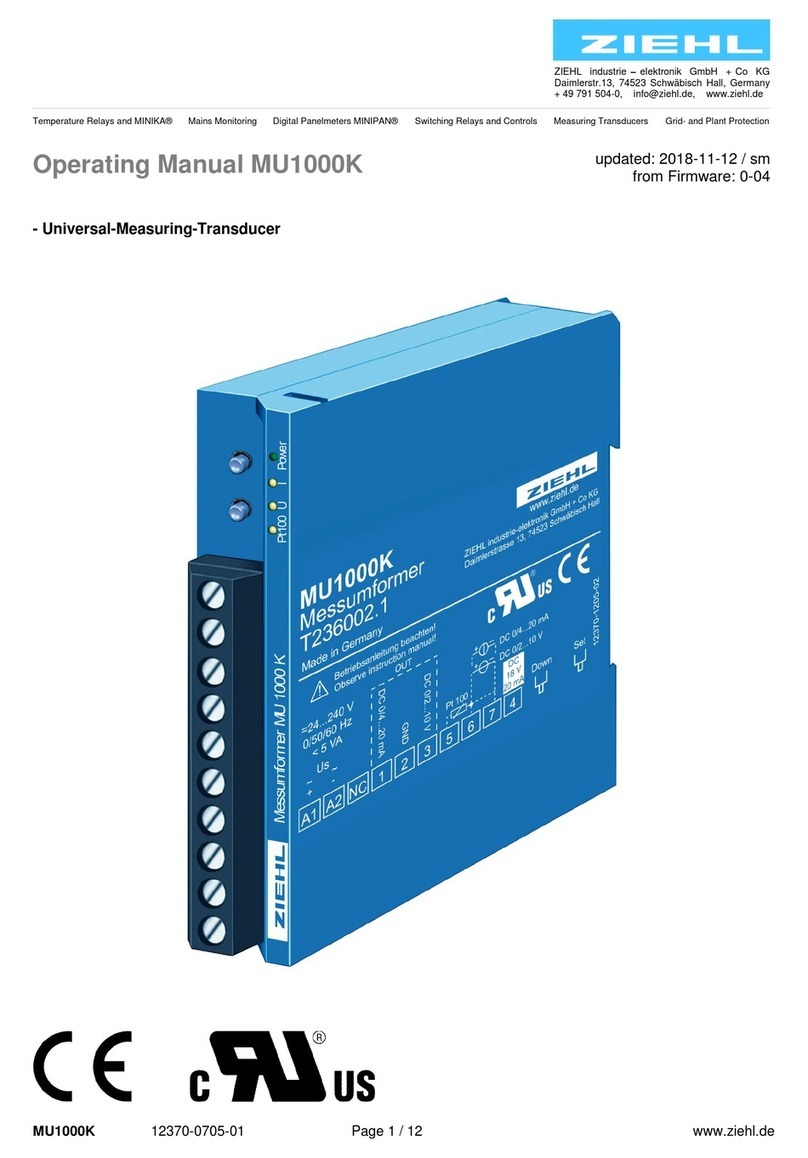
ZIEHL MU2000K User manual

ZIEHL industrie –elektronik GmbH + Co KG
Daimlerstr.13, 74523 Schwäbisch Hall, Germany
Temperature Relays and MINIKA® Mains Monitoring Digital Panelmeters MINIPAN® Switching Relays and Controls Measuring Transducers Grid- and Plant Protection
Quick Guide MU2000K
updated: 2018-02-19 / sm
MU2000K 12600-0752-00 Page
1
/ 8 www.ziehl.de
- Universal Measuring Transducer for Voltage and Current (AC and DC)
Detailed operating manual see:
https://www.ziehl.com/en/products/?view=detail&detail=110
1 Display and controls
- Set
Button to navigate in menu
- Down
Button to change Parameters
- LED Power
Device active
- LED I
Current input active
- LED U
Voltage input active
- LED AC
Alternate Current /
Voltage measuring active
2 Factory setting
Default settings:
•Input: AC 5 A (AC 0 –5 A)
•Output: DC 0 –10 V, 0 –20 mA
•Measuring time: 160 ms (8 measurements, x 20 ms measurement time)

MU2000K 12600-0752-00 Page
2
/ 8 www.ziehl.de
3 Connecting diagram
4 Important Information
DANGER!
Hazardous voltage!
Will cause death or serious injury. Turn off and lock out all power
supplying this device before working on this device.
The measuring input fulfils reinforced insulation according to DIN EN 61010-1 for
overvoltage category II and pollution degree 2.
Connected voltages may not exceed 300 V AC/DC to earth.
To use the equipment flawless and safe, transport and store properly, install and start professionally and
operate as directed.
Only let persons work with the equipment who are familiar with installation, start and use and who have
appropriate qualification corresponding to their function. They must observe the contents of the
instructions manual, the information which are written on the equipment and the relevant security
instructions for the setting up and the use of electrical units.
The equipment is built according to DIN / EN and checked and leave the plant according to security in
perfect condition.If, in any case the information in the instructions manual is not sufficient, please contact
our company or the responsible representative.
Instead of the industrial norms and regulations written in this instruction manual valid for Europe, you
must observe out of their geographical scope the valid and relevant regulations of the corresponding
country.
Observe the maximum temperature permissible when installing in switching cabinet. Make sure
sufficient space to other equipment or heat sources. If the cooling becomes more difficult e.g.
through close proximity of apparatus with elevated surface temperature or hindrance of the
cooling air, the tolerable environmental temperature is diminishing.
Attention! Universal power supply
The device has a universal power supply, that is suitable for DC- and AC voltages.
Before connecting the device to supply-voltage make sure that the
connected voltage corresponds with the voltage on the lateral type on the device.

MU2000K 12600-0752-00 Page
3
/ 8 www.ziehl.de
A circuit-breaker or switch must be situated within easy reach of the
unit and fused. Installation excess current protection should be ≤ 10 A.
5 Installation
The unit can be installed as follows:
•Installation in switchgear cabinet on 35 mm mounting rail according to EN 60715
•With screws M4 for installation on walls or panel. (additional latch is not included in delivery)
Connection according to connection plan or type plate.
6 Commissioning
6.1 Overview of the predefined standard ranges
Following standard ranges can be set without adjustment to the unit:
Input
voltage (AC / DC)
Input
current (AC / DC)
Output
Zero point
Full scale
Zero point
Full scale
0 V …
30 V
0 A …
1 A
0 - 10 V / 0 - 20 mA
80 V …
120 V
0 A …
5 A
or
0 V …
150 V
2 - 10 V / 4 - 20 mA
0 V …
300 V
0 V …
600 V
6.2 Setting a predefined range
•Power off the device
•Press Button [Set] and keep pressed
•Power on the device, and keep pressed the button [Set]
After 5s flashes the green LED, release button [Set]
Parameterization „input type“ → LED ON flashes 1x
•Select with button [Set] the input type →displayed by LED U (DC voltage),
LED AC + U (AC voltage), LED I (DC current), LED AC + I (AC current)
•Press button [Down]
Parameterization „range“ >> LED ON flashes 2x
•Select with button
[Set] the range of
the input
Number
LED
of flashes
U
AC + U
I
AC + I
1 x
DC 0…30 V
AC 0…30 V
DC 0...1 A
AC 0...1 A
2 x
DC 80…120 V
AC80…120 V
DC 0...5 A
AC 0...5 A
3 x
DC 0…150 V
AC 0…150 V
4 x
DC 0…300 V
AC 0…300 V
5 x
DC 0…600 V
AC 0…600 V
•Press button [Down]
Parameterization „output“ → LED Power flashes 4x
•Select with button [Set] the output
range
Number
LED
Of flashes
U + I
1 x
0 - 10 V / 0 - 20 mA
2 x
2 - 10 V / 4 - 20 mA

MU2000K 12600-0752-00 Page
4
/ 8 www.ziehl.de
•Press button [Down]
End of parameterization, LED ON lights permanently
Attention:
•When no button is pressed during scaling for 120 s, the process is cancelled automatically. Entered
values will be discarded.
•When scaling is started, all parameters are reset to default.
•In normal operating mode the selected input is displayed with LED.
6.3 Diagram for setting a predefined range
6.4 Overview of scaling an arbitrary range
Other ranges may be set by scaling of the input signal:
Range
Output
Input
Zero point
Full scale
U (AC / DC)
0 … 600 V
0 … 600 V
0 - 10 V / 0 - 20 mA
I (AC / DC)
0 … 5 A
0 … 5 A
or
2 - 10 V / 4 - 20 mA
Mode
Normal state

MU2000K 12600-0752-00 Page
5
/ 8 www.ziehl.de
6.5 Scaling of range
•Power off the device
•Press Button [Down] and keep pressed
•Power on the device, and keep pressed the button [Down]
After 5s flashes the green LED, release button [Down]
Parameterization „input type“ → LED ON flashes 1x
•Select with button [Set] the input type →displayed by LED U (DC voltage),
LED AC + U (AC voltage), LED I (DC current), LED AC + I (AC current)
•Press button [Down]
Parameterization „input zero point“ → LED ON flashes 2x
Connect a signal at the input corresponding to the zero point
•Press button [Down] (store of value, green LED flashes 3 times quickly)
Parameterization „input full scale“ → LED ON flashes 3x
Connect a signal at the input corresponding to the full scale
•Press button [Down] (store of value, green LED flashes 3 times quickly)
Parameterization „output“ → LED ON flashes 4x
•Select with button [Set] the output range
oLEDs (U + I) 1 x flash -> output 0 - 10 V / 0 - 20 mA
oLEDs (U + I) 2 x flash -> output 2 - 10 V / 4 - 20 mA
•Press button [Down]
End of parameterization, LED ON lights permanently

MU2000K 12600-0752-00 Page
6
/ 8 www.ziehl.de
6.6 Diagram for scaling of range
6.7 Setting the System measurement time
•Power off the device
•Keep pressed buttons [Set] and [Down] simultaneously
•Switch on power supply while buttons are pressed
Release buttons after app. 5s when green LED starts blinking
Parameterization „System measurement time“ → LED ON flashes 5x
•Select with button
[Set] the System
measurement time
Number
LEDs
of flashes
AC + U + I
1 x
20 ms (60Hz = 17 ms)
2 x
40 ms (60Hz = 33 ms)
3 x
80 ms (60Hz = 67 ms)
4 x
160 ms (60Hz = 133 ms)
5 x
320 ms (60Hz = 267 ms)
6 x
640 ms (60Hz = 533 ms)
•Press button [Down]
End of parameterization, LED ON lights permanently
Signal input =
zero point
Signal Input =
full scale
Mode
Normal state

MU2000K 12600-0752-00 Page
7
/ 8 www.ziehl.de
6.8 Checking of parameters
During operation, several parameters can be checked.
7 Error search
Wrong output signal (current/voltage) OUT (terminal 1 –2 –3)
Cause
The device is not configured correctly
Remedy
Check commissioning
22mA at output 0/4…20 mA, 11V at output 0/2…10 V (LED Power flashes quickly)
Cause
Internal error of device
Remedy
Reset by interrupting supply voltage. If the error cannot be patched by a Reset send
back to factory for repair.
Mode
Normal state

MU2000K 12600-0752-00 Page
8
/ 8 www.ziehl.de
8 Technical data
Rated supply voltage Us
AC/DC 24 –240 V
0/50…400 Hz < 3 W < 8 VA
Tolerance
DC 20,4 - 297 V
AC 20 - 264 V
Housing
Type K
Dimension (H x W x D)
75 x 22,5 x 110 mm
Line connection solid wire
each 1 x 0,5…2,5 mm2
Stranded wire with insulated ferrules
each 1 x 0,14…1,5 mm2
Torque
0.5 Nm (3,6 lb.in)
Protection class housing
IP 40
Protection class terminals
IP 20
Mounting
Snap mounting on 35 mm standard rail EN 60 715 or
M4 screws
Weight
app. 100 g
Subject to technical changes
9 Housing Type K
Dimensions in mm
1 lower part
2 upper part
3 bar
4 screw
5 holes for screw-mount
19,8 19,8
35,4
22,5
75,0
82,5
110,0
1045 1940
1945 1960
1945 1960
4,2
100,5
5,0
2
1
3
4
3.1
3.2
5
Table of contents
Other ZIEHL Transducer manuals
Popular Transducer manuals by other brands

Garmin
Garmin GT15M-IH installation instructions

Hontzsch
Hontzsch UVATP operating instructions

S+S Regeltechnik
S+S Regeltechnik THERMASGARD HSM Operating Instructions, Mounting & Installation

Siedle
Siedle novotechnik PTN user manual

Balluff
Balluff BTL7-V50T-M-P-C003 Series user guide

Spectrum
Spectrum 3669 product manual