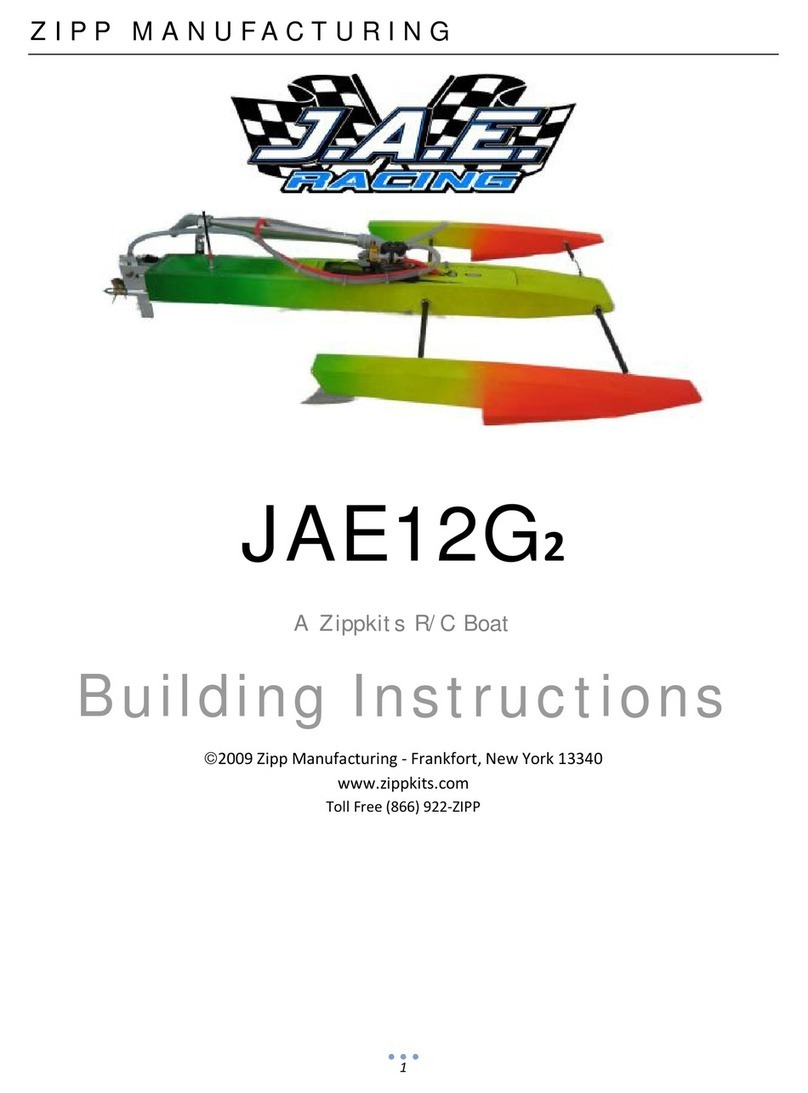
Zipp Manufacturing I-BOX Instruction Manual

TableofContents
Introduction1
SECTION 1- THE FRAME
Suppliesneeded tobuild3
Equipmentneeded torun 4
Building Surface 5
Partsidentification5
Building Jig8
Keel8
Bulkheadsand Spines8
Engine rails8
Skeg Mount12
Stringers9
SECTION 2- SHEETING
Side Sheeting 11
Transom13
BottomSheeting 12
Sealing interior17
Deck Sheeting 19
Hatch 22
SECTION 3- EQUIPMENT
RadioBox15
Fuel Tank 31
Running Hardware26
Balancing 30
Engine Mounting30
Stuffing Tube 31
SECTION 4- PAINT
Hull prep 36
Sanding and Filling36
Primerand Paint37
Decals37
SECTION 5- ASSEMBLY
HardwareAssembly37
Setup 38
SECTION 6- RUNNING
Running 39
ALSOSEE:
CrackerBox Tuning Tools
Troubleshooting

IBOX/NBOX
1
Introduction
Thankyouforpurchasingthiskit.Wearesurethatitwill
provideyouwithmanyhoursofenjoyment.
Pleasetakethetimetoreadthisentiremanual beforebuildingthis
boat. Youwill becomefamiliarwiththebuildingorder, andless likely
tomakemistakes.
Thiskitisnotatoy.Although R/Cboatingisafun andrewardinghobby,itcan be
dangerousifnotdonewithcommon senseandsafetyinmind. Justaboutanyone
shouldbeabletobuildthiskit,butitshouldnotbeoperatedbychildrenwithoutclose
adultsupervision.
Hereareafewsafetytips:
•Neveroperateyourboatalone.Ifyougethurt,youmaynotbeable to
driveforhelp.
•Never,everoperateyourboatinanareawheretherearefull size boats
orswimmers.Ifsomethinghappens,a15poundobjecttravelingat50+
mph candoseriousdamage.
•Alwaysuseafailsafe.Thisshutstheengineoff intheevent ofradio
signal loss.Testthefailsafeeachdayofrunning,byshuttingoff your
transmitter.
•Alwayscarryafireextinguisher,asgasolineisextremelyflammable.
Themanufacturerassumesnoliabilityfordamagesorotherlossintheuseof
thisproduct,aswe havenocontrolovertheconstructionorenduseof this
product.

IBOX/NBOX
2
Purpose
Theseboatsweredesigned aslegalhullsinthe Crackerboxclass.
Thereareotherrestrictionssuchasengine, exhaust, and lengthof hardware.
Bottomline: Readthe rulesbeforeyou build.It maysaveyou timeand money!
The IBoxwasdesigned tobe legalforIMPBA Crackerboxracing.
The NBoxwasdesigned tobe legalforNAMBA Crackerboxracing.
You can buildthisboat without havingthe engine orradio, butit doesmakeit
easiertohavethemavailablewhen you build.
You can useanygasolineengine(check the rules), aslongasit hasmounts
for5inchrails.
If you useaZenoah orsimilar, you willgenerallyuseacollet typeof cable
system.
If you useaHomelite, orsimilarsport engine,you willgenerallyuseasquare
drivetype.
Thesekitsareidentical, except forthe bottoms. Constructionisidentical.Both
the IBoxand NBoxarebuiltexactlythesameway.
Onlyone instruction manualisused forboth.
Thisreducesourcosts,asweonlyhavetoproduceonemanualforbothkits.
You benefit becausethiskeepsthe kit pricereasonable.

IBOX/NBOX
3
Toolsandsuppliesneeded tobuild:
§Small woodplane(miniplane)
§Sandingblockswith80 and220 gritpaper
§Drill with bits
§Rightangle drill orattachment
§Square
§12x48 FLATplywood(thethickerthebetter)
§MediumCAglueandaccelerator
§Goodquality30 minuteepoxy
§Epoxyfinishingresin
§2feetof 6ounce fiberglasscloth,3incheswide
§3inchlengthof 2x4,splitinhalf
§3inchscrewsornails
§Lotsofclamps!Springclamps,paperclamps,cclamps,etc.
§Razorsaw
§Widetape
§Woodfiller
§Primer
§Paint

IBOX/NBOX
4
Additional itemsneededto complete:
§Gasolineenginewith5inchmounts
§.250Colletfor engine(Zenoahtypeengines)
§.25024inchcablew/weldedstubshaft(Zenoahtypeengines)
§.250-.250brass ferrule(sport“trimmer”typeengine)
§24inchsectionofsquaredrivecable(“trimmer”typeengine-getfromtrimmer)
§¼inchstubshaft(“trimmer”typeengine)
§¼inchthrustbearing(“trimmer”typeengine)
§Tunedpipeorcanistermuffler (checktherules)
§2channelsurfaceradiowith 1standardand1heavydutyservo(100in/ozminimum)
§Throttlepushrod
§Rudderpushrod(at least“4-40”size)
§2pushrodseals(Zipp3404)
§16-24ouncefueltankand tubing(gasolinecompatible)
§.250strut (Zipp3403)
§.250drivedog(Zipp3405)
§Prather 270prop(startingpoint)
§Propnuts(Zipp3406)
§Cablegrease
§Largerudder(water pickuptype-Zipp3402)
§3feetlargesiliconetubing(waterline)
§12inchlengthof11/32brass tubing
§36inchlengthof5/16brass tubing
§Floatation(pool noodles,foam,etc.)
§Transomturnfin(Zipp3410)

IBOX/NBOX
5
Beforewecan startbuilding, weneed todo someprep work. Good prep work
willpayoff laterwithastraight, true runningboat.
First, weneed aflat worksurface. Nothingelsewilldo.
If you don’thaveaperfectlyflat bench, youcanmakeone withyourpieceof
12x48 plywood.
Simplyscrewacoupleof 2x4’slengthwisetothe bottom. Makesurethe 2x4’s
arestraight!
You can then put thison abench, and shimthe cornerstomakeit steady.
Or,if you arereallypressed forspace, you cansetit on acoupleof saw
horses.
The Build
Wearereadytostart the build!
Remember- The boatisbeingbuilt upside down. Anyreferencetothe top or
bottomreferstotheboat’stop orbottom. If youaregoing toattachsomething
tothe top,it wouldbe closest tothe bench. Right and left arealways asyou
aresitting inthe boat, orfromthe rear.
Got it?If not, standon yourhead asyoubuild…
Let’sidentifythe partsinthesheets.Don’t removethe partsuntilyou actually
need them, assomelooksimilar,but arenotthe same.

IBOX/NBOX
6

7
WeliketheGreatPlanes11 inchbarsanders
Usegoodqualityepoxyandfinishing resin
Yourlifewillbemucheasierwithoneofthese
Acidbrushtrimmedforfastepoxyapplication

8
Bulkhead2andspines
Bulkheads1, 2andthree inplacewiththespines.
Notethattheholesinthespinesface forward.
Blockclampedtobulkhead5, keepingitflat.
Let’sgetstarted.
Attachthe jigboardtoyourFLAT bench(or12x48
ply) withscrews, nails, clampsorwhateveryou
need, tomakesureit’sattached tothe surface.
Makesurethe “F”issothatyou can read it.
Removebulkheads1, 2, 3and the (2)spines.
Sand the edgeswith80 grittoremovethe fuzz,as
well asthe littletabsthatheldtheminthesheet.
Grab bulkhead 2and the twospines. Pushthe
centerslot of the spinesintobulkhead 2.Check the
fit; it shouldbe flushwiththe topofthe bulkhead.
Put bulkhead 2intothe jig.The holeinthe spines
shouldfaceforward.
Put bulkheads1and 3intothe jig, engaging the
spinesinthe slots.
Starting fromthe frontofthe jig,gluethe tabsof
bulkhead 1tothe jig.
Useasquaretoensurethat it’s90 degreestothe
jig. Alsomakesurethatthe tabsdon’t protrude
underthe jig.
UseCAand accelerator.
Don’t glue the spinesat thistime. Wewillglue them
afterweflipthe hullover.
Whendry and square, glue bulkheads2and 3the
sameway. Usethe square.
Makesurethe “Z”on bulkhead 3isreadablefrom
the back.
Removebothkeels.
Sand asbefore.
Using CA, gluebothkeelstogether. Besurethat
the keelsarealigned witheachother.
Clampwhiledrying.
Remove,sand and glue bulkheads4and 5tothe
jigasbefore.
Makesurethe cutoutinbulkhead 4istoYOUR
RIGHT, when looking atthe back of the boat(it will
be on the left,forexhaust, when upright).
Find the two¼plyengine rails. Sand themsmooth
with80.
Nowlookat bulkhead 5.Isittwisted orwarped? If
so, clampapieceof wood tothe back ofit forthe
next fewsteps.
Check the fitof the engine railsintobulkheads3, 4
and 5.
Ifok, glue themin(the bigend goesforward).
The keel shouldbe dry bynow.
Check the fitof the keelintobulkheads1, 2and 3.
Ifok, glue itin, making surethe keel iscentered on
bulkhead 1.
Thiskind oflookslikeaboat,doesn’t it?
Takeabreak,and givethe glue alittlewhileto
completelycure.

9
Bulkheads, spinesandenginerailsinplace.
Keelinstalledwithsupportblocks.
Nailtoholdstringers.
Placeyourtwochunksof2x4on eachside ofthe
keel, against the bench.
Drilltwopilot holesineach(sotheydon’tsplit), and
attachthemtothe jigand benchwithscrewsor
nails.
Thesekeep the keelfrombending ortwisting aswe
attachthe stringers. Putthemabout 1-1/2inchesin
front of bulkhead 1.
Stringers
Next, wewillinstallthe stringers. Makesureyou
followalong closely,astheseareveryimportantto
the final shape.
Grab the four1/4x1/4x48sticks. Carefullycheck
themforknotsorotherimperfections. If you find
any, be suretheyareinstalled towardsthe rear,
wherethe bend isn’t sogreat.
Whenfitting the stringerstothe notchesinthe
bulkheads, theyshouldbe flushwiththe sides.
Most of the time,the stringersarenot exactly
square, soiftheyarenot flushwiththe sides, try
turning them.Theyusuallymeasure.250x.260 or
so.
Having themflushwillmakebuilding mucheasier.
Using CA, glueone ofthe top (closest tothe bench)
stringerstothe notchinbulkhead 5.
You can layitinthe notchon bulkhead 4whilethe
glue dries;just don’t glueitto4yet.
Hitthe glue jointwithaccelerator.Holditinplacefor
60 secondsorso.
Whenyou aresurethe glue iscompletelycured,
glue tobulkhead 4.
Ifbulkhead 4istwisted orwarped, straighten it
whenyou glue the stringerson.
Theywillholditinplace.
Hitthat withaccelerator,holdfor30 secondsorso,
then moveahead to3,then 2,then 1.
Whilethe glue iscuring on 1, bend the stringerto
the keel, and holditthereuntil the glue jointon 1is
cured. Ithelpstodriveanailinthe bench, nearthe
front, toholdthe stringersbeforetrimming.

10
Topstringersinstalled.
Notethattop stringersareflushwithtopofkeel.
Anotherviewoftopstringers.
The reason forgluing, holding forafewseconds,
then moving forwardisbecausethe shape ofthe
stringerchangesasyou moveforward. Doing itthis
way, the glue hasnot completelycured,and can be
“adjusted”alittle, asyou bend the stringertothe
nextbulkhead.If you waited untileachglue joint
wascompletelycured beforemoving on tothenext
one, the stringerwouldtakeon astraight, angular
look,instead ofthe smoothcurveitshould.
Withapencil,mark the angleof the cutinthe front
of the stringer,tofiton the keel,asyou bend it
around.
Holdthe front of thestringerfirmly, and carefullycut
on the line withyourrazorsaw.
Or,you can simplyholdthe stringerinplace, and
cutit withthe razorsawagainst the keel.
Don’t glue ittothe keel yet.
Glue the othertop stringerontothe bulkheads,
exactlythe samewayasbefore.
Trimthe frontwiththerazorsaw.
Nowyou get toglue yourself tothe boat!Trynot
to…
Using CA, put glue on the endsofthe stringers.
Squeezebothstringerstogetheratthe tipof the
keel.
Makesurethat bothareeven, and flushwiththe top
of the keel.
Hitthe joint withaccelerator, and holdforaminute
orso.
Try nottoglue yourfingerstothe stringers!Ifyou
do, it couldbe ratherembarrassing tohaveyour
wifetry tofree you.She willusethatstory forlife!
Whenyou aresurethe jointissecure, glue inthe
bottomstringers.
Theyhavealittlemorebend than the top,but you
arean expert now!
Glue themtothe bulkheadsexactlythe sameway.
Whenyou arereadytoglue themtothe keel,make
suretheyaretouching and slightlybehindthe top
stringers(see photo).

11
Bottomstringersgluedtotopstringers. Verylittle
keelcontact.
Blending stringersforagoodfitoftheside
sheeting.
Sidesheetingclampedinplace.
Whenthatissecure, put someglue inthe area
wheretheyall join,togiveitalittleextrastrength.
Timeforanotherbreak.Giveyourbeautifulboat
skeleton atleast 20 minutestocure.
Callyourwifeintolookatit.She will eithersay
“that’snicehoney” oraskwhyyou can buildaboat
inafewhours, but the shelfyou weregoing tobuild
willbe 3thisyear.
Blendingthe
stringers
Beforewecan glue the side sheeting inplace, we
need tomakesurethe stringersareflat. Do this
withyoursanding block and fresh80 gritpaper.
Sand the stringers, using yoursanding blockto
blend themat the front.
Check tosee if yoursanding blocksitsflaton the
stringersat allpoints. Ifitdoesnot, the side
sheeting won’t either.The front ofthe stringerswill
need afairbit of blending.The rearwill need very
little.
Whenthe sideshavebeen sanded and blended, it’s
timetostartthe sheeting.
Dry clampthe side sheeting inplace.
Clampand adjustthe sheeting sothatitoverhangs
an equalamount on the top and bottom.Leavea
littlehanging off of bulkhead 5aswell.
Whenitlooksgood,makeareferencemark
somewherethat iseasytosee. I makeit between 3
and 4.
Mark aline on the stringerand the sheeting,sothat
you can align the marksquicklywhen gluing.
Removethe clamps.

12
Epoxyonfrontinsideofsidesheeting.
Checkingthekeel, bulkheadandsidesheetingfor
flatness.
Sidesheetingbeforetrimming.
Using 30 minuteepoxy,mixup about 1/2ounce.
Stirverywell.
Using asmallstick oracidbrush, coatthe stringers
and bulkhead edges.Workquickly.
Makesurethat all surfacesthatwilltouchthe
sheeting arecoated. Try nottousesomuchthatit
runsall over. Brushepoxyon the front 6inchesor
soofthe side, tohelpstrengthen the high stress
nosearea.
Align the marksand start clamping,adjusting the
sheeting forequaloverlap on the top and bottom.
Clampthoroughly, butbe carefulnottodistortthe
stringers.
Using anewmixing containerand applicator, do the
otherside. You mayhavetotrimthe fronttipofthe
first side,sothe second side fits.
Allowtocureatleast 1hour.
BottomSheeting
Whenthe glue isfullycured on the side sheeting,
plane and sand the side sheeting and stringersto
matchthe angleand contourof thebulkheads.
Timetogetintimatewithyourwood plane. Ifyou
don’t haveone,stop here. Gotothe storeand buy
one. Really.
The mistakemost peoplemakewithwood planesis
tryingtotakeoff toomuchwood.
Ifyoutrytoplane withthe blade too deep, you will
gouge and splitthe wood.
Adjust yourplane toremoveabout 1/64 of an inch
ofmaterialorso.
Ifyouhaveneverused aplane, practiceon some
scrap wood beforeplaning the sides.
What wearetrying todo withthe plane istoshave
the stringersand side sheeting tomatchthe angle
of the bottom.
Starting fromthe rear, holdthe plane atthe same
angleasbulkhead 5.

13
Sidesheetingaftertrimming.
Anotherviewoftrimmedsheetingandstringers.
Transomgluedtobulkhead5
Pushdownand forward, increasing the angleas
you moveforward.
Usethe angleon the bulkheadstodetermine the
anglethatyou holdthe plane.
Whenyou areclosewiththe plane, switchtofresh
80 griton yoursanding block.
Matchthe angleof the bulkheads. Also, lightly
sand halfof thekeel atthe sametime, sothatthe
bottomsheet laysflaton the structure. Do not
change the shape ofthe keel, justmatchthe angle.
The keel willhaveaslight“V”shape when you are
done.
Be very careful notto sandthekeel toomuch,
orthebottomwillnotfit!
Sand the rearof bulkhead 5.Sand the stringersand
sidesflushwiththe bulkhead.
Using 30 minuteepoxy, glue the transomtothe
back ofbulkhead 5.Try tomatchthebottom“vee”,
and leavean equaloverhang on the sidesand top.
Clampuntildry.
Makeamarkinthe exact centerofbulkheads4and
5. Makethismarkon the edge, sothatyou know
howfartoglue the sheeting.
Testfitthe bottomsheeting inplace.It shouldcover
exactlyhalf of the keel.Also, sand agradually
increasing bevelon the inside (center) edge,sothat
bothsheetswillmeet squarely.
Makesurethe frontisaccuratelyaligned withthe
centerofthe keel and thatthereissomeoverlap at
the rear.
Whensatisfied withthe fit, makean alignment mark
on the bottomsheeting and the keel.
Cut about 8piecesof wide tape, and set aside.
Mixabout 1/2ounceof 30 minuteepoxy.
Using asmallstick oracidbrush, coatthe stringers
and bulkheadswherethe bottomsheeting will
contact. Workquickly.
Alsocoat half of thekeel.
Brushepoxyontothe first 6inchesofthe frontof
the sheet, tohelpthe glue joint here.
Align yourmarksand put acoupleofclampsalong
the keel, clamping the sheeting firmlytothe keel.
Check yourcentermarkson bulkheads4and 5.
Wipeallexcess glue off ofthe keel, asit will
interferewiththe otherside sheeting.
Ifeverything looksgood, start wrapping the wide
tape across the bottomsheeting.

14
Halfofbottomclamped, tapedandweighted.
Otherhalftapedandweighted.
Anotherviewofbothbottomhalvesattached.
Start atthe keel, and pull the tape tight asyou
attachittothe side.
Useasmanypiecesoftape asyou need,tomake
surethe bottomsheeting istighttothe keel,side
stringersand sheeting.
Lookforany“crown”inthe sheeting asaresult of
taping.If it exists, usesomeweightstoflatten itout.
Alsoput weight overthe engine rail,tohelpholdit
against the sheeting.
Forveryinexpensiveweights, breakup some
cinderblocks. You can get manydifferent shapes
and weights, and theirrough surfacehelpskeep
theminplace.
Afterthe glue fullycures(atleast 2hours), remove
the tape and clamps. Check foranyglue that may
havesqueezed ontothe keel. Useasharpknifeto
scrape anyaway.
Testfitthe otherbottomsheet, and makeany
adjustmentsbeforeyou glue.
Makesurethat bothbottomsheetsmeetas
perfectlyaspossible.
Takeyourtimehere.Start fromthe rear. Putthe
sheet inplace,and noteanyareasthattouch,
keeping the sheeting frommeeting perfectly.Use
yourblockwith80 tosand these“high”spots.
Moveforwardand sand, fit, sand,fit,untilitfits
perfectly.Besuretosand aprogressivelysharper
bevel, sothatthe bottomsheetsfittightlytogether.
Glue the otherside ofthe bottomsheeting on the
samewayasthe first,onlythistimeyou can’tuse
clamps.
Tape the crap outof it,put weightson it, and set
aside.
Let’sbuildthe radioboxwhilethe glue cureson the
hull.
RadioBox
Removeallof the radioboxparts:Twolong sides,
twoshort sides, the top and bottom,aswell asthe
1/16 plytop.
Sand allthe partssmoothwith80.
Layapieceof plasticwrap orwaxed paperon your
bench.
Using CA, gluethe twosmallsidestothe twolong
sides.
The smallsidesgo between the long ones.
Useasquare.

15
Radioboxsidesgluedastwoassemblies.
Sidesjoinedflatonthebench.
Gettingreadytoglue1/8plytopinplace. Top
andbottom1/8plyalreadydone.
Put glueon the edges, and jointhetwoboxhalves
on the bench.
Lightlysand the bottomofthe box.
Glue onthe bottom.
Lightlysand the top.
Glue the radioboxtop on.
Thisisthe1/8inchBirchtop.
Takeabreakforafewminutes, sothatthe radio
boxglue jointscan cure.
Using 80 grit, sand the overhang on the top and
bottomsothatit’sflushwiththe sides.
Sand the top with180 or220 grit paperon ablock.
Carefullyremovethe lidfromthe 1/8plyradiobox
top.
Sand the edgessmooth.
Glue the 1/8plytop tothe radiobox.
It hasaslightlylargerholeforthe lid, sotryto
centerit sothatthe “lip”isevenallaround.
Makesurethat you don’t getanyglue inthe “lip”,as
itwillinterferewiththe waythe lidseats.
Sand the entireboxwith180.
Stand back and admireyourawesomeradiobox!

16
1/8plytopinstalled, notelipforlid.
Notehowlidfitsnicelywithamplearea for
sealing tape.
Skegslotstarts 17-3/4inchfromthetransom
Back tothe boat:
Makesurethatit hasbeen atleast 2hourssince
you glued the bottomsheeting tothe hull.
Withyourrazorsaw, cut allthe tabsthat areholding
yourhulltothe building jig.
Liftthe hullstraightup,togetit outofthe twoblocks
holding thekeel.
Ditchthe jig.Wedon’t need itanymore.
Hey, thisisreallystarting tolooklikesomething
now!
Afteryou finishadmiringyourcool newhull, let’s
moveon.
Trimthe excess bottomand side sheeting flush.
You can useyoursmallplane toget close. Finish
withan 80 grit sanding block.
Don’t spend too muchtimewherethe side sheeting
meetsthe top, aswewillcomebacktothisarea
later.
Alsoglue inthetwospinesthat you fitted earlier.
Glue inthe centerspine. It buttsagainst the keel,
and overhangsat bulkhead 3.The twoholesinthe
centerspine indicatethe top front.
CenterSkeg
Measure17-3/4inchesfromthe transom.Thisis
the rearof the skeg slot. Makeamark inthe center
of the bottom.Measure2-1/2inchesforward, and
makeanothermark.
Drill1/8inchholesinthebottomat yourmarks. Use
astraightedge and utilityknifetocutthe slot
betweenthe twoholesinthe bottom.
Check tosee thatthe skeg fitsproperly.If not, find
out whyand correctit.
Ifalliswell, pulltheskeg out, and set aside. It will
be epoxiedinplacejust beforepainting.

17
Spinesandcenterspineinstalled.
Sealing interiorwithepoxyfinishing resin.
Seamglassedwith6ounce clothandepoxyresin.
SealingInterior
Nowweneed tosealthe inside.It isvitalthat all
exposed wood be sealed.
Wewill alsoglass the rearkeel area.
Mixup about 2ouncesof epoxyfinishing resin.You
can thinthe resinwithabout10% acetone, sothatit
brusheseasily.Goeasyon the acetone, asit will
soften the epoxyglue jointsif you usetoo much.
It’sprettyfunnytogetthe inside sealed, and see
the side pop off the boat becauseyou thinned the
sealertoo much…Don’t ask!
Startfromthe front.
Using abrush, coat allareasofwood inside the
hull.Getinside the holesand “Z’s”.
Becareful nottogetanyresininthe boltholesfor
the skeg.
Try nottoget too muchresinon the top edgesof
the bulkheadsand stringers, asit will makeit more
difficulttosand later.Besuretogetthe bottom
edgesof the spines.
Fiberglassingseam
Use6ouncecloth, about3incheswide. Maketwo
pieces, one fromthe back of bulkhead 3to4, and
one from4to5.
Mixanother2ouncesoffinishing resin.
Brushresinontothe centerseamand laythe cloth
down, centered on the seam.
Brushinaveryheavycoatofresin,sothatthe cloth
iscompletelywetted.
Continue coating the inside withfinishing resin.
Ifyouneed tomixmore,useanewcontainerand
brush. If you don’t,the oldresinwillmess withthe
newresin, and createaproblem.Trustme…
Afteryou are100% surethat allexposed wood
inside the hull hasbeen coated, let it sit overnight.
Afterthe hull sealerhashad achancetocure,let’s
get the hull readyforthe top sheeting.

18
Anotherviewofglassedseam.
Deckformersinstalledinbulkheads4and5.
Checkingdeckformerswithstraightedge.
Trimthe building tabs, and sand the bulkheadsto
matchthe top contour.
Using autilityknifeand 60 gritpaper, cutand sand
ataperon the front of thedeck joiner.
It shouldgo fromnothing atthe front,tofull
thickness about 4inchesfromthe front.
Takeyourtime, and makeasmoothprogression.
Useyourplane toshavethe top stringers(and
sides)tothe contourof the bulkheads.
Do thisthe samewayyou didthe bottom.
Use80 grit tofinishit up. Besurenottoround the
edges.
Glue the deck supportsintobulkheads4and 5.
Useastraight edge between the bulkheadsto
check the decksupports.
This manual suits for next models
1
Table of contents
Other Zipp Manufacturing Toy manuals
Popular Toy manuals by other brands

Goldwing RC
Goldwing RC 91in CORVUS 50-60CC manual

Bill Hempel
Bill Hempel 50% J-3 Cub Assembly manual

Viessmann
Viessmann 5172 Operation manual

DICKIE TOYS
DICKIE TOYS Despicable Me 2 20 112 0005 operating instructions

Betzold
Betzold Tellimero operating instructions

Eduard
Eduard Zimmerit Pz.IV Ausf.H manual