Zipp Manufacturing JAE12G2 Instruction Manual

ZIPPMANUFACTURING
JAE12G
AZippkits R/CBoat
Building Instructions
2009 Zipp Manufacturing-Frankfort,New York 13340
www.zippkits.com
Toll Free(866)922-ZIPP

2
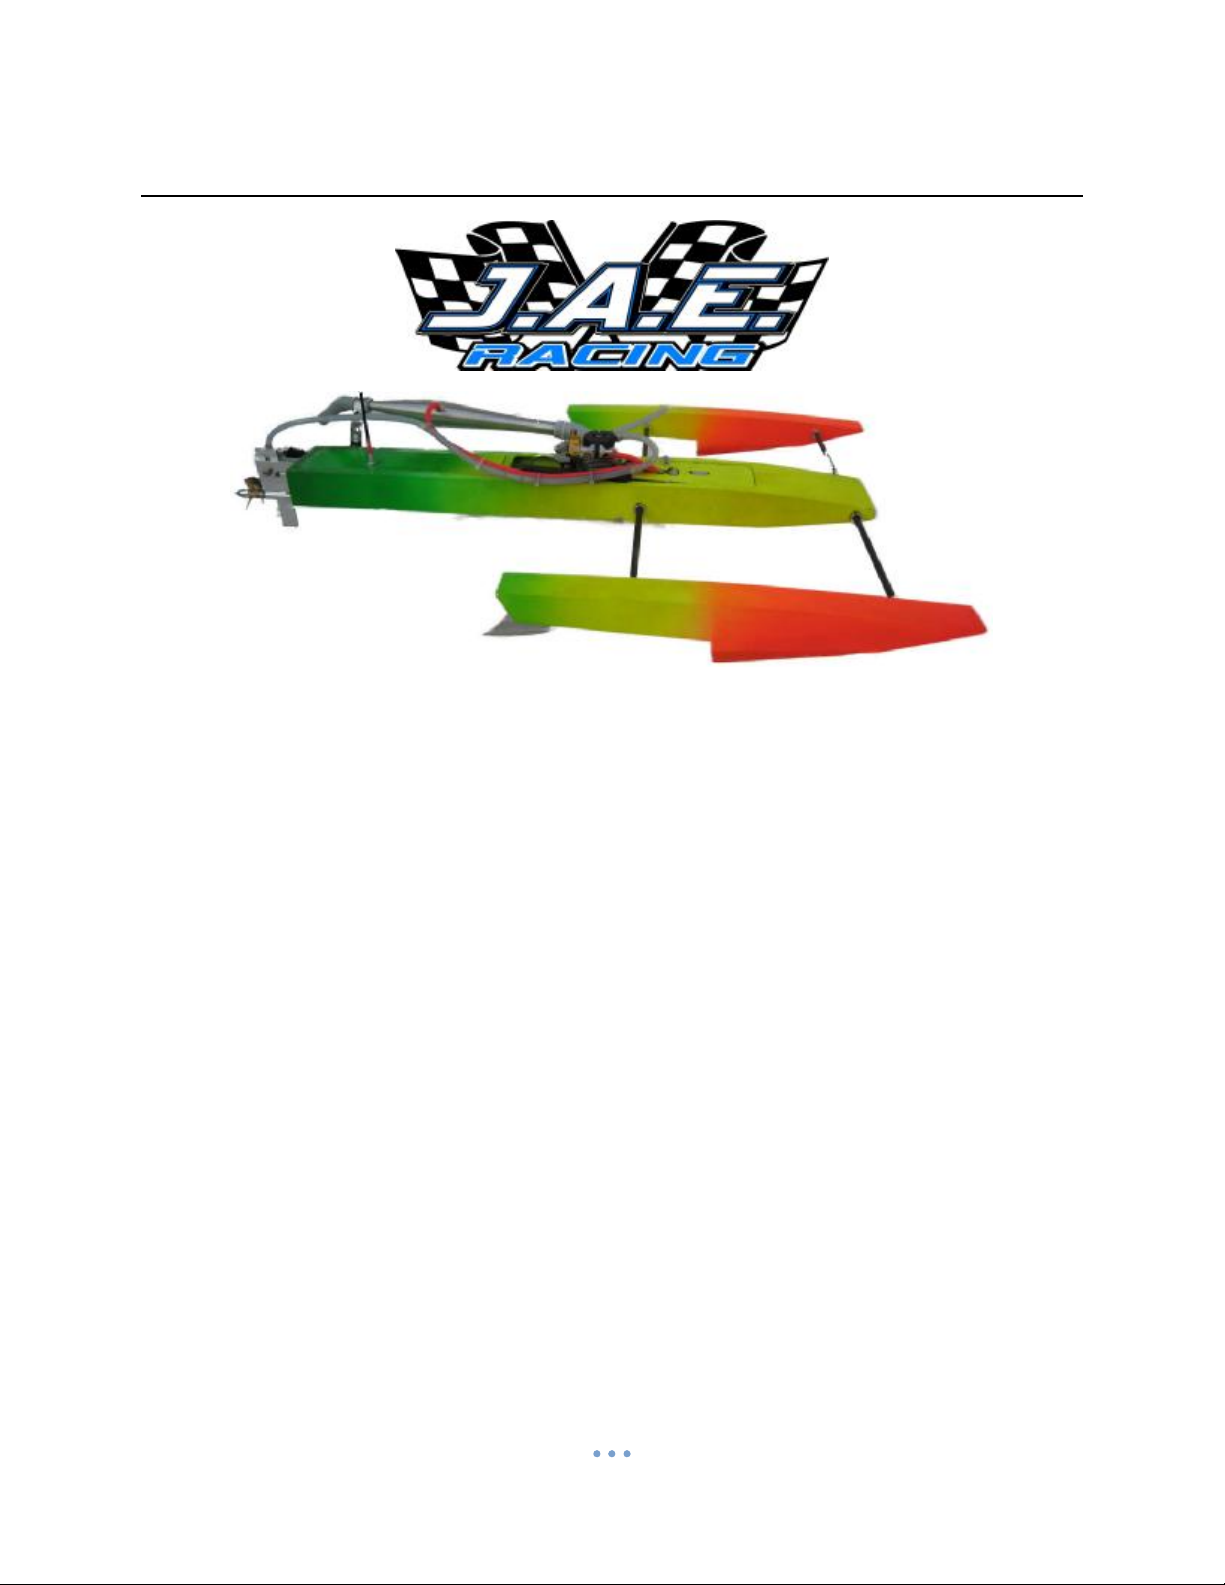
The JAE12G2wasdesignedanddeveloped asaresultofajoint venturebetweenIMPBA Hall
ofFamememberRodGeraghty,DavidHall, RonZakerJr.&MartinTruexJr.
The maindifferencebetweenthishull andall theothersistheuseof sharpedgesonthe bottom
ofthesponsonsandtub,asopposedtocurved surfaces.Thishelpsbreakanysurfacetension
ofthewaterandmakesforafasterboat.
Thisdesignapproachhasbeenbuilt, developedand testedagreatdeal.
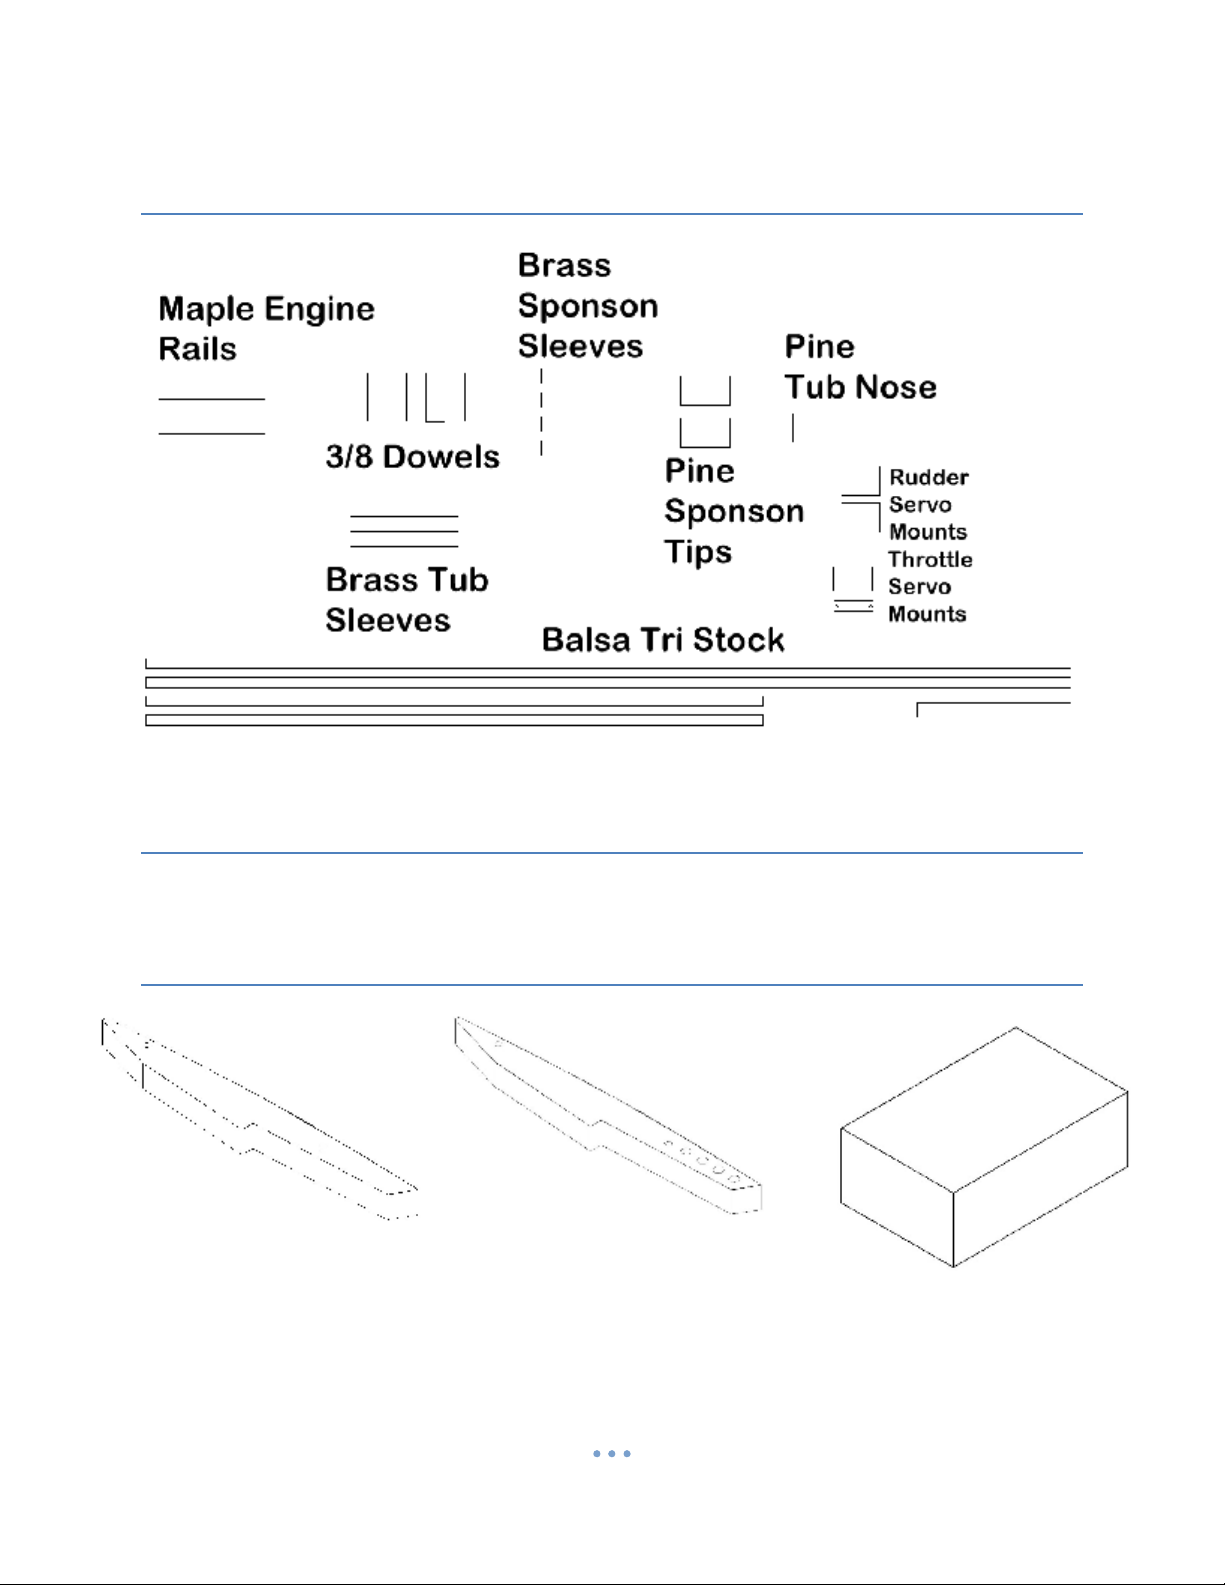
Inadditiontoamarineengine,youcanuseanyaircooled12, 15,18, 20(small block)caror
truggyengine, withexcellent results.
The kitisnothardtoassemble,asall of the hardstuff hasbeen doneforyou.
Thatisnoexcusetodo apoorjobwithassembly. The betteryoubuildthisboat,thebetteritwill
run.Often thedifferencebetweenan excellent buildingjobandapooroneisasimplesanding
block.
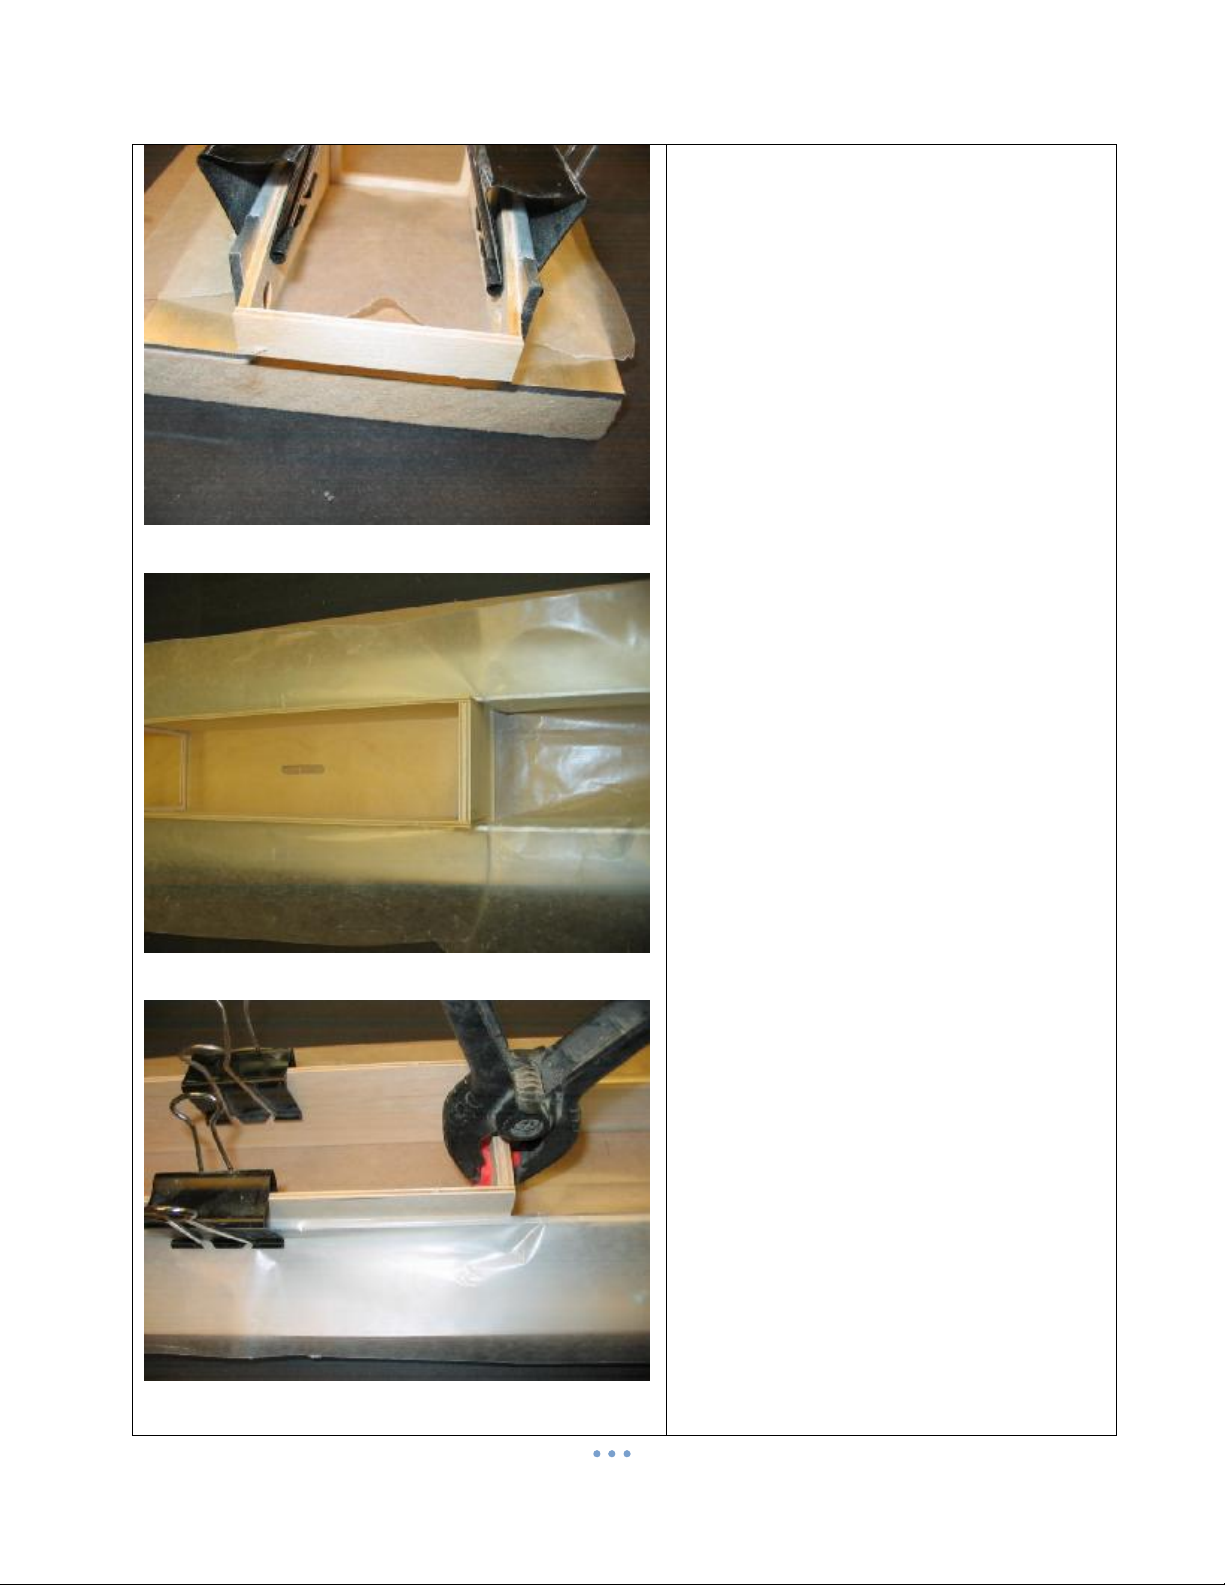
Anoteaboutoverhangs:
Thisboat isdesignedtoshearwaterandpreventanycapillaryactionof water. Todothisthe
tub, skiandsponsonshaverearoverhangs. Theseshearthewateroff and mustbeleftinplace
andnot rounded inanyway.
The boatalsohassideoverhangsonthe sponsons. Thesehelptheboat getuponplane
quicker. If youareusingapowerfulengine,youcansandtheseoff, but leaveall cornerssharp.
Takethetimetoreadthisentiremanual, sothat you arefamiliarwithall thebuildingsstepsand
theirproperorder. Takeyourtime; makesureyouunderstandeverythingbeforeyoudoitand
you will be rewardedwithanimpressiverunninghull…
Thiskit isnot atoy. Although R/Cboatingisafunandrewardinghobby,it canbedangerous
ifnot donewithcommonsenseand safetyinmind. Justaboutanyoneshouldbeableto
buildthiskit, butit shouldnot beoperated bychildren without closeadult supervision.
Themanufacturerassumesno liabilityfordamagesorotherloss intheuse ofthisproduct,as
wehavenocontrol overtheconstructionorend useofthisproduct.

3
Toolsandsuppliesneededtobuild
§Sandingblockswith80 and150 gritpaper
§Drill with bits
§Square
§Flatfile
§FLATWorkbench
§1/2ounce MediumCAglueandaccelerator
§Goodquality5and30 minuteepoxy
§Epoxyfinishingresin
§Springclamps,paperclamps,cclamps,etc.
§RazorbladeorX-Actoknife
§Maskingtape
§Waxedpaper
§Woodfiller
§Primer
§Paint

4
Additionalitemsneededtocomplete
§.12-.20airorwater cooledNitroengine
§.150Colletandflywheelforengine
§Startingbelt
§.150x16inchcablew/welded3/16stubshaft(Zipp 3475)
§Headertofitengine
§Tunedpipe
§2channelsurfaceradiowith 2servos (HitecHS-225MGandHS-85recommended)
§Throttleandrudder pushrods (2-56Size)(Zipp 3462)
§2-56Clevises(Zipp 3459)
§2pushrodseals(Zipp3404)
§4ounceFuelTank(SullivanSS-4)
§Z21Strut (Zipp3495)
§.187drivedog(Zipp3485)
§440prop(Zipp4007)
§10-32Propnuts(Zipp3489)
§EngineMounts(Solinger 12recommended,Zipp 3481)
§Cablegrease
§Rudder(Zipp3477)
§12inchlengthof1/4brasstubing(Zipp 3474)

5
Let’sidentifythepartssothat wecaneasilyfindthemwhen needed. Markthepartsthatare
insideotherparts.
/6 plywood parts:
/8 plywood parts

6
Miscellaneous parts
Foam parts
Left sponson has holes
Right sponson has
6 holes
Foam nose block

7
Doaninventoryofall the parts, tobe surethateverythingisthere. Ifanything ismissing or
damaged,contact usassoonaspossible, sothat wecangetreplacementstoyouquickly.
Tub Jig
Werecommendthatyoumakeajigforthetub.
Thiscanbe assimpleastwostraight piecesof ½to¾inchthick wood.
It can be aselaborateas1/8by2inchaluminumanglewithadjustment slotsfordifferenttub
widths.
Eitherway,youneed somethingtoclampthetub sidesto.
Everycriticalcomponenton thishull dependsonastraight,squaretub.
Dowhateverittakestogetitdone correctly.

8
Tub sides marked before assembly.
Bulkheads glued in place (this is the 1FE).
Tub side marked for transom alignment.
Tub
Let’sbuildthe tub.
First, markthe insidesofthetubrightand
left. Thesponsonboomholeistowardthe
bottomofthetub side.
Makethesemarks inthefrontportionof the
sides,whereit won’tbeseenlater.
Check thefitof thebulkheadsintheright
tubside.
Useafiletotouchupthe insidecornerson
thebulkheads, tosquareoff thetinyradius
leftbythecuttingbit.
Onceyouarehappywiththefitof the
bulkheadsinthetubside,gluetheminwith
CA. Usethesquareprovidedinthekitto
ensureeachbulkhead isperfectlysquare.
Makeamarkonbothtub sides(inside)with
alinethatisanextensionofthetransom
cutout.
Usethislinetoalignthetransomcorrectly
on thetub side.

9
Using the square provided in the kit.
Tub sides glued to bulkheads.
Tub jig.
Assemblethetubsidesonaflatsurface
Check thefitof thebulkheadsintheleft tub
side. Ifall iswell,gluethebulkheadsin
placeoneatatime,usingthesquarefrom
thekit.
Flipthetuboverand lightlysand the
bottom.
Nowisthe timetouseyourtubjig. If you
don’t havethe abilitytomakeanaluminum
jig, seebelow.
Useapairofthickwoodensticks.Leave
theseclampedtothesideswhilegluingthe
aftbottominplace.

0
Tub sub nose being glued in place. Tub extends just past jig.
Waxed paper prevents one piece tub/jig assembly. 1FE shown.
TD being glued in place.
Putalayerofwaxedpaperoverthejig.
Putthetubaft bottominthejigand setthe
tubontoit.
Fullyclampthejigsidestothe jig.
Glue thetubsubnosetothe veryfrontof
thetub. Thissupportsthenosefor
sheeting,andprovidesasolidbaseforthe
tubnoseblock.
Using epoxy,gluethetubaftbottomin
place. Makesurethat thebottomextendsto
thefrontbulkhead.It shouldcoverthe full
1/8inchbulkhead.Lateron,wewill sand
thistomatchtheangleofthetub sides.
Leaveasmall overhangatthe rearofthe
tub. Donot sandthisoff.
The aftbottomsheet isprecuttothe
correct length. Makethefrontofthisflush
withthe front of thefirst bulkhead,and the
rearoverhangwill becorrect.
Glue inthetransomdoublerwithepoxy.
Makesurethat it fitsflatagainst the
transom,andthatit sitsfirmlyonthetub
bottom.
Clampuntil cured.

Tub sleeves sanded, ready to glue in.
Tub sleeves, doublers and booms in place. 1FE shown.
Fwd. sleeve and doubler detail. 1FE shown.
When thetubbottomhascured, letsmove
on toboomtubealignment.
Thisisprobablythemost criticalstepinthe
assembly, sotakeall the timeneededto
getthisright.
Removethetubfromthejig.
Grab thetwobrass boomtubesleeves,and
use80gritpapertorough thelast ¼inchor
soof eachend.
Putthereartubedoublersinplaceandslip
aboomtube sleeveandcarbonboomtube
throughthe tubanddoublers.
Measurethecarbontubeoneachsideof
thetub,andcenterit.Makesomepencil
marks onthe tube,ontheoutsidesofthe
tubsothat youcanquicklycenterthetube
later.
Dothesamefortheforwardboomtubeand
doublers.
The forwardboomtube doublerslineup
withthe forwardboomtubeholes.They
onlyaligncorrectlyoneway,sobesurethat
theorientationiscorrectbeforeyoumixany
glue.
Weightthetubsothat it isflaton thebench.

2
Measuring boom tube distance above flat bench.
Tub sleeves sanded flush with tub side.
Clampthe
doublers
inplace
without
glue
andmeasurethe endsofthetubes.
Bothsidesofthetubesshouldbethesame
distancefromthebench.
Ifnot,loosenthe clampsand adjustthe
doublersuntil theyare.
Ifthe doublersorholesnowhavetobe
sandedtofit, youmust sandthemand
repeatthemeasuringprocess.
Thisisacriticalstepintheassembly, andif
done incorrectly, yourhull will neverhandle
properly.
When youarehappywiththeheightofthe
tubesabovethebench, check toseethat
thetubesaresquarefronttoback withthe
boomsquareprovidedinthe kit.
When youhavechecked anddouble
checkedthattheboomtubesarestraight
andsquaretotheworld,removethe
clamps,but leaveeverything inplace.
Mixup some30minuteepoxy, andcoatthe
doublerswheretheywill beincontactwith
thetubsidesandbottom.
Align therailsandclampinplace.
Quicklycheckyourmeasurementsand
squareseveraltimes,andmakeanytiny
adjustmentsbeforetheepoxy startstocure.
Useanyexcessepoxytobuildasmall fillet
aroundthesleevesanddoublers.Clampin
place.
Setasideforat least3hours.
Repeatforthefrontboomtubes.Besure
everythingisperfectbeforeyouwalk
away…
Onceeverythinghascured, sandthe brass
tubsleevesflushwiththetubsides.

3
Radio box lid support glued in place behind bulkhead .
Foam nose block being test fit.
Foam sanded to match tub sides. Note angle sanded on aft
sheeting.
Glue inthelidframesupport. Thisgets
attached totherearof bulkhead2,andis
flushwiththelowerportionof the sides.
Check thefitof thefoamnoseblock. Ifall is
well, gluethefoamnoseblock inplacewith
epoxy orpolyglue.Allowtocure.
Sandthefoamflushwiththetubsides.
Becarefulnottosand thetubsidestoo
much.
Thisfoamisneededforfloatation, incase
you shearoffbothsponsons…

4
This is what makes a JAE a JAE… Sponsons are similar.
Engine rails glued in touching the aft doublers.
Engine bay with lower tri stock in place.
Glue theforwardbottominplacewith
epoxy.Besuretosandtheangleintothe
aft sheetsothat itmatchesthetubsides.
The forwardbottomsheet shouldcoverthe
bevelontheaft sheetingandbeleft square.
Donot sandtherearof theforward
sheeting; itneedstohaveasharpedgefor
thewatertoshearoff.
Seedrawing.
Using epoxy,gluethetwomapleengine
railsinplace, touchingthe aftboomtube
doubler.Allowtocure.
Fit andgluethe ¼balsatristockinsidethe
tubbottom.
Cut the¼balsatristockasfollows:
(2)10inches
(4)9inches
(2)5inches
(2)4-1/4
Cut thelongestpiecesfirst.Seecutting
guideinback ofthismanual.
Theseareslightlylong. Trimforanexact fit
intheradioboxandengine area.
Usethe pieceof5/16x4balsatristock to
reinforcethetransomoneachside, inside
thetub.
Install yourengine onitsmounts,then set
theengineandmount inplaceonthe
enginerails. The glowplugshouldbeabout
3-1/2inchesforwardofthebulkhead,but
thisinnotatall critical.

5
Engine test fit.
Engine mounted on Solinger mounts.
Rough initial bending of shaft tube.
Find anail orametalrod that slipsintothe
collet.
Usethistomakesurethat theengineis
aligned withtheholeintherearbulkhead.
It shouldlineupperfectly.Ifnot, findout
whyandcorrect it.
Mount the engine.
Onceyouarehappywiththeengine
placement, screwtheenginemountsin
placewiththescrewsprovidedwiththe
mounts. Drill pilot holestoavoidsplittingthe
enginerails. IfusingtheSolingermounts,
drill 3/32pilotholes.
Withtheengineinplace, wecan moveon
totheshafttube.
Thisisanotherareathat will needtobe
done perfectlyforagood runninghull.
Bendingtheshafttubeisapieceofcake, if
you knowthesecret.
The ¼inchbrasstubingneedstobe
annealed.
Thiswill makeit easy tobendbyhand,
without kinks.
Toannealthetube, simplyheat it withany
propanetorch,until it changescolor.
You will seethe brasscolorchange toa
sort of blue. It onlytakesacoupleof
seconds, sowatchforit.

6
Shaft tube in place.
Bottom.
When yousee thetubing changecolor,
movetheflameslowlydownthetubeuntil
thewholethingisdone.
Putascrewdriverinoneend of thetubing
toholdit whileyouheat it.
Trynottoannealthelast inchorso.
You caneitherset the hot tubeon aheat
proof surface(concretewill do), oryoucan
quenchit withwateruntil cold.
When thetubinghascooledoffwewill be
bendingitintoan“S”shape.
Whyan“S”shape?
Testshaveproventhatatubewithtwo
bendshaslessdragthanatubewithone.
The reason isthattwobendssupportthe
flexcablebetter, reducingcablewhip,and
drag.
Measurefromtheendof theenginecollet
totherearbulkhead.
Removetheengine.
Puttheshaft tubethroughthe holeinthe
rearbulkhead,andtheholeinthe tub
bottom.
Puttheendthatyoudidn’t annealtowards
theengine.
Letthetubestick throughtherearbulkhead
bythe sameamount that youmeasured,
minusabout3/8inch.
Markthe shaft tubehereforreference.
Nowstudythesideviewof the shaft tube,
andcarefullyandslowlybendthe“S”shape
intothetube.
Trytomakesurethatthetubesticks
throughthe bulkheadtheproperamount,
andthe rearofthetubeisabout¼inch
fromthetubbottom.
Takeyourtime,and goalittleatatime.
Ifyoutrytorushit, andkinkthe tube, you
will havetostartoverwithanewtube.

7
Shaft tube thru ski.
Take your time with the shaft tube.
Strut on ski.
When youfinish,youshouldhaveanice
“S”tubethat startsabout 3/8inchbehind
theenginecollet, andcontinuespastthe
rearof the boat (wewill trimit later).
Glue theshaft tubeinplacewithepoxy and
filler(tothicken).Besuretoget insideand
outside thetub, andbothsidesofthe
bulkhead.Allowtocure.

8
Ski parts ready for assembly.
Ski side glued to bottom (rear).
Ski side glued to bottom .
Ski
Assemblethe3partsof the skiusing epoxy
orCA.
Glue theskibottomontothesides.Match
thebottomsheetingtothe rearendof the
sides,and letthefrontoverhang. Clampor
tapethisassemblyuntil cured.
Sandthefrontofthesheetingsothatit
featherstonothingatthefront.

9
Note long bevel sanded in front of ski.
Rear of assembled ski.
Drill in the center of this hole.
Sandasharpbevelonthefront of the ski
bottomsheet,sothat itblendsintothetub
bottom. Donot glue theskitothetub yet.
Servos
Bolttherudderinplace. Thisshouldbe as
fartothe rightaspossible, andbesurethat
you haveat least ¾inchofrudderbelow
thebottomof the ski.
Makeamarkonthe transomwherethe
rudderpushrod will exit.
Sight thisfrombehindtheboat.
(see drawing).
Drill a¼inchhole, inboardof yourmark.

20
Mark on transom. Old style strut shown.
Rudder servo tray parts. Sides are ¼ ply.
Servo tray assembled. Make sure you match servo length.
Assembletherudderservotray. Thisis
madefromtheservomount base, strap and
thetwo5/8x7x8inchplywoodblocks.
Check thelengthofyourservo,andglue
theblocks inplace.
Thistraywill fit the HitecHS-225MG servo.
UseepoxyormediumCAtobuildthetray.
Check thefitof theservointhetray.You
will havetocutarecessfortheservowire
inone block.
Makesurethat theservoisatinybittaller
that the mount,otherwise, thestrapwon’t
tightentheservo.
Usetwoservoscrews(not supplied)to
attachthestrap.
Table of contents
Other Zipp Manufacturing Toy manuals
Popular Toy manuals by other brands

GRAUPNER
GRAUPNER 4469.400 manual

KEiro
KEiro ECLIPSE 400/1.2 Building instructions

Aircraft Modelers Research
Aircraft Modelers Research Giant Stick 85 user manual

Bright Starts
Bright Starts Hungry Monkey Tummy Time Water Mat manual

Common Sense RC
Common Sense RC SNAP&FLY owner's manual

KY MODEL
KY MODEL FP201804 manual