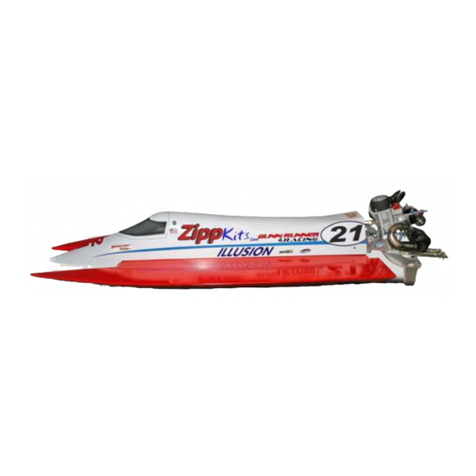
Zipp Manufacturing PRO VEE Full Race Mono Hull Instruction Manual

P R O V E E
1
Z I P P M A N U F A C T U R I N G
PRO VEE
Full Race Mono Hull
A Zippkits RC Boat
Building Instructions
2016 JMP Hobby Group LLC
Indiana USA
(866) 922-9477 www.zippkits.com

D E S I G N C U S T O M I Z A T I O N
Introduction
Thank you for purchasing this kit. We are sure that it will
provide you with many hours of enjoyment.
Pleasetakethetimetoreadthisentiremanual
beforebuildingthisboat.Youwillbecome
familiarwiththebuildingorder,andlesslikelyto
makemistakes.
This kit is not a toy. Although R/C boating is a fun and rewarding hobby,
it can be dangerous if not done with common sense and safety in mind.
Just about anyone should be able to build this kit, but it should not be
operated by children without close adult supervision.
Here are a few safety tips:
Never operate your boat alone. If you get hurt, you may not be
able to drive for help.
Never, ever operate your boat in an area where there are full
size boats or swimmers. If something happens, a 14 pound
object traveling at 60+ mph can do serious damage.
Always use a failsafe if not racing. This shuts the engine off in
the event of radio signal loss. Test the failsafe each day of
running, by shutting off your transmitter.
Always carry a fire extinguisher, as gasoline is extremely
flammable.

P R O V E E
3
The manufacturer assumes no liability for damages or other loss in
the use of this product, as we have no control over the construction
or end use of this product.
Purpose
This boat was designed as race boat from the start. It is legal for racing in any
mono class, due to its vee bottom, if you choose to race.
The Pro Vee was designed for big power and big water. It will handle as much
power as you can get, and go through water that would upset most other “race”
hulls.
You can build this boat without having the engine or radio, but it does make it
easier to have them available when you build.
You can use any gasoline engine (check the rules), as long as it has mounts
for 5 inch rails.
Please note that this boat is a very high performance product. This is the
current state of the art in Mono hull design as of 2015/2016.
The Pro Vee requires that you build it squarely and set it up perfectly.
If you do so, you will have one of the fastest, most competitive hulls available.
Don’t eyeball anything. Measure EVERYTHING to be sure you are 100%
correct.
Use a straightedge and a square to build and setup a perfect boat. Nothing
else will do.
That said, this is one of the easiest building gas boat kits you can buy. Really!
You can do it!

P R O V E E
4
Toolsandsuppliesneededtobuild:
Small wood plane (mini plane)
Sanding blocks with 80 and 220 grit paper
Drill with bits
Square
FLAT work bench (the thicker the better)
Medium CA glue and accelerator
Titebond III glue and/or Good quality 30 minute epoxy
Epoxy finishing resin
Medium sized rubber bands (#64 work well)
Screws or nails
Waxed paper
Lots of clamps! Spring clamps, paper clamps, c clamps,
etc.
Razor saw
Wide tape
Wood filler
Primer
Paint

P R O V E E
5
Additionalitemsneededtocomplete:
Gasoline engine with 5 inch mounts (Zipp 3409 Zenoah mounts)
.250 Collet for engine (Zenoah type engines) (Zipp 3440 )
.250 24 inch cable w/welded stub shaft (Zenoah type engines) (Zipp 3444 )
Tuned pipe w/dropped header or canister muffler (Zipp 2018/2011 or 2037)
2 channel surface radio with 1 standard and 1 heavy duty servo (150 in/oz
minimum)
Throttle pushrod (Zipp 3462)
Rudder pushrod (at least “4-40” size) (Zipp 3463)
2 pushrod seals (Zipp # 3422/3404 )
Medium Fuel Cell and tubing (gasoline compatible) (Zipp 3506)
.250 stinger type drive (Zipp 3401)
.250 drive dog (Zipp # 3446 )
75 mm prop (Zipp 4102/4105)
Prop nuts (Zipp # 3450 )
Cable grease (Zipp # 3532 )
Large rudder (water pickup type- Zipp 3413)
3 feet large silicone tubing (water line, Zipp 3461)
Trim tabs and turn fin (Zipp 3417 and 3410)
18 inch length of 5/16 brass tubing (Zipp 3568)
Floatation (poolnoodles, foam, etc.)
The Zipp 3610 Ultimate Hardware Set includes everything needed
except engine and radio.

P R O V E E
6
Before we can start building, we need to do some prep work. Good prep work
will pay off later with a straight, true running boat.
First, we need a flat work surface. Nothing else will do.
If you don’t have a perfectly flat bench, you can make one with a piece of
12x48 plywood.
Simply screw a couple of 2x4’s lengthwise to the bottom. Make sure the 2x4’s
are straight!
You can then put this on a bench, and shim the corners to make it steady.
Or, if you are really pressed for space, you can set it on a couple of saw
horses.
The Build
We are ready to start the build!
Remember- The boat is being built upside down. Any reference to the top or
bottom refers to the boat’s top or bottom. If you are going to attach something
to the top, it would be closest to the bench. Right and left are always as you
are sitting in the boat, or from the rear.
Got it? If not, stand on your head as you build.
Please note that in some of the pictures, the boat shown may look different from
yours.
This is because we make a whole series of boats that are assembled in exactly the
same way. Where it is important, we show the correct hull in the pictures.
Also, some of the pictures may be out of sequence with what we are doing. This is
to clarify a point.
Take your time, read ahead in the manual and understand what you are going to
do before you do it.
If you need assistance, we are here to help.

P R O V E E
7
We like the Great Planes 11 inch bar sanders
Use good quality epoxy and finishing resin
Your life will be much easier with one of these
Acid brush trimmed for fast epoxy application

P R O V E E
8
Let’s get started.
Attach the jig board to your FLAT bench (or 12x48
ply) with screws, nails, clamps or whatever you
need, to make sure it’s attached to the surface.
Remove bulkheads 1, 2, and 3 from the sheet.
Note that the bulkheads are marked. These should
face the rear, when glued into the jig.
Put bulkheads 1, 2 and 3 into the jig, engaging the
tabs in the slots.
Starting from the front of the jig, glue the tabs of
bulkhead 1 to the jig.
Use a square to ensure that it’s 90 degrees to the
jig. Also make sure that the tabs don’t protrude
under the jig.
Use CA and accelerator or Titebond III.
When dry and square, glue bulkheads 2 and 3 the
same way. Use the square.
Remove both keels.
Using CA or Titebond lll, glue both keels together.
Be sure that the keels are aligned with each other.
Clamp while drying.
Laminate 4A to the back of BH4. The back of the
bulkhead has BH4 engraved on the tab.
Glue bulkheads 4 and 5 to the jig as before.
Find the four 1/8 ply engine rails. Laminate both
sets. Sand them smooth with 80.
Laminate the two shaft supports together.
Clamp until cured.

P R O V E E
9
The keel should be dry by now.
Check the fit of the keel into bulkheads 1, 2 and 3. If
okay, glue it into the slots in the jig board.
Glue to the bulkheads, making sure that it is fully
seated. You may need to tap it into place. Make
sure that both front tabs are fully seated in the jig.
The keel will be higher than the bulkheads.
Now look at bulkhead 5. Is it twisted or warped? If
so, clamp a piece of wood to the back of it for the
next few steps.
Check the fit of the engine rails into bulkheads 3, 4
and 5.
Be sure that the cutout rail is on the right side of the
boat. This will be on the left (from the rear), when
looking at the boat upside down.
You may have to tap the rails down into the
bulkheads.
Check to be sure all bulkheads are square to the
building jig (90 degrees).
Glue in the engine rails with 30 minute epoxy or
Titebond III.
Bulkhead 5 must be 90 degrees to the building
jig. Use the engine rails to establish this.
Double check this, as it is the most common
mistake made.

P R O V E E
10
Glue the laminated shaft support into the slots. You
will have to spread the rails apart slightly to do this.
Note that the engine rails fit fully in their slots. No
part of the engine rails should be above the
bulkheads.
Glue in both bulkheads 1A. These support the
chines. Use your square.
This kind of looks like a boat, doesn’t it?
Take a break, and give the glue a little while to
completely cure.

P R O V E E
11
Chine Supports
The chine supports have a very important role in
keeping the bottom of the boat straight and flat.
The chine supports are marked CS, and that mark
should face out on both sides. The lettering for
“PRO VEE” should be upside down as well.
You will be gluing the chines to the edges of these
supports.
It is important that the chine supports not protrude
past the chine edge, so that you can sand the
chines later (see drawing).
Glue in the chine supports. Make sure that “CS” is
facing out. Glue them to bulkhead 5, then 4 and 3.
Chines
Next, we will install the Chines. Make sure you
follow along closely, as these are very important to
the final shape.
When fitting the chines to the notches in the
bulkheads, they should be flush with the top (and
bottom) of the bulkhead.
This is important as the chines set the angle for the
top and bottom sheeting.

P R O V E E
12
Test fit the chines in place. Note that the chines
have small tabs at the front. These key into the
keel.
The chines will end up with a small angle at the
front, which is correct.
Do not glue the deck chine to bulkhead 5 at this
time. We need to wait until the other glue joints are
secure before we glue this.
All bulkheads have water drain notches, and we can
use them to hold rubber bands. Bulkheads 4 and 5
will need rubber bands looped around the tabs. The
others can use the spine notches.
Using Titebond III or epoxy, glue one of the deck
chines (UC) in place.
Put glue on the edge of CS, but only from bulkhead
4 forward. We don’t want to glue the support to 5
until the chine is in place there.
Use rubber bands in the provided slots to help hold
them in place. Do the other deck chine before this
one cures.
In other words, glue both top chines, then glue both
bottom chines. We don’t want to pull on one side
and not the other.
Note that you should not clamp the chines to
bulkhead 1A. Put glue down, and let the chine rest
on 1A in its natural position. The chines may or may
not contact 1A.

P R O V E E
13
Repeat for the bottom chines. Glue to both CS as
well.
You can make great clamps from some 3 inch PVC
pipe.
We sliced it into 1 inch pieces with the band saw,
and cut out a small section of the circle.
These clamps are cheap, and work very well.
Add a little extra glue at the nose. We need some
strength here.
Glue the rear of the deck chines into bulkhead 5.
You will have to twist the chine so that it is flush
with bulkhead 5 (flat). We used medium CA with
accelerator, and held them for a minute until cured.
Glue to CS at the same time with Titebond III.
Double check that all chines are flush with their
respective bulkheads and the CS are in the proper
position. Allow to cure.
Note that the CS may or may not exactly follow the
curve of the chines. They really don’t need to. They
are there to provide vertical support for the bottom
sheet.

P R O V E E
14
Blending the chines
Before we can glue the side sheeting in place, we
need to make sure the chines are flat. Do this with
your sanding block and fresh 80 grit paper.
Sand the chines, using your sanding block to blend
them at the front.
Check to see if your sanding block sits flat on the
chines at all points. If it does not, the side sheeting
won’t either. The front of the chines will need a little
bit of blending. The rear will need very little.
Sand the front of the keel where the side sheeting
will lay.
Only sand enough to get the bevel. Don’t change
the shape of the keel.
Side Sheeting
When the chines have been sanded and blended,
it’s time to start the sheeting.
Dry clamp the side sheeting in place. Use the
rubber bands to hold in place.
Clamp and adjust the sheeting so that it overhangs
an equal amount on the top and bottom. Leave a
little hanging off of bulkhead 5 as well.
Sand a bevel on the front edge so that it will meet
the other side sheet.
When it looks good, make a reference mark
somewhere that is easy to see. I make it between 3
and 4.
Mark a line on the chine and the sheeting, so that
you can align the marks quickly when gluing.
Remove the clamps.
Using 30 minute epoxy or Titebond III, glue the
side in place.
Using a small stick or acid brush, coat the chines
and bulkhead edges. Work quickly.
Make sure that all surfaces that will touch the
sheeting are coated. Try not to use so much that it
runs all over.

P R O V E E
15
Align the marks and start clamping with rubber
bands as before, adjusting the sheeting for equal
overlap on the top and bottom.
Line up the nose, so that the side covers half of the
keel.
You will need a few clamps.
Clamp lightly, but be careful not to distort the
chines.
Check all over to be sure that the side is in contact
with the frame. If not, add clamps until it is.
Allow to cure at least 3 hours.
Repeat for the other side. Get the nose to fit as well
as you can. If there is a gap, don’t worry about it.
That’s what wood filler is for…
After the sides have cured, sand the rear of
bulkhead 5. Sand the chines and sides flush with
the bulkhead.
Using 30 minute epoxy, glue the transom to the
back of bulkhead 5. Try to match the bottom “vee”,
and leave an equal overhang on the sides.
Clamp until dry.
Note the correct orientation of the transom. If you
don’t, the holes will be in the wrong position.

P R O V E E
16
Bottom Sheeting
Use the angle on the bulkheads to determine the
angle that you hold the sanding block.
Use fresh 80 grit on your sanding block.
This is one of the most critical parts of assembly, as
it sets the shape of the bottom. DO NOT over sand
the chines.
Take your time and sand until the side sheeting is
just flush and no more.
You cannot do this with any kind of power tool.
Match the angle of the bulkheads. Also, lightly
sand half of the keel at the same time, so that the
bottom sheet lays flat on the structure. Do not
change the shape of the keel, just match the angle.
The keel will have a slight “V” shape when you are
done.
Be very careful not to sand the keel too much,
or the bottom will not fit!
Make a mark in the exact center of bulkheads 4 and
5. Make this mark on the edge, so that you know
how far to glue the sheeting.
Note that the bottom sheets have the position of the
strakes marked on one side. This side must face
outside the hull.
Test fit the bottom sheeting in place. It should cover
exactly half of the keel. Also, sand a gradually
increasing bevel on the inside (center) edge, so that
both bottom sheets will meet squarely.
Make sure the front is accurately aligned with the
center of the keel and that there is some overlap at
the rear.
When satisfied with the fit, make an alignment mark
on the bottom sheeting and the keel.
Mix up some 30 minute epoxy.
Using a small stick or acid brush, coat the chines
and bulkheads where the bottom sheeting will
contact. Work quickly.

P R O V E E
17
Also coat half of the keel.
Brush epoxy onto the first 6 inches of the front of
the bottom sheet, to help the glue joint here. This
should be done on the side WITHOUT the strake
outline.
Make sure that the strake outline is facing out when
you glue the sheet in place.
Align your marks and put a couple of clamps along
the keel, clamping the sheeting firmly to the keel.
Check your center marks on bulkheads 4 and 5.
Wipe all excess glue off of the keel, as it will
interfere with the other side sheeting.
If everything looks good, start clamping the bottom
sheeting.
Bulkheads 3, 4 and 5 should have weight over
them.
Also put weight over the engine rail and shaft
support, to help hold it against the sheeting.
After the glue fully cures (at least 2 hours), remove
the weight and clamps. Check for any glue that may
have squeezed onto the keel. Use a sharp knife to
scrape any away.
Take your time on the next step, it’s important.
Test fit the other bottom sheet, and make any
adjustments before you glue.
Make sure that both bottom sheets meet as
perfectly as possible.
Take your time here. Start from the rear. Put the
sheet in place, and note any areas that touch,
keeping the sheeting from meeting perfectly. Use
your block with 80 to sand these “high” spots.
Move forward and sand, fit, sand, fit, until it fits
perfectly. Be sure to sand a progressively sharper
bevel, so that the bottom sheets fit tightly together.
The goal is to have a nice, tight joint that is straight.
Try to keep the gap to less than 1/16 inch.
Glue the other side of the bottom sheeting on the
same way as the first, only this time you can’t use
as many clamps.

P R O V E E
18
Put weights on it, and set aside.
Make sure that the bottom sheet is in contact all the
way around. Clamp the nose.
You can also tack glue the bottom sheets together
at this time. Put a drop of medium CA about every
two inches or so, check that the bottom sheets are
properly aligned, and hit the drop with a shot of
accelerator.
Let’s build the radio box while the glue cures on the
hull.
Radio Box
Remove all of the radio box parts: Two long sides,
two short sides, the top and bottom, as well as the
1/16 ply top.
Lay a piece of plastic wrap or waxed paper on your
bench.
We use Titebond III and glue all of the 1/8 ply parts
at once.
We tape it together to cure for a couple of hours.
Using CA or Titebond III, glue the two long sides
and two short sides to the bottom.
The small sides have a “T” and “R” on them. These
face inside.
The “R” on the short side should be on the same
side as the “R” on the radio box bottom.

P R O V E E
19
Glue the radio box top on.
This is the 1/8 inch Birch top.
Take a break for a while, so that the radio box glue
joints can cure.
Lightly sand the top of the box.
Glue the 1/16 ply top to the radio box.
It has a slightly larger hole for the lid, so try to
center it so that the “lip” is even all around.
Make sure that you don’t get any glue in the “lip”, as
it will interfere with the way the lid seats.
The plastic lid will be sealed with tape when running
the boat.
Sand the entire box with 220.
Stand back and admire your awesome radio box!
Back to the boat:
Make sure that it has been at least 2 hours since
you glued the bottom sheeting to the hull.
With your plane, remove the overhang of the bottom
sheets at the sides.
Sand all over with 80. Do this while the boat is still
attached to the jig, as it is far easier than trying to
do it in your lap!
Keep the bottom corners sharp at this point.
Do not round off the bottom to transom
junction, we need it sharp.
With your razor saw, cut all the tabs that are holding
your hull to the building jig.
Ditch the jig. We don’t need it any more.
Hey, this is really starting to look like something
now!
After you finish admiring your cool new hull, let’s
move on.

P R O V E E
20
Deck Framework
The first step is to test fit and glue the spines in
place. We used Titebond lll. The center spine (CS)
and the two spines (S). The marks go forward.
Note that the spines go under the chine at the front.
All spines should be flush with the bulkheads.
Test fit the deck supports (DS). These should set
parallel with the chine and not bow at all.
If they are not, find out why and correct it before
gluing in place.
If okay, glue in both deck supports.
Sand the top so that all spines and supports are
flush with the bulkheads.
Trim the building tabs, and sand the bulkheads to
match the top contour.
DO NOT sand off the top of bulkhead 4.
Reinforce the engine rails as follows:
Mix filler with 30 minute epoxy to make a paste for
the engine rails.
This paste should create a small fillet on each side
of the rails.
Make the paste thick so that it will not run or sag.
Do the inside and outside of the engine rails. Make
sure that you pack it in on the inside.
Use your finger the make a small fillet.
Wipe off any excess filler.
This manual suits for next models
1
Table of contents
Other Zipp Manufacturing Toy manuals
Popular Toy manuals by other brands

Chipolino
Chipolino DINO instruction manual

Plum
Plum 27620AA69 Assembly instructions

Power Wheels
Power Wheels W6209 instructions

The Learning Journey
The Learning Journey TechnoTrax Mine Shaft instruction manual

Enabling Devices
Enabling Devices Harbor Breeze user guide

LEGO
LEGO Mindstorms education 9797 Assembly instructions