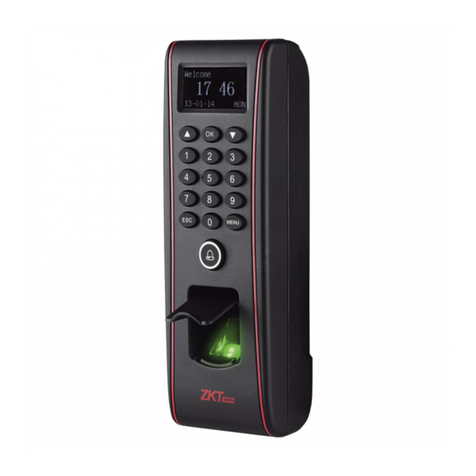
ZKaccess inPulse User manual

1
inPulse & inPulse+ and ZKBioSecurity 3.0 Quick Start Guide
Quick Start Guide
inPulse & inPulse+
+
ZKBioSecurity 3.0

.......................................................................................... .......................................................................................................................................................................................................................................................................................................................................................................................................................................
..........................................................................................
2
inPulse & inPulse+ and ZKBioSecurity 3.0 Quick Start Guide
CONTENT
Safety Precautions....................................................................3
Device Overview......................................................................4
Product Dimensions & Installation..............................6
Power Connection ..................................................................7
Ethernet Connection.............................................................8
Lock Relay Connection ........................................................9
Wiegand Output Connection......................................11
Standalone Installation .....................................................12
Third Party Controller..........................................................13
How does inPulse/inPulse+ works...........................14
Registration and Verification.........................................15
Device Operation..................................................................16
ZKBioSecurity 3.0
Downloading...........................................................................20
Installation ..................................................................................21
Adding Device.........................................................................23
Creating a Time Zone.........................................................25
Creating an Access Level.................................................26
Enrolling Personnel..............................................................27
Wiegand Format....................................................................29
Add & Delete Personnel to Access Level.............30
Real -Time Monitoring.......................................................31
Exporting Reports.................................................................32
ZKBioSecurity
Software
Installation and
Setup starts at
Page 20

.......................................................................................... .......................................................................................................................................................................................................................................................................................................................................................................................................................................
..........................................................................................
3
inPulse & inPulse+ and ZKBioSecurity 3.0 Quick Start Guide
Safety Precautions
The following precautions are to keep users safe and prevent any damage.
Please read carefully before installation.
Do not install the device in a place subject to direct sunlight,
humidity, dust or soot.
Do not place a magnet near the product. Magnetic objects
such as magnets, CRTs, TVs, monitors or speakers may dam-
age the device.
Do not place the device next to heating equipment.
Be careful not to let liquid like water, drinks or chemicals
leak inside the device.
Do not let children touch the device without supervision.
Do not drop or damage the device.
Do not disassemble, repair or alter the device.
Do not use the device for any other purpose than specied.
Clean the device often to remove dust on it. In cleaning, do
not splash water on the device but clean it with a smooth
cloth or towel.
Contact your supplier in case of a problem.

4
inPulse & inPulse+ and ZKBioSecurity 3.0 Quick Start Guide
Device Overview
Not all products have ngerprint and nger vein functions.
inPulse+
inPulse

5
inPulse & inPulse+ and ZKBioSecurity 3.0 Quick Start Guide
Device Overview
12 Pin Cable Connector
7 Pin Cable Connector
8 Pin Cable Connector
Tamper Alarm Button
2 Pin Cable Connector
4 Pin Cable Connector Ethernet(TCP/IP)
Auxiliary In
Bell
Sensor
Button
Lock
Alarm
Power Out
Wiegand In
LED, Beep
Wiegand Out
RS232
RS485
Power In

6
inPulse & inPulse+ and ZKBioSecurity 3.0 Quick Start Guide
Product Dimensions & Installation
Product Dimensions
Mounting the Device on the Wall
Fix the back plate onto the wall using wall
mounting screws.
Note: We recommend drilling the mounting
plate screws into solid wood (i.e. stud/beam).
If a stud/beam cannot be found, use supplied
drywall plastic anchors.
Use security screws to fasten
the device to back plate.
Insert the device to back plate.

7
inPulse & inPulse+ and ZKBioSecurity 3.0 Quick Start Guide
Power Connection
Without UPS
With UPS (Optional)
Recommended Power Supply
• 12V±10%, at least 500mA
• To share the power with other devices, use a power supply with higher current
ratings.

8
inPulse & inPulse+ and ZKBioSecurity 3.0 Quick Start Guide
Ethernet Connection
Note: The device can be connected to PC directly by Ethernet cable.
LAN Connection
Ethernet cable
Network Cable Apator

9
inPulse & inPulse+ and ZKBioSecurity 3.0 Quick Start Guide
Lock Relay Connection
Device Not Sharing Power with the Lock
Notes:
1. The system supports NO LOCK and NC LOCK. For example the NO LOCK (normally opened
at power on) is connected with ‘NO1’ and ‘COM1’ terminals, and the NC LOCK (normally
closed at power on) is connected with ‘NC1’and ‘COM1’ terminals.
2. When electrical lock is connected to the Access Control System, you must parallel one
FR107 diode (equipped in the package) to prevent the self-inductance EMF from aecting
the system.
Do not reverse the polarities.

10
inPulse & inPulse+ and ZKBioSecurity 3.0 Quick Start Guide
Lock Relay Connection
Device Sharing Power with the Lock

11
inPulse & inPulse+ and ZKBioSecurity 3.0 Quick Start Guide
Wiegand Output Connection

12
inPulse & inPulse+ and ZKBioSecurity 3.0 Quick Start Guide
Standalone Installation

13
inPulse & inPulse+ and ZKBioSecurity 3.0 Quick Start Guide
Third Party Controller
Wiegand Output Connection

14
inPulse & inPulse+ and ZKBioSecurity 3.0 Quick Start Guide
How does inPulse/inPulse+ works
or
or
or

15
inPulse & inPulse+ and ZKBioSecurity 3.0 Quick Start Guide
Note: During nger vein registration process, ngerprint of the selected nger is also
registered
Select a nger to enroll
(It is recommended to use an index
nger or a middle nger.
(Thumb, ring or little nger are relatively
dicult to place in the correct position.
Fingerprint Placement Position
(In order to read your ngerprint and
nger vein data touch the front side
of nger vein reader with ngertip.
(The device starts collecting data once
the nger root touches the nger vein reader
Verication Steps
Touch the front side of nger vein
reader with ngertip, then press your
nger upon the nger vein reader.
Place the finger according to
the finger guide.
Finger-tip must touch the front
of finger vein reader in order to
properly collect fingerprint and
finger vein images.
Touch the reader with finger
root.
Improper positioning of finger
will affect the proper collection of
fingerprint and finger vein images.
The device starts collecting data
once the finger root touches the
finger vein reader. Remove finger
after “beep” sound.
Note: Maintain the natural hand gesture.
Do not bend your ngers.
Do not exert nger to press the reader
Fingerprint Reader
Fingervein Reader
Fingerguide
Touch Sensor
Registration and Verication

16
inPulse & inPulse+ and ZKBioSecurity 3.0 Quick Start Guide
Device Operation
Date/Time Settings
Press icon to enter the Main Menu > System > Date Time to set date and time.
Adding User
Press icon to enter the Main Menu > User Mgt. > New User to enter the New User adding interface.
Settings include entering user ID, user role, choosing user role (Super Admin / Normal User), registering
ngerprint & Fingervein / badge number / password, and setting access control role.
Ethernet Settings
Press icon to enter the Main Menu > Comm. > Ethernet.
The parameters below are the system default values. Please adjust them according to the actual network.
IP Address: 192.168.1.201
Subnet Mask:255.255.255.0
Gateway: 0.0.0.0
DNS: 0.0.0.0
TCP COMM. Port: 4370
DHCP: Dynamic Host Conguration Protocol, which dynamically allocate IP addresses for clients via
server. If DHCP is enabled, IP cannot be set manually.
Display in Status Bar: To set whether to display the network icon on the status bar.

17
inPulse & inPulse+ and ZKBioSecurity 3.0 Quick Start Guide
Device Operation
ADMS Settings
Press icon to enter the Main Menu > Comm. > ADMS, to set the parameters which are used for connecting
with the ADMS server.
When the Webserver is connected successfully, the initial interface will display the logo.
Enable Domain Name: When this function is turned on, the domain name mode “http://... “ will be used,
such as http://www.XYZ.com. XYZ denotes the domain name when this mode is
on; when this mode is o, enter the IP address format in XYZ.
Server Address: Enter IP address of the ADMS server.
Server Port: Enter the port number used by the ADMS server.
Enable Proxy Server: Method of enabling proxy. To enable proxy, please set the IP address and port
number of the proxy server. Entering proxy IP and server address will be the same.
Note: To connect the device to ZKBioSecurity software, Ethernet and ADMS options must be set correctly.
Access Control Settings
Press icon to enter the Main Menu, press and to select Access Control.
To gain access, the registered user must meet the following conditions:
1. User’s access time must fall within either user’s personal time zone or group time zone.
2. User’s group must be in the access combo (when there are other groups in the same access combo,
verication of members of those groups are also required to unlock the door).
Access Control Options: To set parameters of the lock and other related devices.
Time Rule Setting: To set a maximum of 50 time rules. Each time rule consists of 10 spaces (7 spaces for
one week and 3 holiday spaces), each space consists of 3 time periods.
Holidays: To set dates of holiday and the access control time zone for that holiday.
Combined Verication: To set access control combinations. A combination consists of a maximum of 5
access control groups.
Anti-Passback Setup: To prevent passing back which causes risks to security. Once this function is en-
abled, entry and exit records must be matched in order to open door. In Anti-
Passback, Out Anti-Passback and In/Out Anti-Passback functions are available.

18
inPulse & inPulse+ and ZKBioSecurity 3.0 Quick Start Guide
Device Opreation
Access Control Combination Settings
E.g. : Add an access control combination which requires 2 person’s verication from both Access Control
Group 1 (set in User Management) and Access Control Group 2.
Note:
A. A single access control combination can consist of a maximum of 5 user groups (in order to open
door, verication of all 5 users is required).
B. If the combination is set as shown in gure 3, a user from access control group 2 must obtain veri-
cation of 2 users from access control group 1 in order to open door.
C. Set all group number to zero to reset access control combination.
Troubleshooting
1. “Invalid time zone” is displayed after verication?
@Contact Administrator to check if the user has the privilege to gain access within that time zone.
2. Verication succeeds but the user cannot gain access?
@Check whether the user privilege is set correctly.
@Check whether the lock wiring is correct.
3. The Tamper Alarm rings?
@To cancel the triggered alarm mode, carefully check whether the device and back plate are se-
curely connected to each other, and reinstall the device properly if necessary.
1. In “Combined Verification” List, click the desired
combination to modify, and enter the interface (as
shown in figure 1).
2. Click “+ / -“ to change the number, and click“Con-
firm” to save and back to “Combined Verification”
(as shown in figure 2).

19
inPulse & inPulse+ and ZKBioSecurity 3.0 Quick Start Guide
ZKBioSecurity 3.0
Installation & Setup
It is recommended to install software version 3.0.3.0 or above
Downloading...........................................................................20
Installation ..................................................................................21
Adding Device.........................................................................23
Creating a Time Zone.........................................................25
Creating an Access Level.................................................26
Enrolling Personnel..............................................................27
Wiegand Format....................................................................29
Add & Delete Personnel to Access Level.............30
Real -Time Monitoring.......................................................31
Exporting Reports.................................................................32

20
inPulse & inPulse+ and ZKBioSecurity 3.0 Quick Start Guide
Downloading
1. Go to http://www.zkteco.com/product/ZKBioSecurity3.0_421.html
2. Download the latest software and related les as required.
3. Once downloaded, extract the .rar le to a new folder.
4. Click on setup to
begin installstion.
This manual suits for next models
1
Table of contents
Other ZKaccess Controllers manuals
Popular Controllers manuals by other brands

Shinkawa
Shinkawa VM-21D instruction manual

Doug Fleenor Design
Doug Fleenor Design Preset 10 Architectural Two owner's manual

Allen-Bradley
Allen-Bradley GuardLogix user manual

CGS
CGS CGS TGC Installation, operation & maintenance manual

Johnson Controls
Johnson Controls FlexSys CB2 Installation & operation manual

AMALGAMATED INSTRUMENT
AMALGAMATED INSTRUMENT PM4-CO instruction manual