Networking the GDP
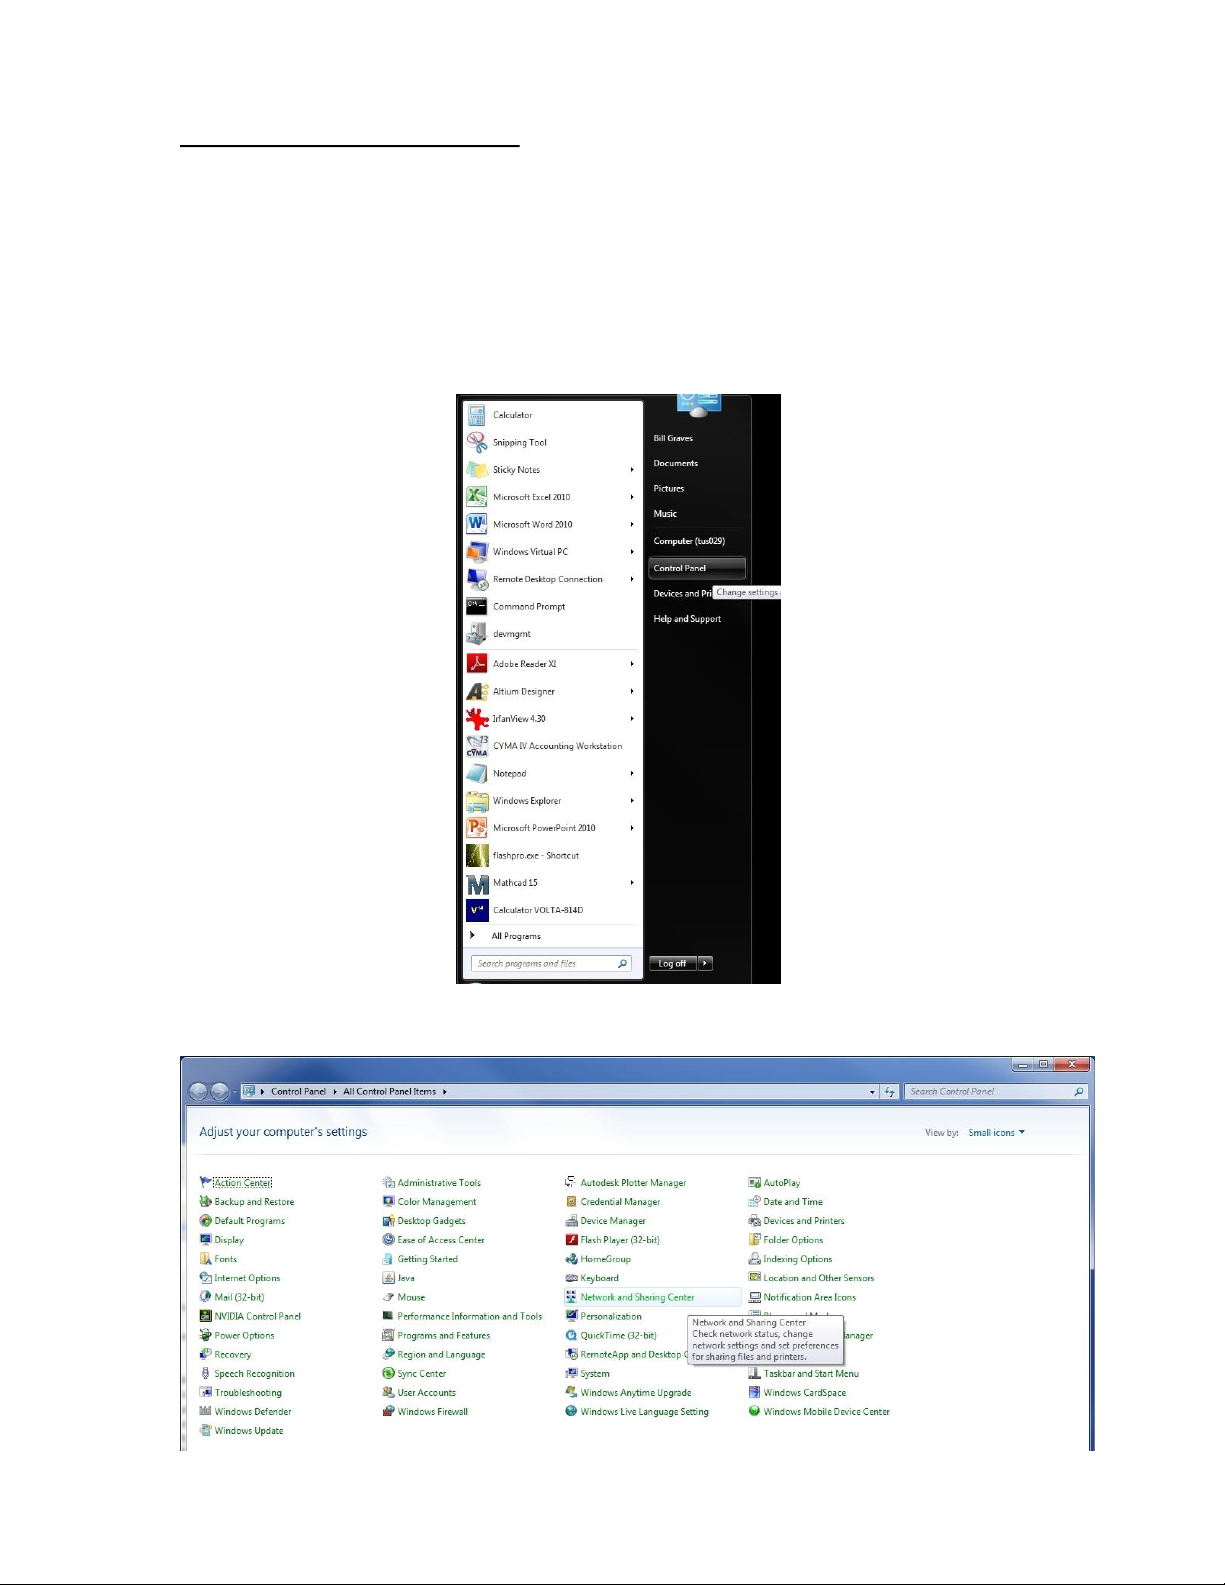
Start the NET utility.
Introduction
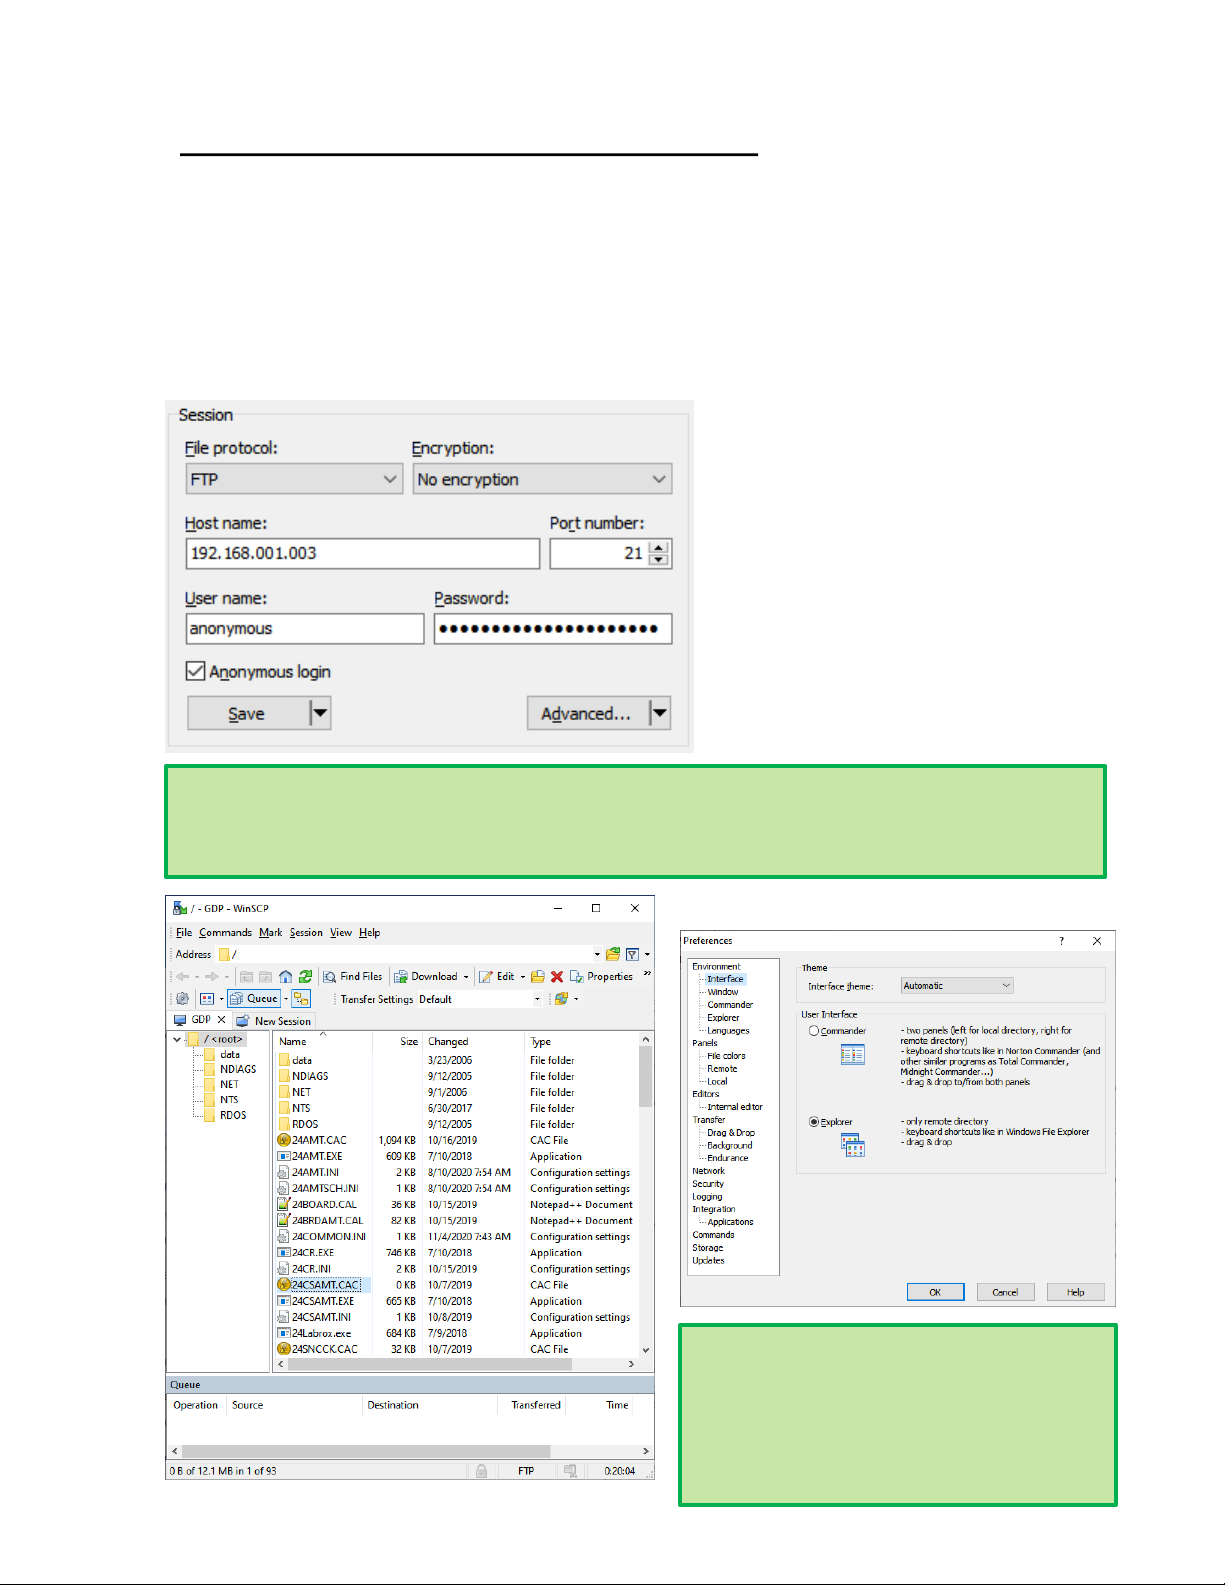
The easiest way to transfer files to or
from the GDP is over the network. The
GDP can either be connected directly to
a computer using a crossover cable, or
connected automatically to a LAN. The
network connection can be used to:
•Retrieve data files from the GDP.
•Transfer antenna cal files to the GDP.
•Install the latest operating programs
on the GDP.
•Place identical Time Schedules on
multiple GDPs.
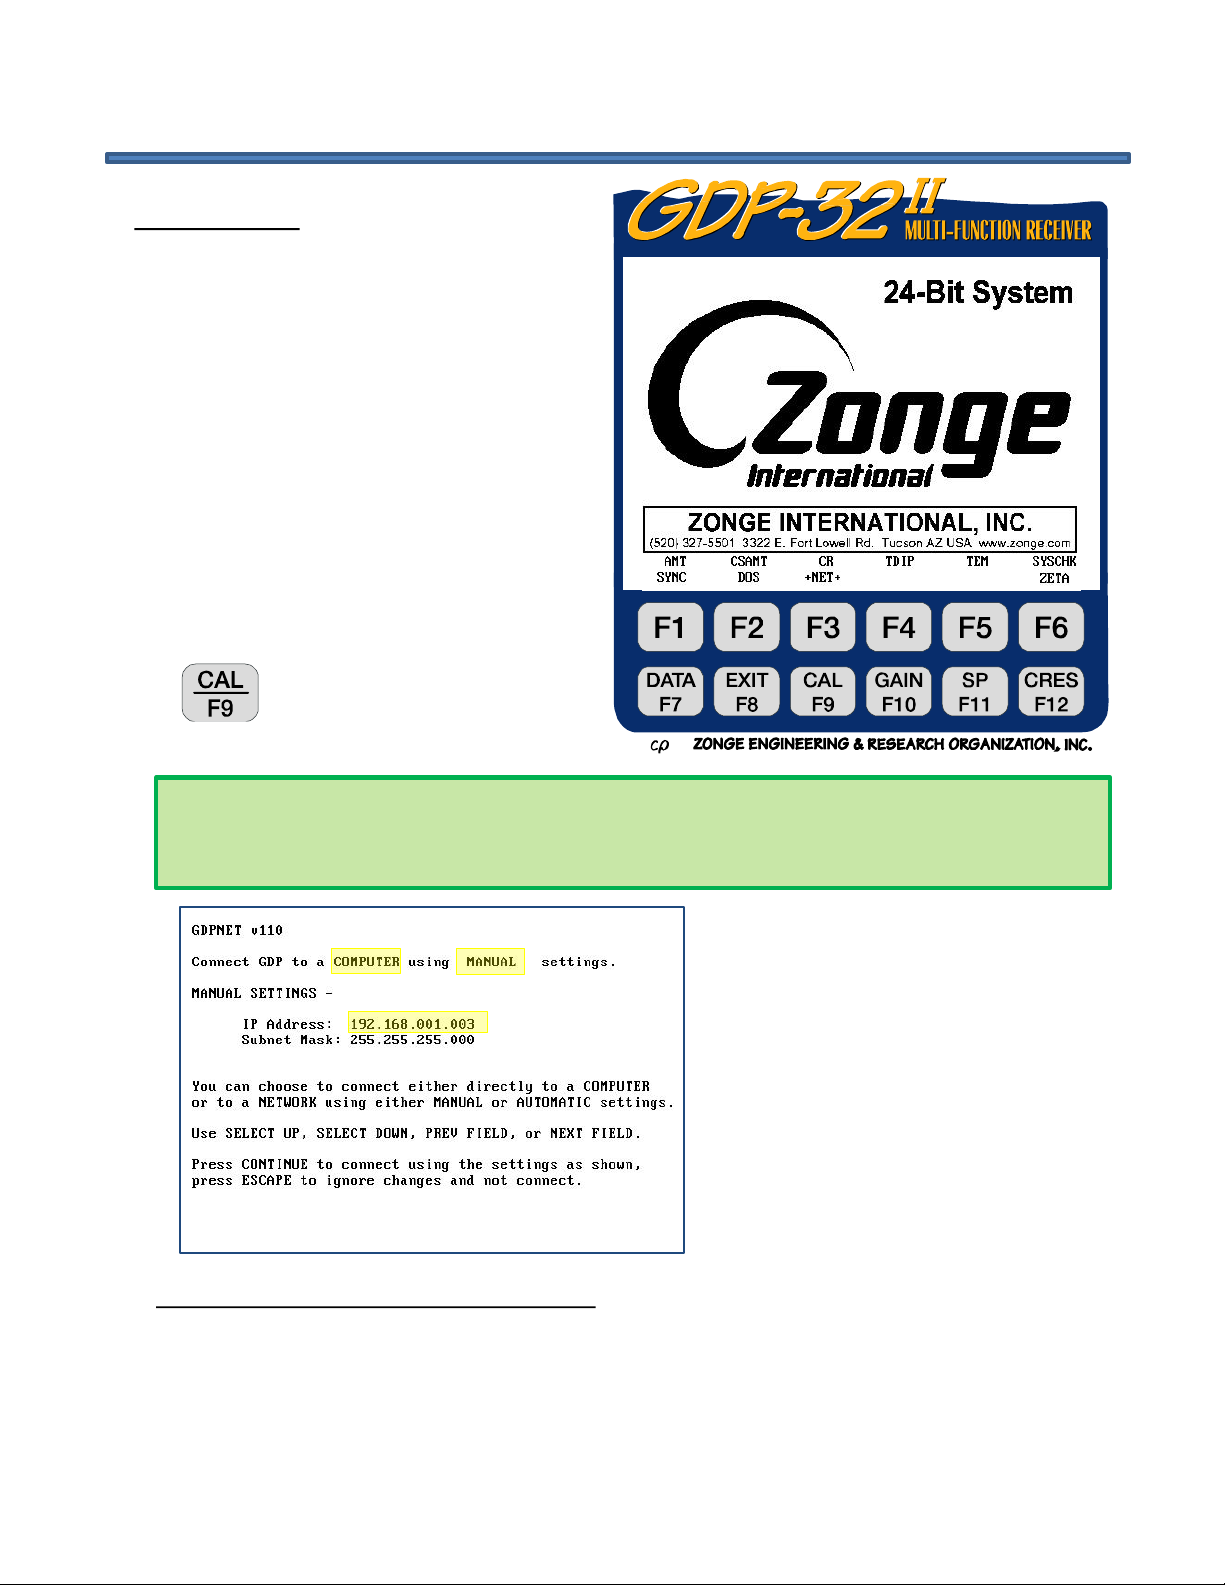
When first powered up or after
a reset, the network will not be
loaded. At this point there are
three connection choices:
•Connect to Computer
using Manual Settings
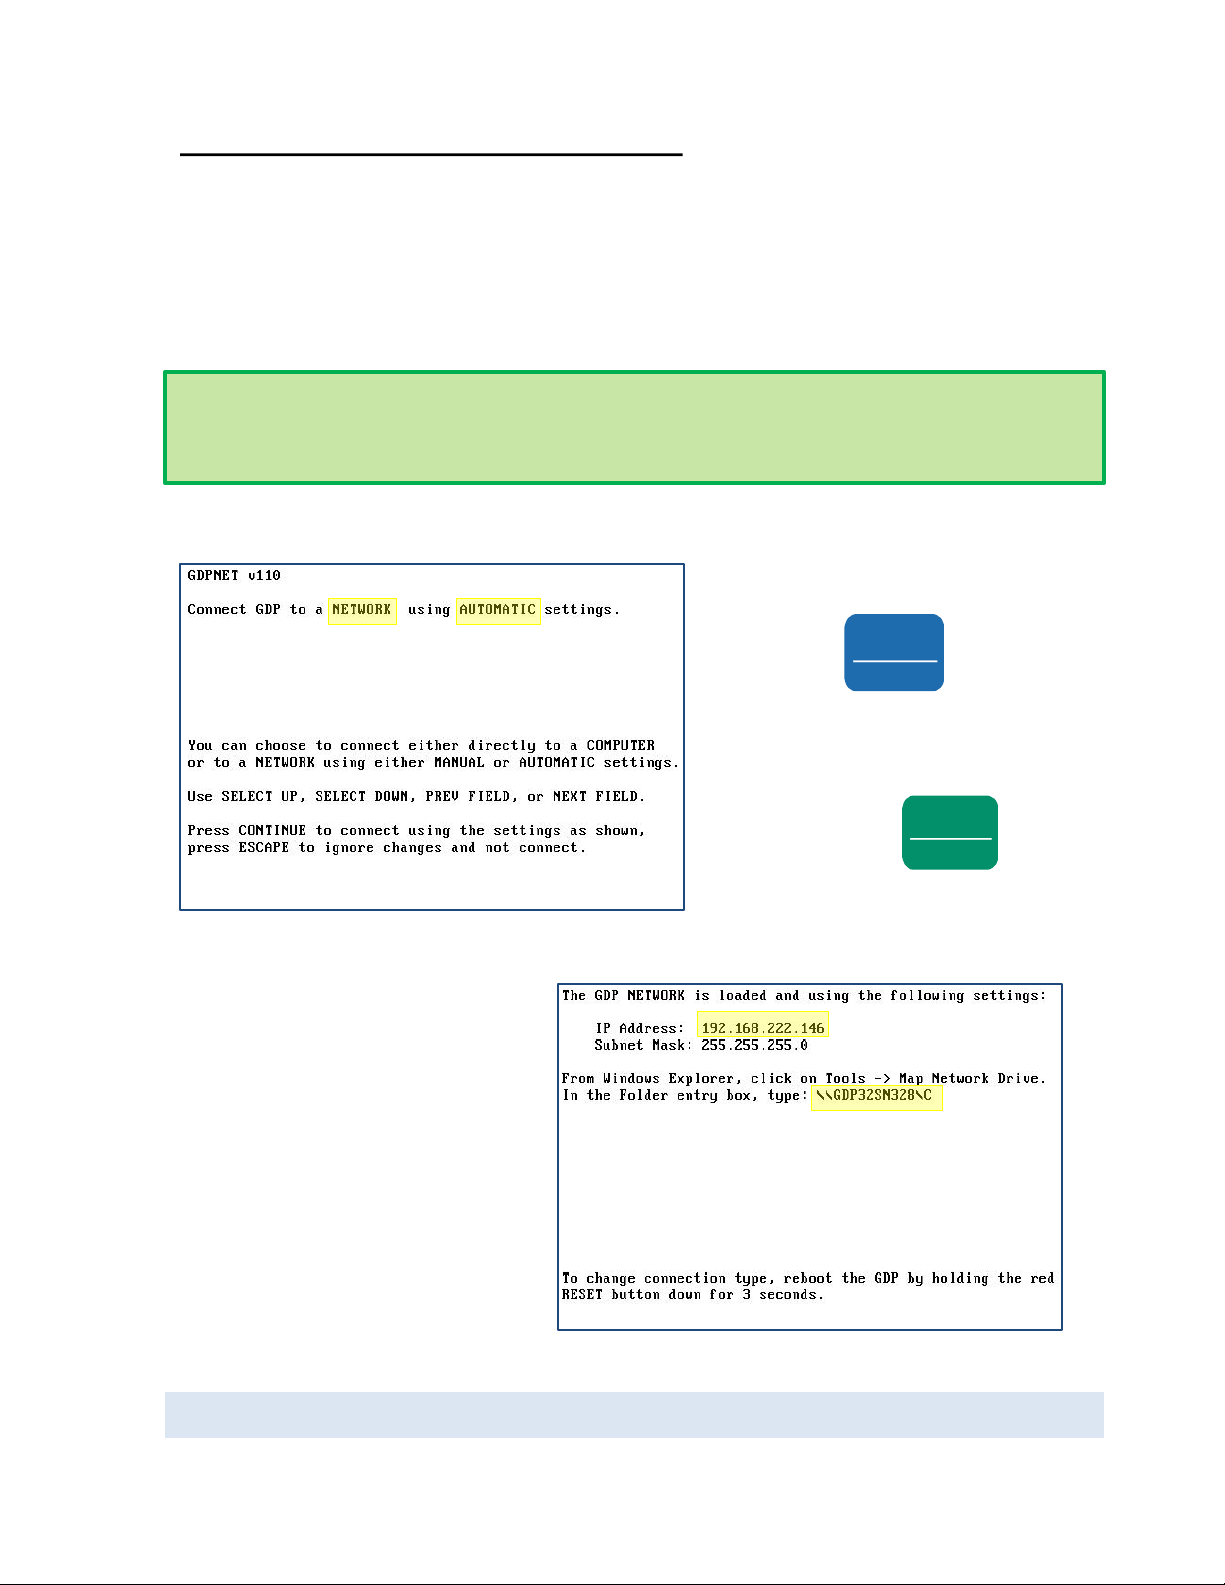
•Connect to Network using
Automatic Settings
•Connect to Network using
Manual Settings
The symbols around the NET function key label indicate if the network is loaded or not.
If it is shown as +NET+, the network is currently loaded and ready for use. If it is shown
as -NET-, the network is not presently loaded and must be started.
Which type of connection are you using?
Directly to a computer–This type of connection is used mostly for transferring data files
to a laptop in the field. Requires manual settings on both the GDP and the computer.
To a Local Area Network–This type of connection is used in an office setting or a
connection to a router. Most often the network has a DHCP server so automatic settings
can be used. Otherwise, a valid IP address must be manually entered into the GDP.