4
Scan
Pressing the Scan button places the system in Scan mode. And the LCD
monitor screen blanks into a standby mode while the system continuously
scans active cameras. If a camera detects motion, the LCD monitor displays
the camera picture and the beeper will sound. Four minutes after the last
detection, the screen returns to standby mode while the LCD monitor resumes
scanning. Pressing the manual or auto button will cancel this mode.
Auto
Pressing the Auto button places the system in Auto mode. In this mode, the
system automatically rotates through all active cameras. When a camera
detects motion, the LCD monitor will display the picture from the camera for a
few seconds, and the beeper will sound. To avoid searching channels that do
not have camera/transitters assigned to them, set the DIP switches (located
on the back panel of the LCD monitor) for those corresponding channels to
The dwell/cycle time (time taken to switch between cameras) is preset to 4
seconds and can be adjusted between 2-30 seconds. To adjust the dwell time,
press both the Auto and Manual buttons simultaneously. Each flash of the
LED increase the dwell time by one second.
the OFF position.
Manual
To select a specific camera to LCD monitor, press the Manual button. The
LCD monitor will switch to a different camera each time the Manual button is
pressed. To avoid searching channels that do not have camera assigned to
them, set the DIP switches (located on the back panel of the LCD monitor)
for those corresponding channels to the OFF position.
Arm/Disarm Each camera
By using the Cam1, Cam2 and Cam3 buttons, you can arm or disarm each
camera independently. When you press one of the buttons, it will turn green.
This means that the camera is armed. By pressing it again, the camera is
disarmed.
5
Important
Multi-Camera Operation///
REARVIEWOFCAMERA
The Wireless Surveillance System (WSS) is designed to work with up to
three cameras. Additional cameras are sold seperately.
When using more than one camera, make sure each camera is assigned
to a specific channel by adjusting the corresponding DIP switch down.
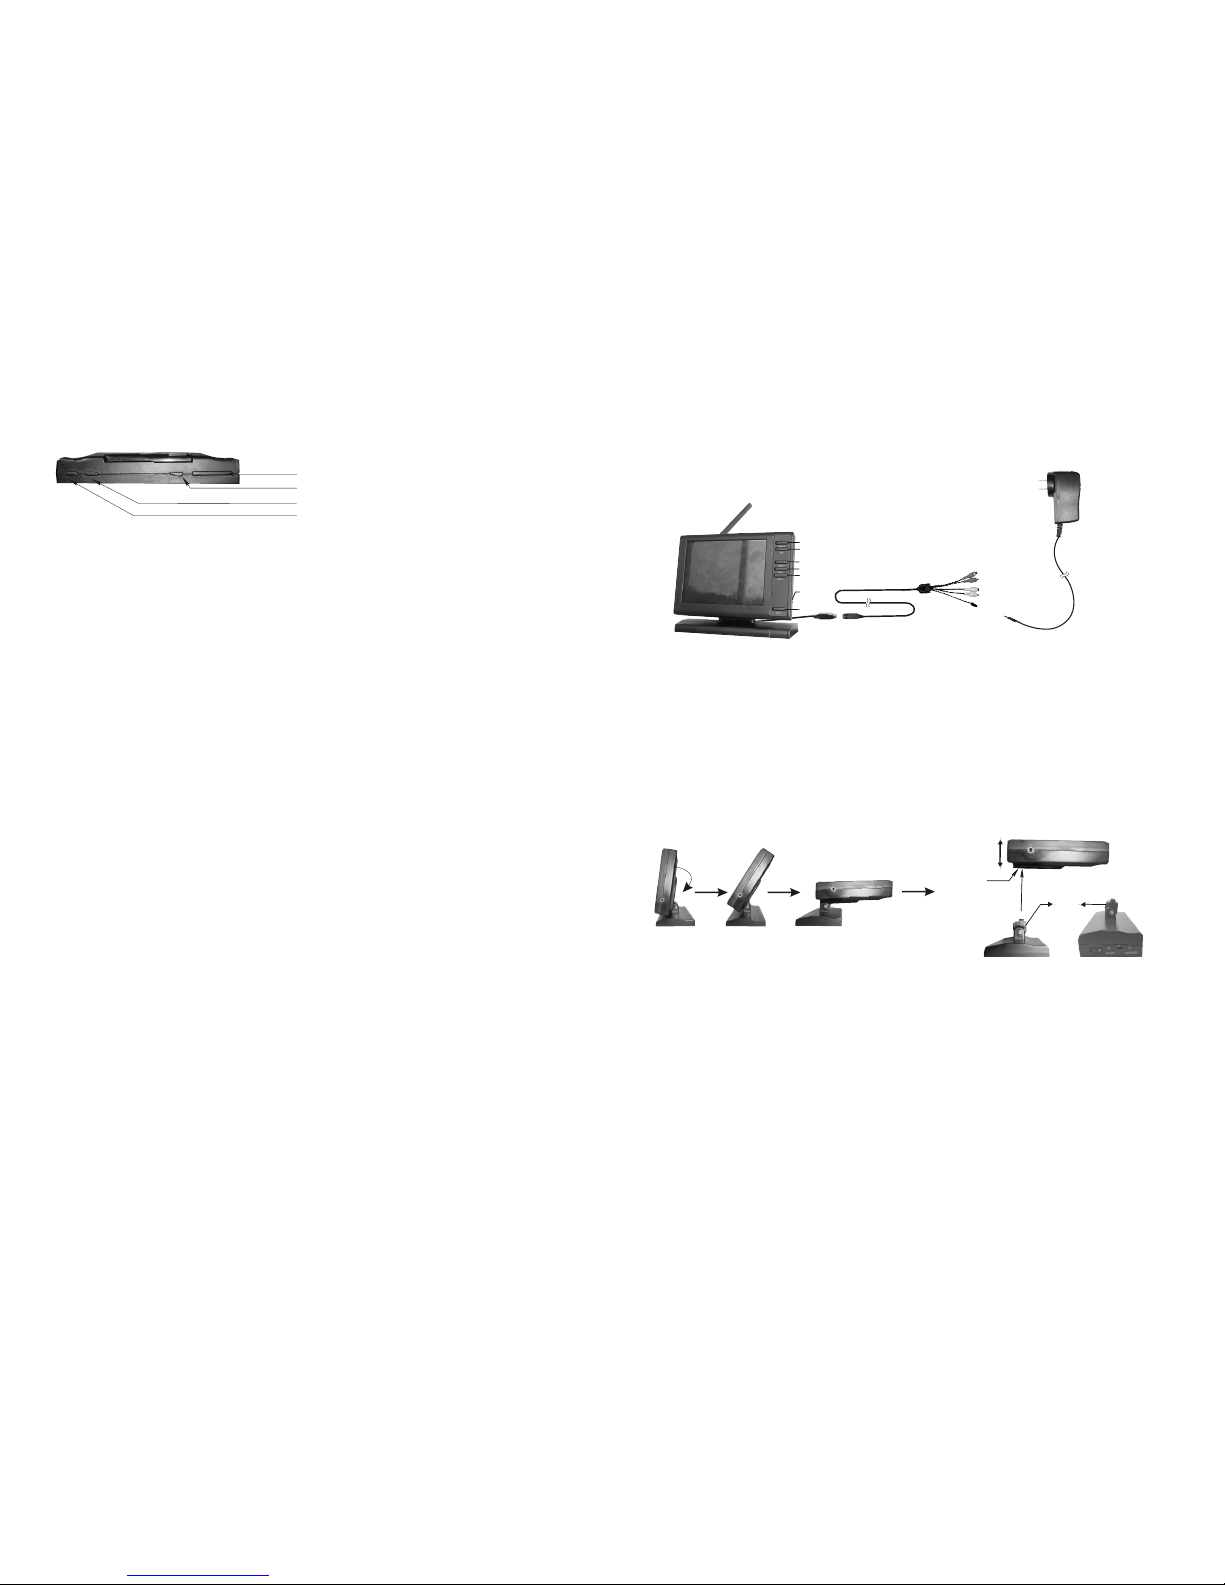
The LCD monitor’s DIP switch located on the back of the LCD monitor should
be adjusted to reflect the channel in use.
1 2 3
1 2 3 1 2 3 1 2 3
Bottom of LCD Monitor
Camera 1
In Use
Camera
1 and 2
In Use
All Three
camera
In Use
Motion-Sensing Cameras///
Operating Modes///
The cameras are equiped with a motion sensor PIR. When a camera detects
motion, a red light flashes on the camera and an audio alert sounds on the
LCD monitor.
Auto
Manual
Remote controller
Cam1
Mirror
Mute
Menu
Cam1
Cam2
Cam3
Scan
The wireless system can be set to operate in one of the three modes: Scan,
Auto or Manual. The desired operating mode can be selected using buttons
on the front panel of the LCD Monitor.
Cam2
Cam3
Source
Manual
Auto
Scan
Up/Down