7
8. PIR Body Detection
8.1 Body Detection Alarm Setting
8.2 Alarm Notification
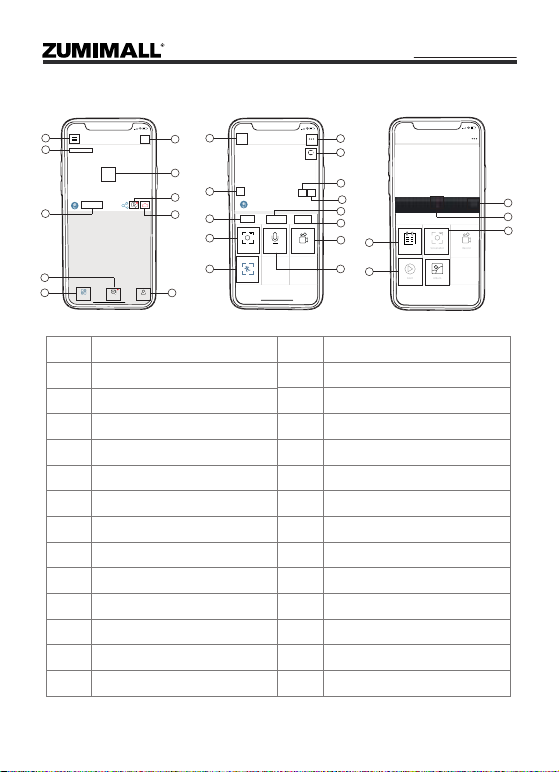
Tap on '...'Set it upSelect 'Motion Setting'
5:51
060238708
Bit Rate:10.74KB/s WiFi:97%
2020-10-08 15:30:10
HD
Live
Screenshot
Motion Detection
Record
History Cloud
<
Intercom
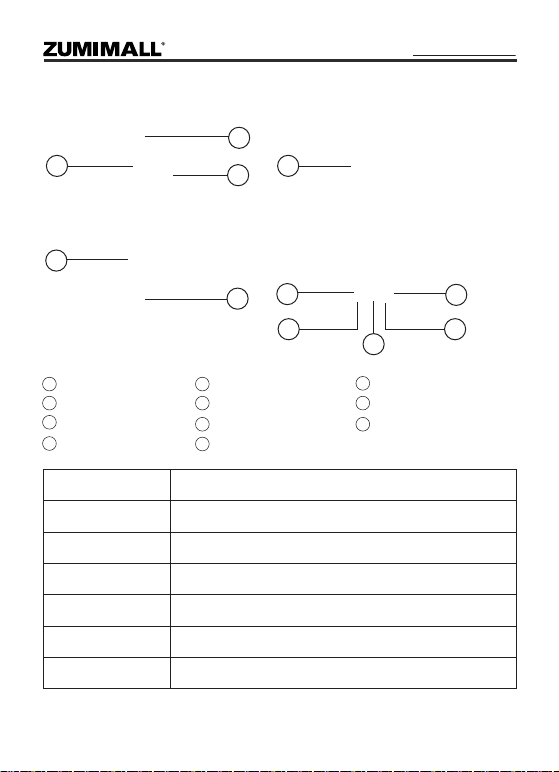
PIR 'Motion Detection'defaults to be 'High'level. But it is adjustable.
Please refer to the pictures below.
This camera does not support 7*24 hours all day recording, it is an
event recording camera. It is only triggered when motion is detected.
Here are system’s reactions:
① Alarm notifications with sounds from App.
② Pics/videos automatically stored in Micro SD Card or Cloud.
Sensitivity
Low
High
Detecting Distance (For moving and living objects)
Up to 5 meters (16ft)
Up to 10 meters (32ft)
NOTE:
The higher the sensitivity is, the longer distance the PIR can detect.
Accordingly, the battery will drain faster.
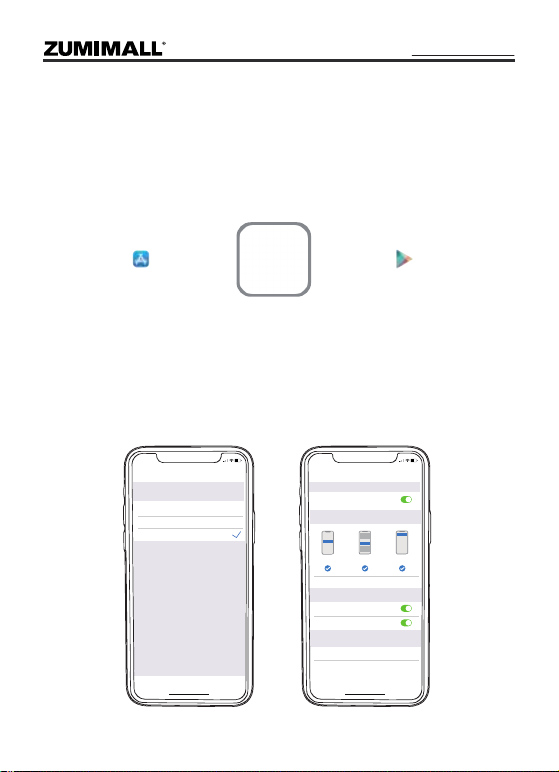
5:51
Settings
<
Receive Alert Notifications
Device Share
>
Device Information
>
Installation Guide
>
Basic Function
>
Power Saving settings
>
Motion Detection
>
Recording management
>
Device Version
Delete the Device
>
Cloud Storage Service
>
Album
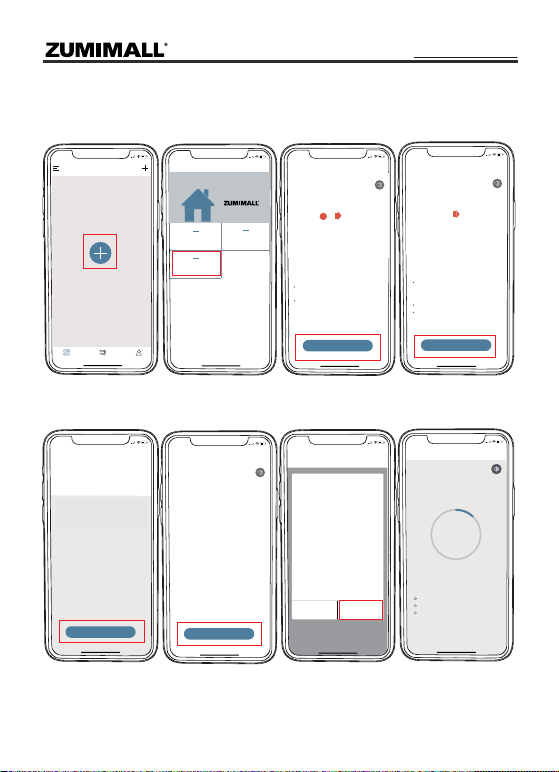
5:50
Motion Detection
Medium
After enabling detection, the camera can detect motion
and sound around the canera and can select different
detection sensitivity accouding to different requirements.
Motion Detection
High
Low
<
Day Detection
The Alert will be triggerd only when
human motion is detected.
Night Detection
Alert Plan
Set the time period of the alarm, the device only triggers
an alarm event during this time period.
>
Off
2 minuters
5 minuters
10 minuters
Alarm Interval