WARRANTY
Limited Warranty on Purchased Items:
All products sold by Flexfire LEDs and shipped within the 50 United States, Canada, and Mexico come with a limited warranty. This limited warranty
does not include product failures that are the result of:
1. Not using a voltage regulated driver to connect the LED product or controls;
2. Connecting LED products to the wrong Output Voltage;
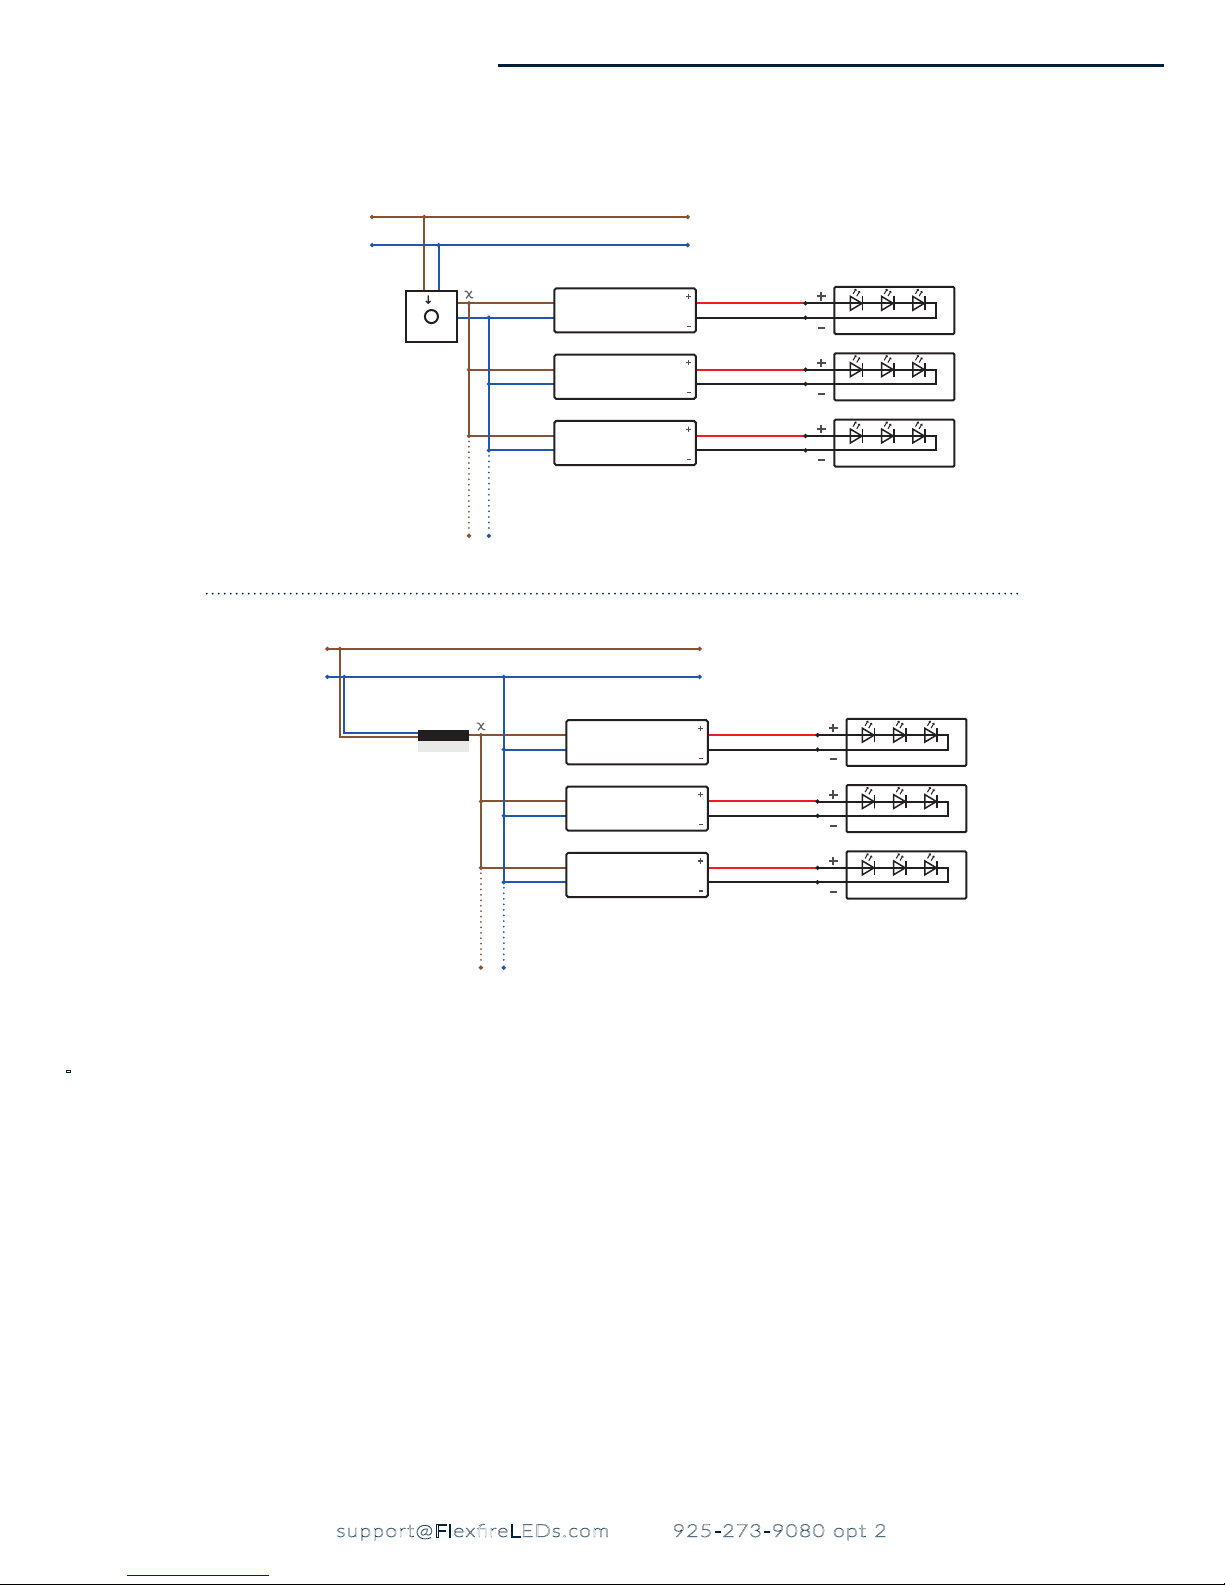
3. Improper connection of drivers, LED products, or controls;
4. Connecting LED products or controls directly to any AC power source;
5. Connecting drivers backwards to an AC power source;
6. Using products in an extremely hot or cold environment and/or without adequate ventilation as overheating will cause the LEDs and transform-
ers to fail more quickly;
7. Water damage to products not specifically sold as waterproof products;
8. Electrical power surges;
9. Damage from hail, flooding, tornado, fire, wind, earthquake, lightning, electrical storm, or any other natural disaster;
10.Damage caused by a vehicle or other accident;
11.Damage caused when transporting the item;
12.Damage to any products that were modified by the user, used for purposes other than as intended or directed, or connected to LED systems
or components not purchased from Flexfire LEDs.
This limited warranty also expressly excludes coverage for excessive wear and tear and/or physical or accidental abuse, loss, or theft. Improper repair
or warranty service performed by someone other than Flexfire LEDs will void this warranty. Buyer is responsible for the safe transport of any item
sent to Flexfire LEDs for warranty service.
If you have an item you believe to be faulty, contact Flexfire LEDs immediately and request tech support. You may be required to provide photos,
videos, and/or descriptions of the item(s) not performing properly. It is Flexfire LEDs goal to troubleshoot thoroughly to eliminate any unnecessary
time or hassle on behalf of the customer. Failure to comply and provide the information requested by Flexfire LEDs will result in a void of warranty.
If a product is deemed faulty by a technician/representative, then a return shipping label and a Return Merchandise Authorization (RMA) form will
be sent out immediately. Once Flexfire LEDs receives the product, we will test the item(s) to better understand where the fault in the product lie(s).
Flexfire LEDs will NOT provide replacement items before the original items have been returned, tested, and deemed faulty. If you need a replace-
ment item while the return process is taking place, then you can repurchase that item. Once the testing process is complete and assuming the
product is faulty, a refund will be issued for the purchase price of the product. Flexfire LEDs will not refund shipping costs on replacement items
If the product is found to be working properly and the error lies in the installation, or with other non-Flexre LEDs products being used, then the
product will be returned to the customer via our standard shipping method paid by the customer. If the customer has paid for a replacement item
while the return process is being processed and the original product is found to be working properly, then the customer will receive the original
product back and no refund.
Buyer’s sole right under this warranty is for repair or replacement of the defective item.
This warranty is not transferable and applies only to the original purchaser of such items, provided that products purchased from an authorized
Flexfire LEDs reseller will also include the above limited warranty. Proof of purchase may be required.
Warranty Period:
In the event of a product defect or malfunction, Flexfire LEDs will cover the cost of the return shipping. This is only valid during the product’s
warranty period stated by Flexfire LEDs. In this case a prepaid shipping label will be issued to the client via our standard shipping method.
•If the item is faulty, Flexfire LEDs will ship out a replacement at no charge.
•If the item is not faulty (still works), the client will need to pay for the shipping to get the product back to them.
V.2018.08.15
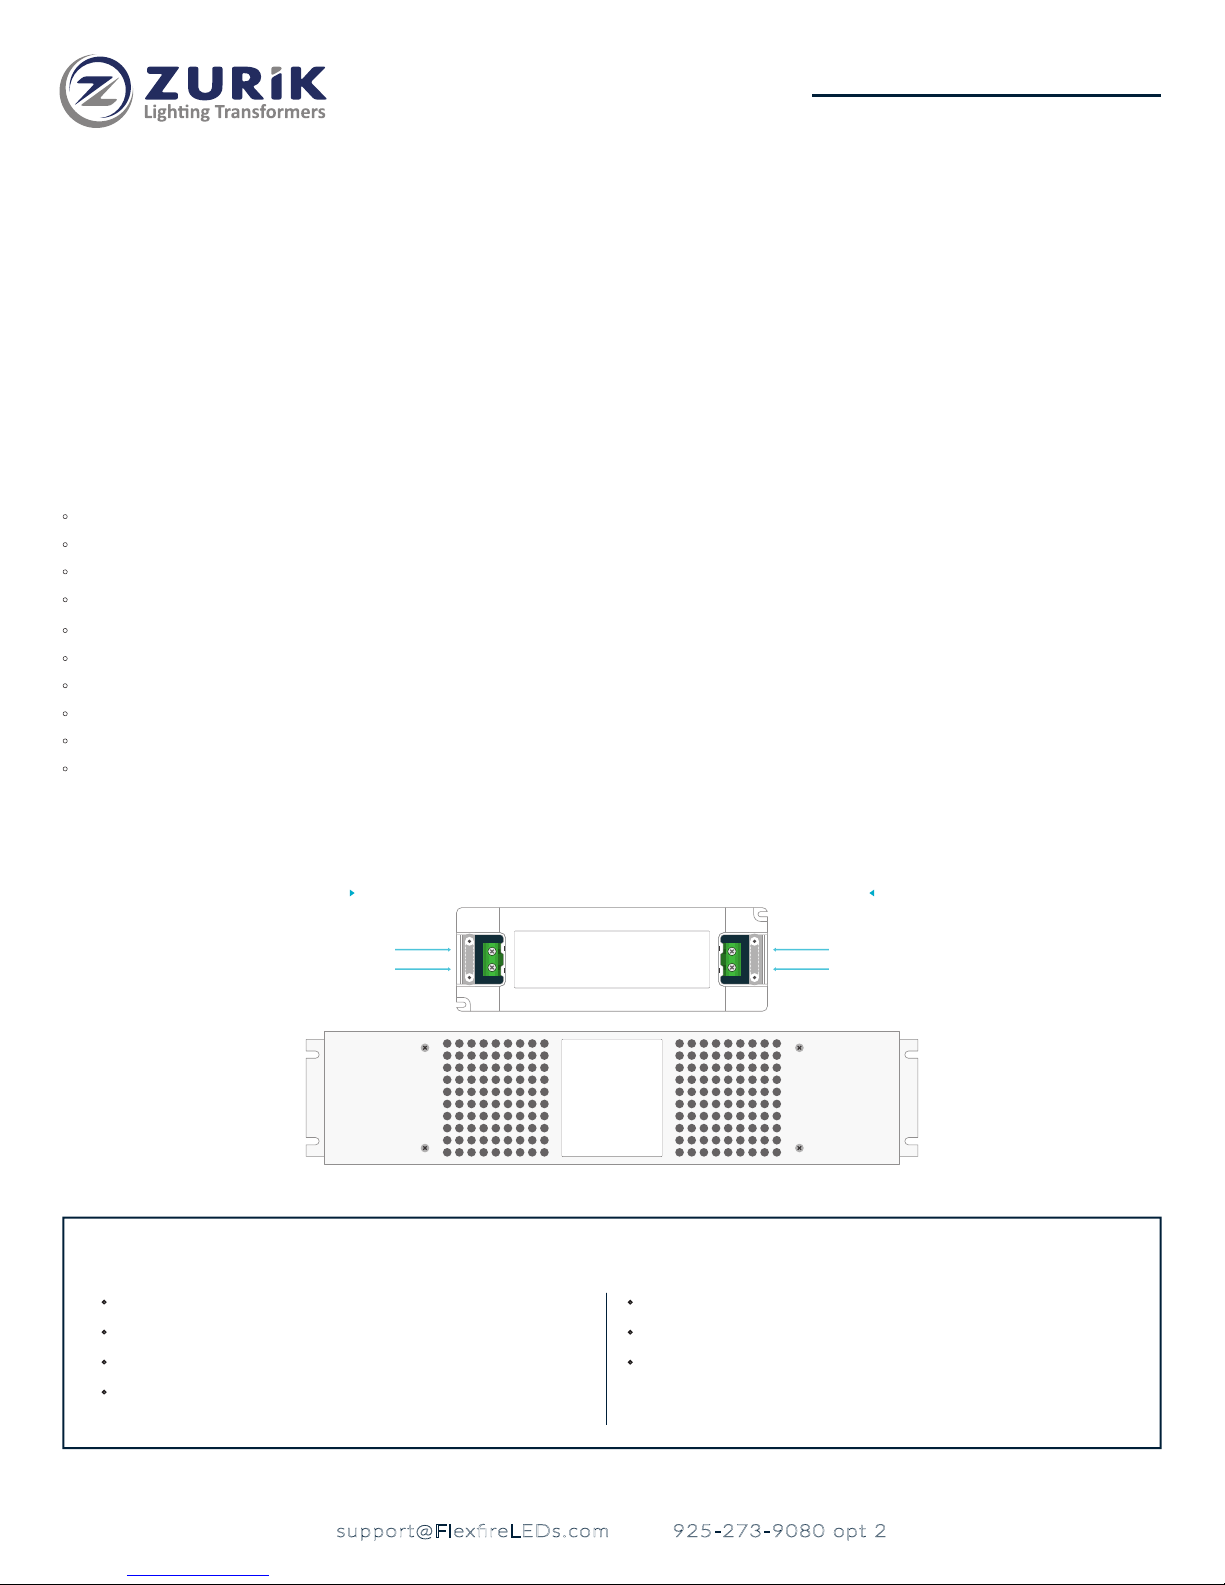
ZRK-EMLV2-30W-XXDC
9page
support@FlexfireLEDs.com 925-273-9080 opt 2
User Guide •ZURIK®EMLV LED Driver 30W